Your attic is the single biggest source of heat gain in summer and heat loss in winter. On a hot day, attic air temperatures can reach 150°F or higher, and that heat radiates directly down through your ceiling into your living space. If your insulation is thin, settled, or simply the wrong type, your HVAC system works harder than it needs to, driving up your monthly bills and shortening equipment life. The frustrating part is that most homeowners never think to check because the problem is invisible from the living room.
The good news is that checking your attic insulation takes about 15 minutes, requires no special tools beyond a tape measure and a flashlight, and gives you concrete data to make a smart decision. The DOE recommends insulation levels between R-30 and R-60 depending on where you live, but millions of homes across the country still have R-11 or less sitting in their attic floor joists from a 1970s installation. Upgrading from R-11 to R-38 can cut heating and cooling costs by 20 to 30% per year.
This post walks you through exactly how to assess what you have, translate inches of insulation into R-value, compare that number to your climate zone target, and choose the right upgrade path whether you are a confident DIYer or prefer to call a professional. You will also find tips on spotting damaged or compromised insulation that costs you money even when the depth looks adequate on the surface.
What You’ll Need
Click on an item below to shop for the recommended items for this recipe on Amazon.
As an Amazon Associate, we earn from qualifying purchases.
How to Do It
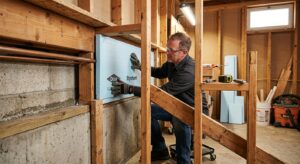
- Locate your attic access hatch or pull-down stairs. Bring a flashlight or headlamp, a tape measure, and your phone to take photos.
- From the access point, look for depth marker rulers if a previous contractor installed them, or identify the type of insulation you see: fluffy pink or yellow fiberglass batts, loose gray or brown cellulose, or rigid foam boards.
- Push your tape measure straight down through the insulation until it hits the ceiling drywall or sheathing, then read the depth at the top surface of the insulation. Measure in at least 3 different spots and average the results.
- Convert inches to approximate R-value using these real-world multipliers: fiberglass batts are about R-3.2 per inch, blown fiberglass is about R-2.5 per inch, cellulose is about R-3.7 per inch, and open-cell spray foam is about R-3.7 per inch.
- Look up your DOE climate zone at energystar.gov and compare your measured R-value to the recommended target. Zones 1 to 2 need R-30 to R-49, Zones 3 to 4 need R-38 to R-60, and Zones 5 to 8 need R-49 to R-60.
- Check for obvious problems: compressed or wet insulation, gaps around recessed lights or plumbing penetrations, a thin or missing layer over the attic hatch itself, and any signs of pest activity or mold.
- Before adding any insulation, air seal all penetrations. Use fire-rated caulk or expanding foam around recessed light housings, plumbing stacks, wiring holes, and the tops of interior walls. This step is critical since insulation slows heat transfer but does not stop air movement.
- Install baffles (also called rafter vents or vent chutes) at each eave to maintain a clear airflow channel from the soffit vents to the ridge. Without these, blown insulation blocks soffit ventilation and causes moisture problems.
- Cut cardboard or foam board dams around the attic hatch opening and staple them in place to keep loose fill from falling into the living space when the hatch is opened.
- Wear an N95 respirator, safety glasses, and long sleeves before operating the blower. Run the fill hose to the far end of the attic and work backward toward the access point.
- Use the bag count calculator on the insulation package or the manufacturer website to determine how many bags you need for your target R-value and square footage. For R-38 using cellulose over an existing R-11 base, plan on roughly one bag per 40 to 50 square feet.
- After blowing, use a ruler or depth gauge to verify you hit your target depth evenly across the entire attic floor. Finish by installing a new insulated attic hatch cover rated at least R-38 on the back of the door.
- Schedule a home energy audit with a certified BPI or RESNET auditor. They use a blower door test and thermal imaging to quantify air leakage and pinpoint the worst spots before any work begins.
- Get at least 3 quotes from insulation contractors. Ask each contractor specifically about air sealing as part of the scope, not just blowing in insulation on top of existing problems.
- Request that the contractor use a two-phase approach: first foam or caulk all penetrations and top-plate gaps, then apply blown-in insulation to the target R-value for your climate zone.
- Ask about encapsulated attic options if your HVAC equipment or ductwork runs through the attic. In that case, insulating and air sealing the roofline rather than the attic floor can be far more effective for your system efficiency.
- After the job, verify the work with your own tape measure in several spots and ask for the contractor’s installed R-value documentation for tax credit and rebate claims.
- File IRS Form 5695 to claim the 30% federal tax credit on qualifying insulation materials. Submit any utility rebate forms within the required window, typically 60 to 90 days after project completion.
Why It Works: The Benefits
Upgrading from R-11 to R-38 typically saves 20 to 30% on annual heating and cooling costs. For the average US household spending around $1,400 per year on HVAC, that translates to $280 to $420 in savings every year.
Thin attic insulation causes the top floor of a home to run 5 to 10°F warmer in summer and colder in winter than lower floors. Adding insulation to recommended levels significantly reduces this temperature imbalance and makes your living space feel more comfortable throughout the day.
When your air conditioner or furnace runs longer cycles to compensate for a poorly insulated attic, components wear out faster. Reducing the thermal load on your system can meaningfully extend equipment life and delay a $5,000 to $12,000 replacement.
The Inflation Reduction Act allows a 30% federal tax credit on attic insulation upgrades up to $1,200 per year. Many utility companies also offer rebates of $0.10 to $0.25 per square foot for blown-in insulation, stacking additional savings on top of energy bill reductions.
A well-insulated and air-sealed attic reduces the stack effect, which means less dust, pollen, and outdoor pollutants get pulled into the home through floor-level gaps. Homeowners with allergies often notice improvement after an attic air sealing and insulation project.
💰 Savings Impact by Action
Upgrading from R-11 to R-38 reduces heating and cooling energy loss through the ceiling by up to 25% annually based on DOE modeling.
Sealing attic penetrations and bypasses before adding insulation reduces whole-house air leakage by 15 to 20%, amplifying the insulation benefit.
Insulating a bare attic hatch to R-38 eliminates a concentrated thermal weak point that can account for 5% of total ceiling heat loss.
Sealing leaky attic ducts prevents up to 20 to 30% of conditioned air from being lost before it reaches living spaces, directly reducing HVAC runtime.
🏠 Key Concepts Explained
The Science Behind It
Heat moves through your attic assembly in three ways simultaneously: conduction through solid materials like drywall and wood framing, convection through air movement, and radiation across open air gaps. Insulation primarily fights conduction by trapping millions of tiny air pockets that resist heat flow. The R-value rating system quantifies this resistance, where each additional unit of R-value proportionally reduces the rate of heat transfer through that layer. Doubling R-value does not double energy savings because the law of diminishing returns applies: going from R-11 to R-22 saves more than going from R-38 to R-49, even though both are the same numerical increase.
The stack effect explains why air sealing matters as much as insulation depth. Warm air is less dense and rises, creating positive pressure at the ceiling and negative pressure at the floor. This pressure difference pulls air through every gap it can find, including around attic hatches, recessed lights, and the tops of interior wall cavities. A blower door test often reveals that these attic penetrations account for 30 to 40% of a home’s total air leakage. Insulation batts are air-permeable, meaning air can flow through them freely, so adding more insulation on top of unaddressed air leaks gives you only a fraction of the theoretical savings.
Radiant heat transfer is the physics behind why attic temperatures soar so dramatically in summer. Dark roofing materials absorb solar radiation and heat up, then re-emit that energy as infrared radiation into the attic air space. The attic air heats up rapidly, and that hot air then conducts heat downward through the ceiling assembly by convection and conduction. Proper attic ventilation (typically 1 square foot of vent area per 150 square feet of attic floor) helps exhaust some of this hot air, but ventilation alone cannot compensate for inadequate insulation. The insulation layer at the attic floor is what ultimately determines how much of that heat reaches your living space.
Frequently Asked Questions
▼ My insulation looks thick enough but my upstairs is still hot in summer. What am I missing?
Insulation depth alone does not tell the whole story. Check for major air leaks first, particularly around recessed lights, the tops of interior walls, and any HVAC ducts running through the attic. Ducts that are poorly insulated or have loose connections dump conditioned air directly into the attic instead of into your living space, which is a major efficiency loss that no amount of ceiling insulation can fix. A duct blaster test or simple visual inspection with the AC running can confirm whether leaky ducts are the culprit.
▼ How do I know which type of insulation I already have?
Fiberglass batts are the most recognizable: pink or yellow fluffy rolls laid between joists. Blown fiberglass looks similar but is loose and has no defined shape, with a slightly shiny texture. Cellulose is gray or brown and looks like shredded paper or newsprint. Vermiculite is a pebble-like gray or silver granular material common in homes built before 1980 and should be tested for asbestos before you touch it. If you are unsure, take a clear close-up photo and ask at your local home improvement store or send it to a local insulation contractor.
▼ Can I just add new insulation on top of the old stuff?
In most cases yes, as long as the existing insulation is dry, undamaged, and free of mold or pests. Blown cellulose or blown fiberglass can both be added over existing batts or loose fill without removing anything. The exception is if the old insulation has a foil or paper vapor barrier facing upward, since that facing should always be against the warm-side surface. If you see a foil-faced batt installed face-up in a cold climate attic, tear the facing or cut slits in it before adding new insulation on top to prevent moisture trapping.
▼ Will adding attic insulation affect my roof warranty or void anything?
Adding insulation to the attic floor does not affect a standard shingle roof warranty. However, if you are considering spray foam on the roofline (encapsulating the attic), some roofing manufacturers require that the attic remain ventilated to maintain warranty coverage. Check your specific roofing warranty documents before choosing an encapsulated approach, and get any contractor assurances in writing.
▼ I rent my home. Is there anything I can do without landlord permission?
Most structural changes including adding insulation require landlord approval, but you can still make a meaningful difference. Install an insulated attic hatch cover if you have access (it is non-destructive and removable), add a door draft stopper to any door leading to an unconditioned attic stairway, and use thermal curtains on top-floor rooms to reduce solar heat gain. Document your energy bills and present the payback math to your landlord, many landlords will approve insulation upgrades when shown it adds property value and reduces tenant complaints.
Quick Tips
- Check insulation depth in multiple locations, especially near the eaves and corners where insulation tends to be thinnest and where installers sometimes skimp.
- Look at your energy bills from January and July. If your home’s heating and cooling costs are well above the national average of $115 per month, under-insulation is likely a major contributor.
- Take photos during your attic inspection and bring them to a home improvement store or energy auditor. Visual evidence helps get accurate quotes and avoids misunderstandings about existing conditions.
- If you see discolored or stained insulation directly below the roof decking, that is a sign of moisture intrusion from a roof leak or condensation problem. Fix the moisture source before adding any new insulation.
- Plan your attic insulation project for fall or early spring when attic temperatures are manageable. Summer attic temps above 130°F create a real heat exhaustion risk for anyone working up there.
Variations for Your Situation
- Apartment or Condo: If you live below another unit or in a mid-rise building, attic insulation does not apply directly. Focus instead on insulating your unit’s ceiling if you are on the top floor by working with your building manager or HOA. You can also reduce heat gain through top-floor windows using solar shades or window film rated for heat rejection, which costs $20 to $80 per window and requires no structural changes.
- Tight Budget (under $50): Skip the blown-in project for now and start with the two highest-impact free or low-cost actions: seal the attic hatch with weatherstripping and rigid foam ($10 to $25 total) and use expanding foam to seal any visible pipe or wire penetrations from the living space below. These two steps alone can cut 10 to 15% of attic-related heat loss for under $40 and take under two hours.
- Older Home (pre-1980): Homes of this era often have knob-and-tube wiring running through the attic, which must not be covered with insulation until a licensed electrician confirms it is safe or replaces it with modern wiring. Older homes also frequently have little or no air sealing at the top plates, making air sealing even more impactful than in newer construction. Budget an extra $200 to $500 for an electrician to assess the wiring situation before any insulation project begins.