If your home heats up fast in summer, struggles to stay warm in winter, or your energy bills seem unreasonably high, your attic is often the first place to look. Heat follows temperature gradients, and in most homes, the attic floor is where conditioned air quietly escapes year-round. The U.S. Department of Energy estimates that adding attic insulation is one of the highest-return home improvements a homeowner can make, with payback periods as short as 2 to 3 years.
Blown-in insulation, also called loose-fill insulation, is the fastest and most cost-effective way to bring an under-insulated attic up to current recommended levels. Unlike batt insulation, blown-in material conforms around joists, wiring, and obstructions without leaving gaps. Most homeowners in climate zones 4 through 8 should target R-49 to R-60 at the attic floor, and many older homes sit at R-11 or less. That gap represents hundreds of dollars in annual wasted energy.
This guide covers everything you need to complete a blown-in attic insulation project yourself on a weekend, including material selection, prep work, air sealing before you insulate, and the actual blowing process. You will also find a professional installation option, realistic savings numbers, and answers to the most common questions homeowners run into.
What You’ll Need
Click on an item below to shop for the recommended items for this recipe on Amazon.
As an Amazon Associate, we earn from qualifying purchases.
How to Do It
- Measure your attic floor area in square feet and check existing insulation depth with a ruler. Use the bag coverage chart on your chosen product to calculate how many bags you need to reach your target R-value, adding 10% for waste.
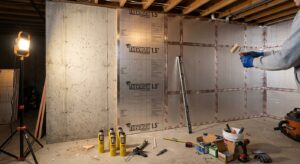
- Seal all air bypasses before adding any insulation. Use canned spray foam on gaps around wiring, plumbing, and light fixtures. Use rigid foam board and acoustical sealant on larger openings like dropped soffits and top plates. This step alone can reduce air leakage by 20 to 30%.
- Install rafter baffles (cardboard or foam ventilation channels) at every rafter bay where the roof meets the attic floor. Staple them to the roof deck so they extend from the soffit vent to at least 12 inches past the top of the insulation. This preserves airflow from soffit to ridge.
- Install depth markers every 4 to 6 feet across the attic floor. You can make these from paint sticks or scrap wood. Mark the target settled depth clearly on each stick so you can gauge depth as you work.
- Put on your PPE: N95 or P100 respirator, safety glasses, long sleeves, and gloves. Set up the blower machine outside or in the garage with the hose routed into the attic access hatch.
- Start blowing insulation from the farthest corners and work backward toward the hatch. Keep the hose tip 12 to 18 inches above the surface for consistent distribution. Check depth markers frequently and add material to low spots before finishing.
- Get at least 3 written quotes from insulation contractors. Ask each to specify the product, installed R-value, and total bag count to ensure you are comparing equivalent scopes of work.
- Ask contractors whether air sealing is included in the quote or priced separately. Many base bids exclude air sealing. Insisting on air sealing first typically adds $200 to $500 but significantly improves the energy performance of the insulation.
- Confirm that the contractor will install rafter baffles at all soffit locations and that existing recessed lights will be addressed. Open-back recessed can lights require IC-rated covers before insulation can be blown over them.
- After installation, ask for a post-installation report showing installed depth measurements and the total bags used. This verifies you received the R-value you paid for and is useful documentation if you sell your home.
- Collect all paperwork including manufacturer product data sheets and receipts for your 25C tax credit claim. File IRS Form 5695 with your return for the year the work was completed.
Why It Works: The Benefits
Upgrading from R-11 to R-49 in a typical 1,500 square foot attic can reduce annual energy costs by $300 to $600, according to ENERGY STAR estimates. Homeowners in colder climate zones typically see the higher end of that range.
A well-insulated attic reduces temperature swings between floors and rooms, eliminating hot spots near the ceiling and cold drafts near interior walls that border poorly insulated spaces.
When the attic is well insulated, your furnace and air conditioner run shorter cycles to maintain setpoint temperatures, reducing mechanical wear and potentially extending equipment lifespan by several years.
Air sealing performed before blowing insulation reduces infiltration of attic air, dust, pollen, and combustion gases into living spaces, improving the air you breathe daily.
A DIY blown-in attic insulation project typically costs $500 to $1,200 in materials for an average home, with payback in 2 to 4 years. Professionally installed projects often pay back in 3 to 5 years and qualify for the federal 25C tax credit of up to 30% of project cost.
💰 Savings Impact by Action
Sealing attic floor penetrations before insulating reduces whole-house air leakage by up to 20%, directly lowering heating and cooling loads.
Upgrading from R-11 to R-49 at the attic floor reduces conductive heat loss through the ceiling by up to 30% of total annual energy use.
A properly insulated attic reduces HVAC system runtime by roughly 15%, lowering equipment wear and electric or gas consumption proportionally.
Adding an insulated cover to an uninsulated attic hatch alone can reduce heating loss by up to 5% of attic-related energy waste.
🏠 Key Concepts Explained
The Science Behind It
Heat moves through building assemblies in three ways: conduction (direct transfer through materials), convection (movement of air carrying heat), and radiation (infrared energy traveling through space). Attic insulation primarily addresses conduction by trapping millions of tiny air pockets that resist heat flow. The R-value system measures this resistance per inch of material thickness. Cellulose delivers approximately R-3.7 per inch while fiberglass loose-fill provides around R-2.5 per inch, which is why cellulose requires less depth to hit a target R-value.
What insulation cannot do by itself is stop air movement. Air moves in response to pressure differences, not temperature gradients, which means even a very high R-value insulation layer is bypassed entirely when air finds a gap to travel through. This is why building scientists consistently find that air sealing delivers the best return of any single upgrade in older homes. When you seal the attic floor before insulating, you address convective heat loss directly. The insulation layer then handles the remaining conductive losses efficiently, and together the two measures address the majority of attic-related energy waste.
Blown-in insulation also outperforms batts in real-world attics because it flows around joists, wires, pipes, and cross-bracing without leaving voids. Batts must be cut and fitted precisely around every obstruction, and studies of existing batt insulations in place found that even small compression or misalignment reduced effective R-value by 30 to 50%. Blown-in material self-levels and fills irregularities by nature of its installation method, delivering more consistent performance across the entire attic floor.
Frequently Asked Questions
▼ How do I know how much blown-in insulation I actually need to buy?
Measure your attic floor area in square feet, then check the coverage chart printed on the bag of insulation you plan to use. Each bag will list how many square feet it covers at various R-value targets. Divide your square footage by the per-bag coverage at your target R-value, then add 10% for waste and hard-to-reach areas. For example, a 1,500 sq ft attic targeting R-49 with cellulose typically requires 45 to 55 bags.
▼ My attic only has 18 inches of clearance. Can I still do this myself?
Yes, but it is significantly more challenging. Use a longer hose extension and work in short segments, keeping your body near the access hatch as much as possible. Knee boards are essential in tight attics. If the clearance drops below 12 inches in large sections, consider hiring a professional who works in confined spaces regularly, as the physical strain and risk of ceiling damage increases substantially.
▼ Will blown-in insulation settle and lose its R-value over time?
Some settling is expected and is already factored into manufacturer depth charts for cellulose, which settles roughly 15 to 20% in the first year. Fiberglass loose-fill settles very little. Install to the target settled depth shown on the bag, not the initial poured depth, and the product will perform at its rated R-value long-term. Both cellulose and fiberglass blown-in products carry 25-year performance warranties from major manufacturers.
▼ Can I blow insulation over my existing insulation or do I need to remove it?
In most cases you can blow directly over existing insulation as long as it is dry, not moldy, and does not contain asbestos. Check the existing layer for any signs of moisture damage or discoloration first. If the existing insulation is wet or has mold growth, remove and replace it and identify the moisture source before adding new material. Blowing over dry, undamaged existing insulation is standard practice and actually adds to the total R-value of the assembly.
▼ How long after the project will I see savings on my energy bill?
You will likely notice a difference within the first full billing cycle after the season changes, though the most dramatic savings appear over the first full heating or cooling season. Many homeowners report a 15 to 25% drop in monthly bills within 30 to 60 days depending on weather. Annual savings become clearest when you compare the same calendar months year over year after the project.
Quick Tips
- Rent or borrow a blower that can move at least 150 cubic feet per minute. Underpowered rental machines make the job take twice as long and produce uneven distribution.
- Blow insulation on a calm, dry day. Wind can deflect material at soffit areas, and humid conditions slow the drying of any spray foam you applied during air sealing.
- Use knee boards (plywood scraps at least 16 inches wide) to distribute your weight across multiple joists. Stepping between joists on drywall ceilings causes cracks and costly repairs.
- Take photos of your depth markers before and after you insulate and keep them with your home records. They are useful for home sales, insurance, and verifying contractor work on future projects.
Variations for Your Situation
- Older Home (pre-1980): Homes built before 1980 often have open top plates, larger penetration gaps, and sometimes knob-and-tube wiring requiring additional precautions. Budget extra time for air sealing, at least 4 to 6 hours, since older framing has more bypasses. Have an electrician evaluate any existing knob-and-tube wiring before you begin. The energy savings potential is higher in older homes, often 25 to 35% on heating costs, making the extra prep work well worth it.
- Tight Budget (under $300): Focus the entire project on air sealing first without adding any new insulation. A thorough air sealing job using $50 to $75 in spray foam cans and caulk can reduce heating and cooling costs by 10 to 15% on its own at zero insulation cost. Then save toward a full blown-in project the following season. If you do purchase insulation, prioritize the hatch cover first with rigid foam board cut to fit, as a typical uninsulated attic hatch loses as much heat as a window left open.
- Finished or Partially Finished Attic: If portions of your attic are finished living space with knee walls and flat sections, the project becomes more complex. The insulation target shifts to the sloped rafters, knee walls, and the flat floor section separately, each requiring different approaches. Blown-in insulation works well in the flat floor sections, but rafter bays may require dense-pack installation with a fill tube, which is harder to DIY. Consider hiring a professional for finished attic configurations to ensure all assembly types are addressed correctly.