If you’ve decided it’s time to improve your home’s insulation, the most common mistake is starting in the wrong place. Homeowners often tackle basements or walls first because they seem accessible, but building science tells a different story. Heat moves from warm to cool through the path of least resistance, and in most homes, that path runs straight through your attic ceiling. Fixing secondary areas while your biggest thermal leak goes unaddressed is like patching a garden hose while the main valve is open.
The order in which you insulate matters because every dollar has a diminishing return. The attic offers the highest energy savings per dollar spent, followed by the crawl space or basement, and then the walls. Skipping ahead in that sequence means paying more for less impact. For the average U.S. home, the Department of Energy estimates that adding attic insulation to code-recommended levels can reduce total heating and cooling costs by 15 to 25% annually.
This guide walks you through the optimal insulation sequence for a typical home, explains the building science behind the priority order, and gives you practical steps at multiple budget levels so you can start saving money this season, not after a full renovation.
What You’ll Need
Click on an item below to shop for the recommended items for this recipe on Amazon.
As an Amazon Associate, we earn from qualifying purchases.
How to Do It
- Access your attic during daylight and look for light coming through from below, around recessed light fixtures, plumbing penetrations, and top plates where walls meet the attic floor.
- Use a can of low-expanding spray foam to seal gaps around pipes, wires, and any penetrations through the top plate. Focus on the perimeter of the attic floor where walls meet the ceiling below.
- Seal around recessed can lights with an airtight cover rated for insulation contact, or replace them with airtight LED fixtures. Recessed lights are among the largest single sources of conditioned air loss in most attics.
- Use fire-rated caulk or intumescent foam for any gaps near chimneys, flues, or HVAC duct boots. These areas require fire-rated materials per building code.
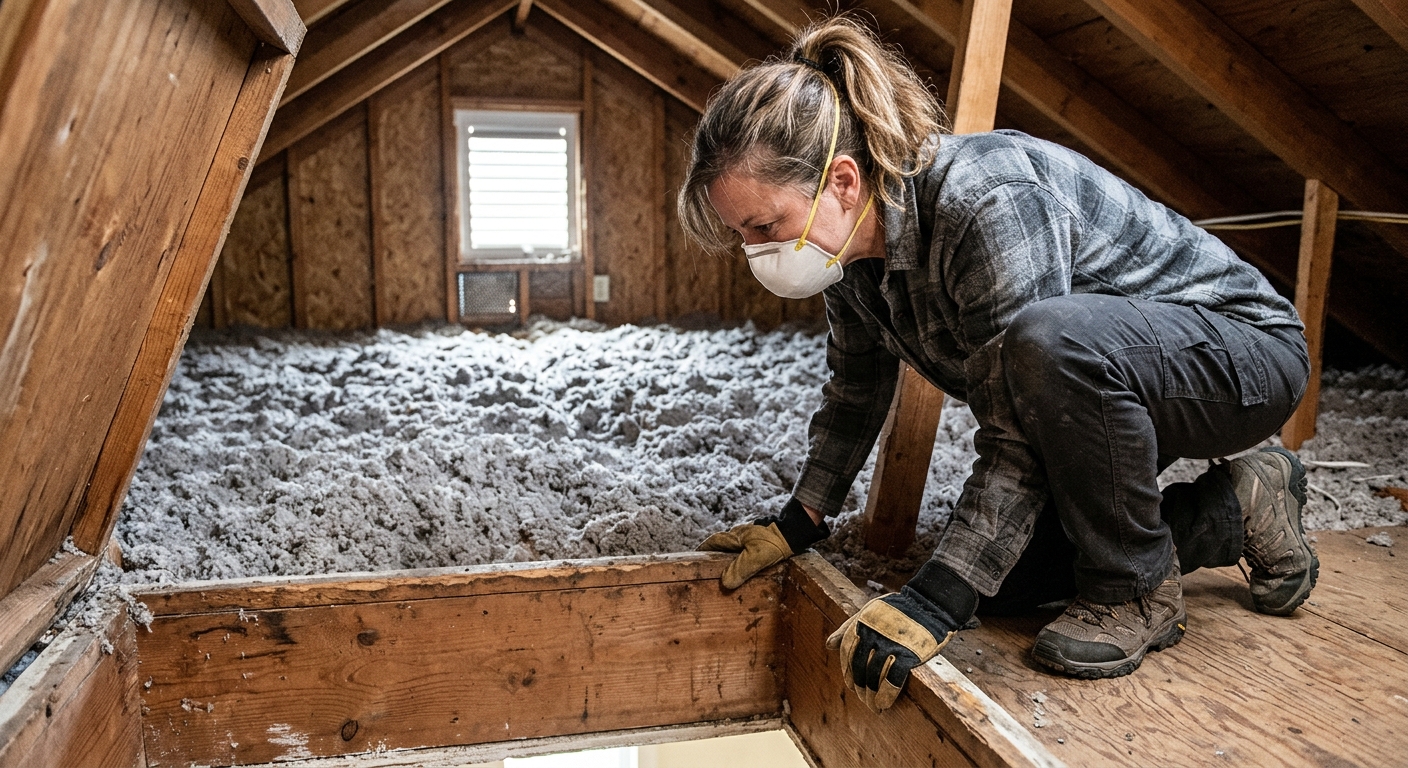
- After sealing, check that your existing attic insulation is at least R-19. If you can see the tops of the floor joists, your insulation is well below recommended levels and adding more is your highest-priority next step.
- Measure your attic square footage and check your current insulation depth. Use the DOE insulation map to determine your target R-value by zone. Most of the U.S. targets R-38 to R-60 for attics.
- Complete all air sealing from the Quick Fix approach above before adding any blown-in material. Blown-in insulation does not stop air movement on its own.
- Install baffles at each rafter bay along the eaves to keep the soffit vents clear. Blocking ventilation while adding insulation creates moisture problems that will undo your work within a few years.
- Set up the blower machine at your access hatch and run the hose into the attic. Work from the far corners toward the hatch so you are not walking on freshly blown material.
- Blow insulation in layers, checking depth with a ruler or the depth markers included in most bags. Cellulose settles about 20%, so add extra depth to reach your target R-value after settling.
- Seal the attic hatch door with weatherstripping and add an insulated hatch cover rated at least R-10. The hatch is a commonly forgotten thermal bypass that can lose as much heat as a small window.
- Inspect the crawl space for signs of moisture, rot, or pest damage before starting. Any active moisture intrusion or structural issues must be resolved before adding insulation or a vapor barrier.
- Install a 6 to 20 mil polyethylene vapor barrier across the entire ground surface, overlapping seams by 12 inches and taping them with a compatible tape. Bring the barrier up the foundation walls and secure it with mechanical fasteners.
- For a conditioned crawl space approach, install rigid foam insulation boards directly against the interior foundation walls at R-10 or higher. This method is more effective than batt insulation between floor joists in humid climates.
- For a vented crawl space, install friction-fit R-19 or R-25 batts between the floor joists above, paper or foil facing upward toward the subfloor. Use wire supports or netting to hold batts in place securely.
- Seal all crawl space vents if converting to a conditioned, encapsulated crawl space. This step requires permits in some jurisdictions and may affect code compliance, so verify local requirements before closing vents permanently.
- Add a small dehumidifier or condition the crawl space with a small supply duct from your HVAC system if encapsulating. An unventilated, undehumidified crawl space can trap moisture and cause more damage than an open vented one.
Why It Works: The Benefits
Properly insulating the attic to R-38 or higher can reduce total annual heating and cooling costs by 15 to 25%, translating to $200 to $600 per year in savings for a typical 2,000 square foot home depending on climate and fuel type.
Attic insulation typically costs $1,500 to $3,500 installed for an average home and pays for itself in 2 to 4 years through energy savings, making it one of the highest ROI home improvements available. DIY blown-in insulation can cut that cost in half.
Insulating the attic first eliminates radiant heat gain in summer and ceiling cold spots in winter, creating more even temperatures throughout the home without changing your thermostat setting.
A better-insulated building envelope means your furnace and air conditioner run fewer cycles to maintain setpoint temperatures. Shorter runtimes reduce mechanical wear, extend equipment life, and lower the risk of mid-season breakdowns.
Encapsulating and insulating a vented crawl space can reduce indoor humidity by 10 to 20 percentage points in humid climates, protecting floor joists from rot, reducing mold risk, and improving indoor air quality in living spaces above.
💰 Savings Impact by Action
Upgrading attic insulation to R-38 or higher reduces heating and cooling costs by 15 to 25% in most U.S. climates according to DOE data.
Sealing penetrations and bypasses in the attic floor before adding insulation can reduce total energy use by 5 to 10% at a material cost under $80.
Encapsulating and insulating a vented crawl space reduces heating loads by 8 to 15% by eliminating cold floor losses and uncontrolled air infiltration from below.
Retrofitting insulation into exterior wall cavities reduces heat loss through walls by up to 40%, but delivers only 5 to 8% total bill savings due to smaller surface area and thermal bridging through studs.
Sealing leaky HVAC ducts in unconditioned attics or crawl spaces can recover 20 to 30% of conditioned air that would otherwise be lost before reaching living spaces.
🏠 Key Concepts Explained
The Science Behind It
Heat transfer in a home occurs through three mechanisms: conduction, convection, and radiation. Insulation primarily slows conduction, the direct transfer of heat through solid materials like drywall, wood framing, and sheathing. R-value is the measure of resistance to conductive heat flow, and every additional R-value point reduces heat transfer through that assembly. The reason the attic outperforms every other location is a combination of surface area, temperature differential, and access. A typical 2,000 square foot home has roughly 1,500 to 2,000 square feet of attic floor, all of it exposed to the most extreme temperature swings in the building envelope.
The temperature differential matters as much as the R-value itself. On a 95-degree summer day, an uninsulated attic can reach 150 to 160 degrees Fahrenheit. The delta between that attic temperature and your conditioned living space at 75 degrees is 75 to 85 degrees. Heat flows faster the greater that temperature gap, which is why a poorly insulated attic drives up cooling bills so dramatically. Adding R-38 insulation to a previously uninsulated attic cuts heat flow into the living space by roughly 90% under those conditions. The math simply does not work as favorably for wall insulation, where temperature differentials are smaller and installation costs are higher.
Air sealing works on a different principle entirely. Gaps in the building envelope allow bulk air movement, which carries far more energy than conduction through a solid wall assembly. A single 1-inch hole in your attic floor can allow as much heat transfer as several square feet of missing insulation, because warm pressurized indoor air escapes directly rather than slowly conducting through a material. This is why the sequence matters: seal air first, then add thermal resistance. Adding insulation without air sealing is like putting a wool blanket over a window that is cracked open, the insulation helps, but you are still losing enormous amounts of energy to uncontrolled airflow.
Frequently Asked Questions
▼ My energy bills are still high after adding attic insulation. What did I miss?
The most common cause is air sealing was skipped or incomplete before the insulation was added. Check around recessed lights, plumbing stacks, and the attic hatch cover, all of which are frequent bypass points. The second most likely cause is that your HVAC ducts run through the attic and are leaking conditioned air directly into unconditioned space. Have your ducts pressure-tested or inspected before assuming the insulation is at fault.
▼ Can I just add new insulation on top of my old attic insulation?
Yes, in most cases you can add blown-in insulation directly on top of existing batts as long as the existing insulation is dry, not compressed, and free of mold or pest activity. Do not add a vapor barrier on top of existing insulation since trapping moisture between layers causes rot and mold. If the existing insulation is wet, damaged, or contains vermiculite (which may contain asbestos), remove it and test before proceeding.
▼ Should I insulate walls before the attic if my walls are obviously cold to the touch?
Cold interior wall surfaces usually indicate air leakage around outlets, switches, and window frames more than a lack of insulation in the wall cavity itself. Before committing to costly wall insulation, seal outlets and switches with foam gaskets, caulk window and door trim, and check that the attic is fully addressed. In most homes, those low-cost air sealing steps reduce cold wall complaints more than adding insulation to the wall cavity would.
▼ What if my attic has HVAC ducts running through it?
Ducts in an unconditioned attic are a significant energy problem separate from insulation. Leaky ducts can waste 20 to 30% of conditioned air before it reaches your living space. Before adding attic insulation, have the ducts inspected and sealed with mastic sealant or metal tape (not standard duct tape). Ideally, work with an HVAC contractor to bury the ducts under the new insulation layer, effectively bringing them into conditioned space, which can cut duct losses dramatically.
▼ How do I know if my crawl space needs encapsulation versus just batt insulation between the joists?
If your crawl space has standing water after rain, visible condensation on joists in summer, a musty odor in the floors above, or wood with any signs of rot, encapsulation with a vapor barrier is the right approach over batts alone. In dry climates with consistently low humidity, floor joist batt insulation can be adequate and is significantly cheaper. When in doubt, rent a hygrometer and measure crawl space humidity on a humid day. Readings above 60% relative humidity indicate moisture control should come before or alongside thermal insulation.
Quick Tips
- Check your current attic insulation depth with a ruler before purchasing materials. If you can see the joists, you likely have less than R-11 and are losing significant money every month.
- Cellulose blown-in insulation is made from recycled paper and is treated for fire and pest resistance. It tends to perform slightly better than fiberglass in air infiltration resistance and costs about the same per R-value.
- The DOE recommends R-49 to R-60 for attics in cold climate zones (zones 5 to 7) and R-38 to R-49 in mixed climates (zones 3 to 4). Look up your zone at energystar.gov to confirm the right target for your location.
- When insulating a crawl space, the conditioned encapsulated approach typically outperforms the floor joist batt approach in humid climates because it eliminates the cold humid air zone entirely rather than trying to insulate over it.
Variations for Your Situation
- Apartment/Rental: Renters cannot modify attic or crawl space insulation, but can address significant comfort issues by sealing gaps around outlets and switches with foam gaskets (under $15 for a pack), adding door draft stoppers, and placing thermal curtains on windows facing the dominant sun exposure. These steps combined can reduce your personal heating and cooling load by 5 to 10% at a total cost under $100, all reversible when you move.
- Tight Budget (under $50): Start with air sealing only. A single can of low-expanding spray foam ($8 to $12) and a tube of fire-rated caulk ($6) applied to attic penetrations, recessed lights, and the attic hatch seal can deliver 5 to 10% energy savings with zero material cost beyond the sealants. Add foam gaskets behind outlet covers on exterior walls for another $10. These three steps address the highest-impact air leakage points in most homes for about $30 total.
- Older Home (pre-1980): Homes built before 1980 frequently have little to no attic insulation, uninsulated crawl spaces with no vapor barrier, and knob-and-tube wiring that complicates attic work. Before adding any attic insulation, have a licensed electrician inspect for knob-and-tube wiring since covering it is a fire hazard and may void your homeowner’s insurance. Also check pipe insulation in the crawl space for asbestos wrapping (gray or white corrugated material) before disturbing anything. In these homes, the energy savings potential is much higher than average, often 30 to 40% reductions in heating costs, but professional assessment before DIY work is strongly recommended.