Every January, millions of homeowners open their utility bill and feel a jolt of sticker shock. The instinct is to blame the weather and move on. But a spike that is significantly higher than last January, or much larger than your neighbors’ bills, is your home sending you a diagnostic signal. Cold weather alone does not explain a 40% increase when temperatures only dropped 15%.
Your energy bill is essentially a report card on three things: how well your home holds heat (the thermal envelope), how efficiently your heating system converts fuel into warmth, and how your household behaviors shift in winter. When any one of those fails, costs climb. When all three are struggling, bills can double. The good news is that most causes are fixable, and many fixes cost less than one month’s inflated bill.
This post walks you through the most common culprits behind a January bill spike, how to diagnose which one is hitting you hardest, and the specific steps you can take right now to stop the bleeding and start recovering that money month after month.
What You’ll Need
Click on an item below to shop for the recommended items for this recipe on Amazon.
As an Amazon Associate, we earn from qualifying purchases.
How to Do It
- Pull up your last 12 months of utility bills and find your cost per billing day for each month. Compare this January to last January. If the jump exceeds what local heating degree day data explains, your home has a problem beyond weather.
- Walk your home on a cold windy day and hold your hand near the top and bottom edges of exterior doors, attic hatch frames, fireplace damper edges, and around electrical outlets on exterior walls. Cold airflow means active infiltration.
- Check your furnace filter. A filter that looks gray or dense with dust is restricting airflow and can reduce furnace efficiency by 5 to 15%. Replace it with a MERV 8 filter if it has been more than 60 to 90 days.
- Lower your thermostat setpoint by 2°F when home during the day and 4°F overnight or when away. Each degree of reduction saves 1 to 3% on heating. Use blankets and layered clothing to offset the comfort difference.
- Seal the two to three worst draft spots you found with rope caulk on windows, door sweep on the worst exterior door, or foam outlet gaskets behind cover plates. These cost $2 to $8 each and take minutes to install.
- Program or schedule your smart thermostat with at least three setpoints: 68°F when home and active, 65°F when sleeping, and 60°F when away for more than two hours. This alone saves 10% annually according to ENERGY STAR data.
- Seal your attic hatch with weatherstripping around the frame and rigid foam board glued to the back of the hatch door. Attic hatches are a major stack-effect bypass and this fix costs under $20.
- Caulk around every exterior penetration you can find: plumbing pipes under sinks at exterior walls, dryer vent collars, and cable or wire entries. Use paintable latex caulk indoors and silicone caulk outdoors.
- Install foam gaskets behind all electrical outlet and switch cover plates on exterior walls. This addresses a surprisingly large air leak pathway and takes about 45 minutes for a whole house.
- Add door sweeps to all exterior doors that show daylight or cold air at the bottom. Adjustable aluminum door sweeps cost $12 to $25 and install with a screwdriver in 15 minutes.
- Check your basement rim joist, the horizontal framing where your floor system meets the foundation wall. Cut rigid foam board to fit each bay and press it in snugly. This single area can account for 10 to 15% of total home air leakage.
- Contact your utility company to ask about free or subsidized home energy audits. Many programs exist under state efficiency mandates and can reduce audit cost to under $100.
- A certified auditor will run a blower door test, depressurizing your home and using a smoke pencil or infrared camera to visualize every air leak. This reveals problems a manual walkthrough cannot find, like leaks inside wall cavities and around recessed lighting.
- Request a prioritized list of recommendations with estimated payback periods. A good auditor gives you ROI-ranked repairs, not just a generic to-do list.
- If attic insulation is below R-38, get quotes from two insulation contractors for blown-in cellulose or fiberglass. Adding insulation from R-19 to R-38 typically saves 15% on heating and cooling and pays back in 3 to 5 years.
- If your furnace is more than 15 years old and running below 80% AFUE, ask your contractor to compare the cost of repairs versus a high-efficiency 95% AFUE replacement. The efficiency gain alone saves 15 to 18% on gas bills annually.
- Ask about available federal tax credits and state rebates. The Inflation Reduction Act provides a 30% federal tax credit up to $1,200 on insulation and air sealing, and up to $600 on qualifying high-efficiency HVAC equipment as of 2024.
Why It Works: The Benefits
Homeowners who address the top two or three culprits identified in a bill spike typically cut heating costs by 15 to 25% within the same billing period, translating to $50 to $200 in savings on a high winter bill.
Fixing air leaks and improving insulation eliminates cold spots, drafts near windows, and rooms that never seem warm enough, because your heating system is no longer racing to offset constant heat loss.
A furnace running excessive cycles because heat keeps escaping wears out faster. Reducing the heating load through air sealing and insulation can add years to your system’s service life, deferring a $3,000 to $6,000 replacement.
A 20% reduction in natural gas heating use for a typical American home eliminates roughly 1.5 to 2 metric tons of CO2 per year, the equivalent of taking a car off the road for two months.
Tracking your bill normalized against heating degree days turns your utility statement into an ongoing efficiency dashboard. You will catch equipment decline and envelope degradation years earlier, before they become expensive emergencies.
💰 Savings Impact by Action
Sealing attic bypasses, rim joists, and penetrations reduces infiltration-driven heat loss by up to 20% of total heating costs according to DOE data.
Replacing a heavily clogged furnace filter restores airflow and can recover 5 to 15% of real-world heating efficiency in a single 10-minute step.
Setting back the thermostat 7 to 10°F for 8 hours per day saves approximately 10% annually on heating and cooling per ENERGY STAR.
Upgrading attic insulation from R-19 to R-38 reduces heat loss through the ceiling by 15 to 20%, one of the highest-ROI upgrades in cold climates.
Replacing an 80% AFUE furnace with a 95% AFUE condensing unit cuts fuel consumption for the same heat output by approximately 15 to 18%.
🏠 Key Concepts Explained
The Science Behind It
Heat always moves from warm to cold, and it does so through three mechanisms: conduction (direct contact through solid materials), convection (movement through air), and radiation (electromagnetic transfer through space). Your home loses heat through all three simultaneously in January. Conduction bleeds warmth through poorly insulated walls and windows. Convection carries heat out through every gap and crack via the stack effect. Radiation transfers heat from warm interior surfaces to cold exterior surfaces like window glass.
The stack effect deserves special attention in winter. Because warm air is less dense than cold air, it rises to the upper levels of your home and finds any available exit point, including attic bypasses, light fixtures, and wall top plates. As warm air exits at the top, cold outside air is pulled in at the bottom to equalize pressure. The greater the temperature difference between inside and outside, the stronger this chimney effect becomes. On a 10°F day with a 68°F interior, the stack effect creates significant pressure differences that force air through gaps you would never feel on a mild day. This is exactly why your January bill spikes while October and November stay manageable.
Furnace efficiency compounds the problem. AFUE (Annual Fuel Utilization Efficiency) measures how much of the fuel energy becomes usable heat. A standard 80% AFUE furnace wastes 20% up the flue. But a dirty filter forces the blower to work harder, restricts airflow across the heat exchanger, and causes the furnace to cycle more frequently due to overheating. A clogged filter can push real-world efficiency to 65 to 70%, meaning you are losing 30 to 35 cents of every heating dollar without knowing it. Replacing that filter is the single fastest return on investment in home energy efficiency.
Frequently Asked Questions
▼ My bill jumped 35% but my thermostat setting never changed. What else could cause this?
The most common culprits are a dirty or failing furnace filter, a furnace that is short-cycling due to a clogged heat exchanger, or a new gap that opened in your thermal envelope such as a settling attic hatch, a newly cracked door sweep, or a contractor who left a wall penetration unsealed after a recent repair. Check your filter first, then walk the perimeter of your home on a cold windy day with your hand extended near all transitions between conditioned and unconditioned space.
▼ Why is my gas bill high but my home feels cold at the same time?
When your furnace is burning a lot of gas but the house still feels cold, the heat is being generated but not reaching your living space. Check for closed or blocked supply vents in multiple rooms, a duct that has disconnected in the attic or crawlspace, or a heat exchanger crack that is allowing combustion gases to bypass the air stream. A disconnected duct is a DIY fix, but a cracked heat exchanger requires a licensed technician immediately because it can allow carbon monoxide to enter the home.
▼ Can I do anything about my January bill if I rent and cannot modify anything?
Yes. Start with the zero-hardware steps: lower your thermostat setpoint by 2 to 4°F and use layered clothing and blankets, which saves 2 to 12% with no permission needed. You can also use removable rope caulk on drafty windows (it peels off in spring), place rolled towels or draft snakes at door bases, and use removable window insulation film kits that install with double-sided tape. For significant issues like a drafty exterior door or broken window seal, document the problem in writing to your landlord because these are habitability issues in most states.
▼ How do I know if my furnace is the problem versus my home’s insulation?
A simple way to distinguish the two: if your furnace runs for very long cycles and the house still warms up, the issue is likely the envelope losing heat faster than the furnace can replace it. If the furnace runs frequently but each cycle is short and does not move the temperature much, the furnace itself may be underperforming. Request a combustion efficiency test from an HVAC technician, which costs $75 to $150 and gives you the real-world efficiency number to compare against the nameplate rating.
▼ How long before I see my bill drop after doing these fixes?
Thermostat changes and filter replacement show up in the very next billing cycle. Air sealing improvements appear within one to two billing cycles depending on your billing period. Insulation upgrades often take one full heating season to see clearly in the data because weather variation can mask month-to-month gains. Track your cost-per-heating-degree-day metric across multiple months for the clearest signal that your fixes are working.
Quick Tips
- Compare your bill to the same month last year adjusted for temperature, not just to last month. A cold November to January comparison will always look alarming even if your home is performing fine.
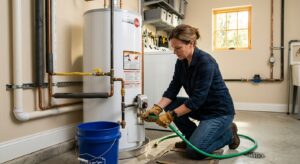
- Set your water heater to 120°F instead of the factory default of 140°F. Water heating accounts for 14 to 18% of your energy bill year-round, and the lower setting is safer for children while saving 4 to 22% on water heating costs.
- Reverse your ceiling fans to run clockwise on low speed in winter. This pushes accumulated warm air down from the ceiling without creating a wind chill effect, reducing heating load in high-ceiling rooms.
- Keep interior doors open between rooms when possible in winter. Closed doors create pressure imbalances in forced-air systems that increase duct leakage and cause some rooms to over-heat while others stay cold.
Variations for Your Situation
- Apartment or Rental: Renters cannot modify ductwork, insulation, or HVAC systems, but can still recover 10 to 20% in heating costs. Use removable rope caulk on windows ($4 per roll), outlet foam gaskets that peel off cleanly ($8 for a pack), draft snakes at door bases, and window insulation film kits ($25 for a five-window pack). Contact your landlord in writing about any broken door seals or single-pane windows, framing it as a habitability and maintenance issue rather than an upgrade request.
- Tight Budget Under $50: Focus entirely on free and near-free actions first. Lower thermostat setpoints (free, saves 2 to 12%), replace the furnace filter ($8 to $15, saves 5 to 15% on heating efficiency), install outlet gaskets on exterior wall outlets ($8 for a full house), and apply rope caulk to the two or three worst drafty windows ($5 to $10). These four steps combined can realistically cut your January bill by 15 to 20% for under $35 total.
- Older Home Pre-1980: Homes built before modern energy codes typically have 30 to 50% more air leakage than newer construction and may have inadequate or settled insulation in walls and attics. Prioritize the rim joist and attic bypasses first, as these are accessible without opening walls and deliver the highest return in older homes. Expect a blower door test to reveal 3 to 5 ACH natural, compared to under 1 ACH in a modern home. A professional air sealing job combined with blown-in insulation typically costs $1,500 to $4,000 but can cut heating bills by 30 to 40%, paying back in 3 to 6 years and qualifying for federal tax credits.