You just finished a renovation, and instead of enjoying your improved home, you’re sweating through a room that never cools down, freezing in a hallway that never warms up, or watching your energy bill climb higher than before the project started. This is more common than most contractors will admit. Renovations change the way your home breathes, moves air, and retains heat, often in ways that were never planned for.
The core problem is that most renovations treat rooms as isolated projects rather than parts of an interconnected system. Add a bathroom exhaust fan without sealing nearby gaps, and you’ve just created a depressurization zone that pulls cold air through your walls. Open up a floor plan, and the airflow your HVAC was designed for no longer matches reality. Insulate one wall of an addition without addressing the adjacent attic, and that room becomes an oven every summer.
This post walks through the most common comfort failures that show up after renovations, the building science behind why they happen, and a clear set of steps you can take yourself or with a professional to diagnose and fix them. Whether your project finished last month or three years ago, these strategies will help you reclaim the comfort you paid for.
What You’ll Need
Click on an item below to shop for the recommended items for this recipe on Amazon.
As an Amazon Associate, we earn from qualifying purchases.
How to Do It
- Do a walk-through on a cold or hot day with a stick of incense or a smoke pen held near every wall penetration, electrical outlet, recessed light, and junction where old and new construction meet. Drifting smoke reveals air leaks you cannot feel with your hand.
- Check every supply register in renovated spaces to confirm air is actually flowing. Hold a tissue over each one. A limp tissue in a new room means you have a disconnected or blocked duct that is dumping conditioned air into a wall cavity.
- Inspect your attic directly above any renovated space. Look for disturbed or missing insulation batts, open top plates where new walls were framed, and any new ceiling penetrations like recessed lights or exhaust fans that are not sealed with an airtight cover.
- Seal all accessible gaps with caulk at baseboards, around outlet boxes on exterior walls, and at any point where pipes or wires enter from outside conditioned space. Use fire-rated caulk around any penetrations through top plates visible from the attic.
- Check your furnace or air handler filter and confirm all return air grilles are unobstructed. A renovation that sealed off a return air pathway causes pressure imbalances that make the whole system underperform.
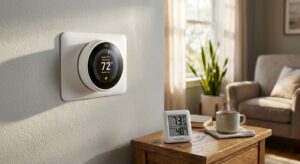
- Set your thermostat to the same temperature for 48 hours and walk each room with a simple indoor thermometer. Document the variance. Anything beyond 4 degrees between rooms points to a duct balance or insulation problem that warrants the next level of repair.
- Purchase two-part spray foam in small cans and caulk rated for HVAC and construction use. In the attic, seal every top plate penetration around new walls framed during the renovation using low-expansion foam. This single step can reduce air infiltration by 15 to 20% in recently renovated homes.
- Install airtight baffles or foam gaskets behind every recessed light canister that was added during the renovation and is accessible from the attic. Uninsulated recessed lights in the ceiling plane are one of the single largest sources of heat loss and gain in renovated homes.
- Reinstall or add insulation in the attic directly above renovated spaces. If batts were disturbed, replace them to restore the original R-value. If the renovation added square footage, verify the new ceiling area has insulation to at least R-38 in most climates.
- In the basement or crawlspace below renovated floors, use rigid foam board cut to fit and sealed with acoustic sealant at the rim joist bays. A properly sealed and insulated rim joist reduces perimeter air leakage by up to 30% in older construction.
- Re-examine any flex duct runs that contractors worked around. Look for disconnected joints, kinked sections, or runs that have no insulation wrap. Reconnect with metal duct tape (not standard cloth duct tape, which fails within 2 to 5 years) and re-wrap with duct insulation to R-6.
- After completing the sealing work, run your HVAC system for a full day and repeat the thermometer room-by-room check. If temperature variance is still above 4 degrees in specific rooms, you likely have a duct airflow volume issue that requires damper adjustment or a duct extension, which may need professional assessment.
- Contact your utility company to ask about subsidized energy audits or check the ENERGY STAR Home Advisor directory for certified auditors in your area. Ask specifically for a blower door test combined with a duct leakage test, which is the combination that reveals post-renovation problems most clearly.
- During the audit, ask the auditor to focus on the boundary between old and new construction, including the transition between existing ductwork and any new runs, the attic plane above additions, and any new exterior walls. These transition zones are where renovations most commonly fail.
- Request a written report showing your home’s air changes per hour (ACH) and duct leakage percentage. A post-renovation home should target below 5 ACH50 for existing homes and below 3 ACH50 for additions built after 2015. Duct leakage to outside should be below 10% of system airflow.
- Have your HVAC contractor perform a Manual J load calculation for the updated floor plan if your renovation added or removed more than 200 square feet of conditioned space. This determines whether your existing equipment is now over or undersized for the actual load.
- If duct leakage is confirmed above 15%, ask about Aeroseal duct sealing, which injects sealant particles into the duct system from the inside and can reduce duct leakage by 90% with an average payback period of 3 to 5 years and an immediate noticeable improvement in comfort.
- For additions or new rooms that cannot be reasonably served by extending the existing duct system, get quotes for a single-zone mini-split heat pump, which can serve a 500 to 1,000 square foot addition at seasonal efficiencies of 200 to 300% and qualifies for a 30% federal tax credit under the Inflation Reduction Act through 2032.
Why It Works: The Benefits
Properly addressing post-renovation air sealing and duct balancing can reduce temperature variation between rooms from 8 to 12 degrees down to 2 to 3 degrees, eliminating hot spots and cold corners that make certain rooms unusable.
Sealing thermal envelope breaches introduced during renovation and correcting duct leaks typically reduces heating and cooling costs by 15 to 30%, translating to $200 to $600 per year in savings for an average home.
Uncontrolled air leaks from renovations pull in attic dust, garage fumes, and outdoor pollutants. Sealing these pathways and ensuring balanced ventilation can reduce indoor particulate levels by up to 40% according to EPA research.
An HVAC system fighting against a disrupted envelope and leaky ducts runs longer cycles and works harder. Correcting these issues can reduce runtime by 20 to 35%, adding years to compressor and blower motor life and pushing major equipment replacement further into the future.
Air sealing at penetrations and rim joists, which are two areas commonly disturbed by renovations, directly eliminates the drafts and cold floor edges that make renovated basements and additions feel uncomfortable regardless of the thermostat setting.
💰 Savings Impact by Action
Sealing top plate penetrations and recessed light bypasses in the attic reduces whole-home air leakage by up to 20% and directly cuts heating and cooling runtime.
Reconnecting and insulating disconnected flex duct runs can recover 20 to 30% of conditioned airflow that was previously dumped into unconditioned spaces.
Sealing and insulating rim joist bays in the basement eliminates up to 15% of perimeter air infiltration common in renovated older homes.
Restoring disturbed attic insulation above renovated spaces to the original R-value reduces ceiling heat gain and loss by 15 to 25% depending on climate.
Balancing duct dampers and verifying correct airflow to each room after a renovation reduces equipment runtime by 10 to 15% by eliminating pressure imbalances.
🏠 Key Concepts Explained
The Science Behind It
Your home functions as a pressure system. Every hole in the building envelope creates a path for air to move from high pressure to low pressure, carrying heat with it in summer and cold in winter. Before a renovation, your home had reached a kind of equilibrium: the total leakage area, the insulation coverage, and the duct system were all sized and positioned relative to each other. A renovation disrupts that equilibrium in multiple places at once, and the results compound each other.
The stack effect is the most powerful force driving this disruption. As warm air rises and escapes through upper-level leaks, it creates a slight negative pressure at lower levels that draws cold outside air inward through any gap it can find. In a typical two-story home, this pressure difference is equivalent to leaving a 1-inch-wide window cracked open year-round. Renovations that add recessed lighting, open ceiling chases, or disturb attic insulation dramatically increase the size of those upper escape points, intensifying the stack effect and the corresponding cold air draw at the lower level. This is why basement renovations so often make the first floor feel drafty, even when the basement itself feels fine.
Duct leakage compounds the problem by interacting with building pressure. Return air ducts that are undersized or disconnected create a negative pressure inside the air handler, which then draws unconditioned air through every available crack in the structure to make up the deficit. This is called air handler depressurization, and it can effectively eliminate the benefit of any air sealing you do on the exterior if the duct system is not addressed at the same time. This is why building scientists emphasize treating the home as a complete system: fixing one part without understanding its relationship to the others can actually make certain problems worse before it makes them better.
Frequently Asked Questions
▼ One room in my renovation is always 8 degrees hotter than the rest of the house. What is causing it?
An 8-degree variance almost always points to one of three problems: no supply register delivering conditioned air to the space, missing or disrupted insulation in the ceiling or wall, or a disconnected duct run that is dumping air into the wall cavity instead of the room. Check for airflow at the supply register first using a tissue, then inspect the attic above the room for missing insulation. If both look normal, you likely have a duct issue that requires a contractor with a duct leakage testing kit.
▼ My energy bill went up 25% after a kitchen renovation. Could the renovation really cause that?
Yes, and a 25% increase is consistent with a significant thermal envelope breach or duct disconnection. Kitchen renovations frequently disturb the ceiling plane above, install new recessed lighting without air sealing, and require repositioning ductwork, all of which are leading causes of post-renovation energy loss. Start by checking the attic directly above the kitchen for open top plates and uninsulated or displaced batt insulation, and look under the kitchen for any duct joints that may have been bumped loose during cabinet installation.
▼ We added an addition and now the whole house feels drafty in winter, not just the addition. Why?
Additions change the total pressure dynamics of your entire home. If the addition was not fully integrated into the air barrier and duct system, it acts like a large cold zone connected to your living space, pulling warm air toward it through interior gaps and accelerating the stack effect throughout the house. Have an energy auditor perform a blower door test with the door between the addition and main house both open and closed to identify where the pressure failure is occurring and whether it is primarily a building envelope or a duct system issue.
▼ Can I fix post-renovation comfort problems myself, or do I always need a professional?
Many common post-renovation comfort problems can be meaningfully improved with DIY air sealing and insulation correction, particularly if the project was smaller in scope like a bathroom remodel or a single-room refresh. However, if your renovation changed your home’s total conditioned square footage by more than 15%, altered the return air pathways, or involved moving ductwork, a professional energy audit and HVAC recommissioning is worth the investment. The diagnostic data from a blower door and duct leakage test will tell you exactly where to spend your time and money rather than guessing.
▼ How long after a renovation should I wait before deciding there is a comfort problem?
Do not wait at all. Run your HVAC system normally for two to three weeks after the renovation is complete and document the temperature in each room at the same time of day for several days. If you see consistent variances of 4 degrees or more between rooms, or if your energy bill is notably higher than the same month in the prior year, that is your signal to investigate. Problems caught early are almost always cheaper to fix because the drywall may still be accessible or contractor accountability may still apply under your contract.
Quick Tips
- Take photos of every wall cavity and ceiling penetration before drywall goes up during a future renovation. These photos are invaluable if comfort problems develop later and you need to identify where insulation or sealing may be missing.
- Ask your contractor to include an air barrier inspection as a line item before any drywall is installed. A 30-minute walk-through with a flashlight at that stage prevents thousands of dollars in remediation later.
- If you are planning a renovation, schedule an energy audit before the project starts. The baseline blower door number gives you a target to maintain and a way to verify the contractor’s work did not degrade your envelope.
- Mini-split heat pumps are the most reliable solution for additions and converted spaces that are difficult to serve with extended ductwork. At 20 to 30 SEER efficiency ratings, they also dramatically outperform the heating and cooling cost of extending an older central system.
Variations for Your Situation
- Apartment or Condo Renovation: If you renovated within a rented or owned condo unit, your ability to access duct systems and wall cavities is limited, but you can still address a significant portion of comfort losses. Focus on air sealing at visible penetrations like where pipes enter under sinks and around outlet boxes on exterior walls using removable acoustic putty pads rather than permanent caulk. Portable or window-mounted heat pumps in the $500 to $900 range are a renter-safe solution for rooms that feel chronically under-conditioned, and they qualify for the federal 30% tax credit if you own the unit.
- Tight Budget Under $150: Prioritize the two highest-impact free or near-free actions first. Walk the attic above renovated spaces with a flashlight and push displaced insulation batts back into position, which costs nothing and can restore significant R-value. Then spend $20 to $40 on low-expansion spray foam to seal visible top plate gaps and pipe penetrations in the attic. These two steps alone can resolve 50 to 60% of common post-renovation energy losses without professional help.
- Older Home Pre-1980: Older homes have less forgiving baselines. Before your renovation, the home likely already had 3 to 5 times the air leakage of a modern house, so any renovation-related disruption sits on top of a problem that was already significant. In these homes, prioritize having a blower door test performed to establish your true leakage baseline, then target rim joist sealing and attic air sealing first since those deliver the highest return in older construction. Expect payback periods of 1 to 2 years for comprehensive air sealing work given the larger magnitude of leakage you are correcting.