If you’ve ever added insulation to your attic and still felt cold drafts in winter or stuffy heat in summer, you’re not alone. Insulation is one of the most misunderstood home improvements on the market. Contractors, big-box stores, and well-meaning neighbors often frame it as the single fix for comfort problems, but insulation only slows heat transfer through solid materials. It does almost nothing to stop conditioned air from leaking out of your home through gaps, cracks, and penetrations.
The U.S. Department of Energy estimates that air leakage accounts for 25 to 40 percent of the energy used for heating and cooling in a typical home. That means if you pile R-49 insulation on top of a leaky attic floor without sealing the holes first, you’ve essentially put a thick blanket over a colander. The warm or cool air you paid to condition escapes right past the fluffy insulation above it. Real comfort improvements come from treating the building envelope as a system, not a checklist of independent upgrades.
This post explains the building science behind why insulation alone falls short, walks you through exactly what to look for and fix first, and gives you two clear approaches: one you can start today at zero cost and one DIY upgrade that most homeowners can complete in a weekend for under $300. You’ll also find real numbers for payback periods and savings so you can prioritize your money wisely.
What You’ll Need
Click on an item below to shop for the recommended items for this recipe on Amazon.
As an Amazon Associate, we earn from qualifying purchases.
How to Do It
- On a cold windy day, walk through your home with a stick of incense or a damp hand near baseboards, electrical outlets on exterior walls, and where pipes or wires pass through walls or ceilings. Watch for smoke movement or feel for cold air drafts.
- Check your attic hatch or pull-down stairs. This is one of the single largest air leakage points in most homes. Hold your hand above the frame when it is cold outside and feel for air movement.
- Look for open stud bays behind kneewalls in finished attics, gaps around recessed light cans visible from the attic, and unblocked spaces between floor joists above attached garages.
- Seal gaps under 1/4 inch with paintable latex caulk. Apply it around window and door trim, baseboards on exterior walls, and where pipes enter walls. One tube of caulk costs about $4 and can seal dozens of small gaps.
- Use foam backer rod stuffed into larger gaps before caulking to avoid wasting sealant on gaps wider than 1/2 inch.
- Check and replace the weatherstripping on your attic hatch, exterior doors, and any door leading to an attached garage. Foam tape weatherstripping costs $5 to $10 per door and installs in under 10 minutes.
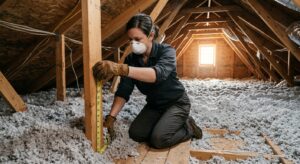
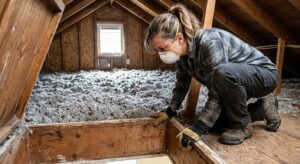
- Before adding any insulation, put on an N95 respirator, safety glasses, and long sleeves and enter the attic. Use a bright flashlight to identify every penetration through the attic floor: top plates, plumbing stacks, electrical boxes, recessed lights, HVAC ducts, and chimneys.
- Seal small gaps around wires and pipes with canned expanding foam rated for small gaps. Use a full-can foam kit or two-part foam for larger openings at top plates. The goal is to create a continuous air barrier across the entire attic floor before adding any insulation on top.
- For recessed light cans that are not rated IC (insulation contact), build or purchase a rigid foam cover sealed with caulk. Never pack insulation directly against non-IC cans, as it creates a fire hazard. IC-rated cans can be sealed with foam at the housing flange.
- Install rigid foam board or rock wool batt against the attic hatch and add a latch to compress weatherstripping. A foam-covered attic hatch costs about $20 in materials and reduces hatch heat loss by 70 percent or more.
- Once all penetrations are sealed, check your existing insulation depth. A standard ruler works fine. In most U.S. climate zones, the DOE recommends R-38 to R-60 in attics. Add blown-in fiberglass or cellulose to reach the recommended level. A 10-bag kit of blown-in cellulose with a rented blower covers roughly 40 square feet at R-30 and costs about $120 to $180.
- Install cardboard or foam rafter baffles at every eave before adding insulation to maintain a clear ventilation channel from the soffit vents to the ridge. Blocking soffit ventilation leads to moisture problems and defeats the purpose of attic ventilation.
- Hire a BPI-certified or RESNET-certified energy auditor. Many utilities offer rebated or free audits. The blower door test depressurizes the house to 50 Pascals and measures total air leakage in CFM50, giving you a baseline number to improve against.
- Review the auditor’s prioritized report. A good audit report ranks improvements by cost per MMBtu saved, not just total savings. Follow their sequence: air sealing first, then insulation, then mechanical upgrades.
- Have a professional spray foam contractor seal band joists, rim joists, and top plates if open-cell or closed-cell spray foam is recommended. Spray foam both air-seals and insulates in one step and is often the most cost-effective solution for rim joists, which are a major leakage point in homes with basements.
- If the auditor recommends dense-pack insulation for existing walls, hire a contractor to drill small holes and inject cellulose or fiberglass. This is not practical as a DIY project and improves wall performance from as low as R-4 effective up to R-13 or more.
- After all envelope work is complete, have your HVAC contractor perform a Manual J recalculation to confirm your existing equipment is still properly sized for the tighter envelope. An oversized furnace or AC in a newly sealed home will short-cycle and cause humidity problems.
Why It Works: The Benefits
Combining air sealing with insulation upgrades saves 20 to 40 percent on annual heating and cooling costs according to DOE data, compared to 10 to 15 percent from insulation alone without sealing.
Eliminating air bypasses stops the stack effect that causes upstairs rooms to overheat in summer and basement rooms to feel perpetually cold, often bringing room-to-room variation from 8 to 10 degrees Fahrenheit down to 2 to 3 degrees.
Uncontrolled air leakage pulls in unconditioned air from attics, crawlspaces, and wall cavities, carrying dust, mold spores, and radon. Sealing these pathways reduces infiltration of outdoor and structural pollutants.
When your envelope actually holds conditioned air, your heating and cooling system runs fewer cycles per day, which reduces wear on the compressor and heat exchanger and can extend equipment life by 3 to 5 years.
A properly sealed and insulated home typically earns an ENERGY STAR certification or improved Home Energy Score, which studies show adds 3 to 5 percent to resale value in most U.S. markets.
💰 Savings Impact by Action
Sealing attic floor penetrations and major leakage points alone reduces heating and cooling energy use by 15 to 20 percent without changing any insulation.
Adding insulation to recommended R-values without addressing air leakage delivers roughly 10 to 15 percent savings because thermal bypasses remain active.
Air sealing followed by insulation upgrade to DOE-recommended R-values delivers 25 to 40 percent savings because both conductive and convective heat loss are addressed together.
Sealing and insulating the rim joist in a basement or crawlspace with spray foam or rigid foam plus caulk reduces whole-house air leakage by 15 to 25 percent and saves 5 to 10 percent on annual bills.
Installing an insulated and weatherstripped attic hatch cover eliminates one of the highest-leakage single points in the ceiling plane and saves 3 to 6 percent on heating bills in cold climates.
🏠 Key Concepts Explained
The Science Behind It
Insulation works by trapping still air in tiny pockets within its fibers or foam cells. Still air is an excellent insulator, rated at roughly R-3.5 per inch for fiberglass batts. But the key word is still. The moment air moves through or around the insulation, either because of gaps in the material or because the material itself is air-permeable, the insulating value collapses. This is the thermal bypass effect, and it explains why a perfectly good R-19 batt installed over an unsealed top plate can perform at the equivalent of R-5 or less under realistic conditions.
The stack effect compounds the problem. Hot air is less dense than cold air, so in a heated home in winter, warm indoor air continuously rises and pushes out through high leaks near the ceiling and roof, while cold outside air is pulled in through lower leaks near the foundation and basement. This creates a constant convective loop that moves conditioned air out of the building regardless of how much insulation sits above it. In summer the direction reverses in some climates, with hot attic air being drawn in through leaks when the air conditioning creates a slight negative pressure indoors. Addressing the stack effect requires reducing the size and number of leak pathways, not adding more resistance to conductive heat flow.
Thermal bridging through wood framing adds another layer of complexity. Wood studs and joists conduct heat roughly 5 to 10 times faster than the insulation installed between them. In a standard 2×4 framed wall, framing members occupy 15 to 25 percent of the wall area, forming a network of conductive pathways that cavity insulation cannot address. This is why continuous exterior rigid foam insulation, which covers the entire wall surface including the framing, adds disproportionately large improvements in effective R-value even at relatively low thickness. A 1-inch layer of polyisocyanurate foam board (R-6.5) over a standard 2×4 wall with R-13 batts raises the effective whole-wall R-value from about R-9 to roughly R-14, a 55 percent improvement from a single inch of foam, because it interrupts the framing bridges.
Frequently Asked Questions
▼ I added insulation last year and my heating bills are the same. What went wrong?
The most likely cause is that air leakage pathways were not sealed before the insulation was installed. Check the attic floor for gaps around plumbing stacks, electrical boxes, and top plates, then seal them with expanding foam and caulk before adding more material on top. If sealing does not help, schedule a blower door test with a certified energy auditor to measure your actual leakage rate and identify where the air is moving.
▼ Why is one room always colder than the rest even though I have good insulation?
A single cold room usually indicates a localized air sealing problem, a duct issue, or thermal bridging specific to that room. Check whether the room has accessible attic space above it with missing or compressed insulation, look for duct leaks serving that room, and check whether exterior walls have insulation at all by using an infrared thermometer or a thermal camera app on your phone on a cold day. If it is a corner room or a room over a garage or crawlspace, the floor and wall intersections are common air leakage locations.
▼ Can I just rent an insulation blower and add more blown-in on top of my existing batts?
You can, but you will get very little improvement in comfort if you skip air sealing first. Adding insulation over leaky top plates is the single most common reason DIY insulation projects disappoint. Before you rent the blower, spend two hours with a flashlight and two cans of expanding foam sealing every visible penetration in the attic floor. That work will give you 80 percent of the benefit for about 20 percent of the effort.
▼ How do I know if my home is too tight after sealing?
Signs of an overly tight home include persistent condensation on windows, stale or stuffy air, high humidity above 60 percent in winter, or back-drafting on combustion appliances like gas furnaces and water heaters. If you notice any of these after aggressive air sealing, have an HVAC technician check combustion appliance draft and assess whether a heat recovery ventilator is needed. Most existing homes are far leakier than the threshold where mechanical ventilation becomes necessary, but new construction and deep energy retrofits often reach it.
▼ Is cellulose or fiberglass better for a DIY attic top-up?
Blown cellulose is generally the better choice for topping up attic insulation. It is denser and less prone to air movement through the material, installs more evenly around obstructions, and is made from recycled content. Fiberglass batts leave gaps around joists and penetrations more easily than blown material does. Either product works well if air sealing is done first, but cellulose performs noticeably better in attics with irregular framing or many obstructions.
Quick Tips
- Use a trigger-operated caulk gun for better control and less waste. The $10 upgrade over a basic squeeze tube pays for itself in the first project.
- Seal from the inside of the attic during cooler months when the space is accessible without heat exhaustion. Attic temperatures above 130 degrees Fahrenheit in summer make detailed air sealing work dangerous.
- When measuring existing insulation, use a ruler and check in three to five locations across the attic floor. Blown-in insulation settles unevenly over time and you may find 10 inches in one spot and 4 inches in another.
- Check your insulation for discoloration. Dark streaks or tracks through fiberglass batts are a visual indicator that air has been moving through the material for years, which confirms you have air leakage pathways that need sealing before you add more insulation on top.
Variations for Your Situation
- Apartment or Condo: Renters cannot modify attic insulation or seal wall penetrations, but significant comfort gains are still available. Focus on door draft stoppers ($10 to $15), removable rope caulk on leaky window frames (fully reversible, under $10), thermal curtains on north and east-facing windows, and outlet gaskets on exterior wall receptacles. These zero-permission fixes can reduce drafts noticeably and cost under $75 total.
- Tight Budget Under $75: Prioritize expanding foam and caulk around the three highest-impact locations: the attic hatch, the rim joist in the basement or crawlspace, and plumbing penetrations through the top floor ceiling. These three areas account for more than half of total air leakage in most homes according to DOE research. Two cans of foam ($12), two tubes of caulk ($8), and a foam attic hatch cover ($20 in materials) can deliver 10 to 15 percent heating bill reductions for under $50.
- Older Home Pre-1980: Homes built before 1980 typically lack any insulation in wall cavities, have uninsulated rim joists, and were built with the assumption that natural air infiltration would handle ventilation. Before adding insulation, test for knob-and-tube or aluminum wiring in the attic and walls since insulating over active knob-and-tube is a fire code violation in most states. Get a professional energy audit first because the scope of work is often larger than a weekend DIY project and utility rebates for professional work on older homes can offset 20 to 50 percent of project costs.