If your heating bills feel shockingly high every winter despite having a relatively modern furnace or heat pump, the culprit is almost certainly not your heating system itself. It is the thermal envelope around it. When insulation levels fall below recommended values, heat escapes through your attic, walls, and floors faster than your heating system can replace it, forcing the equipment to run in long, continuous cycles just to hold a steady indoor temperature. That constant runtime translates directly into fuel or electricity consumption and premature equipment wear.
The U.S. Department of Energy estimates that heating and cooling account for nearly half of a typical home’s total energy use, and that inadequate insulation is responsible for a significant share of that load. Homes built before 1980 often have attic insulation levels of R-11 or lower, while current DOE recommendations for most of the continental U.S. range from R-38 to R-60 in the attic alone. That gap is enormous, and it means your furnace may be working two to three times harder than it needs to.
This post breaks down the building science behind why insulation matters so much for heating efficiency, gives you two practical approaches ranging from a weekend DIY project to a professional upgrade, and provides real numbers so you can decide which path makes the most sense for your home and budget.
What You’ll Need
Click on an item below to shop for the recommended items for this recipe on Amazon.
As an Amazon Associate, we earn from qualifying purchases.
How to Do It
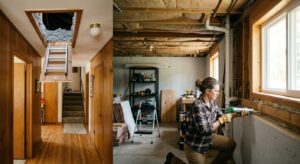
- Locate your attic access hatch and inspect it. If it has no insulation on top and no weather stripping around the frame, it is likely losing as much heat as a window left open all winter.
- Cut a piece of rigid foam board (2-inch polyisocyanurate, R-13) to match the hatch panel dimensions. Use a utility knife and straightedge for a clean cut.
- Glue the foam board to the top of the hatch panel using construction adhesive. If your hatch is in a closet or hallway, add a second layer of foam for R-26 total.
- Install self-adhesive foam weather stripping around the perimeter of the hatch frame where the panel rests. This stops air from bypassing your new insulation.
- If your attic stairs fold down into the living space, consider an insulated attic stair cover tent, available for $50 to $100, which adds R-30 or more over the entire staircase opening.
- Test for air leaks by holding a lit incense stick near the hatch edges on a cold day. Wavering smoke indicates air movement that needs additional sealing with caulk or foam.
- Start by measuring your attic square footage and checking your current insulation depth. Use a ruler and the DOE’s insulation map (available at energystar.gov) to determine your target R-value. Most Zone 4 to 6 homes need R-49 to R-60.
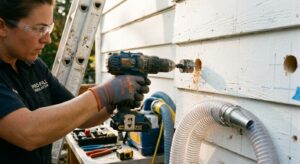
- Before adding any insulation, seal every attic penetration with canned spray foam or acoustical caulk. Target recessed light fixtures, top plates between wall cavities and the attic, plumbing and wire penetrations, and the tops of interior walls. Skipping this step means air bypasses your new insulation and reduces its effectiveness by 30 to 50%.
- Install cardboard or foam baffles in each rafter bay near the eaves to maintain a 2-inch minimum airway from soffit vents to the attic space. This prevents insulation from blocking ventilation and causing moisture problems.
- Rent a blower machine and load cellulose or blown fiberglass bags. Cellulose (R-3.5 per inch) is slightly better at reducing air movement and uses recycled content. Blown fiberglass (R-2.5 per inch) is lighter and good for tight spaces.
- Begin blowing insulation from the farthest point from the hatch and work backward. Keep the hose low and let the material build up gradually. Use painted depth markers (wooden stakes marked with the target depth in inches) placed every 10 feet to guide your progress.
- After filling, verify depth at multiple points and add material where low spots exist. Seal the attic hatch as described in the quick fix approach. Clean up thoroughly because loose insulation is a respiratory irritant.
- Schedule a home energy audit first, either through your utility company (often free or subsidized) or a private BPI-certified auditor. The audit uses a blower door test to locate and quantify air leaks and gives you a prioritized list of improvements with projected savings.
- Get at least three quotes from insulation contractors. Ask each contractor to specify the material, the installed R-value, and whether the quote includes air sealing of attic penetrations. Air sealing should always be part of the scope.
- Ask your utility company about rebates and incentive programs before signing any contract. The federal Inflation Reduction Act also provides a tax credit of up to 30% (capped at $1,200) for insulation improvements through 2032, reducing your net out-of-pocket cost significantly.
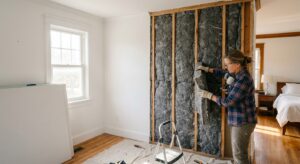
- For walls in older homes (pre-1980), ask about dense-pack cellulose blown into wall cavities through small drilled holes. This approach adds roughly R-13 to empty or partially filled walls without requiring drywall removal, with holes patched and painted after installation.
- After installation, request documentation of the installed material, the coverage area, and the final R-value. A reputable contractor will provide this. If a blower door test was part of the scope, ask for before and after air changes per hour (ACH) readings to confirm the air sealing was effective.
- Monitor your utility bills for the first full heating season after the work is complete and compare them to the same months from the previous year, adjusting for any unusual temperature differences. Most homeowners see a clear reduction within the first month.
Why It Works: The Benefits
Upgrading attic insulation from R-11 to R-38 can reduce heating energy consumption by 20 to 30% annually according to ENERGY STAR data, translating to $200 to $600 in savings per year for a typical 2,000-square-foot home in a cold climate.
A furnace running 8 hours a day instead of 16 hours a day experiences half the mechanical stress, extending the life of heat exchangers, blower motors, and ignition systems. This can delay a $3,000 to $6,000 furnace replacement by several years.
Thin insulation creates cold zones near exterior walls and ceilings, causing uncomfortable temperature swings of 5 to 10 degrees across rooms. Proper insulation levels stabilize surface temperatures and eliminate most of those cold spots.
Air sealing done alongside insulation work reduces infiltration of outdoor pollutants, allergens, and humidity. Homes with sealed and insulated attics typically show measurably lower dust and particulate levels in living spaces.
Studies from the National Association of Realtors and Lawrence Berkeley National Laboratory indicate that energy-efficient homes sell for 2 to 6% more on average, and buyers increasingly ask for utility bill history during the purchase process.
💰 Savings Impact by Action
Upgrading attic insulation from R-11 to R-38 reduces heating energy loss through the ceiling by up to 30% according to ENERGY STAR modeling for cold-climate homes.
Sealing attic floor penetrations before adding insulation eliminates convective bypass and reduces total heating load by 15 to 20% on its own.
Insulating and sealing basement rim joists addresses 10 to 15% of whole-house heat loss, one of the highest-return improvements per dollar spent.
Dense-pack cellulose in previously uninsulated 2×4 stud walls adds R-13 and can reduce wall heat loss by 12 to 18% of total heating load.
Encapsulating and insulating a vented crawl space to code-minimum levels reduces floor heat loss and can cut total heating bills by 10 to 18%.
🏠 Key Concepts Explained
The Science Behind It
Heat loss through a building assembly is governed by Fourier’s Law of Heat Conduction, which states that the rate of heat flow is proportional to the temperature difference across the assembly and inversely proportional to its thermal resistance. In plain terms, the colder it is outside relative to your indoor setpoint, and the lower your wall or ceiling R-value, the faster heat escapes. This is why a home with R-11 attic insulation on a 5-degree night loses heat roughly five times faster than the same home with R-60 insulation. Your furnace must run long enough each hour to replace all that lost heat, and on the coldest nights it simply cannot keep up.
The relationship between insulation and furnace runtime is not linear, which is good news for homeowners. The first increments of insulation added to an empty or nearly empty cavity deliver the largest gains. Going from R-0 to R-11 cuts heat loss through that assembly by about 90%. Going from R-11 to R-38 cuts the remaining loss by roughly another 70%. This is why attic insulation upgrades have such strong returns even when a home already has some insulation present. The law of diminishing returns does eventually kick in, which is why most experts recommend stopping at R-49 to R-60 for most climates rather than pushing to R-80 or beyond where the incremental savings no longer justify the cost.
Air leakage adds a separate and significant layer of heat loss that insulation alone cannot address. When warm interior air escapes through gaps and cracks, it carries its heat content with it in a process called infiltration. Cold outdoor air rushes in to replace it, and your heating system must then warm that cold air from, say, 20 degrees to 70 degrees before it can contribute to indoor comfort. The stack effect, driven by the natural buoyancy of warm air, concentrates this air movement at the top of the house, which is exactly why attic air sealing is so effective. Sealing the attic floor slows the stack effect and keeps conditioned air in the living space where it belongs.
Frequently Asked Questions
▼ My heating bills are still high after I added insulation. What did I miss?
The most common reason insulation upgrades underperform is that air sealing was not done first. If you added blown-in insulation without sealing penetrations in the attic floor, cold air is still bypassing your insulation through gaps around light fixtures, plumbing stacks, and wall top plates. Go back into the attic and look for any unsealed penetrations, then seal them with spray foam or acoustical caulk. Also verify your insulation depth at multiple points because settled material or thin spots near eaves can undercut overall performance significantly.
▼ How do I know what R-value I currently have without calling a contractor?
Bring a ruler into your attic and measure the depth of your existing insulation in several spots away from the eaves. For fiberglass batts, multiply the depth in inches by roughly 3.2. For loose-fill fiberglass, use a factor of about 2.5. For cellulose, use 3.5. For example, 6 inches of cellulose equals approximately R-21. Compare your result to the DOE’s recommended R-values for your zip code, which you can find at energystar.gov, to see how far below the target you are.
▼ Can I just add more insulation on top of what is already there?
Yes, in most cases you can add blown-in insulation directly on top of existing batts or loose-fill without removing anything, as long as the existing material is dry and not contaminated with mold or pests. If you are topping off with blown cellulose over existing fiberglass, this combination works well because cellulose helps slow air movement through the existing layer. The only time you should remove old insulation first is if it is wet, moldy, or contains vermiculite.
▼ Will adding attic insulation cause any moisture or mold problems?
Properly installed insulation with maintained attic ventilation will not cause moisture problems. The key requirements are: keep soffit and ridge vents unobstructed, install rafter baffles before blowing insulation, and make sure bathroom and kitchen exhaust fans vent to the exterior rather than dumping warm moist air into the attic. Problems occur when ventilation is blocked or when air sealing is done improperly, trapping moisture. If you have existing moisture staining or mold in the attic, address that before adding insulation.
▼ What if my home is a condo or apartment and I cannot access the attic?
Renters and condo owners can still address a meaningful portion of their heat loss by focusing on what they can control: seal window and door gaps with removable rope caulk (leaves no permanent damage), add heavy thermal curtains over windows (can reduce window heat loss by 25 to 35%), use draft stoppers at exterior doors, and add area rugs over cold floors. While these steps will not replicate a full insulation upgrade, they can reduce heating bills by 5 to 15% with zero permanent modifications and minimal cost.
Quick Tips
- Check your attic insulation depth right now with a ruler. If you can see the tops of the floor joists or the insulation is less than 10 inches deep, you are almost certainly leaving significant savings on the table every single month.
- Insulate your basement rim joists (the framing where the house sits on the foundation) with cut-and-cobble rigid foam sealed with spray foam. This small area is responsible for 10 to 20% of total envelope heat loss in many homes and takes just a few hours to address.
- Look up your local utility company’s insulation rebate program before buying any materials. Many utilities rebate $0.10 to $0.25 per square foot of insulation installed, which can offset $150 to $400 of your project cost instantly.
- If your home has a crawl space, insulating and encapsulating it (sealing the floor with a vapor barrier and insulating the walls) can reduce floor cold spots, cut heating bills by 10 to 18%, and dramatically improve indoor humidity control.
- After insulating, do not raise your thermostat setpoint to compensate. Keep the same schedule and let the lower heat loss show up as reduced runtime and lower bills rather than a warmer house that erases the savings.
Variations for Your Situation
- Apartment or Condo: Since you cannot insulate the attic or walls, focus on the surfaces you can reach. Add removable rope caulk around drafty windows (about $5 per window and fully removable), hang insulated thermal curtains on exterior-facing windows to cut window heat loss by up to 35%, and place draft snakes at the base of exterior doors. These measures cost $50 to $200 total and can realistically cut your heating bills by 8 to 15% with zero damage to the unit.
- Tight Budget (under $150): Prioritize the attic hatch fix (rigid foam plus weather stripping for $30 to $80), seal rim joists in an accessible basement with leftover rigid foam and a $5 can of spray foam, and add door sweep seals to exterior doors. These three steps address the highest heat-loss weak points and can save $100 to $250 per heating season in a cold climate, paying back in a single winter.
- Older Home (pre-1980): Homes of this era often have little or no wall insulation, R-7 or less in the attic, and extremely leaky envelopes from decades of settling. Start with a professional energy audit, which many utilities offer free or for $100 to $150, to prioritize the highest-impact upgrades. Ask your contractor about dense-pack cellulose for walls (blown in without removing drywall) and confirm the presence of vermiculite before any attic work begins. Federal tax credits and utility rebates make this a particularly good time to tackle a comprehensive upgrade.