
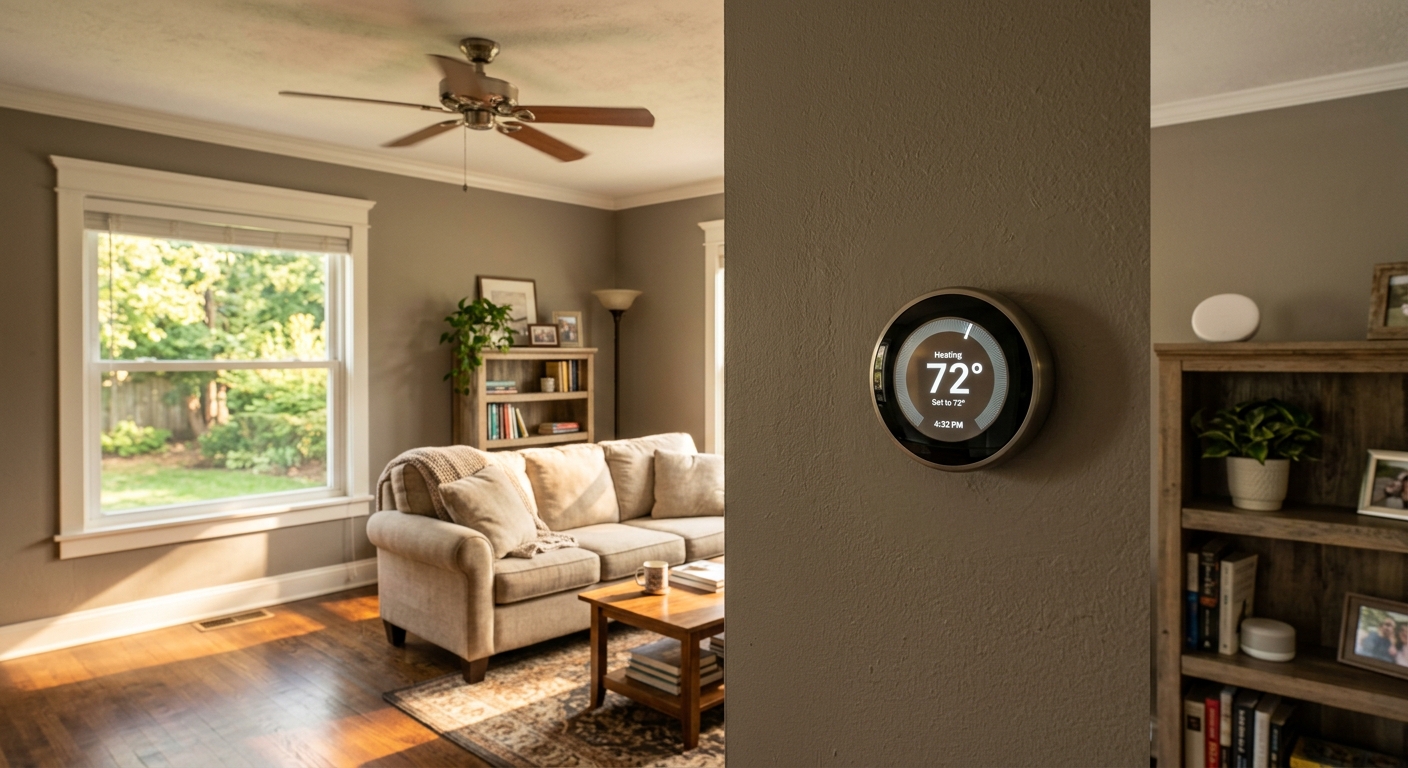
Your thermostat is not lying to you, but it is only telling part of the story. That single temperature reading reflects the air at one specific location, usually a hallway on the main floor, at roughly 5 feet off the ground. Meanwhile, your bedroom two floors up might be 6 to 8°F warmer, the basement 10°F cooler, and the sunny west-facing living room swinging wildly between 68°F and 80°F throughout the day. You are paying to condition all of that space, but your thermostat has no idea any of it is happening.
This disconnect is one of the most common and costly comfort problems in American homes, yet it rarely gets diagnosed correctly. Homeowners turn down the thermostat to cool a hot upstairs bedroom, which over-cools the main floor and drives up energy bills. Others crank the heat to warm a cold corner room, only to end up sweaty everywhere else. The Department of Energy estimates that improper thermostat use and poor temperature distribution together account for up to 25% of wasted heating and cooling energy in typical homes.
This post explains exactly why your thermostat reading misleads you, how to find out what your home’s temperature actually looks like room by room, and what practical steps you can take, from free adjustments today to smart upgrades, to close the gap between the number on the wall and the comfort you actually feel.
What You’ll Need
Click on an item below to shop for the recommended items for this recipe on Amazon.
As an Amazon Associate, we earn from qualifying purchases.
How to Do It
- Download a free indoor thermometer app on your smartphone or buy a basic digital thermometer for $10 to $15. Place it in each room at seated height (approximately 3 feet) for 10 minutes and record the reading. Do this in the morning, afternoon, and evening to capture daily swings.
- Compare each room’s reading to your thermostat’s current display. Document the offset for each room. A difference of more than 3°F above or below the thermostat in a regularly occupied room is a problem worth fixing.
- Check your thermostat’s physical location for obvious placement errors: direct sunlight hitting the device, a supply vent blowing air directly at it, or mounting on an exterior wall. Any of these will cause systematic bias in the reading.
- Adjust ceiling fan direction for the season. In summer, fans should spin counterclockwise when viewed from below to push cool air down. In winter, switch the direction clockwise at low speed to gently pull warm stratified air down from the ceiling without creating a wind-chill effect. This single step can reduce perceived temperature variation by 2 to 4°F.
- Close vents slightly (not fully) in rooms that measure consistently cooler than the thermostat, to redirect more airflow toward warmer rooms. Never close more than 20% of total vents in the home, as this increases duct pressure and can damage your HVAC system.
- Install a smart thermostat with remote room sensors, such as the Ecobee SmartThermostat or Honeywell T9. These systems average temperatures across multiple rooms or prioritize the occupied room, rather than relying on a single hallway sensor. Installation typically takes 30 to 45 minutes and most models are DIY-friendly with step-by-step apps.
- Place remote sensors in your highest-priority comfort rooms: the bedroom you sleep in, the room where the temperature offset was largest in your mapping exercise, and any room with a known hot or cold spot. Position sensors at 5 feet on an interior wall away from vents and windows.
- Seal air leaks in the rooms with the largest temperature offsets. Use a stick of incense or a lit candle near window frames, outlet covers on exterior walls, and where baseboards meet the floor. Visible smoke movement indicates a draft. Apply weatherstripping to window sashes and door frames, foam gaskets behind outlet covers, and paintable caulk along baseboards.
- Add window film to the worst solar-gain windows, typically south and west-facing glass. 3M or Gila heat-control window films block 55 to 79% of solar heat gain and cost $25 to $60 per window. They install with soapy water and a squeegee in about 20 minutes per window and can reduce a problem room’s temperature by 4 to 6°F on sunny afternoons.
- Check attic hatch insulation and seal. Attic hatches are often uninsulated or poorly sealed and allow significant heat exchange. Add a pre-made insulated attic stair cover ($40 to $80) or staple rigid foam board to the back of the hatch door. This alone can reduce upstairs room temperatures by 2 to 4°F in summer.
- After completing the steps above, re-run your temperature mapping exercise to measure improvement. Adjust smart thermostat sensor weighting based on your results, prioritizing the rooms where comfort matters most.
- Schedule a professional energy audit or HVAC balancing assessment. Many utility companies offer subsidized audits for $100 to $150. A certified auditor will use a blower door test to quantify total air leakage, duct pressurization testing to find duct losses, and an infrared camera to locate insulation gaps and thermal bridges that cause localized cold or hot surfaces.
- Request a duct leakage report. If your ducts leak more than 15% of system airflow (the national average is 20 to 30%), professional duct sealing with Aeroseal or mastic can recover that lost capacity. Aeroseal costs $1,500 to $3,000 but reduces duct leakage by 90% and typically pays back in 3 to 5 years through lower bills and reduced equipment wear.
- Have the technician perform HVAC airflow balancing using a flow hood or anemometer to measure actual CFM delivery at each register. Proper balancing adjusts dampers and registers so every room receives the designed airflow, which directly closes temperature gaps between rooms.
- If the audit reveals insulation below R-30 in the attic, get quotes for blown-in insulation to bring it to R-38 to R-60 depending on your climate zone. This is typically the single highest-return insulation upgrade available, with payback periods of 3 to 7 years and permanent comfort improvement in upper-floor rooms.
Why It Works: The Benefits
Correcting temperature distribution lets you run your thermostat at a more moderate setpoint without sacrificing comfort in problem rooms. Homeowners who address duct imbalance and air sealing together typically see 15 to 25% reductions in heating and cooling costs, which translates to $200 to $500 per year for an average home.
Mapping and addressing real temperature variation eliminates the need to overcondition one zone to compensate for another. Rooms that previously swung 8 to 12°F above or below the thermostat setpoint can be brought within 2 to 3°F, which is the threshold most people perceive as genuinely comfortable.
When temperature distribution improves, your system reaches setpoint faster and cycles off sooner. Fewer and shorter run cycles reduce compressor and blower wear, potentially extending equipment life by 2 to 4 years and reducing repair frequency.
The ideal sleep temperature is 65 to 68°F. If your thermostat is set to 70°F but your upstairs bedroom runs 6 to 8°F warmer, you are sleeping in a 76 to 78°F room, which measurably disrupts sleep cycles. Fixing the temperature gap in sleeping areas has direct health and productivity benefits.
Once you know what your thermostat reading actually represents versus what your occupied rooms feel like, you can program setpoints that account for the real offset. A 2°F thermostat adjustment driven by accurate data saves roughly 2 to 4% on energy bills per degree, with no comfort sacrifice.
💰 Savings Impact by Action
Sealing duct leaks from the average 25% loss rate down to under 10% recovers 15 to 20% of conditioned airflow that was previously escaping into unconditioned attic or crawlspace.
Smart thermostats with remote room sensors save an average of 10 to 15% on HVAC costs by optimizing run times based on occupied-room temperatures rather than a single fixed sensor location.
Heat-control window film on south and west-facing glass reduces solar heat gain by 55 to 79%, cutting cooling load in problem rooms by up to 10% of whole-home cooling energy.
Sealing infiltration gaps around windows, outlets, and penetrations reduces uncontrolled air exchange by up to 30%, cutting the energy wasted conditioning air that immediately escapes.
Upgrading attic insulation from R-19 to R-38 or higher reduces ceiling heat transfer by 50%, which directly lowers upper-floor temperatures and cuts cooling energy use by 15 to 20%.
🏠 Key Concepts Explained
The Science Behind It
The root issue is that air is a poor conductor of heat and does not mix itself uniformly in a sealed room. Warm air has lower density and rises by convection, while cool air sinks. In a room with 9-foot ceilings and no active air mixing, the temperature gradient from floor to ceiling can reach 5 to 10°F under normal conditions. Your thermostat, mounted at roughly 5 feet on a wall, reads the midpoint of this gradient, which means it is simultaneously under-reporting the temperature your ceiling fan motor experiences and over-reporting what you feel when you sit on the couch.
Solar radiation adds a separate and significant layer of complexity. Glass transmits shortwave solar radiation, which then converts to longwave infrared heat when it strikes interior surfaces. This radiant heat warms walls, floors, and furniture directly, raising the mean radiant temperature of a room independent of air temperature. Mean radiant temperature is roughly half of what determines thermal comfort for occupants. A room with an air temperature of 70°F but sun-warmed walls at 85°F will feel uncomfortably warm even though the thermostat reads correctly. Conversely, a room with 70°F air but cold exterior walls in winter will feel chilly because your body is losing radiant heat to those cold surfaces at a faster rate than the air can replace it.
Duct systems compound the problem because they were designed with specific airflow assumptions that rarely survive real-world installation and decades of settling, disconnection, and leakage. When a duct run loses 25% of its airflow to leaks in the attic or crawlspace before reaching the register, the room at the end of that run receives 25% less conditioned air than it was designed to get. No amount of thermostat adjustment compensates for that physical shortfall. The HVAC system simply runs longer, spending more energy conditioning air that escapes into unconditioned space rather than the room where you need it.
Frequently Asked Questions
▼ My thermostat says the house is at setpoint but I still feel hot or cold. What is wrong?
Air temperature is only part of thermal comfort. If you feel cold despite a correct air temperature reading, you are likely losing radiant heat to cold exterior walls or windows, a problem air temperature alone does not fix. If you feel hot, solar heat gain or high humidity is raising your mean radiant temperature above what the air thermometer measures. Check humidity with an inexpensive hygrometer: indoor relative humidity above 55% in summer makes a 72°F room feel like 78°F due to reduced evaporative cooling from your skin.
▼ Why is my upstairs always so much hotter than downstairs in summer?
The two most common causes are attic heat transfer through under-insulated ceilings and duct leakage into the hot attic before air reaches the upstairs registers. Start by checking attic insulation depth: you need at least 10 to 14 inches of blown fiberglass (R-38) in most climates, and more in hot climates (R-49 to R-60). If insulation is adequate, have an HVAC tech test your duct leakage. Even modest duct sealing in the attic zone can reduce upstairs temperatures by 4 to 6°F.
▼ Can I just add a window AC unit or portable heater to fix a problem room?
Yes, this is a practical short-term fix for a single severe problem room, and it often costs less than $150. The tradeoff is that it does nothing to fix the underlying cause and adds to electricity costs long-term. If you go this route, make sure your central system’s thermostat is not located in or adjacent to the room you are supplementally conditioning, or the central system will misread the home’s average temperature and short-cycle, wasting energy in the rest of the house.
▼ Will a smart thermostat actually fix uneven temperatures or just measure them better?
A smart thermostat with remote sensors measures the problem more accurately and can optimize run times based on occupied room temperatures rather than a single hallway reading, which typically improves comfort and saves 10 to 15% on energy. But it cannot create airflow that does not exist: if a room has a fundamental duct imbalance, insulation gap, or air leakage problem, the smart thermostat will simply run your HVAC system longer trying to compensate. Use sensor data to identify root causes, then address those causes directly.
▼ How do I know if my thermostat itself is reading inaccurately?
Place a calibrated digital thermometer directly next to your thermostat and let it sit for 15 minutes. A discrepancy of more than 1.5°F means your thermostat sensor may have drifted, a common issue with thermostats older than 10 years, or that its location is being influenced by a nearby heat source or draft. Most smart thermostats allow manual calibration offsets in the settings menu to correct for a known bias without replacing the unit.
Quick Tips
- Run your temperature mapping test on the hottest afternoon of the week and the coldest night of the month to capture the full range of your home’s actual behavior, not just average conditions.
- If your smart thermostat allows it, set sensor priority to your bedroom from 10 PM to 7 AM and your main living area during the day. This single scheduling change improves sleep comfort without raising average energy use.
- Thermal curtains on south and west-facing windows can reduce solar heat gain by 33% in summer when kept closed during peak sun hours (roughly 10 AM to 4 PM), which can lower problem room temperatures by 3 to 5°F at zero ongoing cost.
- If you have a two-story home and the upstairs consistently runs 5°F or more warmer than downstairs, check whether your attic insulation has settled or been disturbed. Even R-38 insulation that has been compressed to half its thickness can lose 40 to 50% of its effective R-value.
Variations for Your Situation
- Apartment/Rental: Renters cannot modify ductwork or install a new thermostat without permission, but they can deploy wireless indoor temperature sensors ($15 to $30 each from brands like Govee or SensorPush) connected to a free smartphone app to map real room temperatures. Use that data to have an informed conversation with your landlord about HVAC balancing. In the meantime, thermal curtains, door draft stoppers, and a fan in ‘Circulate’ mode address comfort at zero or minimal cost and require no permanent modifications.
- Tight Budget (under $50): Focus first on the free steps: ceiling fan direction adjustment, closing blinds during peak sun, and running the HVAC fan on ‘Circulate’ for 20 minutes per hour. Then spend $10 to $15 on a digital thermometer to map real temperatures and $15 to $20 on foam outlet gaskets and rope caulk for the worst-leaking windows. These steps cost under $40 total and can realistically reduce temperature variation by 3 to 5°F in most homes.
- Older Home (pre-1980): Homes built before 1980 typically have R-11 or less wall insulation, single-pane or early double-pane windows, and duct systems that were never pressure-tested. Temperature variation of 10 to 15°F between rooms is common and represents a genuine building envelope problem, not just a thermostat issue. Prioritize a professional energy audit first, as the interaction between multiple deficiencies in older homes means DIY fixes can have unintended consequences such as moisture problems when air sealing without adequate ventilation. Many states offer weatherization assistance programs for income-qualifying homeowners that cover audit and improvement costs at no charge.