Your attic insulation has a dirty secret: it was probably designed with cold winters in mind, but summer heat plays by entirely different rules. In winter, insulation slows conductive heat loss through your ceiling and walls. In summer, radiant heat from a sun-baked roof can raise attic temperatures to 150°F or higher, and that same insulation has to work against a much more intense and directional heat source. The result is that a home that feels perfectly comfortable in January can turn into an oven in July, even with the same R-value sitting in the attic.
This seasonal mismatch costs American homeowners real money. The Department of Energy estimates that heating and cooling account for about 43% of the average home’s energy bill, and a significant portion of that waste comes from insulation systems that are not optimized for both seasons. Adding radiant barriers, air sealing bypasses, and the right insulation type in the right location can close this gap and deliver savings of 15 to 30% on annual energy costs, often with payback periods under five years.
In this post, we break down exactly why insulation behaves differently in summer versus winter, which mechanisms are working against you right now, and what you can actually do about it, from free thermostat adjustments to a weekend DIY project to a professional upgrade that qualifies for federal tax credits.
What You’ll Need
Click on an item below to shop for the recommended items for this recipe on Amazon.
As an Amazon Associate, we earn from qualifying purchases.
How to Do It
- Set your thermostat 7 to 10°F higher when away from home during summer (the DOE estimates this saves up to 10% annually). Use a programmable or smart thermostat schedule if available.
- Check your attic hatch for insulation coverage. A bare plywood hatch is a major thermal bypass. Purchase a pre-made attic stair cover kit for $25 to $50 or cut rigid foam to fit and secure it with hook-and-loop fasteners.
- Inspect attic ventilation from inside the attic on a hot day. If soffit vents are blocked by insulation, use a rake or gloved hand to pull insulation back at least 3 inches from eave baffles. Proper ventilation lowers attic air temperature by 20 to 40°F.
- Close blinds and curtains on south- and west-facing windows between 10am and 4pm in summer. This single habit reduces solar heat gain through glass by 45%, meaningfully cutting cooling load without touching your insulation.
- In winter, reverse step 2: ensure your attic hatch is covered and that any pull-down stair unit has its insulating cover in place before heating season begins.
- Map your attic before adding insulation. Look for gaps around recessed lights, plumbing stacks, top plates of interior walls, and wiring penetrations. These air bypasses are responsible for 25 to 40% of total air leakage in a typical home.
- Seal recessed light housings with fire-rated intumescent caulk or install insulation-contact (IC) rated covers from above. Seal all plumbing and wiring penetrations with fire-rated caulk or expanding foam rated for the gap size (use foam for gaps under 1 inch, backer rod plus caulk for larger gaps).
- Seal the tops of interior partition walls, which are often open to the attic and act as large chimneys in both summer and winter. Use rigid foam scraps cut to fit and secured with foam adhesive, then tape seams with housewrap tape.
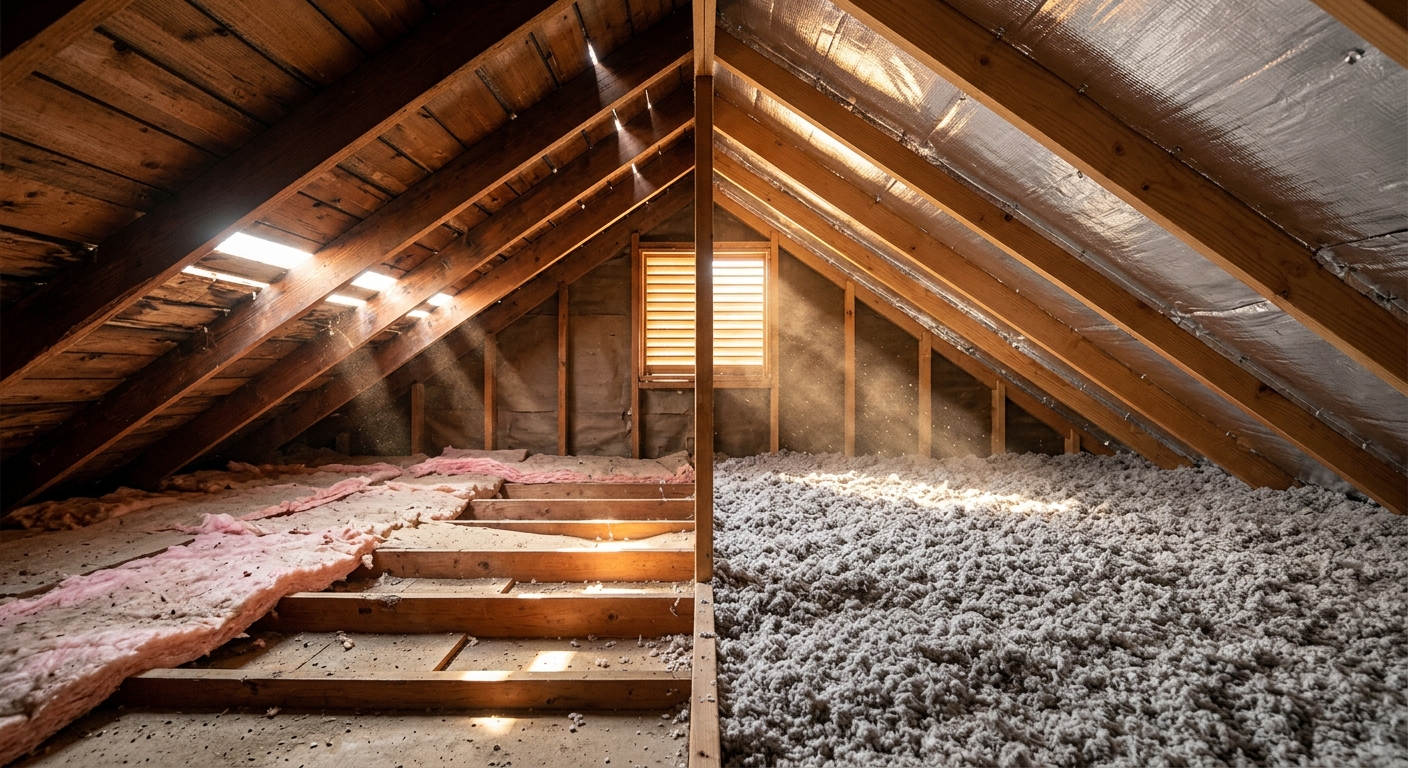
- Measure your existing insulation depth. In most U.S. climate zones, the DOE recommends R-38 to R-60 in the attic. If you have less than 11 inches of blown fiberglass (approximately R-38), add blown cellulose or additional batts to bring it up to code for your zone.
- Rent a blower machine from a home center (often free with purchase of a set number of bags) and blow cellulose to the correct depth. Cellulose runs about $0.50 to $1.00 per square foot installed DIY, versus $1.50 to $3.00 professionally installed.
- Install attic baffles at each rafter bay along the eaves before adding insulation to ensure airflow from soffit to ridge is maintained. Without baffles, new insulation will block ventilation and worsen summer heat buildup.
- Hire an insulation contractor to install a reflective radiant barrier on the underside of your roof rafters. This reflects 95% of radiant heat before it ever enters the attic air, reducing attic temperatures by 20 to 30°F in summer. Cost is typically $0.15 to $0.25 per square foot of attic floor area.
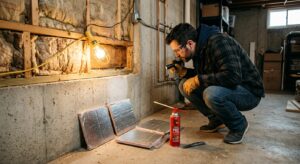
- Have the contractor assess and air seal the attic using two-component spray foam for large bypasses around framing, chimney chases, and dropped soffits. Spray foam fills irregular gaps completely and adds R-value at the same time.
- Request that the contractor bring insulation levels to your climate zone’s recommended R-value: R-38 for Climate Zones 1 to 3, R-49 for Zones 4 to 6, and R-60 for Zones 7 and 8.
- Ask about closed-cell spray foam for rim joists in the basement or crawlspace. Rim joists are often the largest single air leakage point in a home and addressing them improves both summer and winter performance simultaneously.
- Obtain a post-installation blower door test (often $200 to $400) to verify that air sealing work actually reduced ACH50 (air changes per hour at 50 pascals). This measurement documents your improvement and may be required for tax credit documentation.
Why It Works: The Benefits
Properly addressing radiant heat gain with a radiant barrier plus adequate attic insulation can reduce cooling loads by 5 to 10%, translating to $50 to $150 in savings per cooling season in hot climates.
Air sealing combined with bringing attic insulation to DOE-recommended levels (R-38 to R-60 depending on climate zone) can reduce heating costs by 10 to 20% annually.
Fixing the summer radiant heat problem reduces the temperature difference between floors and between rooms, eliminating the common complaint that upstairs rooms are 5 to 10°F hotter than the thermostat setting.
When insulation and air sealing reduce peak load, your AC runs shorter cycles and the compressor experiences less stress, potentially extending system life by 2 to 5 years.
Insulation upgrades that meet IECC standards qualify for the 25C Energy Efficient Home Improvement Credit, covering 30% of costs up to $1,200 per year, directly reducing your out-of-pocket payback period.
💰 Savings Impact by Action
Sealing ceiling bypasses and penetrations reduces conditioned air loss and cuts heating and cooling costs by 10 to 20% according to DOE data.
Bringing attic insulation to the recommended R-value for your climate zone reduces heat gain and loss by 10 to 15% annually.
A properly installed radiant barrier reflects up to 95% of radiant heat in summer, reducing cooling loads by 5 to 10% in hot climates.
Restoring blocked soffit and ridge ventilation can lower attic air temperature by 20 to 40°F, reducing the thermal load on insulation by up to 8%.
Setting back the thermostat 7 to 10°F for 8 hours per day saves up to 10% annually on heating and cooling costs per DOE guidance.
🏠 Key Concepts Explained
The Science Behind It
In winter, heat transfer through your ceiling is primarily conductive: warm interior air heats the ceiling drywall, which conducts that energy molecule by molecule up through the insulation toward the cold attic air above. R-value is a direct measure of resistance to this conductive flow. Double your R-value, and you roughly halve the rate of heat loss. This is the scenario insulation was originally engineered to address, and it works well.
In summer, the dominant mechanism is radiant heat transfer from the sun-heated roof surface. Your dark asphalt shingles can reach 180°F on a sunny afternoon. That heat radiates as infrared energy into the attic space, heating the air and all surfaces inside. By the time that heat energy reaches your insulation layer, it has already been absorbed and re-emitted multiple times. High R-value slows it down, but attic air temperatures of 140 to 160°F mean the temperature differential driving heat into your home is 2 to 4 times larger than what insulation faces on a cold winter day in most U.S. climates. This is why a radiant barrier, which reflects rather than resists heat, is a complementary tool rather than a redundant one. It attacks the problem at the source before the attic air heats up.
Air sealing amplifies both seasonal benefits through a different mechanism entirely. Air moves heat 7 to 10 times faster than conduction through a solid material. A gap the size of a quarter in your ceiling plane can let more heat into or out of your home than several square feet of missing insulation. In summer, hot pressurized attic air finds any path of least resistance into conditioned space. In winter, buoyancy-driven stack effect pushes warm air out through those same gaps near the top of the house. This is why the DOE consistently lists air sealing as the single highest return-on-investment improvement most homeowners can make, often delivering 10 to 20% savings with materials costing under $100.
Frequently Asked Questions
▼ My upstairs is always 5 to 10 degrees hotter than downstairs in summer. Will more insulation fix this?
More insulation helps but is rarely the complete answer. The temperature difference usually points to a combination of radiant heat gain through the roof, undersized or poorly balanced duct work on the second floor, and air leakage at the top of the home. Start by checking that your supply registers upstairs are fully open and that your return air path is unobstructed. Then assess attic insulation depth and consider a radiant barrier if you are in a hot climate (Climate Zones 1 through 3).
▼ I added insulation last year but my bills did not go down. What went wrong?
Adding insulation without first air sealing is the most common and costly mistake homeowners make. If conditioned air is escaping through gaps and cracks, additional R-value cannot compensate for that loss. Hire a home energy auditor to perform a blower door test, which will locate and quantify your air leakage points. Focus air sealing efforts there first, and you will likely see the savings you expected from the insulation.
▼ How do I know what R-value I actually need for my climate zone?
The DOE’s climate zone map divides the U.S. into zones 1 through 8. Zone 1 to 2 (deep South, Hawaii) recommends R-30 to R-49 in attics. Zones 3 to 4 (mid-Atlantic, Pacific Northwest) recommend R-38 to R-60. Zones 5 through 8 (Upper Midwest, Mountain West, Alaska) recommend R-49 to R-60. You can find your zone by entering your ZIP code at energystar.gov or energy.gov. Measure your current depth and multiply by the insulation type’s R-value per inch to see where you stand.
▼ Can I just add new insulation on top of my old insulation?
Yes, in most cases you can add blown cellulose or unfaced fiberglass batts directly on top of existing insulation, as long as the existing material is dry and not contaminated with mold or pests. Do not use faced batts as a top layer, as the vapor retarder facing can trap moisture in the middle of your insulation stack. Air seal any visible bypasses before adding the new layer while you still have clear access to the ceiling plane.
▼ Does insulation work differently in a cathedral ceiling or flat roof compared to an attic?
Yes, significantly. Cathedral ceilings and unvented flat roofs have no attic buffer and no room for additional blown insulation, so they rely entirely on the R-value already present in the rafter cavity. The solutions there include adding rigid foam above the roof deck during a re-roofing project, or spraying closed-cell foam on the underside of the roof deck from inside. Both approaches are more expensive per square foot than attic work but are sometimes the only viable option. Consult an insulation contractor who specializes in unvented roof assemblies.
Quick Tips
- Check your attic insulation depth every 5 years. Blown insulation settles over time and can lose 10 to 15% of its depth within a decade, reducing effective R-value.
- Paint your roof with a cool-roof coating or choose light-colored shingles at replacement time. Cool roofs can reduce roof surface temperature by 50 to 60°F, cutting attic heat gain dramatically before it even reaches your insulation.
- Insulate and air seal your attic access hatch first. This single item is often completely uninsulated and represents a hole the size of a window in your thermal envelope.
- Use a laser thermometer to scan your ceiling on a hot summer afternoon. Warm spots reveal exactly where heat is bypassing your insulation, so you can target air sealing efforts precisely instead of guessing.
Variations for Your Situation
- Apartment/Rental: Renters cannot modify attic insulation or air seal the building envelope, but they can address the symptoms. Use thermal curtains or cellular shades on south- and west-facing windows to block 40 to 50% of solar heat gain. Draft snakes at door bottoms and temporary foam weatherstripping on leaky windows cost under $30 total and reduce air infiltration noticeably. A portable smart plug with an energy monitor can help you identify which appliances are adding to your cooling load so you can shift usage to off-peak hours.
- Tight Budget (under $50): Focus entirely on the attic hatch and ventilation check. A foam-board attic hatch cover costs $10 to $20 in materials and can be cut and installed in under an hour. Clearing blocked soffit vents costs nothing. Together these two steps can lower attic temperatures by 15 to 30°F and meaningfully reduce summer heat gain without spending more than a dinner out.
- Older Home (pre-1980): Homes built before 1980 often have little or no attic insulation (R-0 to R-11), knob-and-tube wiring that complicates insulation work, and wallcavities filled with compressed vermiculite or asbestos-containing materials. Have a certified energy auditor assess the home before doing any DIY insulation work. Many older homes qualify for utility rebates and weatherization assistance programs specifically designed for this housing stock. The savings potential is higher than in a newer home, often 25 to 40% on annual energy bills, making the investment particularly worthwhile.