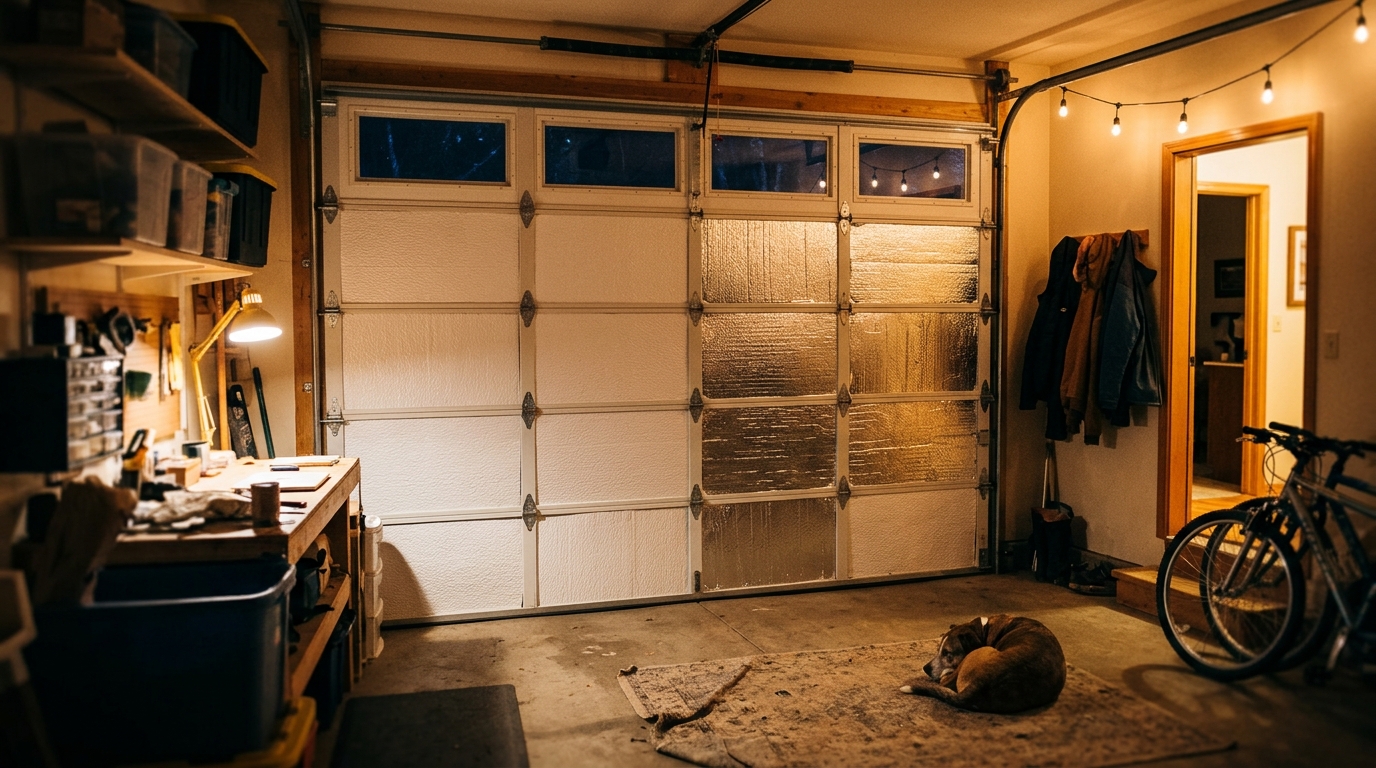
Your garage door is probably the largest single moving part of your home’s exterior, and in most houses it is also the worst-insulated. A standard single-layer steel door has an R-value of roughly R-0.5 to R-1, which is barely better than a sheet of cardboard. On a winter night when it is 20°F outside, that door lets your garage drop to within a few degrees of the outdoor temperature, and the cold does not stay in the garage.
If your garage is attached, that chilly space shares walls, a ceiling, and often ductwork with your living areas. The result is cold floors above the garage, a bedroom that never quite warms up, a furnace that runs longer than it should, and a water heater or freezer in the garage working harder than necessary. In summer, the same door becomes a heat radiator that bakes the space and pushes warmth into the house.
The good news is that a garage door insulation kit is one of the cheapest and fastest insulation upgrades you can make. In this post, we cover how the kits work, how to choose between a quick install and a more thorough DIY job, what savings to realistically expect, and the mistakes that can damage your door opener or void your warranty.
What You’ll Need
Click on an item below to shop for the recommended items for this recipe on Amazon.
As an Amazon Associate, we earn from qualifying purchases.
How to Do It
- Close the door and turn off the lights in the garage on a sunny day, or have a helper shine a flashlight along the edges, to find daylight gaps around the sides, top, and bottom.
- Remove the old bottom seal by sliding it out of the retainer track on the base of the door. Measure the length and the retainer style (T-end, bulb, or beaded) before buying a replacement.
- Slide in a new vinyl or rubber bottom seal. Cut it a half inch shorter than the door width and work it along the track from one end.
- Install vinyl or rubber weatherstripping along the sides and top of the door frame. Press it firmly against the closed door so it compresses lightly without blocking travel.
- Run the door through a full open and close cycle to confirm the seals do not bind, and adjust the stop molding if needed.
- Clean each door panel with a damp cloth and let it dry. Dust and grease prevent adhesive tape and clips from holding.
- Measure the width and height of each recessed panel. Most kits come precut, but trimming is common because panels vary by a half inch or more.
- Cut each foam or reflective panel with a utility knife and straightedge. Score and snap foam board, and cut vinyl facings with sharp scissors. Leave a 1/4 inch gap at the edges so panels can be pressed in without bowing.
- Fit each piece into its recess and secure with the retainer clips or double-sided tape provided. Do not use construction adhesive, which can damage the paint and make future removal difficult.
- Check the door balance. Disconnect the opener by pulling the release cord, lift the door halfway by hand, and let go. It should stay in place. If it drifts down or up, call a garage door technician to adjust the springs before using the opener.
- Reconnect the opener, run the door through several cycles, and confirm it opens and closes smoothly without straining.
- Get quotes from at least three installers. Ask each for the R-value of the proposed door, not just the thickness, since polyurethane insulates far better than polystyrene at the same thickness.
- Choose between polystyrene (R-6 to R-9) and polyurethane (R-12 to R-18). Polyurethane costs more but is stiffer, quieter, and better for living spaces above or beside the garage.
- Confirm the installer will replace the springs, bottom seal, and perimeter weatherstripping with the new door. These are the parts that fail most often.
- After installation, test the auto-reverse safety feature by placing a 2×4 flat under the door and closing it. The door should stop and reverse on contact.
Why It Works: The Benefits
Most homeowners see the garage run 10 to 12°F warmer than before, which makes it more comfortable to use and protects paint, tools, and stored items from extreme cold.
Reducing cold transfer through shared walls and the ceiling can raise floor and room temperatures by several degrees, often fixing the one bedroom that never feels comfortable.
The Department of Energy notes that insulating an attached garage door can reduce energy loss meaningfully. Typical homeowners save roughly 5 to 10% on heating and cooling, or about $50 to $150 per year.
Foam and reflective insulation dampen the metallic rattle and street noise that comes through a bare steel door, which is a real benefit if a bedroom sits above the garage.
A garage freezer or refrigerator runs less often when summer garage temperatures drop by 10 to 15°F, and a water heater loses less standby heat in winter.
💰 Savings Impact by Action
Replacing the bottom seal and adding perimeter weatherstripping cuts infiltration through the largest gaps in the door assembly.
Raising the door from R-1 to R-5 reduces conductive heat loss by roughly 70 to 80% across the door surface.
Garage temperatures typically rise 10 to 12°F in winter, reducing the cold load on shared walls and ceiling.
A garage freezer or water heater in a milder space runs less often, trimming its energy use by up to 8%.
🏠 Key Concepts Explained
The Science Behind It
Heat always moves from warm to cold, and the rate depends on three things: the temperature difference, the surface area, and the thermal resistance (R-value) of what is in between. A bare steel garage door has almost no resistance, so on a 20°F night the garage interior settles within a few degrees of outdoor temperature. Your home’s shared wall and ceiling then lose heat to that cold garage instead of a mild buffer zone.
Adding insulation raises the door’s R-value from about R-1 to R-5 or more, which cuts conductive heat flow by roughly 70 to 80%. Reflective facings add a smaller benefit by reducing radiant exchange, because a low-emissivity surface radiates less cold into the garage space. The effect is strongest in cold climates and in garages with a room directly above them.
Air leakage matters just as much as conduction. Because warm air rises and cold air sinks, gaps at the bottom of the door pull in cold air at floor level while warm air escapes at the top, a pattern called the stack effect. Sealing the perimeter breaks that loop. Combining air sealing with panel insulation produces savings that are greater than either measure alone.
Frequently Asked Questions
▼ Will insulating my garage door hurt the opener or springs?
It can if the kit adds too much weight. Most foam kits add 10 to 20 pounds, which is usually fine, but always test the balance by disconnecting the opener and lifting the door halfway by hand. If it will not stay put, have a technician adjust the springs before using the opener.
▼ My garage is still cold after installing a kit. What is wrong?
Check for air leaks first, since the bottom seal and side weatherstripping often matter more than panel R-value. Also look at the garage walls, the ceiling, and the window or entry door, which may be uninsulated. A garage will only warm up significantly if you reduce leaks across the whole envelope.
▼ Is it worth insulating a detached garage?
Usually only if you use it as a workshop or keep temperature-sensitive items there. Without a shared wall to your home, you will not see utility bill savings, though the space will be more comfortable and drier.
▼ How long before I notice savings on my bill?
You will feel the temperature difference in the garage and adjacent rooms within the first cold night. Bill savings show up gradually, typically $50 to $150 per year for an attached garage, so full payback takes one to three years depending on your climate and energy prices.
▼ Can I use this in a hot climate?
Yes. Insulation works in both directions, and in hot climates it reduces how much solar heat the door passes into the garage and the rooms next to it. Reflective facing kits are particularly effective in southern and southwestern climates.
Quick Tips
- Do the work on a mild day so adhesive tape and foam clips bond properly. Most adhesives fail below 40°F.
- Choose a light-colored or reflective facing in hot climates to bounce summer sun away from the door surface.
- Insulate and seal the door between the garage and your house too. A weatherstripped, insulated entry door is just as important as the large garage door.
- Check seal condition every fall. Rubber bottom seals harden and crack after 5 to 7 years, and replacing them takes 15 minutes.
Variations for Your Situation
- Apartment or Rental: Most renters with an assigned garage can use removable kits that clip into panel recesses without adhesives, around $60 to $100. Always get landlord permission in writing, and consider a $15 bottom seal that slides out cleanly when you move.
- Tight Budget (under $50): Skip the panel kit and focus on air sealing. A new bottom seal ($10 to $15), vinyl side and top weatherstripping ($15 to $25), and a rolled-up draft blocker for the garage entry door will capture roughly half of the possible benefit.
- Older Home (pre-1980): Expect more air leakage around old wood frames and worn tracks, so seal gaps first. Check that the opener and springs can handle the added weight, and consider replacing a dented or rusting door entirely, since a modern insulated door often outperforms any retrofit kit.
- Cold Climate (zones 5 to 7): Choose a thicker kit with at least R-6 and add a weatherstripped, insulated entry door between the garage and house. If a bedroom sits above the garage, also insulate the garage ceiling with R-30 batts.