Every winter, millions of homeowners crank up the thermostat and wonder why the house still feels cold. The answer is almost never the furnace. It is the invisible gaps, thin insulation, and unblocked pathways that let warm air escape and cold air pour in. Your heating system is working hard, but the house itself is working against you.
The good news is that most of the biggest heat loss culprits are fixable in a single weekend with basic tools and a modest budget. We are talking about projects that range from free to a few hundred dollars, with payback periods measured in months, not years. The Department of Energy estimates that air sealing and insulation improvements alone can reduce heating and cooling costs by 15 to 25% annually.
This post walks you through seven high-impact projects you can realistically complete over a Saturday and Sunday. We cover what to do, why it works, what it costs, and roughly how much you can expect to save. Whether you rent or own, have a tight budget or room to invest, there is something here that will make your home noticeably warmer by Monday morning.
What You’ll Need
Click on an item below to shop for the recommended items for this recipe on Amazon.
As an Amazon Associate, we earn from qualifying purchases.
How to Do It
- Walk every exterior door and window on a cold or windy day with a lit incense stick or damp hand. Anywhere the smoke wavers or you feel cold air is a gap to address first.
- Roll up old towels or blankets and place them at the base of drafty exterior doors as a free temporary fix. This alone can noticeably reduce cold air infiltration at the floor line.
- Close the fireplace damper completely when not in use. An open damper is equivalent to leaving a 12-inch hole in your ceiling and is one of the most overlooked heat loss sources in the home.
- Reverse your ceiling fans to run clockwise on the lowest speed setting. This pushes warm air that has collected near the ceiling back down toward the living space without creating a wind-chill effect.
- Place heavy curtains or thermal drapes over windows at night and open them during the day to capture solar heat gain. This simple habit can reduce window heat loss by 10 to 25% compared to leaving bare windows uncovered.
- Set your thermostat to 68 degrees Fahrenheit when home and awake, and drop it to 60 to 62 degrees overnight or when away. This setback schedule alone saves approximately 10% on annual heating costs.
- Install self-adhesive foam or V-strip weatherstripping on all exterior door frames. Measure the door perimeter, cut strips to length, and press firmly into the door stop channel. A $10 to $15 weatherstripping kit per door can cut door-related infiltration by 50 to 70%.
- Apply rope caulk or permanent caulk to gaps around every window frame where it meets the wall. Use rope caulk for windows you open seasonally since it peels off in spring, and silicone or latex caulk for fixed frames.
- Install window insulation film kits on single-pane or older double-pane windows. These shrink-to-fit plastic films add an insulating air layer and reduce radiant heat loss. Cost is $3 to $8 per window, and installation takes about 15 minutes per window.
- Seal electrical outlets and switch plates on exterior walls with foam gaskets available at hardware stores for about $0.50 each. These are a surprisingly significant air infiltration point, especially in older homes.
- Add a door sweep to the bottom of each exterior door to block the gap at the floor. Self-adhesive rubber sweeps cost $8 to $15 each and take about 10 minutes to install. Combined with weatherstripping, they eliminate nearly all air leakage around the door perimeter.
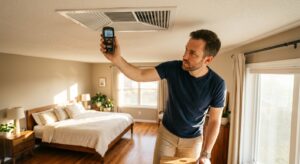
- Replace your furnace filter if it has not been changed in the last 60 to 90 days. A clogged filter restricts airflow and forces your furnace to work harder to distribute heat. A clean MERV 8 to 11 filter improves airflow and efficiency immediately.
- Install a programmable or smart thermostat if you do not already have one. Basic programmable models cost $25 to $40 and pay for themselves in under two months of scheduled setbacks. Smart models like Ecobee or Nest cost $130 to $250 and offer remote control and usage reporting.
- Add attic hatch insulation. The pull-down attic stair or hatch cover is often completely uninsulated, acting like a trapdoor to your cold attic. Purchase or build an insulated attic stair cover for $50 to $150 and seal the edges with weatherstripping. This single fix can save $100 or more per year in cold climates.
- Blow in or add batt insulation to your attic if it is below R-30. Renting a blower from a home improvement store costs $20 to $50 per day, and blown cellulose insulation runs $0.25 to $0.50 per square foot. Bringing a 1,000-square-foot attic from R-19 to R-38 typically costs $200 to $350 in materials and can reduce heating costs by 10 to 15%.
- Insulate accessible basement rim joists, the wood framing sitting on top of your foundation wall where significant cold air infiltrates. Use cut-to-fit rigid foam board (R-10 to R-15 per 2.5 inches) sealed with canned spray foam around the edges. A typical home has 100 to 200 linear feet of rim joist.
- Schedule a professional energy audit if your home still feels drafty after completing the DIY steps. Many utility companies offer subsidized audits for $100 to $150 that include a blower door test identifying leakage points invisible to casual inspection. This audit will prioritize where your next dollar of investment has the highest return.
Why It Works: The Benefits
Combining air sealing, weatherstripping, and thermostat scheduling typically reduces heating costs by 15 to 30% per season. For a homeowner spending $1,500 per winter on heat, that is $225 to $450 back in your pocket annually.
Sealing drafts and adding window insulation reduces cold spots and radiant chill near exterior walls. Rooms that previously felt 5 to 8 degrees colder than the thermostat reading will feel significantly closer to the set temperature.
A tighter, better-insulated home retains heat longer, so your furnace runs fewer cycles and your home recovers to set temperature faster after a setback period or after doors are opened.
Air sealing also limits the infiltration of cold, dry outdoor air that causes winter static electricity, dry skin, and condensation on windows. Many homeowners notice humidity comfort improvements within days of sealing major gaps.
When your home holds heat more effectively, your furnace runs shorter and less frequent cycles. Reducing runtime by even 20% meaningfully extends the life of your heat exchanger, blower motor, and associated components.
💰 Savings Impact by Action
Sealing gaps, cracks, and bypasses throughout the building envelope reduces conditioned air loss by up to 20% according to DOE estimates.
Upgrading attic insulation from R-11 to R-38 cuts heat loss through the ceiling by up to 70%, translating to roughly 10 to 15% total heating bill reduction.
Setting back the thermostat 7 to 10 degrees for 8 hours per day saves approximately 10% annually on heating costs.
Combining window film, thermal curtains, and weatherstripping reduces window-related heat loss by up to 25 to 40%, contributing roughly 10 to 12% total savings in window-heavy homes.
Insulating and air-sealing basement rim joists with rigid foam can eliminate up to 15 to 25% of total basement heat loss, saving 5 to 8% on whole-home heating costs.
🏠 Key Concepts Explained
The Science Behind It
Heat moves in three ways: conduction through solid materials, convection through air movement, and radiation through space toward cooler surfaces. Most of the wintertime discomfort and energy loss in a typical home involves all three happening simultaneously. Your walls conduct heat outward through framing and insulation, warm air convects out through gaps and cracks, and your body radiates heat toward cold window glass and exterior walls even when the air temperature seems adequate.
The stack effect is the dominant force driving air infiltration in winter. Because warm air is less dense than cold air, it rises through your home and exits through upper-level gaps, attic bypasses, and penetrations around wiring and plumbing. As it escapes, it creates a slight negative pressure in the lower levels of the house that pulls cold outdoor air in through foundation cracks, door gaps, and basement rim joists. This is why your feet are cold even when the thermostat says 70 degrees Fahrenheit. Interrupting the stack effect by sealing both the top and bottom of the thermal envelope is far more effective than sealing only one end.
Insulation works by trapping still air in small pockets, since air itself is a reasonable insulator when it cannot move. The R-value of insulation measures how strongly it resists heat conduction per inch of thickness. Doubling R-value does not double savings in a linear way, but moving from a poorly insulated attic at R-11 to R-38 typically cuts heat loss through that surface by 70%, which translates to meaningful reductions in furnace runtime and fuel consumption. The attic is the highest priority because heat rises and the temperature differential between your living space and an unconditioned attic in winter can exceed 50 to 60 degrees Fahrenheit, creating a massive driving force for heat loss.
Frequently Asked Questions
▼ I weatherstripped everything and my house still feels cold and drafty. What am I missing?
The most common hidden culprits are attic bypasses, which are gaps around plumbing pipes, electrical wires, and interior wall tops that open directly into the unconditioned attic. Go into your attic on a cold day and look for frost or feel for air movement around any penetration through the ceiling drywall. Sealing these with spray foam or caulk from the attic side is often the highest-impact fix remaining after doors and windows are addressed.
▼ Why does my furnace run constantly but the house never reaches the set temperature on really cold days?
This usually means one of three things: the furnace is undersized for the heat load on extreme cold days, the air filter is so clogged it is starving airflow, or the home is losing heat faster than the furnace can produce it due to inadequate insulation or major air leaks. Start by replacing the filter immediately. If that does not help, check whether your attic insulation is at least R-30 and have an HVAC technician verify the furnace is firing at full rated output.
▼ Can renters do any of this without landlord permission?
Yes, most of these projects are renter-friendly and reversible. Rope caulk on windows, removable window film, outlet gaskets, door draft stoppers, ceiling fan reversal, and thermal curtains require no permission and leave no permanent marks. Avoid permanent caulk on window frames or door sweeps that require screws without asking your landlord first, though most landlords welcome the efficiency improvements.
▼ How long before I see the savings on my actual utility bill?
You should see the difference in your first full billing cycle after completing the projects, typically 30 days. Because utility bills are also affected by outdoor temperature swings month to month, the clearest comparison is to check your bill against the same month one year prior, or to watch your thermostat’s runtime data if you have a smart thermostat that tracks it.
▼ My house is from the 1960s. Are these fixes even worth it, or does it need something more serious?
Older homes typically have 30 to 50% more air leakage than modern homes and frequently have little or no wall insulation, making these fixes even more impactful, not less. Start with every air sealing step you can access, then prioritize attic insulation since walls are costly to insulate from the interior. A utility-sponsored energy audit is particularly valuable for pre-1980 homes because the auditor will use a blower door test to quantify your leakage rate and show you exactly where to focus next.
Quick Tips
- Do the incense or smoke test on the coldest and windiest day possible since the stack effect and pressure difference are strongest then, making leaks much easier to detect.
- Rope caulk is your best friend for rental situations or seasonal windows. It seals completely, costs about $3 per roll, and peels off cleanly in spring without leaving residue.
- If you have radiators or baseboard heaters, place reflective insulation panels behind them on exterior walls. These $15 to $30 kits reflect radiant heat back into the room instead of letting it warm the wall cavity.
- Check your dryer vent flap on the exterior of the house. Many are stuck open or have a broken damper, allowing a constant stream of cold outdoor air into the laundry area. A replacement vent cap costs $8 to $12 and takes 10 minutes to install.
Variations for Your Situation
- Apartment or Rental: Focus on zero-permission projects that are fully reversible. Install tension-rod thermal curtain panels ($25 to $60) on drafty windows, use V-seal rope caulk on window gaps, add foam outlet gaskets, reverse ceiling fans, and use draft snakes at door bottoms. A smart plug-in space heater with scheduling ($30 to $50) can supplement a poorly controlled central system. Total weekend cost: $50 to $100 with no landlord approval needed.
- Tight Budget (Under $50): Do the incense draft test first to identify your worst three leaks. Spend $8 on a roll of rope caulk for windows, $10 on a weatherstripping kit for your worst door, $3 on outlet gaskets for exterior wall outlets, and $0 reversing ceiling fans and closing the fireplace damper. These five steps alone typically deliver 10 to 20% heating savings with no tools and under two hours of work.
- Older Home (Pre-1980): Assume you have significantly more air leakage and less insulation than a newer home. Prioritize attic air sealing and insulation first since these homes commonly have R-0 to R-11 in the attic versus the recommended R-49 for cold climates. Basement rim joist insulation is also critical in older construction. Budget $200 to $500 for attic improvements and consider applying for utility rebates or weatherization assistance programs, which many states offer at low or no cost for qualifying homeowners.