Your thermostat is the brain of your home’s heating and cooling system, yet most people treat it like a light switch: on or off, hot or cold. The average household spends about $900 a year on heating and cooling, according to the U.S. Energy Information Administration, and a poorly managed thermostat is responsible for a significant chunk of that waste. Running your HVAC at full comfort settings while you’re asleep, at work, or on vacation is the equivalent of leaving your car running in the driveway all day.
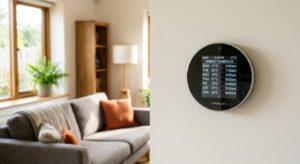
A smart thermostat doesn’t just let you adjust the temperature from your phone. It learns your schedule, anticipates when you need comfort, responds to outdoor weather conditions, and gives you data about how hard your system is actually working. The difference between a $25 programmable thermostat and a $150 smart model isn’t just convenience — it’s the ability to deliver the right temperature at the right time without you having to think about it.
This post breaks down exactly what a smart thermostat does behind the scenes, how much you can realistically expect to save, and how to get it set up correctly so it performs from day one. Whether you’re handy with a screwdriver or prefer to have a professional handle the wiring, there’s a clear path forward for every type of homeowner.
What You’ll Need
Click on an item below to shop for the recommended items for this recipe on Amazon.
As an Amazon Associate, we earn from qualifying purchases.
How to Do It
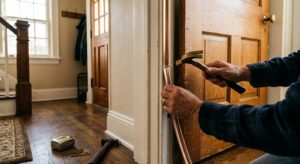
- Take a photo of your existing thermostat wiring before disconnecting anything. Label each wire with a piece of masking tape using the letter printed on the terminal it connects to (R, G, Y, W, C, etc.).
- Turn off power to your HVAC system at the breaker before touching any wires. Use a non-contact voltage tester to confirm power is off.
- Remove the old thermostat faceplate, disconnect each wire one at a time, and secure them so they don’t fall back into the wall cavity. Install the new thermostat’s mounting plate using the included hardware.
- Connect each wire to the matching labeled terminal on the new thermostat’s base. Most smart thermostats include a wiring diagram and a labeled terminal guide in the app or printed instructions.
- Attach the thermostat display to the base, restore power at the breaker, and follow the in-app setup wizard. You will be asked for your home’s square footage, HVAC type, and your typical schedule.
- Set your comfort schedule in the app: a higher setpoint (68 to 70 degrees in winter or 76 to 78 degrees in summer) for occupied hours, and a setback of 7 to 10 degrees during sleep and away periods. Enable geofencing if available so the thermostat adjusts automatically when you leave home.
- Purchase the smart thermostat ahead of the appointment and use the manufacturer’s online compatibility checker with your current thermostat’s model number to confirm it will work with your system.
- Call your HVAC company or an electrician and ask for a thermostat swap appointment. Describe your system type (gas furnace, heat pump, dual-fuel, zoned) so they bring the right adapter or C-wire kit if needed.
- During the appointment, ask the technician to verify that your system has a functional C-wire (common wire) connection or install a power adapter kit if not. Without a C-wire, some thermostats experience battery drain or connectivity issues.
- Have the technician confirm the thermostat is reading the correct temperature by comparing it to a calibrated thermometer placed near the unit. A misread of even 2 to 3 degrees Fahrenheit causes your system to over-run and wastes energy.
- After installation, spend 10 minutes with the app setting your schedule and enabling any available utility demand response programs. Ask the technician if your utility offers a rebate, as many HVAC companies will submit the rebate paperwork on your behalf.
Why It Works: The Benefits
The EPA estimates ENERGY STAR certified smart thermostats save an average of $50 per year, while independent studies from Nest and Ecobee show savings of 10 to 23% on heating and cooling costs. On a $900 annual HVAC bill, that’s $90 to $207 back in your pocket each year.
Smart thermostats eliminate the morning cold rush and the too-hot bedroom at night by pre-conditioning the home based on your actual schedule, not a static program. Homes using learning thermostats report significantly fewer hot and cold complaints compared to manual thermostat users.
Most major utilities offer instant rebates of $25 to $100 on smart thermostat purchases, effectively bringing a $150 model down to $50 to $125. Check DSIRE (dsireusa.org) or your utility’s website before purchasing — many rebates are available at the point of sale.
Runtime tracking alerts you when your system is working harder than usual to hit the same setpoint, often signaling a dirty filter, low refrigerant, or failing equipment weeks before a breakdown. Catching a refrigerant issue early can save $200 to $1,500 compared to emergency repair costs.
Adjusting the temperature from your phone before you leave work means the house is comfortable the moment you arrive, without running the system all day. Travelers also benefit by being able to prevent pipes from freezing or check on the home during extended absences.
💰 Savings Impact by Action
Automatically lowering heat by 7 to 10 degrees Fahrenheit for 8 hours each night saves approximately 10% on annual heating costs according to the U.S. Department of Energy.
Geofencing and occupancy-based away setpoints eliminate conditioning of an empty house, saving an additional 12% compared to a thermostat held at a constant comfort setpoint all day.
Smart thermostats that manage humidity allow a summer setpoint 1 to 2 degrees higher without discomfort, reducing cooling runtime and cutting cooling costs by roughly 5%.
Enrolling in a utility demand response program earns bill credits worth the equivalent of 5 to 8% of summer cooling costs by allowing brief pre-scheduled temperature adjustments during peak grid demand.
Catching a clogged filter or low refrigerant condition early through runtime monitoring prevents a 15 to 30% increase in energy use that typically precedes HVAC equipment failure.
🏠 Key Concepts Explained
The Science Behind It
Your home doesn’t heat and cool like a microwave. It behaves more like a slow cooker, absorbing and releasing heat gradually through its walls, windows, floors, and ceiling. This property, called thermal mass, means that the temperature inside your home lags behind the temperature your thermostat is calling for. When you lower the setpoint from 72 to 62 degrees Fahrenheit during sleep hours, the house doesn’t instantly drop to 62. It drifts down over 30 to 90 minutes depending on insulation levels and outdoor conditions. A smart thermostat tracks this drift rate over time and predicts exactly when to start recovery so the house hits your wake-up temperature right as your alarm goes off, not 45 minutes late.
The energy savings from setback scheduling are rooted in a fundamental principle of thermodynamics: the greater the temperature difference between the inside of your home and the outside, the faster heat flows through your walls, windows, and roof (known as conductive heat loss). By reducing indoor temperature during winter nights, you slow down that heat flow and reduce the work your furnace has to do. The DOE confirms that for every degree you set back over an 8-hour period, you save roughly 1% on your heating bill. A 10-degree setback for 8 hours translates to approximately 10% savings — and a smart thermostat ensures that setback actually happens every single day without relying on you to remember.
Occupancy detection takes this a step further. Geofencing uses your phone’s GPS to detect when you leave a defined radius around your home and automatically shifts to an away setpoint. Passive infrared sensors inside the thermostat itself detect body heat to confirm occupancy. When these two data points agree that the house is empty, the system holds a wider setback. According to Ecobee’s published data, homes using occupancy-based scheduling save an additional 4 to 6% compared to homes using only time-based schedules. The underlying reason is simple: time-based schedules assume you leave at 8 a.m. every weekday, but real life is irregular. Occupancy-based control captures savings on those days when you leave late or come home early.
Frequently Asked Questions
▼ My smart thermostat says the temperature is 72 but the room feels much hotter or colder than that. What’s wrong?
The thermostat may be affected by its location rather than a faulty sensor. Check whether it’s mounted near a supply vent, in direct sunlight, or on an exterior wall. Any of these can create a reading that’s 3 to 8 degrees off from the actual room temperature. Relocating the thermostat to an interior wall in a central room, or adding a remote room sensor if your model supports it, usually resolves the discrepancy.
▼ My smart thermostat keeps losing Wi-Fi connection. How do I fix it?
Most smart thermostat connectivity issues come from a weak C-wire connection causing the thermostat to operate on battery power alone, which limits Wi-Fi functionality. Check the C terminal on your thermostat base and at the furnace control board to ensure the wire is fully seated. If you don’t have a C-wire, install the manufacturer’s power adapter kit (usually $15 to $25) or ask an HVAC tech to run a C-wire from the furnace to the thermostat.
▼ How long before I actually see the savings on my energy bill?
Most homeowners see a measurable change within the first full billing cycle after setting up a proper schedule with setbacks. However, comparing month-to-month bills can be misleading because weather varies. For an accurate comparison, look at your bill’s cost per heating or cooling degree day, or compare the same month year-over-year after the thermostat has been running for a full season.
▼ Can a renter install a smart thermostat without landlord permission?
Technically, replacing a thermostat modifies the property, so most leases require landlord approval. However, most landlords agree when you explain that it won’t damage anything and the old thermostat can be reinstalled when you move out. Keep your original thermostat in a safe place so you can swap it back. If your landlord says no, a smart plug-in space heater with scheduling or a window AC unit with a smart thermostat adapter are renter-friendly alternatives that require no wiring.
▼ My HVAC runs constantly but never reaches the setpoint. Will a smart thermostat fix this?
No, and this is an important distinction. A smart thermostat optimizes when your system runs, but it cannot fix an undersized, aging, or malfunctioning HVAC system. If your system runs continuously and still can’t reach the setpoint on a mild day (above 30 degrees Fahrenheit in winter or below 95 degrees Fahrenheit in summer), you likely have a refrigerant issue, a failing heat exchanger, a severely undersized system, or major air sealing and insulation problems. Call an HVAC technician for a system evaluation before investing in a smart thermostat.
Quick Tips
- Set your away setpoint no more than 10 degrees from your comfort setpoint in summer. Setting it too high (above 85 to 88 degrees) causes humidity to build up in an empty home, which can promote mold growth in humid climates.
- Check your thermostat’s runtime report monthly for the first few months after installation. Your baseline runtime per degree day is your benchmark — a 20% increase with no change in weather usually means a dirty filter or early equipment issue.
- If your utility offers a demand response or peak savings program, enroll. The financial incentives are real (typically $20 to $75 per year in bill credits) and the temperature adjustments are small, usually 2 to 4 degrees for 2 to 4 hours during summer afternoons.
- Mount your thermostat away from supply vents, exterior walls, direct sunlight, and appliances that produce heat. A thermostat sensing a false reading of even 3 degrees Fahrenheit will cause your system to short-cycle or over-run, wasting energy and shortening equipment life.
Variations for Your Situation
- Apartment/Rental: Renters who can’t modify HVAC wiring can still benefit from a smart approach using a standalone smart plug combined with a window or portable AC unit that has a remote temperature sensor. Devices like the Sensibo Sky or Cielo Breez (typically $80 to $120) add smart scheduling and geofencing to existing window AC units without any wiring, delivering similar scheduling savings. Always get written permission before swapping any hardwired thermostat.
- Tight Budget (under $50): Skip the smart thermostat for now and focus on a quality 7-day programmable thermostat in the $25 to $40 range. Set it with a proper heating setback of 8 degrees for 8 hours during sleep and work hours. The DOE confirms this single change saves up to 10% annually. When you can afford the upgrade, the habits you build with a programmable thermostat carry directly over to the smart model.
- Older Home (pre-1980): Pre-1980 homes frequently have only two-wire thermostat connections, no C-wire, and potentially millivolt heating systems common with older boilers and gravity furnaces. Before purchasing any smart thermostat, photograph your current wiring and use the manufacturer’s online compatibility checker. If you have a two-wire system, look for models specifically designed for it (such as the Nest Thermostat E in some configurations) or budget an extra $75 to $150 for a technician to run a new thermostat cable from your furnace to the thermostat location.