That one bedroom that bakes in summer, or the bonus room above the garage that never seems to cool down, is not just annoying. It is a sign that something in your home’s thermal envelope or air delivery system is working against you. Hot spots drive up energy bills because the thermostat in the main living area reaches setpoint while problem rooms remain uncomfortable, often prompting residents to lower the thermostat further and run the system longer than necessary.
The good news is that most hot spots have one of four root causes: insufficient airflow, duct leakage, poor insulation or air sealing, and solar heat gain. Each of these has clear symptoms you can identify without any specialized equipment. A $15 digital thermometer, your smartphone, and a stick of incense or a tissue are enough to run a meaningful diagnostic that can save you hundreds of dollars in unnecessary service fees or misdirected repairs.
This guide walks you through a systematic process to pinpoint exactly why your room is overheating, what it will cost to fix, and when the problem is complex enough to warrant a professional. You will come away knowing whether you need a $20 weatherstripping fix or a duct rebalancing job, and you will be able to describe the problem clearly if you do call a technician.
What You’ll Need
Click on an item below to shop for the recommended items for this recipe on Amazon.
As an Amazon Associate, we earn from qualifying purchases.
How to Do It
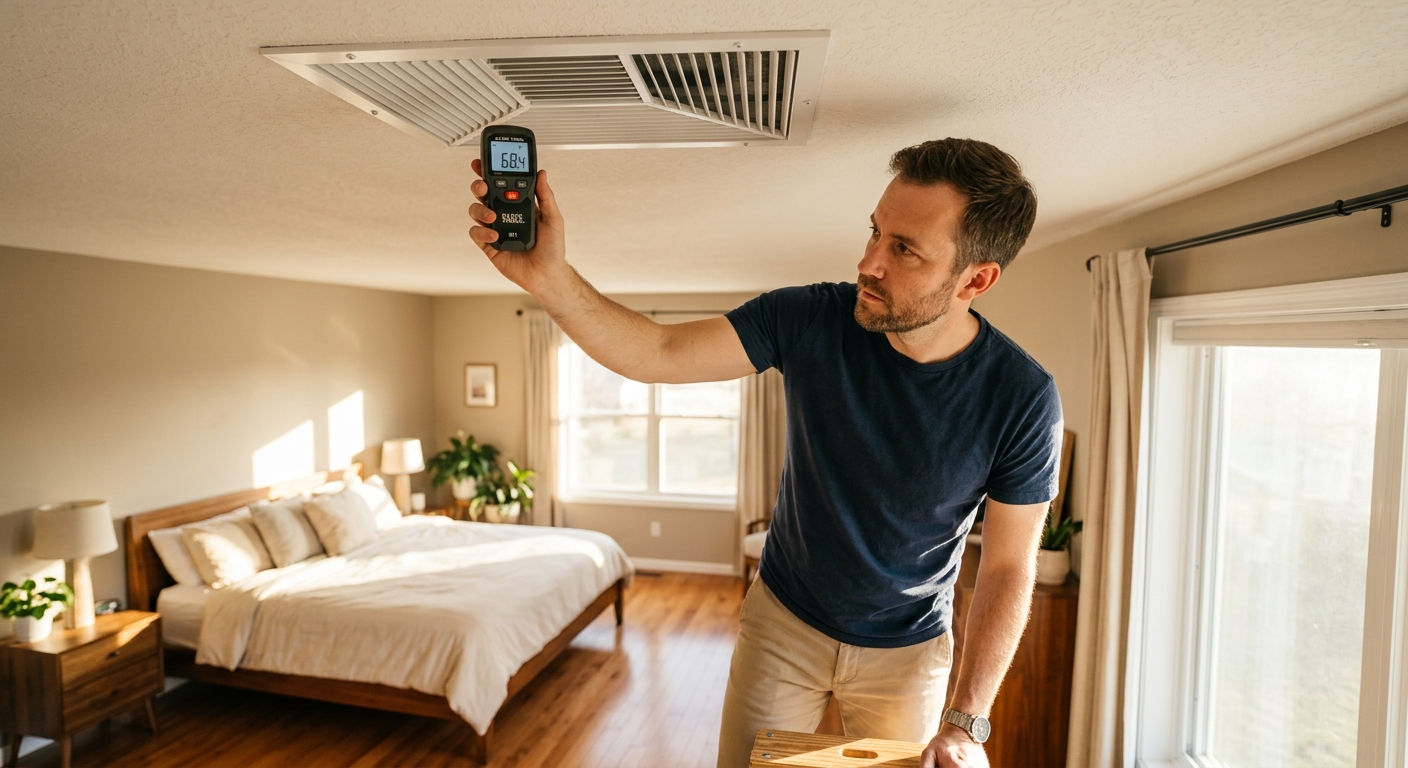
- Measure and record temperatures in every room using a digital thermometer. Check at the same height (about 4 feet) and at the same time of day, ideally mid-afternoon on a sunny day. Note any room more than 3 degrees warmer than your thermostat setpoint.
- Go to the hot room and hold your hand 2 to 3 inches from every supply register. You should feel a clear, steady flow of cool air. If the flow feels weak or warm, note it. Then check whether the register damper is fully open by looking for a small lever or dial on the register face.
- Check the return air situation in the hot room. Many rooms have a supply register but no dedicated return, meaning the door must be open for air to circulate back to the air handler. Close the door and feel whether supply airflow decreases, which confirms a return air restriction.
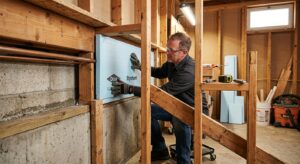
- Inspect accessible ductwork in the attic, crawl space, or basement near the hot room. Look for disconnected sections, visible holes, or flexible duct that is kinked, crushed, or has a sharp bend. Even a partial disconnection in an attic can eliminate 80 to 100% of airflow to a room.
- Assess solar gain by visiting the room at its hottest time of day and noting which windows receive direct sunlight. Touch the interior surface of exterior walls and the ceiling. Surfaces that feel noticeably warm to the touch indicate heat conducting through the assembly, pointing to an insulation or air sealing gap.
- Compare your findings against this simple decision tree: weak airflow with visible duct damage means a duct repair is your fix; weak airflow with intact ducts means a balancing or static pressure issue for an HVAC tech; good airflow but room still hot means insulation, air sealing, or solar gain is your culprit.
- Seal accessible duct leaks with UL 181-rated foil tape (not standard duct tape, which fails within a few years). Focus on joints at the air handler, take-offs from the main trunk, and any connections near the problem room. Each sealed joint can recover 2 to 5% of lost airflow.
- If the hot room lacks a return air path, cut a 1-inch gap under the door or install a transfer grille in the wall between the room and the hallway. A 14-by-6-inch transfer grille costs about $15 and solves return air restriction without requiring ductwork changes.
- Add attic insulation if the room is on the top floor and attic insulation is below R-30. Blown-in cellulose costs $0.50 to $1.50 per square foot installed and brings most attics to R-38 to R-49, reducing heat gain through the ceiling by 15 to 25%.
- Install blackout cellular shades or solar shades (solar heat gain coefficient of 0.25 or lower) on west and south facing windows in the hot room. Cellular shades cost $30 to $80 per window and can block 40 to 60% of incoming solar heat gain in summer.
- Air seal the attic floor above the hot room if you can access it safely. Use canned foam to seal around recessed light fixtures, plumbing penetrations, and top plates. Sealing attic bypasses typically reduces cooling load in upper rooms by 10 to 20% and pays back in one to two cooling seasons.
- After completing repairs, run the system for 30 minutes and remeasure room temperatures. A successful fix should bring the room within 2 to 3 degrees of the thermostat setpoint within one to two sunny days.
- Request a duct leakage test (blower door with duct pressurization) from an HVAC contractor or energy auditor. This test measures total duct leakage as a percentage of system airflow and identifies whether professional duct sealing with Aeroseal or mastic is justified.
- Ask for a room-by-room airflow measurement using a flow hood or balometer. This tells you exactly how many CFM each room receives versus how many it needs based on its size and heat load, removing all guesswork about whether the room is genuinely undersupplied.
- If airflow to the problem room is significantly below target, ask the contractor to evaluate whether adding a booster fan in the duct run, resizing the branch duct, or adding a dedicated mini-split makes the most economic sense for your specific layout.
- Request a copy of the Manual J load calculation if the contractor recommends equipment replacement. A properly sized system based on your home’s actual heat load often resolves persistent hot spots that oversized equipment creates through short cycling and poor dehumidification.
Why It Works: The Benefits
HVAC diagnostic visits typically cost $75 to $150 before any work is done. Completing your own diagnosis first means you either fix the problem yourself for less, or you arrive at the service call with specific information that shortens the technician’s time and reduces your bill.
Fixing the root cause of a hot spot, whether it is a leaky duct, missing insulation, or a blocked register, can reduce cooling energy use by 10 to 30% depending on severity. A home losing 25% of its conditioned air through duct leaks can see annual savings of $150 to $400.
Correcting a hot spot often improves comfort in adjacent rooms too, since the system no longer has to compensate for a room that refuses to reach setpoint. Many homeowners report more even temperatures throughout the home after fixing a single airflow or insulation problem.
A system running longer cycles to fight an unresolved hot spot accumulates more run hours per year than it should. Reducing unnecessary runtime by even 15% can meaningfully extend compressor life, which averages 10 to 15 years and costs $1,500 to $2,500 to replace.
Homeowners who can describe specific symptoms, room temperatures, register airflow, and duct conditions get more accurate quotes and are less likely to pay for work that does not address the actual problem.
💰 Savings Impact by Action
Sealing leaky ducts that lose 20 to 30% of conditioned air can recover up to 20% of cooling energy wasted before air reaches the room.
Upgrading attic insulation to R-38 or R-49 reduces ceiling heat gain by 15 to 25%, directly lowering the load on the room below.
Installing solar shades with a low solar heat gain coefficient on west-facing windows cuts afternoon solar heat gain by up to 60%, reducing localized cooling load by roughly 12%.
Correcting return air restriction with a transfer grille or door undercut restores balanced airflow and can reduce system runtime by 10% in affected zones.
Sealing attic bypasses around penetrations and top plates reduces unwanted heat transfer into upper rooms by 15 to 20% and improves the effectiveness of existing insulation.
🏠 Key Concepts Explained
The Science Behind It
Every room in a forced-air home is allocated a specific volume of conditioned air, measured in cubic feet per minute, based on a heat load calculation that accounts for the room’s size, window area, insulation level, and orientation. When any part of that system is disrupted, whether by a leaky duct, a blocked register, or a load that is higher than originally calculated, the room’s supply air cannot remove heat as fast as it enters, and the room temperature climbs above the rest of the house.
Heat flows by three mechanisms: conduction through solid materials like walls and roofs, convection through air movement, and radiation from warm surfaces to cooler ones. A hot spot is almost always driven by one mechanism dominating the others in that specific room. A west-facing room with large windows is a radiation and conduction problem. A room above an unconditioned garage with poor insulation is primarily a conduction problem. A room at the end of a long duct run with multiple bends is an airflow and static pressure problem. Correctly identifying which mechanism is dominant is what separates a fix that works from one that wastes money.
Duct systems operate at a slight positive pressure in supply runs and a slight negative pressure at returns, typically 0.1 to 0.5 inches of water column. When a duct leaks into an unconditioned attic, two things happen simultaneously: the room loses conditioned air volume, and the hot attic air surrounding the leaky duct heats the supply air before it reaches the register. This double penalty, less airflow plus warmer air, is why even a small duct leak in a 130-degree attic can raise a room’s temperature by 5 to 8 degrees compared to an identical room with intact ducts.
Frequently Asked Questions
▼ My hot room has strong airflow from the register but it is still 8 degrees warmer than the rest of the house. What am I missing?
Strong airflow rules out a duct capacity problem and points to an oversized heat load relative to the cooling allocated to that room. Check the supply air temperature at the register using a thermometer held just inside the grille. If it reads within 12 degrees of room temperature instead of the expected 15 to 20 degree difference, the system may have a refrigerant or coil issue. If supply air temperature is fine, focus on reducing heat gain through insulation upgrades, attic air sealing, and window treatments.
▼ The hot spot only happens in the afternoon. Does that mean it is definitely a window or solar problem?
A hot spot that appears or worsens specifically in the afternoon strongly suggests solar heat gain from west or southwest facing windows, combined with peak outdoor temperatures. Start by measuring how much direct sunlight hits the windows between 2 and 6 PM. Installing solar shades with a solar heat gain coefficient below 0.25, or adding exterior shading like awnings or overhangs, is typically the most cost-effective first fix and can reduce afternoon solar heat gain by 40 to 70%.
▼ I found a disconnected duct in my attic. Can I just push it back together and tape it myself?
Yes, and this is one of the highest-impact DIY fixes available. Reconnect the flexible duct by pulling the inner liner back over the collar at least 2 inches, securing it with a zip tie or foil tape, then pulling the outer vapor barrier back over and taping that as well. Use only UL 181-rated foil tape, not cloth duct tape, which dries out and fails within a few years. After reconnecting, run the system and feel the register to confirm airflow has been restored.
▼ My home is two stories and the entire upstairs is hot, not just one room. Is that a different problem?
Whole-upstairs heat is usually a combination of attic insulation deficiency, duct leakage in the attic, and the stack effect, where heat naturally stratifies to the upper floor. Check attic insulation depth first. If you see less than 10 inches of fiberglass batts or 8 inches of blown insulation, you are likely below R-30 and adding insulation to R-38 or R-49 should be your first priority. Also check whether your system has any dedicated return air on the upper floor, as a single return in a central hall is often inadequate for a full second story.
▼ How do I know if my HVAC system is just too small for my house versus having a fixable hot spot problem?
Run your system on the hottest day of the year and check whether it ever cycles off, or whether it runs continuously for hours without reaching setpoint anywhere in the house. If the whole house struggles and the system never cycles off on a 95-degree day, undersized equipment or very poor insulation is the likely culprit and a Manual J load calculation from an HVAC contractor is the right next step. If only one or two rooms are hot while the rest of the house is comfortable, the system capacity is likely adequate and the problem is localized to airflow, insulation, or solar gain in those specific rooms.
Quick Tips
- Take temperature readings at three times of day, morning, early afternoon, and evening, to determine whether your hot spot is driven by solar gain (worst in afternoon) or a constant airflow deficit (consistent all day).
- Check whether closing or opening interior doors changes how much air comes out of the supply register. A significant change confirms a return air restriction that a simple door undercut or transfer grille can fix for under $20.
- Photograph every duct connection you inspect in the attic or crawl space before touching anything. This gives you a before record and helps a contractor understand what you found if you end up calling one.
- A $15 plug-in outlet thermometer with a remote sensor lets you log the temperature difference between the hot room and your main living area over 24 hours, giving you precise data instead of impressions.
Variations for Your Situation
- Apartment/Rental: Renters cannot modify ductwork or add insulation, but can address solar gain with removable window films (3M and Gila make renter-friendly options costing $20 to $40 per window) and cellular shades that mount without drilling. Also request in writing that management inspect and clean the supply registers in the hot room, as landlords are responsible for maintaining HVAC airflow. A portable evaporative cooler or a 6,000 to 8,000 BTU window air conditioner ($150 to $300) is a practical backup for an extreme hot spot you cannot otherwise fix.
- Tight Budget (under $50): Focus first on free steps: open all register dampers fully, remove any furniture blocking registers or returns, and undercut doors to hot rooms by 1 inch to improve return air circulation. For under $20, buy foil tape to seal any visible duct joints you can reach through a ceiling or floor register with a flashlight and your hand. For under $50, add a set of blackout curtains to the hottest window. These three steps together often reduce a hot spot by 3 to 5 degrees at no meaningful cost.
- Older Home (pre-1980): Homes built before 1980 often have original ductwork with unsealed slip joints, minimal attic insulation (R-11 or less), and single-pane windows, meaning all three root causes are likely active simultaneously. Start with attic insulation since it delivers the highest return, but budget for professional duct sealing as well because original metal duct systems in older homes frequently leak 30 to 40% of conditioned air. Energy audits through local utility programs are often available at low or no cost and can prioritize your repairs based on measured heat loss rather than guesswork.