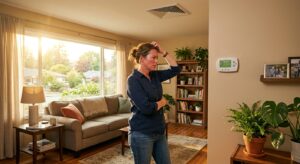
You set the thermostat to 72°F, the AC kicks on, and an hour later you’re still sweating while your neighbor next door is already comfortable. Same outdoor temperature, similar house size, but somehow your home just won’t cool down. This is one of the most common and frustrating cooling complaints homeowners have, and the answer is almost never ‘get a bigger AC unit.’
The real culprit is almost always heat gain: how fast your home absorbs heat from the sun, the hot attic above you, and air leaking in from outside. A house with poor insulation, air leaks, or unshaded windows can absorb heat faster than even a correctly sized AC can remove it. The Department of Energy estimates that air leaks alone account for 25 to 40% of the energy used for heating and cooling in a typical home, and heat gain through an under-insulated attic can add thousands of BTUs of load every hour.
This post covers the six building science factors that determine how fast your home cools, how to diagnose which ones are hurting you most, and two levels of fixes you can do yourself this weekend. Whether you spend $0 or $200, you will see a measurable difference on your next utility bill.
What You’ll Need
Click on an item below to shop for the recommended items for this recipe on Amazon.
As an Amazon Associate, we earn from qualifying purchases.
How to Do It
- Close blinds, shades, or curtains on all south and west-facing windows before 1 PM. This single step can reduce solar heat gain by up to 45% through those windows and is the fastest free action you can take.
- Check your AC air filter. A clogged filter can reduce airflow by 15 to 25%, forcing longer run times. If it looks gray or clogged, replace it now with a MERV 8 to 11 filter.
- Switch ceiling fans to run counterclockwise on high during cooling season. Fans do not lower air temperature but the wind-chill effect makes 78°F feel like 72°F, letting you raise the thermostat setpoint by 4°F with no comfort loss.
- Set a thermostat schedule: raise the setpoint to 82 to 85°F when the house is empty for more than 4 hours, then return to your comfort setpoint 30 minutes before you arrive home. This reduces runtime by 10 to 15% without sacrificing comfort.
- Walk your home at dusk and feel for warm air drafts around recessed lights, attic access hatches, and where pipes enter walls. Mark any drafts with masking tape so you know where to seal next.
- Buy one tube of fire-rated acoustic caulk, one can of low-expansion spray foam, and a roll of foam weatherstripping. Total cost should be under $40 at any hardware store.
- Seal all attic hatch edges with weatherstripping and apply rigid foam board to the back of the hatch door, cut to fit and glued in place. Attic hatches are often completely unsealed and can be the single largest air leak in the house.
- From the attic (early morning before it heats up), spray foam around every pipe, wire, and duct penetration you can find where they pass through the attic floor into living space. Focus on gaps larger than a quarter inch.
- Caulk around every interior electrical outlet and light switch on exterior walls using a foam gasket ($5 for a pack of 20) placed behind the cover plate. These small gaps add up to significant air infiltration.
- Install exterior window film rated for solar heat rejection on south and west-facing windows. A quality 3M or Gila film ($20 to $40 per window) can reject 50 to 70% of solar energy while keeping the view intact.
- After sealing, run your AC on a hot afternoon and check whether the system reaches your setpoint within 45 minutes. If it still struggles, the next step is a professional duct leakage test.
- Schedule a home energy audit with a BPI-certified auditor. They will perform a blower door test that quantifies exactly how leaky your home is and identify the biggest problem areas, typically costing $150 to $400 and often subsidized by utilities.
- Review the audit results and prioritize attic air sealing combined with insulation top-off if your current attic insulation is below R-38. Adding insulation from R-19 to R-38 can reduce cooling load by 15 to 25%.
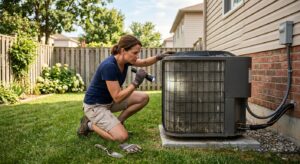
- Have a certified HVAC technician perform a duct leakage test. If ducts leak more than 15% of airflow, have them sealed with mastic (not tape) and insulated to at least R-6 if they run through unconditioned space.
- Ask your auditor about a cool roof coating or radiant barrier in the attic. A radiant barrier stapled to attic rafters reduces radiant heat transfer from the roof deck by 25 to 40%, lowering attic temperatures by 20 to 30°F.
- After all envelope work is complete, have your HVAC technician recheck refrigerant charge and airflow. Improved building performance sometimes reveals that a previously undersized system is now correctly sized, or that static pressure needs adjustment.
Why It Works: The Benefits
Reducing heat gain through air sealing and window treatments can cut the time it takes your home to drop 10°F by 30 to 50%, so your AC reaches setpoint faster instead of running continuously.
Combining air sealing with proper attic insulation typically reduces cooling costs by 15 to 35% annually, which on an average $150 summer electric bill translates to $22 to $52 saved every month.
Fixing duct leaks and sealing the building envelope reduces hot spots, so upstairs bedrooms and sun-facing rooms no longer feel 5 to 10°F hotter than the rest of the house.
Every hour your AC runs unnecessarily adds wear to the compressor. Reducing runtime by even 20% can extend equipment life by several years, delaying a $3,000 to $6,000 replacement.
AC units remove humidity most efficiently when they run in longer, steady cycles rather than short bursts. A properly sealed home allows the system to complete full dehumidification cycles, reducing that sticky feeling even at the same thermostat setting.
💰 Savings Impact by Action
Sealing gaps, penetrations, and the attic hatch reduces conditioned air loss and hot air infiltration by up to 20% of total cooling energy use.
Closing blinds or installing solar window film on south and west-facing windows reduces solar heat gain by up to 45%, cutting overall cooling load by roughly 15%.
Upgrading attic insulation from R-19 to R-38 reduces ceiling heat transfer by 15 to 25%, directly lowering the BTU load your AC must overcome each hour.
A properly programmed setback of 4 to 7°F when the home is unoccupied saves approximately 10% annually on cooling costs with no comfort sacrifice.
Sealing ducts that leak 25% of airflow with mastic and improving duct insulation to R-6 can recover that lost cooling capacity, effectively delivering up to 20% more cooling per dollar spent on electricity.
🏠 Key Concepts Explained
The Science Behind It
Your home is constantly exchanging heat with its surroundings through three mechanisms: conduction (heat moving through solid materials like walls and ceilings), convection (hot air physically moving into your home through gaps), and radiation (infrared energy from the sun passing through windows or radiating from a hot roof into the attic below). On a 95°F day, all three are working against your air conditioner simultaneously, and your AC can only remove a fixed number of BTUs per hour regardless of how hot it gets outside.
The key number to understand is your home’s heat gain rate measured in BTUs per hour. A typical 2,000 square foot home might have a heat gain of 30,000 to 48,000 BTUs per hour on a peak summer day. A correctly sized 3-ton AC unit removes exactly 36,000 BTUs per hour. If your home’s heat gain exceeds your AC’s capacity even briefly, indoor temperature will rise and keep rising until outdoor temperatures fall. Reducing heat gain through sealing and shading does not just save energy; it can mean the difference between your AC keeping up and your AC running at 100% capacity all day without ever reaching setpoint.
Air infiltration adds a compounding problem: every cubic foot of hot humid outdoor air that leaks in must be cooled and dehumidified before your thermostat registers progress. Humid air requires significantly more energy to cool than dry air because the AC must first condense moisture out of it before the temperature drops. This is why a leaky home can feel clammy and uncomfortable even when the thermostat reads 74°F. Sealing the envelope reduces both sensible heat (temperature) and latent heat (humidity) load simultaneously, which is why the comfort improvement often feels greater than the temperature numbers alone would suggest.
Frequently Asked Questions
▼ Why is my AC still running all day even after I tried these fixes?
If your AC runs continuously without reaching setpoint on days above 95°F, you may have a refrigerant charge issue, dirty evaporator coils, or a system that was undersized from the original installation. Check that your supply vents are fully open and unblocked, then call an HVAC technician to check refrigerant levels and static pressure. A correctly sized and charged system should be able to maintain 75°F indoors when it is 95°F outside.
▼ My upstairs is always 8 to 10 degrees hotter than downstairs. What is causing that?
This is almost always a combination of stack effect, poor attic insulation, and insufficient airflow to upper-floor registers. Start by checking that upstairs supply vents are fully open and that return air registers are not blocked by furniture. Then inspect attic insulation depth: if you can see the joists, you need more insulation. In multi-story homes, partially closing downstairs registers by 20 to 30% redirects more airflow upstairs and often resolves the imbalance.
▼ Can renters do this without landlord permission?
Yes, most quick fixes require no permission: adjusting blinds, using window film (removable versions exist), running fans, and changing thermostat schedules are all renter-safe. For air sealing, use removable rope caulk in window frames and foam outlet gaskets behind outlet covers, both of which come out without damage. Avoid spray foam or permanent caulk without written landlord approval.
▼ How long before I actually notice savings on my bill?
Air sealing and window treatments produce results on the very next hot day: your AC will reach setpoint faster and cycle off sooner. You will see the financial impact on your first full billing cycle after completing the work, typically within 30 to 45 days. Compare your kilowatt-hour usage year over year (same month, prior year) rather than dollar amounts, since utility rates change.
▼ What if my home is older than 30 years?
Homes built before 1990 typically have significantly more air leakage and less insulation than current code requires, meaning the potential savings from these fixes is even larger than average. However, older homes may also have knob-and-tube wiring, asbestos insulation, or inadequate combustion air for older furnaces, so a professional energy audit is strongly recommended before doing aggressive air sealing in a pre-1990 home.
Quick Tips
- Pre-cool your home in the early morning by opening windows briefly if outdoor temperatures drop below 70°F overnight, then close everything up before 9 AM to trap the cool air.
- Use an inexpensive infrared thermometer to scan your ceiling, walls, and around window frames on a hot afternoon. Any surface reading more than 5°F above the room air temperature is a heat gain problem worth addressing.
- Plant a deciduous tree or install an exterior awning on the west side of your home. A mature shade tree can reduce cooling costs by 15 to 35% on the shaded side, and an awning pays back in 1 to 3 cooling seasons.
- If your home has a whole-house attic fan, run it for 20 to 30 minutes after sunset when outdoor air drops below 75°F to flush stored heat out of the structure before running your AC overnight.
Variations for Your Situation
- Apartment/Rental: Renters cannot modify central HVAC or add insulation, but window treatments make the biggest impact here. Install removable solar film (Gila or 3M) on west and south-facing windows for $20 to $40 per window and use a freestanding tower fan to improve air circulation. Foam outlet gaskets on exterior walls require no tools, cost about $5 per pack, and are completely reversible. A smart plug with scheduling can also help run a portable dehumidifier only during peak hours, reducing that clammy feeling without landlord involvement.
- Tight Budget (under $50): Focus on the three zero-cost steps first: close window coverings before noon, set a thermostat schedule with a 4°F setback when away, and switch ceiling fans to counterclockwise. With your $50, buy foam outlet gaskets ($5), a quality air filter ($12), and weatherstripping for the attic hatch ($8), then spend the remaining $25 on a roll of reflective foam tape to seal the most obvious gaps around your attic hatch door. These four actions alone can reduce cooling costs by 10 to 18%.
- Older Home (pre-1980): Homes from this era average two to three times more air leakage than newer construction, and attic insulation is often R-11 or less. The payback on professional air sealing and insulation is typically under 3 years in these homes. Before sealing aggressively, have an HVAC technician check that your furnace and water heater have adequate combustion air, and hire a certified auditor to test for asbestos vermiculite insulation in the attic before disturbing anything. Many states offer income-qualified weatherization programs that cover these upgrades at no cost.