If you live in a two-story home, you already know the frustration: the upstairs bedrooms feel like a sauna by 8 PM, so you drop the thermostat, and by midnight the first floor is cold enough to hang meat. This is one of the most common comfort complaints among homeowners, and it costs real money. Overcooling the first floor to compensate for a hot second floor can add 15 to 25% to your cooling bill every summer.
The root cause is physics. Heat rises, and your second floor absorbs radiant heat from the roof all day long. Most single-zone HVAC systems were not designed to fight this battle efficiently, but that does not mean you are stuck with miserable temperature swings. A combination of smart vent adjustments, strategic thermostat scheduling, and a few targeted upgrades can bring both floors within 2 to 4 degrees of each other without a major renovation.
In this post, you will learn exactly why two-story homes develop this hot-top, cold-bottom pattern, what quick fixes you can implement today for free, and which DIY and professional upgrades deliver the best payback. Whether you have a single-zone system, a two-zone system, or no AC at all, there is a practical solution here for your situation.
What You’ll Need
Click on an item below to shop for the recommended items for this recipe on Amazon.
As an Amazon Associate, we earn from qualifying purchases.
How to Do It
- Partially close 25 to 40% of the supply vents on the first floor by rotating the louver slats. Do not close them fully, as this can increase duct pressure and stress the blower motor. Target rooms that feel coldest first.
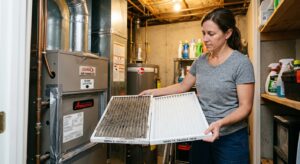
- Confirm that all second-floor supply vents are fully open and unobstructed by furniture, rugs, or drapes. A single blocked vent can reduce airflow in that room by up to 50%.
- Set your ceiling fans to run counterclockwise (forward) at medium or high speed in summer. This pushes air down and creates a wind-chill effect, making a 78-degree room feel like 74 to 75 degrees without changing the thermostat.
- Raise the thermostat setpoint by 2 degrees (for example, from 72 to 74 degrees Fahrenheit) and rely on ceiling fans for the comfort difference. This alone can reduce cooling energy use by 6 to 8% per degree raised.
- Close interior doors to upstairs rooms you are not using during the day to reduce the volume of air the AC must condition on that floor during peak heat hours.
- Install a smart thermostat (such as an Ecobee or Honeywell T9) that supports remote temperature sensors. Place a sensor in the hottest upstairs room. Program the thermostat to average or prioritize the upstairs sensor during afternoon hours (2 PM to 9 PM) when the second floor peaks in heat. Cost: $130 to $200.
- Add a whole-house attic fan or a smart attic ventilation fan if your attic is poorly ventilated. Running it in the evening pulls hot attic air out and can drop attic temperatures by 20 to 30 degrees, reducing radiant heat into the second floor by the next morning. Cost: $50 to $150 for a basic model.
- Install blackout or cellular shades on all west-facing and south-facing second-floor windows. Cellular shades with a honeycomb structure provide an insulating layer and can block 40 to 60% of solar heat gain through the glass. Cost: $25 to $60 per window.
- Check your attic insulation depth. If it is below 10 to 12 inches of fiberglass batts (approximately R-30), adding blown-in insulation to reach R-38 or R-49 is a strong DIY project using a rented blower from a home improvement store. This single upgrade can reduce cooling load on the second floor by 15 to 25%. Cost: $300 to $700 for materials depending on attic square footage.
- Seal any visible gaps around recessed lights, attic hatches, or top-plate penetrations in the attic floor with fire-rated caulk or foam before adding insulation. These air leaks allow hot attic air to flow directly into the living space and account for up to 30% of a home’s air leakage in older construction.
- Re-examine vent balancing after all steps are complete. Walk each floor with your hand near supply vents to confirm airflow is reaching the second floor rooms. Adjust first-floor dampers further if needed now that the thermostat is better calibrated to the upper floor.
- Hire a licensed HVAC contractor to perform a Manual J load calculation for each floor separately. This determines the true cooling load by floor and is required before any zoning or equipment sizing decision. Expect to pay $150 to $300 for a standalone calculation, or it may be included in a system quote.
- Request a two-zone damper system quote. This involves installing motorized dampers in your existing ductwork and adding a second thermostat or sensor for the upper floor. The system automatically directs more conditioned air to whichever zone needs it. Cost: $1,500 to $3,500 added to existing system.
- Alternatively, ask about a ductless mini-split for the upper floor. A single-zone 12,000 to 18,000 BTU mini-split mounted in a central upstairs hallway can handle the second floor independently, leaving the existing central system to cover the first floor only. Cost: $2,500 to $5,000 installed.
- Request that the contractor inspect and balance your existing duct system as part of any upgrade. Leaky ducts lose 20 to 30% of conditioned air before it reaches the rooms. Sealing and balancing alone can sometimes resolve the temperature split without a full zoning upgrade.
- After installation, verify the system performance over 5 to 7 days of normal weather. Both floors should be within 2 to 4 degrees of each other during peak afternoon hours. Request a final walkthrough and airflow test from the contractor before signing off.
Why It Works: The Benefits
Properly balancing airflow and reducing attic heat gain typically cuts summer cooling costs by 15 to 25%, saving the average homeowner $90 to $200 over a cooling season depending on home size and climate.
The right combination of vent adjustments and a ceiling fan strategy can bring the temperature difference between floors from 8 to 12 degrees down to just 2 to 4 degrees without any equipment replacement.
When the system stops short-cycling to satisfy a poorly placed thermostat, compressor run times become longer and steadier. This reduces wear and can extend equipment life by 2 to 5 years compared to a system that is constantly cycling on and off.
Research shows optimal sleep temperature is 65 to 68 degrees Fahrenheit. Getting upstairs bedrooms into that range instead of 76 to 80 degrees improves sleep quality, which is one of the most consistent quality-of-life benefits homeowners report after addressing this problem.
Warm air holds more moisture. By lowering the second-floor temperature, you also reduce relative humidity upstairs, which reduces the perceived heat and lowers the risk of mold or moisture problems in upper-floor closets and corners.
💰 Savings Impact by Action
Redirecting airflow toward the second floor reduces first-floor overcooling and cuts wasted cooling energy by up to 12% with no cost.
Upgrading attic insulation to R-38 or R-49 reduces radiant heat gain into the second floor by 15 to 25%, lowering the cooling load the AC must overcome.
Blocking direct sun on west and south second-floor windows with cellular shades reduces solar heat gain by 40 to 60%, cutting localized cooling load by up to 10% overall.
Using remote sensors to prioritize the hotter floor prevents short-cycling and reduces cooling runtime by 8 to 12% compared to a single first-floor thermostat.
A two-zone damper system or dedicated mini-split for the upper floor delivers conditioned air exactly where it is needed, reducing total cooling energy use by 20 to 30%.
🏠 Key Concepts Explained
The Science Behind It
Two-story temperature problems are a direct consequence of how heat energy behaves. Warm air has lower density than cool air, which means it rises and accumulates at the highest point in any connected air space. This is called thermal stratification, and in a two-story home it creates a natural temperature gradient. Add a roof that has been absorbing solar radiation all day, and the attic above the second floor can reach 130 to 150 degrees Fahrenheit by late afternoon. Even with R-30 attic insulation, that heat slowly conducts through the ceiling assembly and radiates into the upstairs living space over the course of the day.
Your HVAC system compounds the problem. The thermostat on the first floor sees air that is already cooler due to stratification and shuts the compressor off. But that decision is made without any information about what is happening upstairs. The result is a system that delivers exactly the right temperature at the sensor location and a wildly incorrect temperature everywhere else. This is why duct balancing and thermostat placement are not just comfort issues but efficiency issues. Every BTU the system delivers to an already-cool first floor is a BTU that never reached the hot second floor.
Window orientation makes this worse in a compounding way. West-facing second-floor windows receive direct solar radiation in the afternoon, which is the hottest part of the day and the time when the roof is also at peak temperature. A standard double-pane window with no low-e coating allows roughly 70% of solar energy to pass through as radiant heat. Blocking that solar gain with a cellular shade or exterior overhang is thermodynamically equivalent to removing a small electric space heater from the room, often reducing the local cooling load by 200 to 500 BTUs per hour per window.
Frequently Asked Questions
▼ Why is my upstairs still hot even after I adjusted the vents and raised the thermostat?
If vent balancing alone did not help, the most likely culprits are inadequate attic insulation or a duct leak in the second-floor supply runs. Go into your attic and check the insulation depth at the attic floor. If it is less than 10 inches, heat is conducting straight through. Also look for disconnected or kinked flex ducts serving upper-floor rooms, which are a common cause of severe airflow loss on upper floors.
▼ Can I install a second thermostat on the second floor myself without a zoning system?
A second thermostat without motorized dampers will not actually control anything independently, it would just be a display. What you can do without professional help is install a smart thermostat like the Ecobee SmartThermostat with remote sensors and program it to weight the upstairs sensor more heavily during afternoon hours. This is a genuine functional improvement and costs $150 to $200.
▼ My first floor is freezing but raising the thermostat just makes the upstairs unbearable. What do I do?
This is a classic single-zone imbalance and means the root cause is not the thermostat setpoint but the airflow distribution. Start by partially closing first-floor vents (not more than 40%), confirm all upstairs vents are fully open, and add a remote sensor upstairs if you have a compatible smart thermostat. If those steps do not close the gap to within 4 to 5 degrees, get an HVAC contractor to test static pressure in your duct system because a restriction or leak is likely the underlying issue.
▼ How long before I actually see savings on my electric bill after making these changes?
Free airflow adjustments and thermostat changes will show up on your very next monthly bill, typically as a 10 to 20% reduction compared to the same month last year if weather is similar. Attic insulation and window shading improvements take one to two full billing cycles to appear clearly. Zoned HVAC systems typically show a 20 to 30% reduction in cooling costs starting the first full summer after installation.
▼ What if I have a heat pump instead of a central AC? Does any of this change?
The airflow balancing, thermostat, and insulation advice applies equally to heat pump systems. The one difference is that heat pumps are more sensitive to restricted airflow than standard AC compressors, so be conservative when partially closing first-floor vents and never close more than 25 to 30% of supply vents with a heat pump system. Restricted airflow on a heat pump can reduce efficiency and trigger defrost cycles prematurely.
Quick Tips
- Run ceiling fans in every occupied room rather than lowering the thermostat. Each degree you raise the setpoint saves 3 to 4% on cooling costs, and a fan makes the room feel 4 degrees cooler at almost no energy cost.
- Pre-cool the house early in the morning (before 10 AM) by running the AC while outdoor temperatures are still low, then let the thermal mass of the floors and walls carry you through the hottest midday hours with less compressor run time.
- Use interior blinds or shades on all second-floor windows facing west or south from about noon onward. This one habit can reduce afternoon heat gain upstairs by 30 to 40% without any purchases.
- Check your attic access hatch for insulation and weatherstripping. An unsealed attic hatch is essentially a hole in your ceiling, and it allows hot attic air to pour directly into the stairwell or hallway, defeating every other balancing effort you make.
Variations for Your Situation
- Apartment or Condo (Upper Floor Unit): Renters in top-floor units face the worst version of this problem with no access to central HVAC controls. Focus on blocking solar gain with blackout curtains on west and south windows ($20 to $40 each), adding a portable evaporative cooler or portable AC unit in the bedroom, and using box fans to pull cooler air in during the evening when outdoor temps drop. A USB-powered desk fan aimed at your body can make a 78-degree room feel like 72 to 73 degrees at minimal cost.
- Tight Budget (under $50): Spend nothing on equipment and focus entirely on behavioral and free fixes. Partially close 25 to 30% of downstairs vents, reverse all ceiling fans to counterclockwise, block afternoon sun with any heavy fabric or existing curtains on upper-floor windows, and raise your thermostat to 76 to 78 degrees while relying on fans for comfort. These free steps alone typically reduce the temperature gap between floors by 3 to 5 degrees and cut cooling bills by 10 to 15%.
- Older Home (pre-1980): Homes built before 1980 typically have minimal attic insulation (R-11 or less), single-pane or early double-pane windows, and significant duct leakage. Prioritize attic air sealing and insulation above all else, as the payback period is often under 3 years in warm climates. Avoid closing first-floor vents aggressively in older duct systems because the ducts may already be undersized and adding pressure stresses the blower. A duct leakage test (around $200 to $400 from an HVAC contractor or energy auditor) is well worth the investment before doing anything else in a pre-1980 home.