You spent $8,000 to $15,000 replacing every window in your home with shiny new double-pane, low-e units. The sales rep promised 20 to 30% savings on your energy bills. Six months later, your utility bills barely budged. Sound familiar? You are not alone — window replacement is one of the most oversold energy upgrades in the home improvement industry, and the gap between marketing claims and real-world savings leaves thousands of homeowners frustrated each year.
The truth is that windows, even old single-pane ones, are rarely the dominant source of heat loss in a home. According to the U.S. Department of Energy, windows account for roughly 25 to 30% of heating and cooling energy loss — but only when air leakage, poor installation, and surrounding insulation failures are already under control. If your attic is under-insulated, your ducts are leaky, or your walls have no air barrier, new windows will feel like a rounding error on your energy bill.
This post breaks down the real reasons your new windows are underperforming, what the building science actually says about where your energy dollars are escaping, and the specific steps you can take right now to capture the savings you were promised. Most of the fixes cost under $100 and take an afternoon.
What You’ll Need
Click on an item below to shop for the recommended items for this recipe on Amazon.
As an Amazon Associate, we earn from qualifying purchases.
How to Do It
- On a windy day, hold a lit incense stick or a damp hand along the interior perimeter of each new window where the trim meets the drywall. Moving smoke or a felt breeze indicates an unsealed gap behind the trim.
- Remove the interior window trim carefully using a putty knife and pry bar. Inspect the gap between the window frame and the rough framing — it should be filled with low-expansion spray foam or a foam backer rod plus caulk, not loose fiberglass or nothing at all.
- If the cavity is empty or loosely filled, inject low-expansion polyurethane foam (use the low-expansion type — standard foam can bow window frames and void warranties) into all gaps around the perimeter. Allow to cure fully before trimming flush.
- Reinstall the trim and apply a paintable latex caulk line along the joint where trim meets drywall and where trim meets the window frame. Smooth with a wet finger for a clean seal.
- On the exterior, inspect the flashing tape and caulk line around the window. Any gaps, cracks, or lifted tape edges should be recaulked with a high-quality silicone or siliconized latex caulk rated for exterior use.
- Check the weep holes on the bottom of the window frame to ensure they are clear — blocked weep holes trap water inside the frame and accelerate seal failure.
- Download your utility bills for the past 12 months and calculate your average monthly usage in kWh or therms. This baseline number is essential — without it you cannot measure whether any fix is actually working.
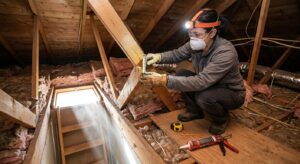
- Inspect your attic insulation depth and coverage. The DOE recommends R-38 to R-60 for most U.S. climates. If you can see the tops of your floor joists, you are losing far more energy through the ceiling than through your windows. Add blown-in cellulose or fiberglass to reach the recommended depth before expecting windows to show savings.
- Locate and seal attic bypasses — the gaps around plumbing pipes, electrical boxes, and partition wall top plates where conditioned air escapes into the attic. Use fire-rated caulk or rigid foam board plus canned foam for large openings. This single step can reduce heating costs 5 to 10% on its own.
- Check your heating and cooling duct connections in the attic or crawlspace. Wrap any disconnected or poorly connected joints with UL 181-rated foil tape (not standard duct tape, which fails within months). If more than 20% of joints appear loose or disconnected, schedule a professional duct blower test.
- Add interior window insulation film kits to any windows that face prevailing winter wind or that feel noticeably cold to the touch. These $8 to $15 per window kits add an additional air gap, effectively creating a third pane, and can reduce heat loss through that window by 30 to 50% in winter.
- Reassess your thermostat schedule. If your HVAC is running at full set temperature while you are away, no window upgrade will compensate for that load. Set a setback of 7 to 10 degrees for 8 or more hours per day to save an additional 10% on annual heating and cooling costs.
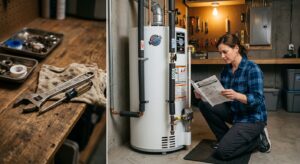
- Contact a certified home energy auditor (look for BPI or RESNET certification) or check whether your utility company offers subsidized audits — many utilities provide them free or at reduced cost as part of demand-side management programs.
- During the blower door test, the auditor pressurizes your home to 50 Pascals and measures total air leakage in ACH50 (air changes per hour). A well-sealed modern home should be below 3 ACH50. Homes above 7 ACH50 have serious envelope problems that no window upgrade can overcome.
- Request a thermal imaging scan during the test if available. The camera will show exactly which windows have unsealed rough openings, which walls lack insulation, and whether your new windows are actually performing as rated. This visual evidence is invaluable for prioritizing fixes.
- Review the auditor’s prioritized improvement list. In most homes, the order of return on investment runs: air sealing, attic insulation, duct sealing, HVAC tune-up, and then windows. If your windows were installed before addressing the items above them on this list, the remediation projects will now deliver the savings you expected from windows.
- If the audit reveals that your windows were installed with the wrong SHGC for your climate, contact your installer. Many window manufacturers offer a SHGC specification that varies by orientation, and some installers will negotiate a correction on a recent install if approached professionally with data.
Why It Works: The Benefits
Properly air-sealing and insulating around installed windows can recover 40 to 60% of the energy performance you were sold, often pushing actual bill savings from 3 to 5% up to 10 to 15%.
Sealing the perimeter of new windows eliminates the radiant chill and air movement that makes rooms near windows uncomfortable even when the thermostat reads 70 degrees.
Unsealed window rough openings allow warm humid air to condense inside wall cavities, leading to mold and rot that can cost $2,000 to $10,000 to remediate. Proper sealing protects your investment.
Reducing infiltration around windows lowers the runtime of your heating and cooling system, extending equipment life and reducing maintenance costs by reducing short-cycling and overwork.
Correcting window orientation mismatches — such as swapping high-SHGC glass on west-facing windows in warm climates — can reduce peak afternoon cooling loads by up to 25% in affected rooms.
💰 Savings Impact by Action
Sealing rough opening gaps around new and existing windows reduces infiltration-driven heat loss by up to 12% of total heating and cooling costs in a typical home.
Sealing attic bypasses around penetrations stops stack-effect-driven air loss and can reduce annual heating bills by 5 to 10% independent of any window improvement.
Upgrading attic insulation to DOE-recommended R-38 to R-60 reduces ceiling heat loss by 15 to 25%, which dwarfs the savings from window glass upgrades in most climates.
Sealing leaky duct connections in unconditioned spaces recovers 20 to 30% of conditioned air that would otherwise be wasted before reaching living areas.
Adding a low-e interior window film to existing single or double-pane windows reduces heat loss through the glass by up to 30%, translating to roughly 5 to 8% on whole-home heating bills.
🏠 Key Concepts Explained
The Science Behind It
Windows lose energy through three distinct mechanisms: conduction through the glass and frame, radiation of heat toward cold surfaces, and air infiltration through gaps. High-quality double or triple-pane windows with low-e coatings address the first two mechanisms very effectively, reducing conductive loss (measured as U-factor) and blocking radiant heat transfer. A window with a U-factor of 0.25 loses roughly half as much heat by conduction as a single-pane window at U-0.50. That sounds impressive until you understand that in a typical 2,000 square foot home, windows represent only about 70 to 150 square feet of total envelope area compared to 1,500 square feet of walls and 2,000 square feet of ceiling.
Air infiltration is where the math changes dramatically. The energy lost through a small unsealed gap operates on a completely different scale than conductive loss. Pressurized air moving through a crack carries its full heat content with it — there is no insulating layer to slow it down. Research from Lawrence Berkeley National Laboratory shows that infiltration can account for 25 to 40% of total heating and cooling loads in typical American homes. When a window is installed without proper air sealing at the rough opening, all of the engineering in the glass unit is essentially bypassed by air moving around it through the wall cavity.
The other critical and often overlooked factor is that window energy ratings are tested under controlled laboratory conditions that do not reflect real installation quality. The NFRC label on your window tells you how the unit performs when perfectly installed with no gaps, correct flashing, and ideal conditions. Field studies consistently show that real-world window performance is 15 to 35% worse than the rated values due to installation variability. This means your U-0.25 windows may actually be delivering U-0.30 to U-0.34 in your home, not because the product is bad, but because installation practices do not match laboratory conditions.
Frequently Asked Questions
▼ My new windows were installed 6 months ago and my bills are actually higher. What happened?
Higher bills after window replacement almost always point to installation air leakage or a mismatch between the window’s SHGC rating and your climate or orientation. Start by doing the incense test around every window trim on a windy day. If you find leaks, re-seal the rough openings as described above. If leaks are not the issue, pull the NFRC sticker from any remaining paperwork and check whether the SHGC is appropriate for your primary window exposures — a low-SHGC window on south-facing glass in a northern climate can actually increase heating costs by blocking passive solar gain.
▼ The window installer says the installation is fine. How do I prove there is an air leak?
Request a blower door test from an independent certified energy auditor — this is the only objective, quantified measurement of your home’s air leakage and will show whether your infiltration rate changed after installation. If the auditor can perform the test with a thermal camera while the house is pressurized, any gaps around window rough openings will show up clearly as temperature anomalies. This documented evidence gives you a factual basis for a warranty or workmanship conversation with your installer.
▼ How long before I actually see the savings from new windows show up on my bill?
With no other changes, well-installed double-pane low-e windows typically reduce heating and cooling bills by 7 to 15% compared to old single-pane windows, and you should see that difference within the first full heating or cooling season. If you are not seeing it, the issue is almost certainly installation quality or other envelope problems overwhelming the window improvement. Compare the same calendar month year over year, adjusting for heating or cooling degree days if the weather differed significantly between years.
▼ Can I get a refund or warranty repair if my windows were installed wrong?
Most window manufacturers warranty the unit itself (the glass seal, hardware, and frame) but specifically exclude installation workmanship from coverage — that falls on the installer or general contractor. Review your installation contract for a workmanship warranty, which reputable installers typically offer for 1 to 5 years. If you paid with a credit card, document your case with energy bills and blower door test results before disputing. Many states also have contractor licensing boards where workmanship complaints can be filed if the installer refuses to engage.
▼ My house is older and drafty everywhere. Will air sealing around windows even make a difference?
Yes, but address the biggest leaks first for the best return. In older homes, the largest air leakage pathways are typically attic bypasses around plumbing and electrical penetrations, not windows. Use the blower door test or a DIY pressure diagnostic on a windy day to identify your worst leakage zones. Sealing the top five or six leakage points in most older homes can reduce infiltration by 20 to 30%, which will do more for comfort and bills than anything else you can do at a similar cost.
Quick Tips
- Check your window specification sheet for SHGC values — south and east-facing windows benefit from a higher SHGC (0.40 and above) in cold climates to capture free solar heat in winter, while west-facing windows in warm climates should be 0.25 or lower to block afternoon heat gain.
- Cellular or honeycomb blinds closed at night add R-2 to R-4 to any window and cost $20 to $60 per window — that is a faster payback than the window replacement itself in most cases.
- If your new windows feel cold to the touch on the interior glass surface during winter, the unit may have a failed gas fill seal. Call your installer — argon or krypton gas fill failure typically shows as condensation between the panes and is usually covered under the window warranty for 10 to 20 years.
- Replacing windows on the north side of a home in a cold climate almost never pencils out energetically. North-facing windows receive no useful solar gain and are exposed to cold prevailing winds. If budget is limited, prioritize air sealing over replacement on north exposures.
Variations for Your Situation
- Apartment or Rental: Renters cannot replace windows or access rough openings, but can still recover significant performance with reversible fixes. Apply interior window insulation film kits ($8 to $15 per window) for a temporary third pane effect, use cellular blinds for an additional R-2 to R-4 per window, and apply removable rope caulk along drafty sill and trim gaps — it peels off cleanly when you move out. These measures together can reduce window heat loss by 30 to 50% with zero damage to the unit and total costs under $100 for a typical apartment.
- Tight Budget Under $50: Focus entirely on the air sealing quick fix. A tube of low-expansion foam ($6), a tube of paintable caulk ($5), and a caulk gun ($10) address the single highest-impact cause of window underperformance. If you find the rough openings were properly sealed, buy a roll of rope caulk ($3 to $5 per roll) and apply it along the window sash perimeter on the interior for the winter season. This costs under $40 total and is reversible, yet can cut infiltration through that window by 50 to 70%.
- Older Home Pre-1980: Homes built before 1980 typically lack housewrap, proper flashing, and any air barrier in the wall cavity. When new windows are installed in these homes, the rough opening is often the only air-sealed point in an otherwise leaky wall assembly. Start with a professional blower door test to establish your baseline ACH50 — pre-1980 homes commonly test at 10 to 20 ACH50, meaning air sealing the entire envelope is a bigger priority than window performance. Focus remediation dollars on attic air sealing first (5 to 10% savings), then crawlspace or basement rim joist sealing (3 to 5% savings), before spending more on window-specific improvements.