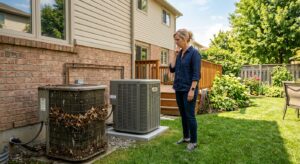
If your home heats up like an oven by noon, your AC runs almost nonstop, and your electric bill spikes every July, poor insulation is likely the root cause. Homes built before 1980 often have little to no attic insulation by modern standards, and even newer homes frequently have gaps, bypasses, and thin coverage that let heat pour in. The result is not just discomfort but an HVAC system working 30 to 50 percent harder than it should, wearing out faster and costing you hundreds of dollars every summer.
A full insulation upgrade is the right long-term answer. Adding attic insulation to R-38 or higher can reduce cooling loads by 15 to 25 percent, and combined with air sealing, total savings can reach 20 to 30 percent annually. But that project typically costs $1,500 to $4,000 depending on attic size and current coverage, and not every homeowner can write that check today. The good news is that smart, layered strategies can meaningfully reduce heat gain and cut your cooling bills right now, without touching a single batt of insulation.
This post covers exactly that: the most effective immediate actions you can take to lower indoor temperatures, reduce AC runtime, and stay comfortable in a poorly insulated home. We break everything down by effort and cost, from zero-dollar tweaks you can do tonight to weekend DIY upgrades under $200, so you can make real progress at whatever pace fits your budget.
What You’ll Need
Click on an item below to shop for the recommended items for this recipe on Amazon.
As an Amazon Associate, we earn from qualifying purchases.
How to Do It
- Set your thermostat to 78 degrees F when home and 85 degrees F when away. Each degree above 72 saves roughly 3 percent on cooling costs, and the DOE estimates setback schedules save 10 percent annually.
- Close all window coverings on south- and west-facing windows before 10 a.m. Standard blinds block 30 to 40 percent of solar heat gain; blackout curtains block up to 70 percent.
- Switch ceiling fan direction to counterclockwise at medium or high speed. This creates a wind-chill effect that lets you feel 4 degrees F cooler without changing the actual air temperature, so you can raise the thermostat set point.
- Eliminate internal heat sources during the hottest hours (noon to 6 p.m.). Avoid using the oven, run the dishwasher and dryer after 8 p.m., and switch to LED lighting if you have not already. Incandescent bulbs convert 90 percent of energy to heat.
- Enable night flush cooling when outdoor temps drop below 72 degrees F. Open windows on opposite sides of the home to create cross-ventilation, purging stored heat from walls and furniture before the next day’s heat builds.
- Install reflective window film on all south- and west-facing glass. Look for films with a Solar Heat Gain Coefficient (SHGC) of 0.25 or lower. A $30 to $50 kit covers 60 to 80 square feet and can block 50 to 79 percent of solar heat gain through glass.
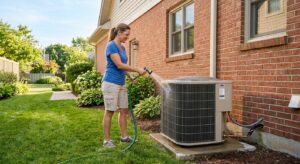
- Seal attic bypasses with fire-rated expanding foam or caulk. Focus on gaps around recessed lights, plumbing penetrations, and the top plates of interior walls. These bypasses are often responsible for 20 to 40 percent of a home’s total air leakage even before considering wall insulation.
- Add or replace attic hatch insulation. A bare attic hatch has an effective R-value as low as R-1, acting as a direct hole in your ceiling. Cut rigid foam board (R-10 or higher) to fit flush and tape the edges with foil tape, or purchase a pre-made attic stair cover rated at R-15 to R-38 for around $50 to $100.
- Install door sweeps on any door that opens to an unconditioned garage, basement, or exterior. A $10 to $15 adhesive sweep takes five minutes per door and stops warm air infiltration at floor level where the stack effect pulls it in most aggressively.
- Place a box fan in a north- or east-facing window blowing inward on nights when outdoor temps drop below indoor temps. Pair with an opposite window cracked open to exhaust warm air. This accelerates night flush cooling and can drop indoor temps 4 to 6 degrees F overnight.
- Rent an insulation blowing machine (free with purchase at most home improvement stores) and add blown cellulose or fiberglass to your attic floor to bring coverage to at least R-30. A 40-bag job covering 1,000 square feet typically costs $200 to $350 in materials and saves 10 to 20 percent on cooling bills immediately.
- Install radiant barrier foil on the underside of attic roof rafters or staple it to the attic floor joists over existing insulation. Radiant barriers reduce attic temperature by 20 to 30 degrees F on hot days, cutting the heat load that bleeds into living space. Materials cost roughly $0.10 to $0.20 per square foot.
- Add rigid foam insulation (R-10 minimum) to the inside of basement rim joists and any crawl space walls that border conditioned space. These low and upper boundaries are responsible for a disproportionate share of heat and air movement in older homes.
- Apply rope caulk or weatherstripping to all operable windows. Older single-pane or poorly fitted windows can account for 25 to 30 percent of a home’s total heat gain. Rope caulk is removable each season and costs under $5 per window.
- Insulate your hot water pipes in unconditioned spaces with foam pipe insulation ($5 to $10 for 10 feet). This has a minor cooling benefit but more importantly prevents your water heater from working harder in summer heat, lowering total home energy use by 2 to 4 percent.
Why It Works: The Benefits
Combining window treatments, air sealing, and thermostat scheduling can reduce summer cooling costs by 10 to 30 percent, saving a typical homeowner $40 to $120 per month during peak cooling season depending on climate and home size.
Cutting heat gain through behavioral and low-cost physical improvements can reduce compressor runtime by 20 to 35 percent, extending equipment life and pushing back costly repairs or replacement.
Blocking radiant heat at windows and reducing air infiltration prevents the mid-afternoon temperature spikes that make rooms feel stuffy and unbearable even when the AC is running.
Many of these steps cost $0 to $150 and pay back in one cooling season, making them smart interim investments even after you eventually upgrade insulation.
Bedrooms that stay below 72 degrees F support deeper sleep. Targeted interventions like window film, ceiling fans, and bedroom door sealing can drop nighttime sleeping-area temps by 3 to 6 degrees F without extra AC cost.
💰 Savings Impact by Action
Closing blinds or adding reflective film on south- and west-facing windows blocks up to 70 percent of solar heat gain through glass, reducing cooling load by 15 to 20 percent.
Sealing bypasses and penetrations at the attic floor reduces whole-home air leakage by 15 to 25 percent, directly cutting the volume of outdoor hot air your AC must condition.
Setting back to 85 degrees F while away and 78 degrees F when home saves approximately 10 percent on annual cooling costs per DOE estimates.
Upgrading attic insulation from R-11 to R-38 reduces ceiling heat gain by 15 to 25 percent and is the highest single-project ROI improvement for most homes.
Strategic overnight ventilation when outdoor temps drop below 72 degrees F can reduce the next day’s AC runtime by 8 to 12 percent by pre-cooling thermal mass before heat builds.
🏠 Key Concepts Explained
The Science Behind It
Heat moves in three ways: conduction (through solid materials), convection (through air movement), and radiation (through electromagnetic waves). In a poorly insulated home in summer, all three are working against you at once. Your roof absorbs radiant energy from the sun and conducts that heat into the attic, which can reach 130 to 150 degrees F on a hot day. Without sufficient insulation between that attic and your living space, heat conducts downward through the ceiling. Meanwhile, air leaks created by gaps at penetrations, fixtures, and framing connections allow convective hot air from the attic and outside to enter continuously.
The thermal resistance value known as R-value measures how well a material slows conductive heat flow. The Department of Energy recommends R-38 to R-60 for attic floors in most U.S. climate zones, but homes built before 1980 often have R-11 or less. That means heat flows through the ceiling roughly three to five times faster than it should, forcing your air conditioner to run much longer cycles to compensate. Each additional R-value point reduces heat flow proportionally, which is why even partial improvements like going from R-11 to R-25 deliver meaningful and measurable reductions in cooling load.
Window glass compounds the problem because it transmits radiant solar energy directly into the room without much resistance. Standard clear glass has an SHGC of around 0.86, meaning 86 percent of solar radiation passes through and becomes heat in your home. Reflective film, exterior shading, or cellular shades with high R-values intercept that radiant load before it converts to sensible heat inside. This is why window treatments and attic air sealing together often deliver faster perceived comfort improvement than adding insulation alone, even though insulation delivers the bigger long-term energy savings.
Frequently Asked Questions
▼ My AC runs all day and the house still won’t cool below 80 degrees F. What is going on?
Continuous AC operation that still cannot reach setpoint usually means the system’s cooling capacity is being overwhelmed. In a poorly insulated home, the sensible heat gain can exceed what the equipment was designed to handle on extremely hot days. Start by verifying your air filter is clean (replace if it has been more than 60 days), make sure all supply and return vents are unobstructed, and check that no refrigerant is leaking by looking for ice on the refrigerant lines near the indoor unit. If those check out, implement the window and attic bypass sealing steps in this post before calling an HVAC technician, since fixing the envelope often resolves the problem without equipment work.
▼ Can renters apply these strategies without landlord permission?
Yes, most of the zero-cost and several DIY steps require no landlord approval. Thermostat scheduling, ceiling fan direction, internal heat source management, and night flush cooling are fully within a renter’s control. Removable window film and rope caulk on windows are also renter-safe since they come off without damage. Avoid permanent adhesives, spray foam on building surfaces, or any work on the HVAC system without written permission. If your unit is consistently overheating, document temperatures with photos and timestamps and present it to your landlord as a habitability concern, which may prompt them to address insulation or HVAC performance.
▼ How soon will I see lower electric bills after making these changes?
Behavioral changes like thermostat setbacks and window covering schedules show up in your very next billing cycle if you maintain them consistently. Physical upgrades like window film and attic bypass sealing deliver savings starting from the day they are installed. Because utility bills reflect a full month of use, compare the same calendar month year over year rather than month to month for the clearest picture, since weather variation affects comparisons significantly.
▼ My home is from the 1960s and has very little insulation in the walls, not just the attic. Does that change anything?
Wall insulation is harder and more expensive to retrofit than attic insulation, and it is less impactful per dollar in most climates since the roof is the dominant heat pathway in summer. Focus your immediate efforts on the attic, windows, and air sealing as described here, which typically delivers 70 to 80 percent of the available savings. For walls, blown-in insulation through small holes drilled between studs is a professional job costing $1 to $3 per square foot and is best planned as a longer-term project. In the meantime, interior cellular shades or thermal curtains on walls that face direct sun provide a meaningful partial buffer.
▼ Will adding insulation to just the attic floor make a noticeable difference if my walls are still bare?
Yes, noticeably. In most U.S. climates the attic ceiling accounts for 25 to 35 percent of total summer heat gain, making it the single highest-leverage insulation upgrade available. Homeowners who bring attic insulation from R-11 to R-38 typically report 15 to 20 percent reductions in cooling bills even with no wall work done. You will likely still feel heat radiating from poorly insulated walls on very hot days, but the overall indoor temperature and AC runtime should improve measurably within the first week.
Quick Tips
- Prioritize sealing the attic floor before adding insulation. Air sealing alone in the attic can reduce total home air leakage by 15 to 25 percent, and insulation installed over unsealed gaps performs significantly worse than its rated R-value.
- Use a cheap infrared thermometer to find your biggest heat sources. Point it at ceilings, walls, and around windows during peak afternoon heat. Surfaces reading 10 or more degrees above room temperature are your priority targets.
- If you have a programmable or smart thermostat, set the pre-cooling schedule to ramp down to your target temperature by 9 a.m. before outdoor heat peaks, rather than waiting until you feel warm at 2 p.m.
- Ceiling fans only help if people are in the room. Turn them off when you leave to avoid adding unnecessary heat from the motor, which generates 30 to 75 watts per hour back into the air.
Variations for Your Situation
- Apartment or Rental: Renters cannot modify HVAC systems or add permanent insulation, but they can still achieve meaningful results. Focus on removable window film (brands like Gila or BDF run $25 to $50 for a standard window kit), tension-mounted blackout curtains that leave no wall damage, and battery-powered smart plugs to schedule appliances away from peak heat hours. A portable evaporative cooler works well in low-humidity climates as a supplement and costs $60 to $150. Document overheating issues in writing to your landlord and reference local habitability codes, since many jurisdictions require rentals to maintain indoor temperatures below a specified maximum.
- Tight Budget Under $50: Start with pure behavioral changes (thermostat setback, morning window covering, appliance scheduling, ceiling fan direction) which cost $0 and deliver 10 to 15 percent savings immediately. With $15 to $20 buy a door sweep for any door bordering unconditioned space and a tube of rope caulk for your worst-fitting windows. With the remaining budget, a box fan ($20 to $30) used for night flush cooling is the highest-impact single purchase available at this price point. Skip window film until you have $40 or more saved, and prioritize south- and west-facing rooms.
- Older Home Pre-1980: These homes typically have attic insulation at R-7 to R-11 or less, single-pane windows, and air leakage rates two to three times higher than current code. Air sealing is especially high priority here since closing bypasses in a leaky older home often delivers more comfort improvement per dollar than adding insulation on top of existing gaps. Use a stick of incense near electrical outlets on exterior walls, attic hatches, and plumbing penetrations under sinks to visualize air movement, then seal with foam and caulk. Budget $150 to $300 for a targeted air sealing weekend and expect to cut total air leakage by 15 to 25 percent before spending anything on insulation itself.