You just spent $5,000 to $12,000 on a new HVAC system, and your home is still cold in January. The upstairs is frigid, the furnace runs constantly, and your energy bills barely budged. If this sounds familiar, you are not alone, and the good news is that your new system is probably working exactly as it should. The problem is almost never the equipment.
Here is the honest truth that most HVAC contractors will not tell you at point of sale: a heating system can only deliver warmth as fast as your home loses it. If your walls, attic, and rim joists are leaking conditioned air into the outdoors, your furnace or heat pump is essentially trying to fill a bucket with holes. No amount of equipment capacity will solve a building envelope problem. In fact, an oversized system installed to compensate for leakage will short-cycle, wear out faster, and still leave cold spots throughout the house.
This post walks you through the real reasons a new HVAC system underperforms in winter, how to diagnose the specific weak points in your home’s thermal shell, and the practical fixes, ranging from free adjustments to a professional air sealing job, that will finally let your equipment do its job. We include real numbers for savings, payback periods, and the comfort improvements you can realistically expect.
What You’ll Need
Click on an item below to shop for the recommended items for this recipe on Amazon.
As an Amazon Associate, we earn from qualifying purchases.
How to Do It
- Start in the attic: pull back any existing insulation batts to expose the drywall plane. Use canned spray foam (low-expansion) to seal around every wire, pipe, and duct penetration through the ceiling drywall. These attic bypasses are often the single largest leakage source in a home.
- Seal the attic hatch with adhesive-backed weatherstripping foam around the frame perimeter and add rigid foam board insulation (R-10 or higher) to the back of the hatch door itself using construction adhesive.
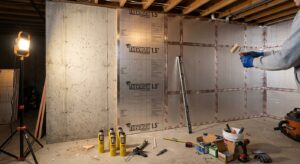
- Move to the basement or crawlspace and seal rim joists, the framed area between the foundation wall and first floor deck, using cut-and-cobble rigid foam board (2-inch XPS or polyiso, R-10) held in place with spray foam around the perimeter to create an airtight seal.
- Return inside and seal around all recessed light cans from the attic side using fire-rated intumescent caulk or pre-made airtight covers rated for insulation contact (IC-rated). Never spray foam directly onto non-IC-rated fixtures.
- Apply rope caulk or V-strip weatherstripping to the interior stops of windows that feel drafty, and replace worn door sweeps on any exterior door where you can see daylight or feel airflow at the threshold.
- After sealing, replace insulation batts in the attic and verify the total insulation depth. Adding blown-in insulation on top of existing material to reach R-38 to R-49 is a natural follow-up that compounds the air sealing investment.
- Contact your utility company first: most utilities offer free or subsidized home energy audits that include a blower door test. Programs vary by state but can reduce audit costs to $0 to $100.
- During the audit, ask the contractor to provide the ACH50 reading before and after sealing. A well-sealed existing home targets below 5 ACH50; many older homes test at 10 to 20 ACH50, meaning the entire air volume of the house is replaced by cold outdoor air 10 to 20 times per hour under winter conditions.
- Review the air sealing report and prioritize work by cost per unit of leakage reduced. Attic bypasses and rim joists typically offer the best return and should be addressed before any wall cavity work.
- Have the contractor seal all identified penetrations using a combination of spray foam, mastic sealant on ductwork, and fire-rated caulk around structural elements. Request a post-sealing blower door test to confirm the improvement.
- Pair the air sealing work with blown-in attic insulation at the same appointment if the contractor offers both services. This avoids paying for two site visits and the combination delivers compounding efficiency gains.
- After the work is complete, install or verify operation of a fresh air ventilation system (an Energy Recovery Ventilator or a simple exhaust fan with makeup air) if the final ACH50 reading drops below 3, because a very tight home requires controlled ventilation to maintain healthy indoor air quality.
Why It Works: The Benefits
Combining air sealing with an attic insulation upgrade to DOE-recommended levels (R-49 to R-60 in most climates) typically reduces heating energy use by 15 to 30%, saving $150 to $500 per year for a median U.S. home spending $1,200 to $1,700 annually on heating.
Eliminating major air leakage points, particularly around rim joists, attic bypasses, and recessed lights, reduces the cold drafts and temperature swings that make some rooms feel 5 to 10 degrees colder than others despite the thermostat being set consistently.
When the thermal envelope is tightened, the furnace or heat pump cycles less frequently and for shorter durations. This directly extends equipment lifespan and reduces maintenance costs, which matters especially for heat pumps that struggle below 35 degrees when they are already working near capacity.
Uncontrolled air infiltration pulls in outdoor pollutants, radon, vehicle exhaust, and allergens through the same gaps that let heat escape. Air sealing gives you control over where fresh air enters, allowing a mechanical ventilation strategy to replace random infiltration.
Under the Inflation Reduction Act, homeowners can claim a 30% federal tax credit (up to $1,200 per year) for insulation and air sealing materials installed through 2032, significantly reducing the upfront cost of these upgrades.
💰 Savings Impact by Action
Sealing attic bypasses and top plates eliminates convective heat loss pathways and can reduce total heating energy use by up to 20% in homes with significant attic leakage.
Insulating and air sealing basement rim joists with rigid foam board eliminates one of the highest-leakage locations in the building envelope, reducing infiltration-driven heat loss by 10 to 15%.
Upgrading attic insulation to R-49 in Climate Zones 4 to 6 reduces conductive ceiling heat loss by 15 to 25% compared to a home with only R-11.
Sealing leaky duct joints with mastic sealant recovers 20 to 30% of conditioned air that would otherwise be lost to unconditioned attics or crawlspaces before reaching living areas.
Replacing worn window and door weatherstripping reduces infiltration through the building’s most commonly used penetrations by up to 8% of total heating load.
🏠 Key Concepts Explained
The Science Behind It
Heat always moves from warm areas to cold ones through three mechanisms: conduction (heat traveling through solid materials like walls and glass), convection (warm air physically moving through gaps and cracks), and radiation (heat energy traveling as infrared waves toward colder surfaces). A new HVAC system addresses none of these pathways directly. It simply adds heat energy to your indoor air fast enough to counteract the losses. When losses are high, the system runs longer. When losses exceed the system’s capacity on a design-day cold spell, the system cannot maintain setpoint no matter how new or efficient it is.
The concept of Manual J sizing explains why contractors sometimes install oversized equipment and why it still fails to fix comfort problems. A properly sized system is designed to run nearly continuously on the coldest expected day for your climate (the 99th percentile outdoor temperature), gradually maintaining indoor temperature rather than blasting heat and cycling off. An oversized system heats the air quickly near the thermostat but never runs long enough to distribute heat evenly through the house or to dehumidify properly in milder weather. The result is cold spots, short cycles, and a system that still struggles on genuinely cold days because it cannot overcome the rate of heat loss through the building envelope.
Air leakage compounds this problem in a way that pure conductive insulation loss does not. When warm indoor air escapes through attic bypasses and rim joists, it carries its full heat content with it. That energy is completely unrecoverable. Insulation slows conductive heat flow but does not stop it entirely. Air sealing, by contrast, eliminates convective heat loss pathways entirely. This is why building scientists consistently rank air sealing as the highest-priority retrofit in an existing home, with insulation upgrades as the logical second step once major leakage points are closed.
Frequently Asked Questions
▼ My furnace runs almost constantly but the house never reaches the thermostat setpoint on really cold days. Is that a system failure?
Probably not. If the system is less than 5 years old and was professionally installed, it is almost certainly a heat loss problem rather than an equipment failure. Every heating system has a design-day capacity, meaning it is sized to maintain your setpoint down to a specific outdoor temperature, often 5 to 15 degrees Fahrenheit depending on your climate. When outdoor temps drop below that design point, even a correctly sized, fully functional system may fall 2 to 5 degrees short. Check your attic insulation depth first, target R-38 minimum, and seal rim joists. Those two fixes resolve the majority of these complaints.
▼ Why is one room always colder than the rest of the house no matter what I do?
A persistently cold room almost always has one of three causes: a duct that is undersized, disconnected, or blocked; an exterior wall or floor that is uninsulated or has missing insulation (common in additions and corner rooms); or significant air leakage specific to that room, often through outlets, recessed lights, or where the ceiling meets an exterior soffit. Start by holding your hand over supply registers in that room to confirm airflow is similar to other rooms. If flow is weak, have a duct contractor check for disconnection or blockage. If flow is normal, an infrared camera scan of the exterior walls will usually pinpoint the insulation gap within minutes.
▼ I had a professional energy audit done but the savings on my bill were much lower than they predicted. What went wrong?
Modeled savings from energy audits assume average occupant behavior and weather, and real-world results routinely come in 15 to 30% lower than projections because actual weather, thermostat habits, and occupancy patterns differ from modeling assumptions. That said, if savings are dramatically lower than predicted (less than half), request the contractor’s post-sealing blower door reading to confirm the work achieved the targeted ACH50 reduction. Occasionally, air sealing work is completed incompletely, especially in attic bypass locations that are tedious to access, and the blower door number reveals whether the physical work matched the scope of what was invoiced.
▼ Can I just add more insulation to my attic without doing air sealing first?
You can, and it will help, but you will leave a significant portion of the available savings on the table. Insulation slows conductive heat loss but does nothing to stop the convective heat loss caused by air bypasses through the insulation layer. Worse, adding insulation on top of existing leaks can trap moisture-laden air inside the insulation assembly, potentially leading to mold or rot over time. The correct sequence is always air sealing first, then insulation, so the insulation layer is both thermally and moisture-protected.
Quick Tips
- Do the attic air sealing on a cold calm evening and use a stick of incense near suspected leakage points from below to see which ones are actively drawing air upward.
- Shoot a quick infrared photo with your smartphone using a $30 IR thermometer app attachment on a cold day. Cold streaks on your ceiling or around outlets almost always indicate air movement, not just conduction.
- Focus weatherstripping effort on doors before windows. A poorly sealed exterior door can leak as much air as leaving a window open 3 inches, and replacement sweeps cost under $20.
- When adding blown-in attic insulation, ask the contractor to install an insulation ruler (a labeled depth gauge stake) in multiple locations so you can verify depth years later without digging through the material.
Variations for Your Situation
- Apartment or Condo: Renters and condo owners cannot modify common walls, attic access, or shared HVAC systems, but they can still address window and door leakage, which accounts for 15 to 25% of a unit’s total infiltration. Apply rope caulk (fully removable at move-out) to drafty window sashes, use an under-door draft stopper on exterior doors, and install insulating window film kits available for $20 to $50 per window on single-pane units. These measures are fully renter-safe and can reduce heating energy use by 8 to 15% in a leaky unit.
- Tight Budget Under $150: Focus exclusively on the two locations that deliver the most heat loss reduction per dollar spent: rim joist sealing and attic hatch insulation. A single tube of low-expansion spray foam ($8) and a sheet of 2-inch rigid foam board ($35 to $45) cut to fit the rim joist bays will cost under $60 and can reduce infiltration by 10 to 20% in a basement-equipped home. Adding a rigid foam cover to the attic hatch brings total materials to under $100 and addresses two of the top three heat loss pathways without requiring any professional help.
- Older Home Pre-1980: Homes built before modern energy codes frequently have zero insulation in rim joists, R-7 to R-11 attic insulation, knob-and-tube wiring in attic cavities (which prohibits covering with insulation without an electrician’s sign-off), and balloon framing with open stud cavities running from basement to attic. Have an electrician assess the attic wiring situation before any insulation work, and expect to budget $1,500 to $4,000 for a comprehensive air sealing and insulation project in a pre-1980 home rather than the $300 to $800 that might apply to a 1995 house. The payback period is still typically 2 to 4 years given the higher baseline energy waste in these homes.