Imagine paying to heat or cool a room with a window left permanently cracked open. That is essentially what unchecked air leaks do to your home every single day. The U.S. Department of Energy estimates that air infiltration accounts for 25 to 40% of the energy used for heating and cooling in a typical home, making it one of the biggest and most overlooked sources of wasted money on your utility bill.
The frustrating part is that most leaks are invisible. They hide behind outlet covers, along baseboards, above dropped ceilings, and in the dark corners of your attic. You feel the drafts in winter and the humidity creeping in during summer, but you cannot quite put your finger on where the air is getting in. That uncertainty makes it easy to keep putting off a fix.
This guide walks you through a practical, room-by-room process for finding those hidden leaks in a single afternoon, using tools you likely already own. You will learn the building science behind why leaks matter so much, how to prioritize the worst offenders, and exactly what to do once you find them. Whether you are a renter doing a quick scan or a homeowner ready to do a thorough DIY audit, there is an approach here for you.
What You’ll Need
Click on an item below to shop for the recommended items for this recipe on Amazon.
As an Amazon Associate, we earn from qualifying purchases.
How to Do It
- Close all windows, doors, and fireplace dampers. Turn off your HVAC fan so the system is not creating its own airflow that could mask leaks.
- Light an incense stick or use a damp hand as your sensor. Move slowly along the perimeter of every exterior wall, pausing at electrical outlets, switch plates, baseboards, window frames, and door frames.
- Watch for the smoke to waver, bend sharply, or blow horizontally. Any disruption indicates moving air. Mark each spot with a small piece of painter’s tape so you can find it again.
- Check the top and bottom of interior walls that adjoin unconditioned spaces such as garages, crawlspaces, or attached unheated rooms. These transitions are major leak zones.
- Inspect less obvious spots: recessed light fixtures in the ceiling (air moves through the housing into the attic), attic hatch edges, and the gap where the tub or shower surround meets the wall.
- After the walk-through, photograph each taped spot and note the location. Prioritize sealing by airflow strength and location: attic bypasses first, then basement and crawlspace sills, then interior wall outlets and switches.
- Choose a cold or windy day for best results. Close all windows, exterior doors, and fireplace dampers throughout the entire house.
- Install a box fan snugly in one window on the lowest floor, blowing air outward to depressurize the house. Seal the gaps around the fan with cardboard and tape so air cannot sneak back in around the sides.
- Turn the fan on high and let it run for 5 minutes to stabilize the pressure. You should feel or hear air being pulled in through any significant gaps almost immediately.
- Use a stick of incense, a thin strip of tissue paper, or your moistened hand to methodically probe every suspected leak location: electrical boxes, pipe penetrations through walls, attic hatch perimeter, recessed lights, and the joint where walls meet the floor.
- Use a flashlight to look for daylight or discoloration around framing members in the attic, crawlspace, or basement. Dark staining on insulation or framing is a sign air has been carrying dust through that gap for years.
- Document every find with photos and measurements. After completing the test, create a prioritized sealing list. Start with attic bypasses and basement rim joists, as these are consistently the two highest-impact areas in most homes.
- Contact your utility provider or a certified BPI (Building Performance Institute) auditor to schedule a home energy audit. Ask specifically whether they include a blower door test and infrared camera inspection.
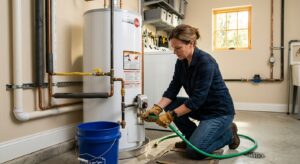
- Prepare your home before the auditor arrives: clear access to the attic hatch, water heater, furnace, and electrical panel. Move stored items away from basement walls and crawlspace access points.
- The auditor installs a calibrated fan in an exterior door and depressurizes the home to a standard 50 Pascals of pressure. The fan measures your home’s total air leakage in CFM50 (cubic feet per minute at 50 Pascals), giving you a precise baseline number.
- Walk through the home with the auditor while the blower door is running. A trained auditor with an infrared camera can pinpoint leak locations by detecting the temperature difference between infiltrating outdoor air and your conditioned indoor air.
- Review the written report, which will rank leaks by impact and include estimated costs and payback periods for each fix. This prioritized list is the most valuable output of the audit.
- Use utility rebates or federal tax credits (up to 30% under the Inflation Reduction Act for insulation and air sealing) to offset the cost of any recommended improvements.
Why It Works: The Benefits
Sealing air leaks can reduce heating and cooling costs by 15 to 30% annually, which translates to $150 to $400 per year for the average U.S. home spending around $1,300 on energy.
Eliminating drafts and cold spots means your thermostat setting actually matches what you feel. Rooms that were chronically too hot in summer or too cold in winter often correct dramatically after targeted sealing.
Air leaks let in outdoor humidity, pollen, dust, and pests. Tighter construction improves indoor air quality and can reduce allergy symptoms noticeably, especially in homes near high-pollen areas.
Every hour of reduced runtime is wear not put on your furnace, AC compressor, and blower motor. Homes sealed to DOE standards can reduce HVAC runtime by 20 to 30%, extending equipment lifespan by years.
An Energy Star certified or well-audited home commands a measurable premium. Studies show buyers pay 2 to 6% more for documented energy-efficient homes, and a clean blower door test result is a concrete selling point.
💰 Savings Impact by Action
Sealing bypasses at the attic floor around top plates, plumbing, and light fixtures reduces total home air leakage by up to 20% on its own.
Foam-sealing and insulating the basement rim joist eliminates one of the largest single leak zones and can cut basement-zone heating costs by 15%.
Installing foam gaskets behind all exterior-wall outlets and switches costs under $15 and reduces infiltration through electrical boxes by 5% of total home leakage.
Replacing worn weatherstripping and applying fresh caulk at window frames can reduce visible perimeter leakage by up to 8% of total infiltration.
A comprehensive air sealing project targeting all zones (attic, walls, basement) can reduce total heating and cooling energy use by 15 to 30% annually per DOE estimates.
🏠 Key Concepts Explained
The Science Behind It
Air moves through your home because of pressure differences, and those differences are always present. The stack effect is the dominant force: warm air is less dense than cold air, so it rises. In winter, heated indoor air climbs toward the top of your house and pushes out through every gap it can find near the ceiling, the attic, and upper floors. That escaping air creates a slight negative pressure at the bottom of the house, which pulls cold outside air in through sill plates, foundation cracks, and low wall penetrations. Your home is essentially breathing in at the bottom and breathing out at the top, all day and all night, regardless of whether your HVAC system is running.
Wind and your HVAC system add to this. A gusty day creates localized high-pressure zones on the windward side of your house and low-pressure zones on the leeward side, forcing air through whichever gaps are available. Meanwhile, an unbalanced HVAC system with a return air duct only in the main hallway can depressurize individual rooms, accelerating infiltration through every outlet and wall penetration in that room. Understanding these forces explains why some leaks only bother you on windy days and others are constant year-round problems.
The reason air sealing delivers such outsized savings compared to its cost is rooted in thermodynamics. When outdoor air replaces conditioned indoor air, your HVAC system must bring that entire volume of air back to your setpoint temperature. In a leaky home with 10 to 15 air changes per hour, you are essentially re-conditioning the entire volume of your home’s air every 4 to 6 minutes. Tightening to 3 to 5 ACH does not just save energy proportionally; it also reduces peak load demand, which means your equipment runs shorter cycles, maintains more even temperatures, and lasts longer. The U.S. Department of Energy’s own modeling consistently shows air sealing as the highest return-on-investment improvement available to the average homeowner.
Frequently Asked Questions
▼ I sealed all the leaks I could find but my energy bills barely changed. What am I missing?
The most impactful leaks are almost always in the attic and basement, not the visible spots at windows and doors. If you only addressed the easy-to-see gaps, check the attic floor for open framing cavities around plumbing stacks, light fixtures, and the tops of interior walls. Also inspect the rim joist in your basement or crawlspace, as this band of wood sitting on the foundation wall is one of the largest combined leak zones in most homes. A professional blower door test will quantify exactly how much leakage remains and where it is concentrated.
▼ Can I do an air leak test in summer or does it only work in winter?
You can find leaks in any season, but they are easiest to detect when the temperature difference between inside and outside is at least 15 to 20 degrees Fahrenheit. Cold winter days or very hot summer days both work well. If the outdoor temperature is close to your indoor setpoint, use the box fan depressurization method instead, since that approach creates its own pressure differential regardless of season.
▼ My home is very new (built in the last 10 years). Is it worth checking for air leaks?
Yes, though newer homes are generally tighter, construction defects and gaps around mechanical penetrations are still common even in recently built houses. Code-minimum construction in many states still allows up to 5 to 7 ACH50, which is loose enough to waste meaningful energy. Check around any additions, penetrations for solar or EV charger wiring, and recessed light fixtures, which are common weak points even in new construction.
▼ Is it possible to seal a house too tightly and cause indoor air quality problems?
Yes, this is a real concern and the reason building science follows the rule: seal tight, ventilate right. A very tight home (below 3 ACH50) without mechanical ventilation can accumulate humidity, CO2, VOCs, and combustion byproducts. If you do significant air sealing, install or check your existing ventilation: bath fans that vent outside, a kitchen range hood, and ideally a fresh air intake or energy recovery ventilator (ERV). For most homes doing moderate sealing, this is not an immediate risk, but it is worth discussing with an auditor.
Quick Tips
- Do your inspection on the coldest or windiest day of the season. Temperature and pressure differences are your allies, making leaks much easier to detect without any special equipment.
- Dark staining or discoloration on attic insulation is a reliable map of air leaks. Air carries dust, and over years that dust marks exactly where air has been flowing through framing gaps.
- Foam gaskets behind outlet and switch plates on exterior walls cost under $0.25 each and take 30 seconds to install. A typical home has 20 to 40 such plates, and collectively they can account for a surprising amount of infiltration.
- After sealing, re-run your incense or tissue paper test to verify the fix worked before patching drywall or replacing trim. A gap you thought you filled with caulk may still be leaking if the bead did not penetrate far enough.
Variations for Your Situation
- Apartment/Rental: Renters cannot access attic or basement spaces, but can still make a meaningful impact by sealing outlet and switch plates with foam gaskets, applying removable rope caulk around drafty windows (it peels off cleanly in spring), and placing door draft stoppers at the base of exterior doors. These no-damage fixes cost under $30 total and are reversible, making them safe for most lease agreements. Focus your incense test on the perimeter of the front door, windows, and any exterior wall outlets.
- Tight Budget (under $50): Skip the professional audit and use the incense walk-through method on the coldest available day. Spend your entire budget on materials: a $5 roll of foam weatherstripping for door frames, a $10 tube of paintable caulk for window frames and baseboards, a $12 pack of outlet foam gaskets, and a $6 door sweep for the worst exterior door. Applied to the right locations, these four items alone can deliver 10 to 15% savings. Document every leak location before buying materials so you do not waste money on the wrong products.
- Older Home (pre-1980): Homes built before modern energy codes can have 15 to 20 ACH or more, meaning a higher baseline of leakage and more potential savings. Prioritize the attic floor above all else, as older homes often have no air barrier at all between living space and attic. Be cautious about disturbing existing insulation, which may be vermiculite (potential asbestos) or fiberglass that has been air-washed and compacted. Consider starting with a professional audit to get an infrared baseline before doing DIY work, since the savings potential is large enough to justify the upfront audit cost of $300 to $600.