You pull the blanket up, but you can still feel it: a thin, steady draft crossing your face or shoulder. You check the window and the glass feels fine and the sash is closed. So where is the air coming from? In most homes, the culprit is a gap in the caulk bead where the window trim meets the wall, or where the casing meets the glass frame. Caulk shrinks, cracks, and pulls away from surfaces over 5 to 10 years, and those hairline gaps add up to a surprisingly large opening.
The DOE estimates that air leakage accounts for 25 to 40 percent of the energy used to heat and cool a typical home, and windows and doors are among the most common leak points. A single failed 1/8 inch gap running the full perimeter of a window can leak as much air as a hole several inches wide. Because bedrooms often sit on exterior walls with several windows, the draft you feel at night is real, measurable, and fixable.
This post covers how to find the leaks, how to choose the right caulk, and two complete approaches: a 20 minute quick fix using removable rope caulk for renters or anyone who wants a no-commitment solution, and a permanent DIY recaulk that will last 20 years or more. We also cover troubleshooting, older home concerns, and the mistakes that cause fresh caulk to fail within a year.
What You’ll Need
Click on an item below to shop for the recommended items for this recipe on Amazon.
As an Amazon Associate, we earn from qualifying purchases.
How to Do It
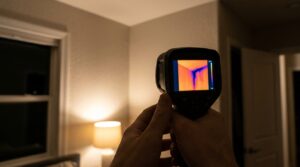
- Find the leaks on a windy or cold day by holding a lit incense stick or your wet fingertip along the window trim, where the trim meets the wall, and where the sash meets the frame. Wherever smoke wavers or your finger feels cold, you have a leak.
- Wipe the gap area clean with a dry cloth so the rope caulk can stick to a dust-free surface.
- Pull off a length of rope caulk and press it firmly into the gap with your thumb, working it in so it fills the crack completely rather than just sitting on top.
- Seal stationary joints only. Do not seal the moving parts of an operable window you plan to open, such as the sash track, unless you accept that it will stay closed until spring.
- Recheck with the incense stick. If smoke still moves, add more rope caulk or press the existing bead deeper into the gap.
- Check the forecast and pick a dry day above 40 degrees F (check the tube label for its minimum application temperature). Caulk applied to damp or freezing surfaces will not bond properly.
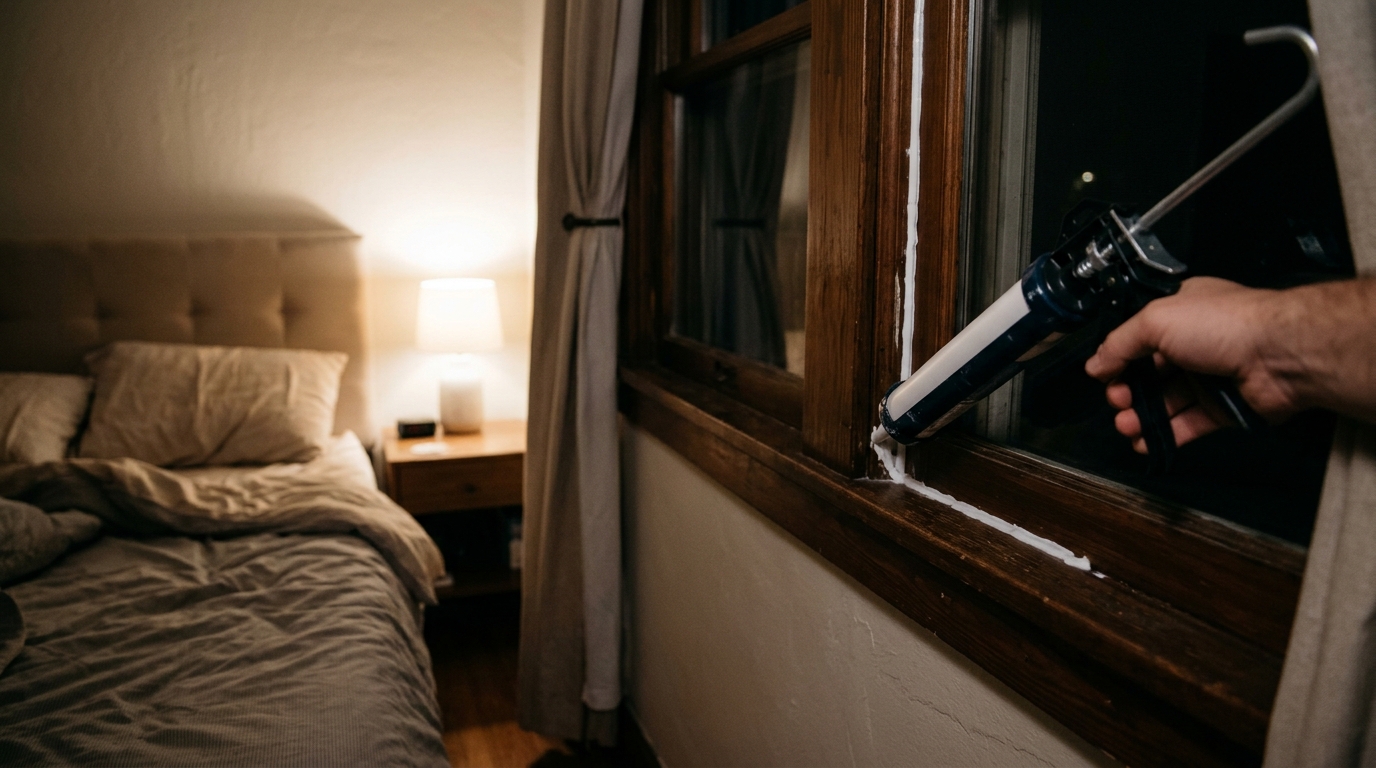
- Remove all old caulk using a utility knife and a caulk removal tool or putty knife. Cut along both edges of the bead and peel or scrape it out completely. Leaving old caulk behind is a common cause of failure.
- Clean the joint with a rag dampened with rubbing alcohol or a mild cleaner, then let it dry fully. Vacuum out dust and debris.
- For gaps wider than 1/4 inch, press foam backer rod into the gap first. This lets the caulk form a proper hourglass shape and prevents it from cracking as the joint moves.
- Cut the caulk tube nozzle at a 45 degree angle so the opening is slightly smaller than the gap width. Puncture the inner seal with a nail or the tube’s built-in poker.
- Apply a continuous bead along the joint in one steady pass, pushing the nozzle ahead of the bead to force caulk deep into the gap.
- Tool the bead immediately by smoothing it with a wet finger, a caulk finishing tool, or a plastic spoon, pressing it into both edges of the joint. Remove excess with a damp rag, then let it cure according to the label, typically 24 hours before water exposure.
Why It Works: The Benefits
Sealing perimeter gaps stops the moving air that makes a bedroom feel several degrees colder than the thermostat reading.
Air sealing around windows and doors can reduce total energy use by roughly 5 to 10 percent, according to ENERGY STAR and DOE estimates, depending on how leaky the home is.
A $10 to $20 tube of caulk covers several windows. With typical savings of $2 to $5 per window per year in moderate climates (more in extreme ones), plus comfort gains, most homeowners recoup the cost within one season.
The same gaps that leak air also let in dust, allergens, and outside sound. Sealing them makes a measurable difference in bedroom air quality and quiet.
Intact caulk keeps rain and humid air out of the wall cavity, helping prevent rot, mold, and paint failure around window trim.
💰 Savings Impact by Action
Sealing leaky window perimeters can reduce total home air leakage and cut heating and cooling energy by roughly 5 to 10 percent.
Properly sealing failed caulk joints can eliminate up to 30 percent of the air infiltration at an individual window opening.
Eliminating the convective draft at the bed can make a room feel 3 to 5 degrees warmer without touching the thermostat.
Intact exterior caulk keeps wind-driven rain out of the wall cavity and can sharply reduce the risk of trim rot and paint failure.
🏠 Key Concepts Explained
The Science Behind It
Air moves through a building because of pressure differences, and those pressure differences are driven by wind, temperature, and mechanical fans. When it is cold outside, warm indoor air is lighter and rises, creating higher pressure at the top of the house and lower pressure near the bottom. That pressure imbalance, known as the stack effect, pulls outdoor air through any gap it can find. A cracked caulk joint around a window is an open invitation.
The reason the draft feels so uncomfortable is convection. Still air is a decent insulator, but moving air continually removes the thin warm layer of air that surrounds your skin, which makes you feel colder even when the room is at 68 degrees F. This is the same principle as wind chill. Even a very slow draft near your head or shoulders can make a bedroom feel 3 to 5 degrees cooler than the thermostat reading.
Quality caulk works by forming a flexible, adhesive seal that bonds to both surfaces of a joint and stretches as the materials expand and contract. Siliconized acrylic and polyurethane formulas can stretch 25 to 50 percent of their joint width without breaking. That flexibility is what keeps a seal intact through years of seasonal swings, while cheap, rigid caulk cracks and lets air back in.
Frequently Asked Questions
▼ I recaulked my window but I still feel a draft. What did I miss?
The draft may be coming through the window itself rather than the trim. Check the sash gap, worn weatherstripping, or a failing glazing seal between the panes. Test again with an incense stick, and if the air moves at the sash, replace the weatherstripping or add a window insulation film kit.
▼ Can renters caulk windows without landlord permission?
Removable rope caulk and temporary weatherstripping are generally safe because they peel off without damage. Permanent caulk is usually a modification, so ask your landlord first. Many landlords approve it since it protects their property from moisture damage, and some will provide the materials.
▼ How long before I notice savings on my bill?
You will feel the comfort improvement the first night. Bill savings show up in the next full billing cycle, though it is easiest to see by comparing the same month year over year, adjusting for weather. Expect roughly 5 to 10 percent if your home had significant window leaks.
▼ What if my home is older than 30 years?
Older homes usually have more failed caulk and more leakage overall, so the payoff is often higher. The caveats are lead paint in pre-1978 homes and wood trim that may be soft or rotted. Inspect first, use lead-safe practices, and repair damaged wood before sealing.
▼ Why does my new caulk keep cracking or peeling?
The three usual causes are dirty or damp surfaces, a joint that is too wide for the caulk, and cheap caulk with limited flexibility. Remove all old material, clean thoroughly, use backer rod on wide gaps, and switch to a premium silicone-latex or polyurethane product.
Quick Tips
- Test every window on a windy day with an incense stick before you buy anything, so you know exactly which joints are leaking and can focus your effort there.
- Caulk in mild weather, ideally between 45 and 80 degrees F, so the joint is at a middle width and the caulk is neither stretched nor compressed when it cures.
- Cut the nozzle opening smaller than you think you need. You can always apply more caulk, but a bead that is too fat is harder to tool cleanly.
- Buy one tube to practice on a scrap piece of trim or cardboard before you work on a visible window to get a feel for pressure and speed.
- Check your caulk every fall. Look for hairline cracks, gaps, or color changes, and touch up small failures before winter arrives.
Variations for Your Situation
- Apartment/Rental: Start with removable rope caulk ($5 to $8) on stationary gaps and peel-and-stick foam weatherstripping on the sash ($8 to $12), then add a clear window insulation film kit ($10 to $15) for the coldest windows. Everything removes cleanly at move-out, and a typical bedroom can be done for under $30.
- Tight Budget (under $50): Spend $10 to $15 on one tube of quality exterior silicone-latex caulk and use a free incense stick to find the worst leaks. Prioritize bedroom and north-facing windows first, use painter’s tape you already have at home, and do one or two windows per weekend so the cost and effort stay spread out.
- Older Home (pre-1980): Expect wider gaps, brittle old caulk, and possibly lead paint, so use wet-scraping methods and a respirator, and follow EPA lead-safe practices. Use backer rod in wide joints, choose a paintable polyurethane caulk for wood trim, and inspect for rot before sealing so you do not trap moisture in the wall.