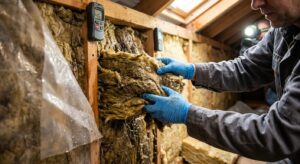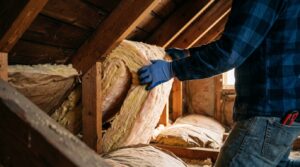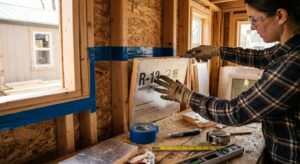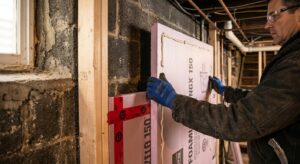
Heat rises, and in a typical house it rises straight out through the ceiling. If your attic insulation is thin, compressed, or full of gaps, you are effectively paying to heat the sky every night. The Department of Energy estimates that adding insulation and air sealing in the right places can save an average of 15 percent on heating and cooling costs, and the attic is almost always the best place to start.
The reason this upgrade feels so fast is that winter nights are when your furnace works hardest. With outdoor temperatures dropping and indoor air at 68 degrees, the temperature difference across your ceiling can easily exceed 40 degrees. A poorly insulated attic lets that heat escape all night long. Fix the ceiling and your furnace cycles less, your upstairs rooms stop feeling drafty, and your bill drops noticeably.
In this post, we cover how to figure out whether your attic needs help, a quick fix you can do in an afternoon for under $100, a full DIY blown-in upgrade, and when it makes sense to call a professional. We also cover the numbers, so you can decide whether the upgrade makes sense for your home.
What You’ll Need
Click on an item below to shop for the recommended items for this recipe on Amazon.
As an Amazon Associate, we earn from qualifying purchases.
How to Do It
- Measure your current insulation depth with a ruler in several spots. Fiberglass at about 3 inches per R-11 is a rough rule of thumb, so under 10 inches usually means there is room to improve.
- Seal the biggest air leaks first. Use expanding foam around plumbing stacks and wire penetrations, and fire-rated caulk or sheet metal around flues and chimneys.
- Seal and insulate the attic hatch. Glue rigid foam board to the back of the hatch door and add weatherstripping around the frame to stop a surprising amount of leakage.
- Lay unfaced fiberglass batts perpendicular to the existing joists to cover the tops of the joists and break thermal bridging.
- Check that nothing is covering soffit vents, and add baffles where needed to keep airflow open.
- Calculate your target. In most climates, aim for R-49 (about 14 to 16 inches of loose-fill cellulose or fiberglass). Colder zones may justify R-60.
- Air seal first: foam or caulk every penetration, cover recessed lights with rated covers, and seal the top plates of interior walls where you can reach them.
- Install ventilation baffles at every rafter bay along the eaves so insulation never blocks the soffit vents.
- Build a dam around the attic hatch, can lights, and any flue using rigid foam or sheet metal, and place depth markers every few feet so you can hit a consistent depth.
- Rent a blower, feed the bags, and blow insulation evenly from the far end of the attic back toward the hatch, filling to your depth markers.
- Insulate and weatherstrip the attic hatch last, then do a final check for missed spots or thin areas.
- Get at least three quotes and ask each contractor what R-value they will install and how they handle air sealing and ventilation.
- Request a pre-work blower door test or energy audit to identify the biggest leakage points.
- Make sure the scope includes air sealing, baffles, hatch insulation, and cleanup or removal of any wet or contaminated old insulation.
- Verify the final depth and R-value on the job, and ask for a post-work blower door reading if available.
- Apply for local utility rebates and tax credits before the work begins, since some require pre-approval.
Why It Works: The Benefits
Moving from R-19 to R-49 typically cuts attic heat loss by more than half, which translates to roughly 10 to 15 percent off total heating and cooling costs. For a home spending $2,000 a year on energy, that is $200 to $300 back every year.
Blown-in cellulose or fiberglass costs about $1.00 to $2.50 per square foot installed by a pro and as little as $0.60 to $1.00 per square foot DIY. A 1,000 square foot attic often pays for itself in 2 to 4 years, and under 2 years in colder climates with higher energy prices.
Rooms under the attic stop feeling chilly on winter mornings because the ceiling surface stays warmer. In summer, insulation also blocks radiant heat from a 130 degree attic, keeping bedrooms noticeably cooler.
With less heat escaping, the system reaches setpoint faster and cycles off sooner. Fewer cycles means less wear and can extend equipment life by a few years.
Heat leaking into the attic melts snow on the roof, which refreezes at the eaves. Better insulation and air sealing keep the roof deck cold and dramatically reduce ice dam formation.
💰 Savings Impact by Action
Raising attic insulation from R-19 to R-49 can cut total heating and cooling costs by 10 to 15 percent in cold and mixed climates.
Sealing attic bypasses and penetrations reduces uncontrolled air loss and can account for 10 to 15 percent savings on its own.
Insulating and weatherstripping a leaky attic hatch stops a surprising chimney of escaping heat, worth about 2 to 4 percent.
Sealing and insulating ducts running through the attic can recover up to 10 percent of conditioned air that would otherwise be lost.
Keeping soffit vents clear protects roof decks and insulation performance, indirectly preserving 3 to 5 percent in savings by preventing moisture damage.
🏠 Key Concepts Explained
The Science Behind It
Heat moves three ways: conduction, convection, and radiation. In a winter attic, conduction carries heat through ceiling joists and drywall, convection pushes warm air up through gaps in the ceiling, and radiation sends heat toward the cold roof deck. Insulation primarily fights conduction by trapping tiny pockets of still air, but it does little to stop convection through open holes. That is why air sealing is such a critical first step.
The savings from added insulation follow a law of diminishing returns. Going from R-11 to R-30 cuts heat loss by about 63 percent through that surface, while going from R-30 to R-49 trims another 20 percent or so. This is why homes with very little insulation see dramatic payback, and homes already near R-38 see more modest gains. Your starting point decides how fast the upgrade pays you back.
Winter nights amplify the benefit because heat flow is proportional to the temperature difference across the ceiling. When it is 15 degrees outside and 68 degrees inside, that difference is over 50 degrees, and a poorly insulated ceiling bleeds heat the whole time your furnace runs. Cutting that flow in half means the furnace runs substantially less, which is where the bill reduction shows up.
Frequently Asked Questions
▼ Why is my upstairs still cold after adding insulation?
The most common culprit is air leakage that was never sealed, such as gaps around ducts, can lights, and wall top plates. Do a smoke pencil or thermal camera check on a windy day, seal what you find, and also confirm that attic ducts are sealed and insulated, since leaky ducts can dump conditioned air into the attic.
▼ Can I put new insulation on top of old insulation?
Yes, as long as the old material is dry, mold-free, and not contaminated by pests or vermiculite. Add unfaced insulation on top so moisture does not get trapped between layers, and make sure you do not block soffit vents.
▼ How long before I actually notice savings on my bill?
You will often feel the comfort improvement within the first cold week. On your bill, compare heating-degree-day adjusted usage month over month, and expect the full effect to show over the first winter, with the clearest savings in January and February.
▼ What if my home is older than 30 years?
Older homes tend to have more air leaks, less insulation, and possible hazards like knob-and-tube wiring or vermiculite. Have an electrician confirm the wiring is safe to cover and test any suspicious loose-fill material before disturbing it, then prioritize air sealing since it pays off the most in leaky older construction.
▼ Is blown-in or batt insulation better for an attic?
Blown-in is usually better for existing attics because it fills around obstructions and irregular spaces without gaps. Batts work well in open, regular joist bays and are easier for small touch-ups, but poor fit leaves gaps that reduce real-world performance.
Quick Tips
- Check your insulation depth this weekend with a ruler. If you can see the tops of your ceiling joists, you almost certainly need more.
- Use a flashlight on a cold, clear night to look for frost or dark staining on attic insulation, which points to air leaks and moisture problems.
- Look up your utility company’s rebate programs and any federal energy tax credits before buying materials or hiring a contractor.
- Mark target depth on rafters or use cheap depth rulers so your blown-in layer ends up even across the entire attic.
Variations for Your Situation
- Apartment/Rental: You usually cannot access the attic, so focus on what you control. Use removable window insulation film ($15 to $25), draft stoppers at exterior doors ($10 each), and heavy thermal curtains ($30 to $60 per window) to cut winter heat loss. If you have a top-floor unit, ask the landlord about attic work and mention that many utilities offer free or discounted upgrades to property owners.
- Tight Budget (under $100): Skip the full insulation project and do the highest-value basics. Foam and caulk the biggest attic air leaks for about $30, insulate and weatherstrip the attic hatch for $20 to $30, and add a few bags of loose-fill or a roll of unfaced batts to the thinnest areas. This combination often delivers 5 to 8 percent savings for under $100.
- Older Home (pre-1980): Expect little or no air sealing, thin insulation, and possible hazards. Have the wiring checked before covering anything, test for vermiculite, and prioritize sealing the attic floor first, since older homes often have open chases, balloon framing gaps, and uninsulated duct runs. Plan for R-49 or more, and consider a professional energy audit with a blower door test.