Most homeowners assume their walls and attic are properly insulated because the house was built that way. Unfortunately, studies of new and existing homes routinely find missing batts, compressed fiberglass, gaps around framing, and voids behind wiring and plumbing. The U.S. Department of Energy estimates that air leakage and insulation defects together can account for 25 to 40% of the energy used for heating and cooling. The problem is that these defects are invisible from inside the room.
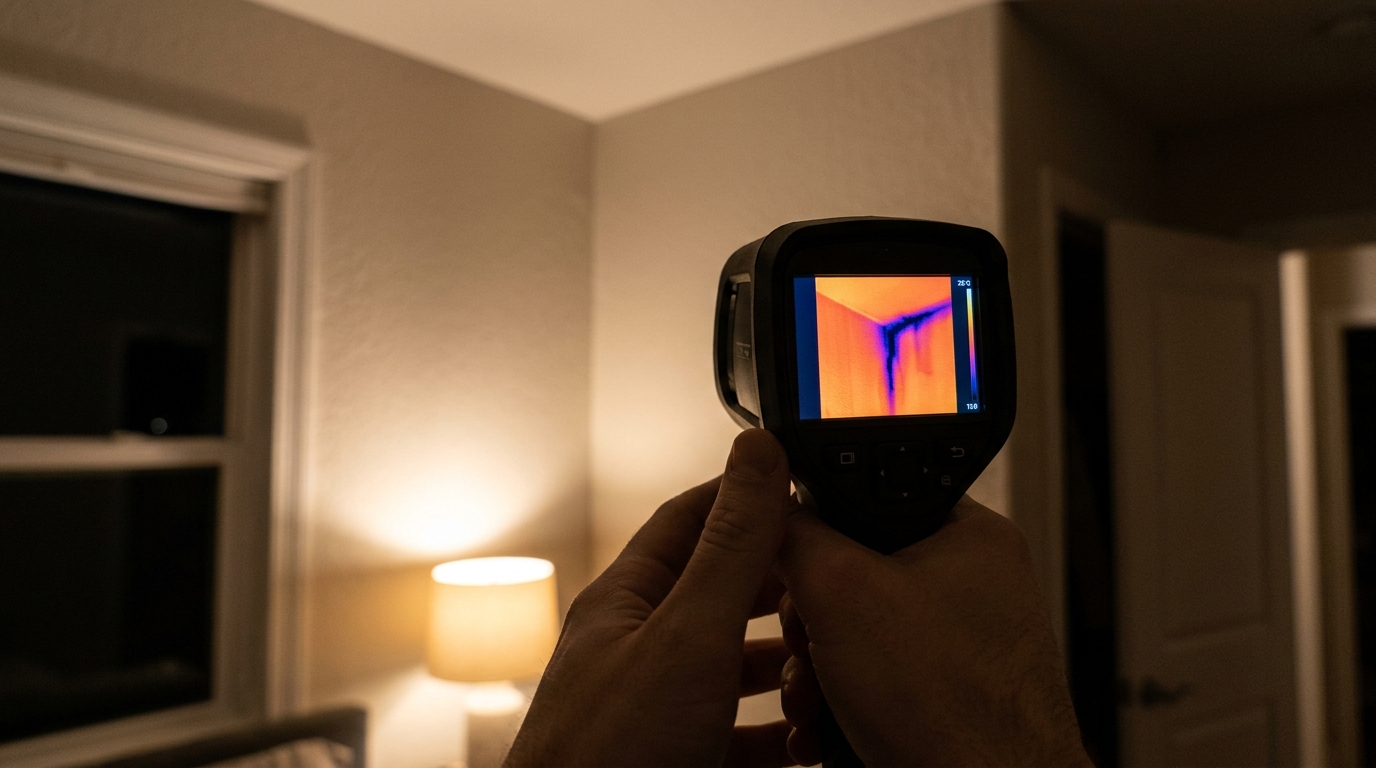
This is where thermal imaging comes in. An infrared camera does not see through walls, but it does show surface temperature differences that reveal what is happening behind them. Where insulation is missing, thin, or wet, the wall surface runs colder in winter and warmer in summer than the surrounding area. Those temperature patterns show up as bright or dark streaks, blotches, and stripes on the camera screen.
Timing matters more than most people realize. Scanning at night, when the temperature difference between indoors and outdoors is at its peak and the sun has not been heating exterior surfaces all day, gives you the clearest and most reliable images. This post walks through how to run your own nighttime scan, how to interpret what you see, and two practical paths for fixing what you find: a low-cost DIY scan with targeted repairs, and a professional audit for bigger or more complicated problems.
What You’ll Need
Click on an item below to shop for the recommended items for this recipe on Amazon.
As an Amazon Associate, we earn from qualifying purchases.
How to Do It
- Wait for the right conditions. Choose a night when the indoor and outdoor temperature difference is at least 15 to 20 degrees F, and start scanning 2 to 3 hours after sunset. Turn your heating or cooling system on and let the house stabilize for at least an hour beforehand.
- Prepare the house. Move furniture away from exterior walls, open curtains and blinds, and turn off ceiling fans. If you want to exaggerate air leaks, run a bathroom exhaust fan or kitchen hood for 10 minutes to slightly depressurize the home.
- Scan systematically. Start at the ceiling and work down each exterior wall in a slow, steady sweep, holding the camera 3 to 6 feet from the surface. Then check around windows, doors, outlets, recessed lights, attic hatches, and the junction where walls meet floors and ceilings.
- Mark what you find. Use painter’s tape or a pencil to mark suspicious cold or hot spots on the wall surface, and take both a thermal photo and a regular photo of each one so you can compare them later.
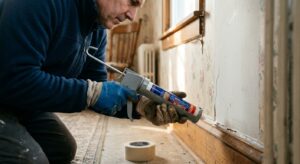
- Fix the air leaks first. Seal gaps around outlets with foam gaskets, caulk baseboards and trim, add weatherstripping to attic hatches and doors, and use expanding foam around penetrations where you can reach them. These repairs are cheap and usually deliver the fastest payback.
- Re-scan after repairs. Repeat the scan on another night with similar conditions to confirm the cold spots have improved, and note any remaining problem areas to address with added insulation or professional help.
- Find a certified auditor. Look for a BPI (Building Performance Institute) or RESNET certified professional, and ask whether they combine a blower door test with infrared imaging. This pairing is far more effective than either test alone.
- Prepare the house. Clear access to the attic, crawl space, and exterior walls, and tell the auditor about any rooms with comfort problems, high bills, or past moisture issues.
- Let the auditor run the blower door test. A powerful fan depressurizes the house so that leaks become obvious on the thermal camera, revealing air pathways that a passive scan can miss. This is the single biggest advantage of a professional audit.
- Review the report together. A good audit produces thermal images, a measured air leakage rate (in ACH50 or CFM50), and a prioritized list of repairs with estimated costs and savings. Ask the auditor to rank the fixes by payback period.
- Complete the repairs in order of priority. Typically that means air sealing first, then attic insulation to the recommended level (R-38 to R-60 depending on your climate zone), then wall insulation if the scan shows significant voids. Many contractors can add dense-pack cellulose through small holes in the wall, then patch and paint.
- Schedule a follow-up test. Ask the auditor to repeat the blower door test after the work is done to confirm results. A reduction of 20 to 40% in measured leakage is common and gives you documented proof for resale or rebate claims.
Why It Works: The Benefits
Fixing insulation gaps and the air leaks they usually accompany can reduce HVAC energy use by 10 to 25%, which is roughly $150 to $450 per year for a household spending $1,800 annually on conditioning.
Rather than blowing insulation into every wall or upgrading the whole attic, you fix only the problem spots. This often cuts project cost by 50% or more compared to whole-house upgrades.
Rooms that never feel comfortable usually have a specific defect behind the wall. Finding and correcting it can reduce temperature swings in a room by 3 to 5 degrees F.
Thermal imaging can flag wet insulation before mold or rot becomes visible, potentially saving thousands in repairs.
Knowing where heat is actually escaping lets you prioritize the highest-impact projects first, so each dollar spent produces more savings.
💰 Savings Impact by Action
Sealing the leaks revealed by thermal imaging can cut heating and cooling energy use by 10 to 20% in typical homes.
Bringing attic insulation up to R-38 to R-60 can reduce heat transfer through the ceiling by 15 to 25%.
Filling empty or compressed wall cavities with dense-pack insulation reduces wall heat loss by roughly 10% of total home energy use.
Drying and replacing wet insulation restores lost R-value and prevents the 5% or greater efficiency loss from damp material.
Leaky ducts in unconditioned spaces can waste up to 20 to 30% of airflow, and sealing them often saves around 12% on HVAC costs.
🏠 Key Concepts Explained
The Science Behind It
Every object emits infrared radiation based on its temperature, and a thermal camera converts that radiation into a color map of surface temperatures. In a well-insulated wall, the interior surface stays close to room temperature because the insulation slows heat flow from the warm indoors to the cold outdoors. Where insulation is missing, thin, or damaged, heat moves more freely, so the inside surface of the wall drops in temperature during winter and rises in summer. The camera picks up those differences even when they are only 1 or 2 degrees F.
The reason nighttime is best comes down to eliminating noise. During the day, the sun heats exterior surfaces, and that stored heat slowly migrates inward for hours after sunset, which can hide or distort the signal from the insulation. By the middle of the evening, those walls have shed their stored solar heat, and the temperature of the interior surface is driven almost entirely by what is happening inside the wall cavity. A larger indoor-to-outdoor temperature difference also amplifies the effect, so a 30 degree F difference gives a clearer picture than a 10 degree F one.
Air movement adds a second layer to the story. Insulation works by trapping still air in tiny pockets, and when air can flow through or around it, performance drops sharply. Research from Oak Ridge National Laboratory and others has shown that gaps as small as 2 to 5% of the wall area can reduce the effective R-value of the assembly by 25% or more. This is why even small voids behind outlets or at the top and bottom of wall cavities matter, and why thermal imaging is so effective at finding them.
Frequently Asked Questions
▼ My thermal camera shows stripes on every wall. Does that mean my insulation is bad?
Not necessarily. Vertical stripes spaced 16 or 24 inches apart are the wood studs, which conduct more heat than the insulation between them, and they appear on nearly every wall. Look instead for irregular blotches, large cold or hot areas, or patterns that break the regular stud rhythm, since those suggest missing or displaced insulation.
▼ Can I do a thermal scan during the day or in mild weather?
You can, but results will be less reliable. You need at least a 15 degree F difference between indoor and outdoor temperatures, and daytime sun can mask or mimic defects for hours. If you cannot wait for a cold night, try scanning shaded north-facing walls in the early morning, or use a blower door test to boost the contrast.
▼ How much will fixing the gaps actually save me?
Savings vary, but most homeowners who air seal and fix obvious insulation voids see 10 to 20% reductions in heating and cooling costs, according to ENERGY STAR data. For a typical $1,800 annual HVAC bill, that is $180 to $360 per year, and many air sealing projects pay for themselves in under a year.
▼ Is a smartphone thermal camera good enough, or do I need a professional one?
For homeowner use, a mid-range smartphone attachment with at least 160 by 120 resolution is plenty to spot meaningful gaps and air leaks. Professional cameras have higher resolution and better sensitivity, which helps with subtle defects, but the real advantage of a pro audit is the blower door test and the expertise in interpreting results.
▼ I found a big cold spot but opening the wall shows insulation. What now?
The insulation may be compressed, wet, or have air flowing around it instead of through it. Check for moisture first with a moisture meter. If it is dry, the issue is likely poor installation or convective looping, and the fix is usually to dense-pack the cavity or add an air barrier, which a contractor can do.
Quick Tips
- Keep a simple log of each scan with the date, indoor and outdoor temperatures, and photos so you can compare before and after results.
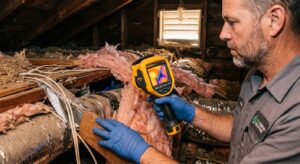
- Scan the attic floor from inside the attic too, since thin, uneven, or compressed insulation there is often the single biggest source of heat loss.
- Pay special attention to the rim joist area, the top plate of walls, and corners where walls meet the ceiling, which are the most common hidden leak sites.
- Check your utility’s website for rebates on air sealing and insulation, since many cover 30 to 75% of project costs after an audit.
Variations for Your Situation
- Apartment/Rental: You cannot modify insulation, but you can still scan for drafts around windows, doors, and outlets and then fix them with removable weatherstripping, foam outlet gaskets, and temporary window film for under $50 total. Document anything structural with photos and send it to your landlord, since many will fix documented problems.
- Tight Budget (under $50): Skip buying a camera and borrow one from a local library, utility lending program, or a neighbor, since many utilities and tool libraries offer free loans. Combine that with caulk ($6), outlet gaskets ($10), and weatherstripping ($12) to handle the most common air leaks.
- Older Home (pre-1980): Expect more extensive problems, including settled or missing wall insulation, unsealed attic bypasses, and leaky ductwork. Before disturbing any old insulation, particularly gray granular material that could be vermiculite, have it tested for asbestos, and consider hiring a professional for blown-in wall insulation since lath and plaster walls are tricky to retrofit.
- Hot Climate (Sun Belt): Flip the logic and scan in the early evening in summer when the attic and walls are still releasing heat, focusing on the ceiling plane and west-facing walls. The same gaps that leak heat out in winter let it in during summer, and attic air sealing and radiant barriers often give the best returns.