Walk into almost any home improvement store in summer and you will find attic fans marketed as a simple solution to high cooling bills. The pitch is straightforward: pull hot air out of the attic, reduce heat gain through the ceiling, and your air conditioner works less. In theory, that is correct. In practice, a poorly installed or misused attic fan can do the opposite, robbing your living space of cooled air and forcing your AC to work overtime.
The problem comes down to air pressure and building tightness. Most homes, especially those built before 1990, have dozens of small gaps and penetrations between the attic and the living space: recessed lights, plumbing chases, attic hatches, and HVAC duct seams. When an attic fan creates negative pressure in the attic, it does not just pull outdoor air in through soffit vents. It also pulls conditioned 72-degree air up from your living room through every one of those gaps. Your AC then has to replace all of that lost air, and your energy bill climbs.
This post will help you figure out whether your attic fan is actually saving you money or quietly draining it. You will learn the simple tests to run, the fixes that cost little to nothing, and when it makes sense to upgrade to a solar-powered or whole-house ventilation strategy instead. Real numbers are included so you can make an informed decision before summer peak rates hit.
What You’ll Need
Click on an item below to shop for the recommended items for this recipe on Amazon.
As an Amazon Associate, we earn from qualifying purchases.
How to Do It
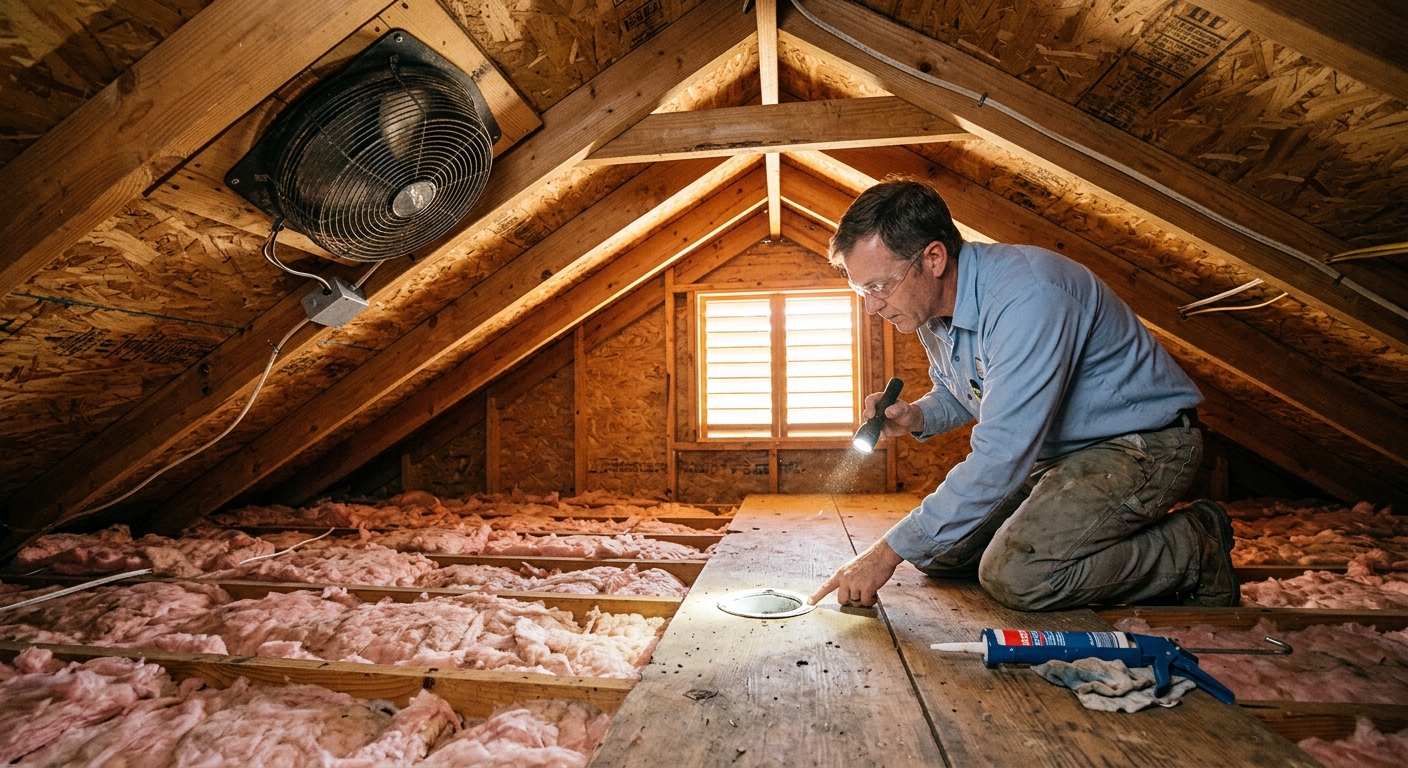
- On a hot afternoon, go to your attic access and crack it open about 2 inches while the attic fan is running. Hold a piece of tissue paper at the gap. If it gets sucked upward into the attic rather than pushed down, your fan is pulling conditioned air from the living space and this is your primary problem.
- Locate the thermostat dial on the attic fan housing (usually a small dial near the motor). If it is set below 100 degrees Fahrenheit, raise it to 110 degrees. This prevents the fan from running when attic temps are only slightly above outdoor air, which provides minimal cooling benefit.
- Go outside and inspect your soffit vents and any ridge or gable vents. If you can see paint, insulation, or debris blocking more than 20% of the vent openings, clear them. Blocked vents starve the fan of makeup air and force it to pull from the living space.
- Turn the fan off at the switch or breaker during the cooler evening hours (below 85 degrees Fahrenheit outdoors). Running the fan at night when outdoor air is already cool provides almost no attic cooling benefit and only wastes electricity.
- Check whether your attic hatch has weatherstripping and a rigid foam insulation cover on the attic side. If not, note this as your first DIY upgrade target since the hatch is one of the largest single air leakage points in most homes.
- Calculate whether your fan is properly sized for your attic. Measure your attic floor area in square feet and multiply by 0.7 to get the minimum CFM rating needed. A 1,500 square foot attic needs at least a 1,050 CFM fan. An undersized fan strains to move air and an oversized fan creates excessive negative pressure.
- Inspect and calculate net free vent area. Add up all soffit, ridge, and gable vent openings. You need at least 1 square foot of net free area for every 150 CFM of fan capacity. If your 1,200 CFM fan has only 4 square feet of vent area, add soffit vent baffles or additional vents before running the fan aggressively.
- Seal recessed light fixtures from the attic side using fire-rated caulk or pre-made airtight covers designed for recessed lights. Each unsealed recessed can is a 4 to 6 square inch hole directly into the living space. A typical home has 10 to 20 of them.
- Seal plumbing vent pipes, electrical wire penetrations, and top plates of interior walls where they meet the attic floor using fire-rated caulk or low-expansion spray foam. These small gaps collectively add up to the equivalent of a basketball-sized hole in your ceiling.
- Install a rigid foam attic hatch cover on the attic side of your pull-down stairs or hatch, and add adhesive foam weatherstripping around the hatch frame perimeter. A bare attic hatch can have an effective R-value as low as R-1, making it a massive thermal bypass.
- After completing the air sealing, run the fan again and repeat the tissue paper test at the sealed hatch. If the tissue no longer gets pulled upward, your fixes are working. Monitor your electricity bill over the next billing cycle to confirm reduced AC runtime.
- Evaluate whether a powered attic fan is even the right tool. If your attic already has adequate passive ventilation (1 square foot of vent area per 150 square feet of attic floor per building code), adding a powered fan may create more problems than it solves. Passive ridge-and-soffit ventilation systems are often sufficient and carry zero operating cost.
- If you decide to replace or add a fan, choose a solar-powered model rated for your attic size. Solar fans consume no grid electricity, eliminating the scenario where your cooling savings are eaten by the fan’s own power draw, which can be 200 to 500 watts for electric models running 8 hours per day.
- For the solar fan installation, choose a south or west facing roof slope for maximum solar gain during the hottest afternoon hours. Mount according to manufacturer instructions and ensure flashing is properly integrated with shingles to prevent roof leaks.
- Consider a whole-house fan as an alternative or complement if your climate has cool nights (outdoor temps dropping below 70 degrees Fahrenheit regularly). A whole-house fan installed in the ceiling between the living space and attic can cool an entire home in 15 to 30 minutes on cool evenings, using 90% less energy than central AC.
- After any fan upgrade, have your attic insulation level assessed. If you are below R-38 in a hot climate or R-49 in a very cold climate, adding blown-in insulation will deliver larger cooling and heating savings than any fan upgrade alone, typically paying back in 3 to 5 years.
Why It Works: The Benefits
A correctly sized and properly vented attic fan can lower attic temperatures by 20 to 40 degrees Fahrenheit on a hot day, reducing the radiant heat pushing through your ceiling and cutting cooling load by up to 10%.
When attic temperatures drop from 150 degrees to 110 degrees, the temperature differential driving heat into the living space decreases by roughly 25%, meaning your AC cycles less and your compressor accumulates fewer run hours over the season.
Chronic attic heat above 130 degrees Fahrenheit accelerates asphalt shingle degradation. Proper attic ventilation can extend shingle life by 5 to 10 years, a meaningful return given that a full reroof costs $10,000 to $20,000.
In cold climates, attic fans that are properly set or seasonal prevent moisture buildup from household air that migrates upward, reducing the risk of mold, wood rot, and insulation damage that costs thousands to remediate.
💰 Savings Impact by Action
Sealing attic floor bypasses eliminates conditioned air loss driven by attic fan negative pressure, reducing cooling energy waste by up to 20% in leaky homes.
Raising the attic fan thermostat to 110 degrees Fahrenheit reduces unnecessary fan runtime by 30 to 50%, cutting the fan’s own electricity consumption and reducing conditioned air loss hours.
Clearing blocked soffit vents restores proper makeup air flow, allowing the fan to draw outdoor air instead of conditioned air and improving attic temperature reduction by up to 10%.
Replacing a 350-watt electric attic fan with a solar-powered equivalent eliminates $15 to $25 per month in fan operating costs while maintaining attic cooling benefits.
Upgrading attic insulation to R-38 reduces the rate of heat transfer through the ceiling by up to 40%, delivering 15 to 17% annual cooling savings regardless of fan type.
🏠 Key Concepts Explained
The Science Behind It
The physics at work here come down to pressure differentials and the path of least resistance. An attic fan is essentially a large exhaust system. It removes air from the attic and that air must be replaced. In an ideal installation, replacement air flows in through soffit vents at the roof eaves, travels across the attic floor, and exits through the fan. This continuous flow sweeps heat out of the attic and lowers the temperature of the surface your ceiling insulation is resting against, reducing the rate of heat transfer into the living space.
The problem is that most existing homes have attic floors that are far from airtight. The International Energy Conservation Code requires homes built after roughly 2012 to meet specific air leakage standards, but older homes were built with little attention to air sealing between the attic and living space. Electrical boxes, plumbing vents, recessed light cans, and the gaps at interior wall top plates collectively create what building scientists call a thermal bypass: a direct air pathway that bypasses the insulation entirely. When your attic fan depressurizes the attic by 5 to 10 Pascals, which is a small but meaningful pressure difference, air rushes through these bypasses from the living space below. Studies from the Florida Solar Energy Center found that in leaky homes, powered attic ventilators can actually increase whole-house energy consumption by 50% or more compared to passive ventilation because of this conditioned air loss.
Temperature differential also matters for understanding when the fan is useful versus wasteful. Heat flows from hot to cold, and the rate of flow is proportional to the temperature difference. If your attic is at 150 degrees and your living space is at 75 degrees, there is a 75-degree differential driving heat through your ceiling. Lowering the attic to 110 degrees reduces that differential to 35 degrees, cutting the heat flow rate roughly in half. But if outdoor air is already 95 degrees and your attic is only 105 degrees, running a powerful fan to achieve a 10-degree reduction in attic temperature while simultaneously pulling 75-degree conditioned air out of the house is clearly a losing trade. This is why thermostat set points and operating schedules matter so much, and why a fan that runs continuously regardless of conditions is more liability than asset.
Frequently Asked Questions
▼ My attic fan is running but my upstairs still feels hot. What is wrong?
The most likely culprits are inadequate soffit ventilation starving the fan of outdoor air, a fan thermostat set too low causing it to run even when attic temps are only slightly elevated, or significant attic air leakage causing the fan to pull conditioned air rather than outdoor air. Start with the tissue paper test at your attic hatch to confirm whether conditioned air loss is happening, then inspect your soffit vents for blockage.
▼ Can an attic fan actually cause my energy bills to go up?
Yes, and this is well-documented in building science research. In homes with leaky attic floors, powered attic ventilators can pull conditioned air out of the living space faster than the AC can replace it, increasing cooling energy use by 10 to 50% compared to passive ventilation alone. The fix is to air seal the attic floor before relying on any powered fan.
▼ How do I know if my attic has enough passive venting for the fan?
Measure the total net free area of all your soffit, ridge, and gable vents in square feet and multiply by 150. That gives you the maximum CFM of fan capacity your vent system can support without going into negative pressure. If your fan’s rated CFM exceeds that number, you either need more vents or a smaller fan.
▼ Is it safe to run my attic fan overnight?
Running the fan overnight when outdoor temperatures drop below 80 degrees provides essentially zero attic cooling benefit since attic temperatures will be close to outdoor air temperature anyway. Overnight operation just runs up electricity costs and maintains unnecessary negative pressure on the house. Use a timer or programmable thermostat to restrict operation to the hottest afternoon hours, typically 1 PM to 7 PM.
▼ Should I just remove my attic fan entirely and switch to passive ventilation?
If your home has adequate soffit and ridge venting meeting the 1-to-150 ratio and your attic floor is well sealed and insulated to at least R-38, passive ventilation often performs comparably to powered fans in moderate climates and eliminates all the associated risks. In hot humid climates like the Southeast, a properly installed and correctly sized powered or solar fan on a good vent system can still deliver a net benefit. Have an energy auditor assess your specific setup before removing existing equipment.
Quick Tips
- Set your attic fan thermostat to 110 degrees Fahrenheit minimum. Running it below this threshold provides little benefit and maximum conditioned air loss risk.
- Add attic insulation baffles at the eaves before increasing fan capacity. Without clear airflow channels from soffit to attic, more fan power just means more suction on the living space.
- Insulate and weatherstrip your attic hatch first. It is the single largest individual bypass in most homes and costs under $30 to fix with rigid foam and adhesive foam tape.
- Check your attic fan’s power consumption. A 350-watt electric attic fan running 10 hours per day in summer consumes about 105 kWh per month, costing $12 to $18 and potentially offsetting any cooling savings it produces.
Variations for Your Situation
- Apartment or Condo: Residents in multi-family buildings have no access to attic spaces and no control over attic ventilation systems. Focus instead on reducing heat gain at the window level with cellular blinds or reflective window film (15 to 25% reduction in solar heat gain), sealing gaps around window AC units with foam tape, and keeping interior doors open to equalize air pressure and reduce the strain on individual room units.
- Tight Budget (under $50): Skip any equipment purchases and focus entirely on the free and near-free fixes: raise the existing fan thermostat to 110 degrees Fahrenheit, clear blocked soffit vents with a brush, add adhesive foam weatherstripping around the attic hatch (under $8 at any hardware store), and set the fan on a timer or manual schedule limited to afternoon hours. These steps alone can eliminate the conditioned air loss problem in many homes at zero to minimal cost.
- Older Home (pre-1980): Homes built before 1980 typically have much higher attic floor leakage rates due to construction practices that made no attempt to separate the thermal envelope from the attic. Air sealing is even more critical and more rewarding in these homes. Budget $200 to $500 for a thorough DIY sealing project using fire-rated caulk and spray foam, and consider hiring a certified energy auditor for a blower door test (around $300 to $500) to quantify your leakage and prioritize sealing locations before investing in any fan upgrades.