Your furnace and air conditioner work hard every single day, but a good portion of that effort quietly escapes through spots your insulation never reached. Builders are required to meet minimum code, but code minimums are not the same as optimal, and certain areas are so awkward or easy to overlook that they get skipped entirely. The result is a home that feels drafty in winter, stuffy in summer, and costs more to condition than it should.
The Department of Energy estimates that air sealing and insulation improvements together can reduce heating and cooling costs by 15 to 30% in a typical home. The biggest gains usually come not from adding more insulation to places that already have some, but from finding the spots where there is nothing at all. Those gaps act like open windows, letting conditioned air stream out and outdoor air pour in around the clock.
This post walks you through the six locations where insulation is most commonly absent or severely deficient, explains why each one matters, and gives you a clear path to fix them yourself or know when to call a pro. Whether you have an afternoon and $50, or you are ready for a more thorough upgrade, you will find a starting point here.
What You’ll Need
Click on an item below to shop for the recommended items for this recipe on Amazon.
As an Amazon Associate, we earn from qualifying purchases.
How to Do It
- Check your attic hatch or pull-down stair cover. Press your hand against it on a cold day. If it feels cold, cut a piece of rigid foam board (R-10 minimum) to fit the attic side and attach it with construction adhesive. Add self-adhesive foam weatherstripping around the perimeter of the frame. This single fix costs under $20 and is one of the highest-return insulation improvements in any home.
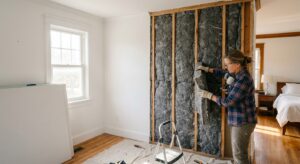
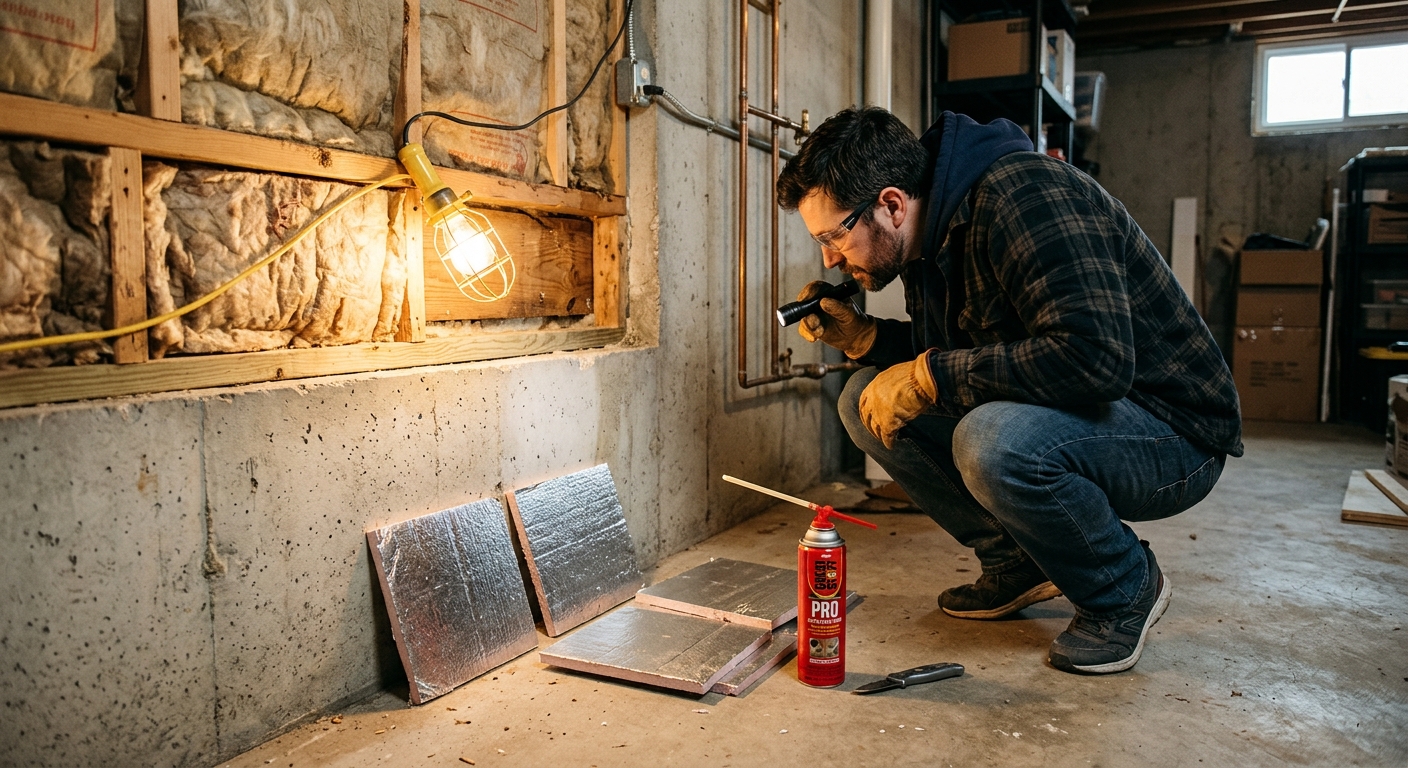
- Locate your rim joists in the basement or crawlspace. These are the short horizontal boards that sit on top of your foundation wall and support your floor framing. Cut pieces of 2-inch foil-faced rigid foam board to fit snugly in each joist bay, then seal all four edges with canned spray foam. This brings each bay to roughly R-10 and stops both conduction and air leakage.
- Inspect recessed light fixtures in top-floor ceilings. From the attic side, look for IC-rated, airtight (ICAT) labels. If the fixture is not labeled ICAT, do not cover it with insulation. Instead, build a simple drywall box around it with at least 3 inches of clearance on all sides, seal the box to the ceiling drywall with caulk, then insulate over the top.
- Look at the top plates of interior walls in the attic. These are often open to the attic air above and allow stack-effect air movement into the wall cavity. Use canned spray foam or fire-rated caulk to seal along the top plate before adding or restoring blown insulation.
- Check the area around your whole-house attic fan if you have one. Most attic fan covers are poorly insulated or completely open in winter. Purchase or build an insulated cover that sits over the fan opening during the heating season.
- Attic Hatch: Build or purchase an attic hatch cover box from rigid foam insulation with a minimum R-20 rating. Glue layers of 2-inch polyisocyanurate foam board together, seal all seams with foil tape, and add a handle for easy removal. Apply self-adhesive foam weatherstripping to the hatch frame opening so the box creates an airtight seal when closed.
- Rim Joists: Measure and cut 2-inch foil-faced polyisocyanurate foam board for all rim joist bays around the full perimeter of your foundation. Press each piece firmly into the bay and seal all edges with low-expansion spray foam. For rim joists in unconditioned crawlspaces, also consider adding a 6-mil poly vapor barrier across the ground surface and sealing it to the foundation walls.
- Garage Ceiling Below Living Space: Confirm the ceiling between an attached garage and living space above is insulated to at least R-19. If batts are sagging or missing, replace them with friction-fit R-19 or R-21 batts in 2×6 framing. Seal all penetrations, including wires, pipes, and ductwork, with fire-rated caulk or foam before installing batts, as this is also a fire and carbon monoxide separation.
- Kneewall Cavities in Finished Attics: In a Cape Cod or finished attic space, the sloped ceiling meets a short vertical wall called a kneewall. The floor behind this wall is often uninsulated. Install R-30 batts in the floor joist bays behind the kneewall and add rigid foam or batt insulation to the kneewall face itself, then staple a continuous air barrier such as house wrap or rigid foam sheathing across the entire kneewall surface to stop convective looping.
- Band Joist in Two-Story Homes: At each floor level in a multi-story home, there is often a band or header joist between floors. Access this from the interior by removing a small section of drywall or, if accessible, from the exterior. Fill each bay with spray foam or cut-and-cobble rigid foam sealed with canned foam, targeting R-10 minimum.
- Crawlspace Walls and Floor: If your crawlspace is vented, insulate between the floor joists above it using R-19 or R-25 batts held up with wire supports or netting. If converting to a conditioned crawlspace (sealed and connected to house air), instead insulate the crawlspace walls with 2-inch rigid foam and seal all vents, then consult local code on vapor and radon requirements before proceeding.
- Schedule a certified home energy auditor or BPI-certified contractor to perform a blower door test combined with an infrared thermal imaging scan. The blower door depressurizes your home so the auditor can pinpoint every air leak using the thermal camera. This takes 2 to 3 hours and costs $200 to $400 on its own, but many utilities offer it free or subsidized.
- Review the audit report, which will rank improvements by cost-effectiveness. Ask the auditor to prioritize the six problem areas covered in this post and get itemized quotes so you can compare what each fix costs versus what it saves annually.
- Hire an insulation contractor to air-seal the attic floor thoroughly before adding blown insulation. Skipping the air sealing step and just blowing more insulation is the most common contractor mistake. Insist that all top plates, penetrations, and recessed fixtures are sealed with foam or caulk before any insulation is added.
- For rim joists and crawlspaces, choose a contractor experienced with spray foam if you want a single-step solution that provides both air sealing and insulation simultaneously. Closed-cell spray foam at 2 inches delivers approximately R-12 and creates a Class II vapor retarder in one application.
- After installation, request a post-installation blower door test to verify that air leakage has actually been reduced. A well-executed project should reduce your home’s air changes per hour (ACH50) by 20 to 40%. Reputable contractors will include this verification or provide it at minimal cost.
Why It Works: The Benefits
Addressing these six locations typically reduces annual energy costs by 15 to 30%, translating to $200 to $600 per year for a home spending $1,500 to $2,000 annually on energy.
Cold floors, drafty corners, and rooms that never reach the thermostat setpoint are almost always caused by missing insulation in rim joists, crawlspaces, or kneewalls. Fixing these areas can bring room temperatures within 2 to 4 degrees Fahrenheit of the thermostat setting even on the coldest days.
When your home holds conditioned air better, your furnace and AC run fewer cycles per day. This directly extends equipment life and can reduce maintenance costs over time.
Uninsulated gaps in the building envelope are also uncontrolled air pathways. Sealing and insulating these spots reduces infiltration of outdoor allergens, humidity, radon, and exhaust fumes from attached garages.
A tighter, better-insulated envelope allows you to right-size HVAC equipment at replacement time, meaning a smaller, less expensive system can handle your load. This compounds savings well beyond the insulation work itself.
💰 Savings Impact by Action
Insulating and air sealing rim joists reduces foundation-level infiltration and conductive loss by up to 15% of total heating energy in homes with uninsulated basements.
An uninsulated attic hatch acts as a direct thermal bridge to the outdoors, and adding an R-20 cover can reduce attic-related heat loss by up to 8% in homes where this has been neglected.
Adding R-19 batts or converting to a conditioned crawlspace reduces floor heat loss and cold-floor complaints, cutting crawlspace-related energy waste by 10 to 15%.
Insulating and air-sealing kneewall cavities in finished attic spaces stops convective looping that can reduce effective R-value of existing insulation by up to 40%.
Sealing open wall top plates in the attic before adding blown insulation reduces stack-effect air movement and improves the real-world performance of attic insulation by 10% or more.
🏠 Key Concepts Explained
The Science Behind It
Heat flows from warm to cold through three mechanisms: conduction, convection, and radiation. In a missing-insulation scenario, all three are working simultaneously. The rim joist, for example, loses heat by conduction through the wood and concrete, by convection as air infiltrates the small gaps between framing and foundation, and by radiation from the warm basement air to the cold concrete wall. Insulation interrupts conduction and, when combined with an air barrier, also stops convection, which is why the combination of air sealing plus insulation outperforms either measure alone by a wide margin.
The stack effect is particularly important for understanding why the top and bottom of your home matter most. Physics dictates that warm air is less dense than cool air, so it rises and exits through any available gap near the ceiling or roof. This creates a zone of negative pressure at the bottom of the house, which draws cold outside air in through rim joists, crawlspace vents, and foundation gaps. The greater the indoor-outdoor temperature difference, the stronger this pressure gradient. In a cold climate, this effect can move hundreds of cubic feet of air per hour through gaps that add up to less than a square foot in total area.
R-value continuity explains why a single weak link in the thermal envelope is so costly. Heat always takes the path of least resistance, and the difference in thermal resistance between a well-insulated wall section and an uninsulated rim joist or open attic hatch is enormous. A rim joist bay with no insulation might have an effective R-value of 3 to 5, while the adjacent wall cavity is at R-13 or higher. Heat preferentially flows through the weak spots at a rate that is dramatically disproportionate to their physical size. This is why fixing a small number of missing-insulation locations produces savings that seem larger than the area involved would suggest.
Frequently Asked Questions
▼ I added insulation to my attic but my heating bill barely changed. What went wrong?
The most common reason is that air sealing was skipped before the insulation was added. Blown insulation that sits over open top plates, unsealed recessed lights, and gaps around plumbing stacks provides far less benefit than the R-value label suggests because air moves freely through it. Schedule a blower door test to see your actual air leakage rate. If it is above 5 to 7 ACH50 in a typical home, go back and seal before expecting major bill reductions.
▼ Can renters do any of this without landlord permission?
Yes, several items require no permanent modification. A removable insulated attic hatch cover can be placed and removed without tools. Draft snakes along doors, insulating window inserts, and outlet gaskets on exterior walls are all renter-safe. For bigger items like rim joists or crawlspaces, write to your landlord with the projected savings and payback period. Many landlords will approve or even fund improvements that increase property value and reduce tenant complaints.
▼ How do I know if my crawlspace insulation is actually doing anything?
Walk barefoot across your first floor on a cold morning. If floors feel significantly colder than the room air temperature, the crawlspace insulation is failing, missing, or has fallen down. Batt insulation in floor joists often sags or falls over time, losing contact with the subfloor and dropping its effective R-value close to zero. Inspect the crawlspace with a flashlight and look for batts that are hanging, compressed, wet, or missing entirely. Replace sagging batts with properly supported replacements, or consider a conditioned crawlspace conversion for a more durable long-term solution.
▼ What if I find old vermiculite insulation in my attic?
Stop and do not disturb it. Vermiculite from the Libby, Montana mine (the dominant source until 1990) is likely contaminated with asbestos. Contact a certified asbestos testing lab to collect a sample, as this requires special handling. If the test comes back positive, hire a licensed asbestos abatement contractor before any additional insulation or air sealing work proceeds in the attic.
▼ My home is only 10 years old. Do I really have missing insulation in these spots?
Possibly, yes. Code compliance at the time of construction does not guarantee thorough installation. Rim joists are frequently under-insulated even in newer homes because they are awkward to detail correctly during framing. Attic hatches are often forgotten entirely. A quick physical check of each of the six locations takes less than an hour and will tell you definitively what you have. Thermal imaging during an energy audit is even more reliable if you want a complete picture.
Quick Tips
- On a cold windy day, hold a stick of incense near suspected gaps around rim joists, attic hatches, and recessed lights. The smoke will visibly bend toward any air leak, making it easy to pinpoint exactly where to focus your sealing efforts.
- When cutting rigid foam board, score it deeply with a utility knife and straightedge, then snap it cleanly. A single sheet of 2-inch polyisocyanurate covers about 32 square feet and costs $25 to $35, making it one of the most cost-effective insulation materials per R-value available at a home improvement store.
- Prioritize improvements in this order for fastest payback: attic hatch, rim joists, then kneewall floors. These three alone account for the majority of missing-insulation heat loss in most homes built before 2000.
- If you add blown insulation to an attic, install depth markers (simple rulers stapled to a rafter) before you start so you can confirm you have hit your target depth when the job is done. Settling of 10 to 15% is normal in the first year.
- Check your local utility’s rebate programs before buying materials. Many utilities rebate $0.10 to $0.20 per square foot of insulation added, and some offer instant discounts at participating retailers that reduce your out-of-pocket cost significantly before any bill credit.
- Take photos of completed work in crawlspaces and rim joist bays before closing them up. If you ever sell your home, documentation of insulation upgrades adds credibility to energy-efficient marketing claims and may be required for certain green certification disclosures.
Variations for Your Situation
- Apartment or Condo: Renters cannot modify insulation in walls, attics, or crawlspaces, but they can address the interior-facing symptoms. Use removable window insulation film kits ($20 to $40 per window) to add a secondary air barrier on drafty windows. Install foam gaskets behind outlet and switch cover plates on exterior walls ($5 for a pack of 10). Place a draft stopper at the base of the front door and any doors leading to unheated common areas. These steps cost under $100 total and can reduce drafts noticeably even in poorly insulated buildings.
- Tight Budget Under $50: Focus entirely on the attic hatch and rim joists. A sheet of 2-inch rigid foam ($30), a can of spray foam ($8), and a roll of foil tape ($10) covers both fixes. The attic hatch alone can be completed for under $20 using leftover foam and self-adhesive weatherstripping. These two locations deliver the highest return per dollar of any insulation improvement in most homes and require no special tools or skills.
- Older Home Pre-1980: Homes built before modern energy codes typically have little or no insulation in rim joists, unfinished knee walls, and sometimes even attic floors. Before adding any insulation, have the home tested for asbestos in existing materials and lead paint on surfaces you might disturb. Prioritize air sealing even more heavily than in newer homes, since the cumulative leakage area in an older house can be equivalent to leaving a window open year-round. A professional blower door test is worth the investment here because the improvement potential is large and you want to know exactly where to focus your effort.