Vapor barriers are one of the most misunderstood products in residential construction. Homeowners and even some contractors install them with the best intentions, hoping to keep moisture out of walls and crawl spaces. But when a vapor barrier is placed on the wrong side of an assembly, or when the wrong permeability rating is used for the climate, it can trap moisture inside the structure instead of keeping it out. The result is condensation buildup inside wall cavities, wet insulation, and wood framing that stays damp long enough to rot or grow mold.
The stakes are real and expensive. According to the EPA, mold remediation in a typical home costs between $500 and $6,000 depending on severity, and structural wood repairs from prolonged moisture damage can run $10,000 or more. What makes this problem so frustrating is that it often develops invisibly over years before any symptoms appear on the surface. By the time you see a stain on drywall or smell mustiness in a crawl space, the damage is already significant.
This post breaks down exactly how vapor barriers work, what goes wrong, how to inspect your own home for problem installations, and what you can do, from a simple DIY inspection to working with a building performance contractor, to correct the issue before it costs you serious money.
What You’ll Need
Click on an item below to shop for the recommended items for this recipe on Amazon.
As an Amazon Associate, we earn from qualifying purchases.
How to Do It
- Identify your climate zone using the DOE Climate Zone map (available at energycodes.gov). This tells you which side of the wall or floor your vapor retarder should be on before you evaluate anything.
- Inspect your crawl space or basement with a flashlight. Look for polyethylene sheeting on the walls or floor. Check whether it is on the ground (correct for crawl spaces) or stapled to the cold side of the rim joists or exterior walls without insulation behind it (a common mistake).
- Check for seam continuity. Vapor barriers in crawl spaces should overlap at least 12 inches at seams and be taped or weighted. Gaps or tears allow humid ground air to bypass the barrier entirely. Tape any tears with housewrap tape rated for vapor barriers.
- Look for condensation staining, dark discoloration, or soft spots on wood framing near or behind the barrier. Use a wood moisture meter to check framing. Readings above 19% indicate active moisture damage that requires professional assessment.
- In finished walls, look for paint bubbling, drywall staining, or musty odors concentrated in one area. These are surface signals of trapped moisture behind the wall. Note the locations for the DIY or professional approach.
- Ventilate any space showing elevated moisture readings immediately using a dehumidifier or fans while you plan a permanent fix. This slows active damage without requiring demolition.
- Remove old damaged or improperly installed sheeting completely. Dispose of any sheeting showing mold growth in sealed heavy-duty bags. Do not cut or disturb heavily molded material without an N95 respirator and eye protection.
- Allow the crawl space to dry for 24 to 48 hours using fans or a portable dehumidifier before installing new material. Installing over a damp substrate defeats the purpose.
- Purchase 6-mil or thicker reinforced polyethylene sheeting rated specifically for crawl space use. Avoid standard painter’s plastic, which degrades quickly. For best results, choose 12-mil reinforced crawl space liner available at home improvement stores for $150 to $350 for an average crawl space.
- Lay the new liner across the entire ground surface, running it up the foundation walls at least 6 inches and ideally 12 inches. Use a continuous piece where possible. Where seams are necessary, overlap them by 12 inches minimum and seal with vapor barrier tape.
- Secure the liner to the foundation wall using furring strips and concrete fasteners, or use a specialized crawl space tape rated for masonry adhesion. The liner should be held firmly against the wall, not just folded at the base.
- Seal all penetrations including pipes, columns, and sump crocks where the liner meets them, using butyl tape or spray foam rated for vapor control. These penetrations are where most barrier failures occur after installation.
- If your crawl space is conditioned (connected to the home’s HVAC), insulate the foundation walls instead of the floor above. If it is vented, insulate the floor above with the vapor retarder facing up toward the warm side. Confirm your specific configuration with local building codes before proceeding.
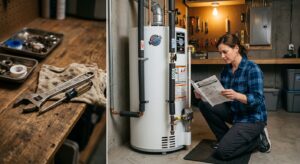
- Hire a building performance contractor or certified home energy auditor who offers blower door testing and infrared thermography. Ask specifically about moisture assessment, not just air sealing. Budget $300 to $500 for a full diagnostic before any work begins.
- Infrared scanning during a blower door test reveals cold spots in walls indicating moisture-saturated or displaced insulation. The contractor maps problem areas so demolition is targeted, not speculative.
- Request a written assessment specifying whether the existing vapor barrier is on the correct side for your climate zone, what the current perm rating of the assembly is, and whether drying potential exists in at least one direction.
- For walls with confirmed moisture damage, the contractor will remove drywall in affected sections, inspect and replace any rotted framing, allow the cavity to dry completely, then reinstall insulation with the correct vapor retarder class for your climate zone.
- In cold climates, a Class II vapor retarder (kraft-faced batts, 0.1 to 1.0 perms) on the interior side is often sufficient and safer than polyethylene sheeting, which can trap moisture if any vapor bypasses it. Smart vapor retarders like Intello or MemBrain adjust permeability with humidity and are the best choice for mixed climates.
- After correction, verify results with a post-work moisture meter reading on the framing (target below 16%) and a final infrared scan to confirm the thermal envelope is consistent before closing the wall.
Why It Works: The Benefits
Correcting a misinstalled vapor barrier before rot sets in avoids wood framing replacement costs that commonly range from $5,000 to $20,000 in a crawl space or wall cavity, based on contractor estimates for mid-size homes.
Wet insulation loses up to 40% of its rated R-value. Fixing moisture infiltration at the source restores insulation performance and can reduce heating bills by 15 to 25% in affected zones.
Mold spores from damp wall cavities and crawl spaces migrate into living areas through gaps and HVAC systems. Correcting vapor barrier problems reduces mold growth at the source, cutting airborne spore counts significantly.
Moisture-damaged insulation creates cold spots and drafty walls in winter and hot, clammy surfaces in summer. Restoring proper vapor control eliminates these comfort complaints without upgrading HVAC equipment.
Homes with documented moisture damage or active mold can see property values drop 10 to 25% and may be flagged during home inspections or denied certain insurance policies. Proactive correction protects your investment.
💰 Savings Impact by Action
Wet insulation loses up to 40% of its rated R-value, and correcting vapor barrier problems restores that lost thermal resistance directly.
Restoring proper vapor control and dry insulation in a crawl space or wall assembly reduces heating energy use by 15 to 20% in the affected zones.
Early correction of vapor barrier problems before mold establishes avoids an average of 85% of the remediation costs compared to treating an active mold infestation.
Addressing elevated wood moisture readings before framing rot begins prevents up to 95% of the structural repair costs that develop after years of unchecked moisture damage.
🏠 Key Concepts Explained
The Science Behind It
Water vapor behaves according to the laws of diffusion: it moves from regions of higher concentration to lower concentration until equilibrium is reached. In practical terms, the warm, moist interior of a home in winter has a higher vapor pressure than the cold dry air outside, so vapor tries to migrate outward through every material in the wall. Each material slows this movement to a degree measured by its perm rating. The goal of a vapor retarder is to place enough resistance on the warm side of the insulation to prevent vapor from reaching the cold dew point zone inside the assembly, where it would condense into liquid water.
The critical concept most homeowners and contractors miss is that the assembly also needs to be able to dry out. No building material is perfectly sealed, and moisture enters wall assemblies through dozens of pathways including air leaks, bulk water intrusion, and vapor diffusion through imperfect retarders. If the barrier is on the wrong side, or if barriers exist on both sides, any moisture that enters has no pathway to escape and accumulates over time. This is why building scientists say you can only have one vapor retarder in a wall assembly, and it must be on the warm-in-winter side in cold climates, because the other side must remain open enough to allow drying.
Climate zone matters enormously because the dominant vapor drive reverses direction between cold and hot climates. In a Florida summer, the vapor drive is inward, from the hot humid exterior toward the air-conditioned interior. A vapor retarder on the interior side in that climate would trap incoming vapor against the cool drywall, causing condensation on the back of the drywall surface. This is why the International Residential Code specifically exempts Climate Zones 1 through 3 from requiring interior vapor retarders and often discourages them. Smart vapor retarders solve this problem by becoming more permeable in high-humidity conditions (allowing drying) and less permeable in low-humidity conditions (blocking vapor drive), making them an excellent solution for mixed climates where the vapor drive direction changes with the seasons.
Frequently Asked Questions
▼ My crawl space smells musty but I already have a vapor barrier. What is going on?
A vapor barrier that is torn, improperly lapped at seams, or not sealed at the perimeter walls allows ground moisture to bypass it entirely. Inspect every seam and perimeter edge with a flashlight looking for gaps, tears, or sections that have pulled away from the wall. Even a 10% coverage gap can allow substantial moisture evaporation from the soil. Also check whether your crawl space vents are functioning correctly, since inadequate venting in a vented crawl space allows humidity to build regardless of barrier condition.
▼ I see condensation on the inside of my walls in winter. Is this a vapor barrier problem?
Condensation on the interior surface of exterior walls is usually an air sealing problem rather than a vapor barrier problem. Warm interior air is leaking into the wall cavity and hitting the cold exterior sheathing where it condenses. Start by sealing electrical outlets on exterior walls with foam gaskets, caulking baseboards, and sealing around window trim on the interior side. If condensation continues after air sealing, then investigate whether the vapor retarder is on the correct side of the insulation for your climate zone.
▼ Can I just add a second layer of plastic sheeting over my existing vapor barrier to strengthen it?
Only if the first layer is clean, undamaged, and correctly positioned. Adding a second layer over a moldy or moisture-contaminated barrier seals the problem in and accelerates damage. If the existing barrier is in poor condition, remove it entirely and start fresh. If it is in good shape but has gaps or thin coverage, a second layer properly lapped and taped over the first is a reasonable improvement for crawl space ground covers.
▼ My home inspector flagged a vapor barrier problem but I cannot afford a full fix right now. What should I do first?
Prioritize stopping active water entry above everything else. Check gutters, downspout extensions, and grading around the foundation to ensure surface water drains away from the house, since bulk water intrusion overwhelms any vapor control strategy. Then use a dehumidifier to manage crawl space or basement humidity below 60% relative humidity while you save for the permanent fix. This buys time and slows damage without requiring a large upfront investment.
▼ How do I know if the vapor barrier problem has already caused structural damage?
Use a wood moisture meter on accessible framing, especially rim joists, sill plates, and floor joists in crawl spaces or basements. Readings above 19% indicate sustained wetness and potential fungal activity. Probe soft-looking areas gently with a screwdriver tip. Rot causes framing to feel spongy and the wood fibers to separate easily. Any framing that probes soft or crumbles must be replaced before encapsulation. If you find damage in multiple locations, budget for a structural assessment by a licensed contractor before proceeding with barrier work.
Quick Tips
- Check your climate zone before buying any vapor control product. The label on a roll of poly sheeting will not tell you whether it is right for your home. The DOE Climate Zone map takes 60 seconds to use and prevents a very expensive mistake.
- In crawl spaces, weigh down seams with bricks or smooth stones if you cannot tape them immediately. Untaped seams that overlap by less than 12 inches will peel back over time from air movement and foot traffic.
- Replace old kraft-faced insulation batts that show any yellowing, compression, or moisture staining. The kraft facing is your vapor retarder and once it is compromised, the batt provides no vapor control at all regardless of its R-value.
- Run a dehumidifier in your crawl space during the first summer after installing a new vapor barrier. Even a correct installation will see elevated humidity initially as the soil beneath the liner continues to release stored moisture into the enclosed space.
Variations for Your Situation
- Apartment/Rental: Renters cannot modify wall assemblies or crawl space barriers, but can address symptoms directly. Run a HEPA air purifier rated for your square footage to capture airborne mold spores from wall cavities. Use a portable dehumidifier to keep indoor relative humidity below 50%, which slows mold growth even when structural moisture issues exist. Document moisture damage with dated photos and notify your landlord in writing, since landlords have a legal obligation to maintain habitable conditions in most states. If musty odors persist despite low indoor humidity, request a professional mold inspection as a condition of your lease renewal.
- Tight Budget (under $50): Focus on crawl space seam repair first since it delivers the highest return per dollar. A roll of vapor barrier tape costs $15 to $25 and sealing open seams and perimeter gaps can meaningfully reduce moisture entry without buying new liner material. Spend the remaining budget on a hygrometer to monitor crawl space or basement humidity. If readings stay above 70% relative humidity consistently, that data justifies prioritizing a larger fix in your next budget cycle. Also seal the crawl space access hatch with weatherstripping if it connects directly to living space.
- Older Home (pre-1980): Homes built before modern vapor retarder standards were common often have no intentional vapor control at all, or have degraded kraft facing on fiberglass batts that provides minimal resistance. Before installing any new vapor retarder, have the home tested for asbestos in old insulation and for lead paint on any surfaces you plan to disturb. In pre-1980 construction, the priority is usually air sealing first since these homes leak heavily through framing gaps and penetrations, and air movement carries far more moisture than diffusion alone. A building performance contractor experienced with older homes can sequence the work correctly to avoid trapping moisture in assemblies that have been drying in a particular direction for decades.