If your air conditioner runs constantly but your home still feels sticky and uncomfortable, humidity is probably the real culprit. Most homeowners think about temperature when they think about comfort, but indoor relative humidity above 60% makes 74 degrees feel like 80. Your AC responds by running longer cycles, burning more electricity, and still leaving you reaching for the thermostat. The result is higher bills and lower comfort at the same time.
Whole-house dehumidifiers, installed in-line with your existing HVAC system, tackle this problem at the source. Unlike portable units that handle one room at a time and require constant bucket-emptying, a whole-house unit quietly conditions all the air flowing through your ductwork. Homes in humid climates, including the Southeast, Mid-Atlantic, Pacific Northwest, and Great Lakes regions, see cooling costs drop by 10 to 25% after installation, because the AC no longer has to handle moisture removal duty on top of temperature control.
This post breaks down exactly how whole-house dehumidifiers work, what they realistically cost, how fast they pay back through energy savings and avoided repairs, and how to decide which approach makes sense for your home and budget. Whether you want to start with a targeted portable solution or go straight to a whole-home upgrade, you will find a clear path forward here.
What You’ll Need
Click on an item below to shop for the recommended items for this recipe on Amazon.
As an Amazon Associate, we earn from qualifying purchases.
How to Do It
- Buy an ENERGY STAR certified 50-pint portable dehumidifier rated for your square footage. A 50-pint unit handles roughly 1,000 to 2,000 square feet in moderately humid conditions.
- Place the unit in the most problematic area first, typically a basement or main living area. Position it at least 6 inches from walls to allow free airflow to the intake grille.
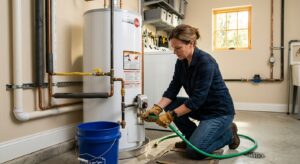
- Route the drain hose to a floor drain, utility sink, or sump pit to enable continuous drainage. This eliminates bucket-emptying and allows 24/7 operation without intervention.
- Set the target humidity to 50% relative humidity using the built-in humidistat. The unit will cycle on and off automatically to maintain that level.
- After two weeks, check your utility bill and note whether the AC is cycling less frequently. If humidity is controlled, raise your thermostat by 1 to 2 degrees and observe whether comfort is maintained.
- Track monthly kWh usage on your electric bill to establish a savings baseline before upgrading to a whole-house unit.
- Have an HVAC contractor perform a humidity audit and Manual J calculation to determine the correct dehumidifier capacity in pints per day for your home’s square footage, climate zone, and infiltration rate.
- Choose a unit with an ENERGY STAR EF rating above 1.8. For most 2,000 to 3,000 square foot homes in humid climates, a 70 to 90 pint per day unit is appropriate. Oversizing is less problematic than with AC units, but undersizing will leave the system running continuously.
- The contractor installs the unit in-line with your return air duct, typically near the air handler in a basement, utility room, or attic. The unit draws humid return air, removes moisture, and returns the conditioned air to the supply plenum.
- A dedicated 240V or 120V circuit is wired to the unit depending on the model. Confirm with your contractor whether a circuit upgrade is needed before installation day.
- The contractor connects a drain line directly to a floor drain or condensate pump. No buckets, no maintenance drains, and no manual intervention needed after setup.
- After installation, set the whole-house humidistat to 50% RH. Raise your thermostat setpoint by 2 degrees and monitor comfort over the first week. Adjust the humidity target between 45 and 55% based on personal preference and outdoor conditions.
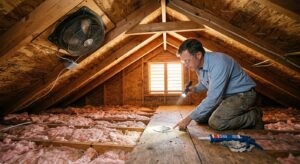
- Inspect your crawl space or basement for exposed soil, gaps around pipes and penetrations, and any standing water or visible mold. Photograph problem areas before starting work.
- Install a 6-mil or thicker polyethylene vapor barrier over all exposed soil in the crawl space, lapping it 12 inches up the foundation walls and securing it with construction tape at seams. This alone can reduce indoor humidity by 5 to 15% in homes with vented crawl spaces.
- Seal all rim joist cavities with cut-and-cobble rigid foam board (2-inch polyiso, R-13) followed by canned spray foam around all edges. Rim joists are among the largest infiltration points for ground moisture in older homes.
- Caulk or foam-seal any pipe penetrations, sump pump openings, and gaps between the foundation sill plate and framing.
- Check basement windows for broken seals and cracked glazing. Replace damaged weatherstripping on basement doors. Cold, damp air infiltrating through these gaps is a direct humidity source.
- After completing the sealing work, measure indoor RH with a digital hygrometer before and after one week. Many homeowners see a 5 to 10 point drop in relative humidity from sealing alone, which meaningfully reduces the sizing requirement for any dehumidifier you add.
Why It Works: The Benefits
By offloading moisture removal from the AC, whole-house dehumidifiers reduce cooling energy use by 10 to 25% in humid climates. On a $200 monthly summer electric bill, that is $20 to $50 per month in direct savings during the cooling season.
Controlled humidity lets most homeowners raise the thermostat by 2 to 4 degrees without noticing a change in comfort. At 3% savings per degree, a 3-degree setpoint increase saves an additional 9% on cooling, compounding the total benefit.
Mold remediation costs $500 to $6,000 on average. Wood rot, warped hardwood floors, and peeling paint from chronic humidity exposure can run into thousands more. Maintaining 45 to 55% RH year-round prevents this damage and the costs associated with it.
Dust mite populations drop significantly below 50% relative humidity, and mold cannot colonize at those levels. Homeowners with asthma or allergies frequently report measurable symptom reduction within weeks of installation.
When the AC does not have to run extended cycles to battle humidity, compressor run hours decrease. HVAC systems that are not overworked typically last 15 to 20 years instead of the 10 to 12 years seen in chronically humid homes, avoiding a $4,000 to $12,000 replacement years ahead of schedule.
💰 Savings Impact by Action
Offloading latent heat removal to a dedicated dehumidifier reduces AC compressor runtime by up to 20% in humid climates.
Raising the thermostat 3 degrees when humidity is controlled saves approximately 9% on cooling costs at 3% per degree.
Sealing crawl space vapor barriers and rim joists reduces whole-home moisture infiltration and cooling load by 10 to 15%.
Preventing mold and moisture damage avoids repair costs that would otherwise represent 10 to 20% of the home’s annual maintenance budget in high-humidity regions.
🏠 Key Concepts Explained
The Science Behind It
Air holds moisture in the form of water vapor, and the amount it can hold increases dramatically with temperature. When warm, humid outdoor air infiltrates your home or when moisture evaporates from soil beneath a crawl space, it raises indoor relative humidity. Your air conditioner removes some of this moisture as a byproduct of cooling, but it does so inefficiently. The evaporator coil must drop the air temperature to the dew point before condensation begins, meaning the compressor runs hard just to wring out moisture that a dedicated dehumidifier could remove at a fraction of the energy cost.
A dedicated dehumidifier works differently. It passes air over a refrigerant-cooled coil to condense moisture, but then immediately reheats the air over a condenser coil before returning it to the room. This means it removes moisture without meaningfully cooling the space, which is exactly what you want when the temperature is already comfortable but the air feels damp. ENERGY STAR whole-house units achieve an Energy Factor of 1.8 to 3.4 liters per kilowatt-hour, compared to 1.0 to 1.5 for older portable units, because modern scroll compressors and larger coil surface areas allow the refrigerant cycle to operate much more efficiently.
The payback math works because of compounding effects. First, the dehumidifier directly removes moisture for less energy than the AC would use. Second, with controlled humidity, occupants tolerate thermostat setpoints 2 to 4 degrees higher, reducing AC runtime and compressor wear. Third, by preventing moisture-driven damage to wood framing, insulation, and finishes, the dehumidifier avoids repair costs that would otherwise accumulate over 5 to 15 years. The Department of Energy estimates that for every degree you raise the cooling setpoint, you save about 3% on cooling costs, so a 3-degree setpoint increase alone covers much of a whole-house unit’s operating cost over a cooling season.
Frequently Asked Questions
▼ How long does it actually take for a whole-house dehumidifier to pay for itself?
For most homeowners in humid climates spending $150 to $250 per month on summer cooling, a $1,800 installed whole-house unit pays back in 2 to 3 years through reduced AC runtime and higher thermostat setpoints. Homes with chronic moisture damage to floors or structure often recover the cost in under 2 years when avoided repair bills are factored in. Request an itemized savings estimate from your HVAC contractor based on your actual utility bills and square footage.
▼ My home has central AC. Do I really need a separate dehumidifier?
In most humid climates, yes. Central AC systems are sized for temperature control and typically remove only 60 to 70% of the latent (moisture) load a home generates on a humid summer day. If your home’s RH regularly exceeds 60% even when the AC is running, the system is not keeping up with moisture. A whole-house dehumidifier fills that gap without requiring you to oversize your AC or run it inefficiently.
▼ Can I install a whole-house dehumidifier myself to save money?
The ductwork connections and electrical wiring typically require a licensed HVAC technician and electrician, and most manufacturers void the warranty on DIY installations. You can reduce installed cost by 10 to 20% by purchasing the unit yourself and supplying it to the contractor rather than having them mark up the equipment. Get 3 quotes and ask each contractor to itemize labor versus equipment costs.
▼ My dehumidifier runs constantly but the humidity never drops below 65%. What is wrong?
This usually means the unit is undersized for the moisture load, there is a significant unaddressed infiltration source such as an unsealed crawl space or sump pit, or the unit’s coil is dirty and operating below capacity. Start by cleaning the filter and coil, then inspect and seal the crawl space vapor barrier and all large penetrations. If the unit still cannot maintain setpoint, have an HVAC contractor verify the unit’s rated capacity against your home’s actual calculated latent load.
▼ What happens if I live in a dry climate? Is a whole-house dehumidifier still worth it?
In arid climates like the Southwest, whole-house dehumidifiers are rarely cost-effective and may not be needed at all. The payback case is strongest in ASHRAE Climate Zones 2 and 3 (the Southeast and Mid-Atlantic) and parts of Zones 4 and 5 with hot, humid summers. Use a hygrometer to check your actual indoor humidity before investing. If you consistently read below 55% RH in summer without intervention, prioritize other efficiency upgrades first.
Quick Tips
- Set your whole-house humidistat to 50% RH in summer, not lower. Over-dehumidifying wastes electricity and can damage wood floors and trim.
- Clean the dehumidifier coil and filter annually with a soft brush and coil cleaner spray. Dirty coils reduce moisture removal capacity by up to 20%.
- If you have a smart thermostat like Ecobee or Nest, use its humidity override feature to prevent the AC from running simply for dehumidification. The dedicated dehumidifier handles that job more cheaply.
- In winter, most humid-climate homes do not need dehumidification. Set the humidistat to 35 to 40% RH in heating season to prevent window condensation without drying out the air.
- Pair the dehumidifier install with air sealing the attic and rim joists. Cutting infiltration reduces the continuous moisture load the unit must handle, extending equipment life and lowering operating costs.
Variations for Your Situation
- Apartment/Rental: Renters cannot install ducted whole-house units, but a 50-pint ENERGY STAR portable dehumidifier ($200 to $350) placed in the main living area with a continuous drain hose to a sink delivers meaningful humidity control. Units like the Frigidaire FFAD5033W1 or hOmeLabs 4,500 Sq Ft model are well-reviewed and handle 1,500 to 2,500 square feet adequately. Ask your landlord if the basement or utility area has a floor drain you can use for continuous drainage, which eliminates any daily maintenance.
- Tight Budget (under $300): Start with crawl space vapor barrier installation ($80 to $150 in materials) and rim joist air sealing ($30 to $60 in foam and rigid board). These two steps alone reduce indoor humidity by 5 to 15 percentage points in many homes and cost under $250 in materials. Add a $200 to $250 ENERGY STAR 50-pint portable unit only if RH still exceeds 60% after sealing. This staged approach costs under $400 total and delivers most of the comfort benefit before committing to a whole-house system.
- Older Home (pre-1980): Homes built before 1980 typically have vented crawl spaces, uninsulated rim joists, and significantly higher air infiltration rates than modern construction. The moisture load is often 30 to 50% higher than in a comparable newer home, meaning you will need a larger capacity unit (90 pint per day minimum) and the crawl space sealing work is not optional. Budget $2,200 to $3,500 for a complete solution including vapor barrier, rim joist sealing, and whole-house dehumidifier installation. The payback period is similar at 2 to 4 years because the baseline energy waste and damage risk are both higher.