Your furnace works hard all winter, but if your home has the typical collection of unsealed gaps, thin spots, and overlooked penetrations, a significant portion of that expensive heated air is quietly escaping before it ever warms the rooms you live in. The U.S. Department of Energy estimates that air leakage alone accounts for 25 to 40% of heating and cooling energy loss in a typical home. That is not a rounding error. That is money flowing straight outside through cracks you probably walk past every day.
The frustrating part is that most of these heat escape routes are not obvious. They are not a broken window or a door that refuses to close. They are the gap behind your electrical outlets, the uninsulated rim joist in your basement, the attic hatch that has never had a single inch of insulation on it. These spots are easy to miss precisely because they look finished and normal. But to warm air, they are open highways to the outdoors.
This post walks you through the eight most common and most impactful places heat escapes from a typical home, explains the building science behind each one, and gives you a clear action plan from free quick fixes to solid DIY upgrades. Whether you tackle one spot this weekend or work through the full list over a season, every improvement compounds into a warmer, quieter, and more efficient home.
What You’ll Need
Click on an item below to shop for the recommended items for this recipe on Amazon.
As an Amazon Associate, we earn from qualifying purchases.
How to Do It
- Buy one can of low-expanding spray foam, one tube of paintable latex caulk, and a pack of foam outlet gaskets (total cost under $30 at any hardware store).
- Install foam outlet gaskets behind every electrical outlet and light switch cover on exterior walls. Remove the cover plate, press the pre-cut foam gasket over the box, and replace the cover. Each gasket takes under two minutes and these gaps collectively account for up to 2% of total home air leakage.
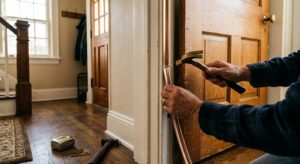
- Walk the perimeter of every exterior door and press a piece of paper against the closed gap. If you can pull the paper out with light resistance, the weatherstripping is failing. Note every door with this problem.
- Replace failed door weatherstripping using adhesive-backed foam tape for the top and sides (cut to length, peel, and press) and a door sweep for the bottom gap. A 3/4-inch gap under a 36-inch door leaks as much air as a 2.4-inch diameter hole in the wall.
- Caulk around every window frame where the trim meets the wall on the interior side. Run a thin bead of latex caulk into any gap larger than a credit card thickness. This seals the rough opening bypass that most window installations leave unsealed.
- Check behind your dryer exhaust vent, bathroom exhaust fans, and range hood exterior caps. If the backdraft damper flap is stuck open or missing, warm air escapes freely. Tap the damper to confirm it closes and moves freely, and replace any that are stuck.
- Insulate the attic hatch or pull-down stair using a rigid foam cover box built from 2-inch polyiso panels (R-13 per panel) cut to fit and taped at seams with foil tape. A typical uninsulated attic hatch loses more heat per square foot than any other surface in the house. Add adhesive-backed foam weatherstripping around the hatch perimeter so the cover seals when closed.
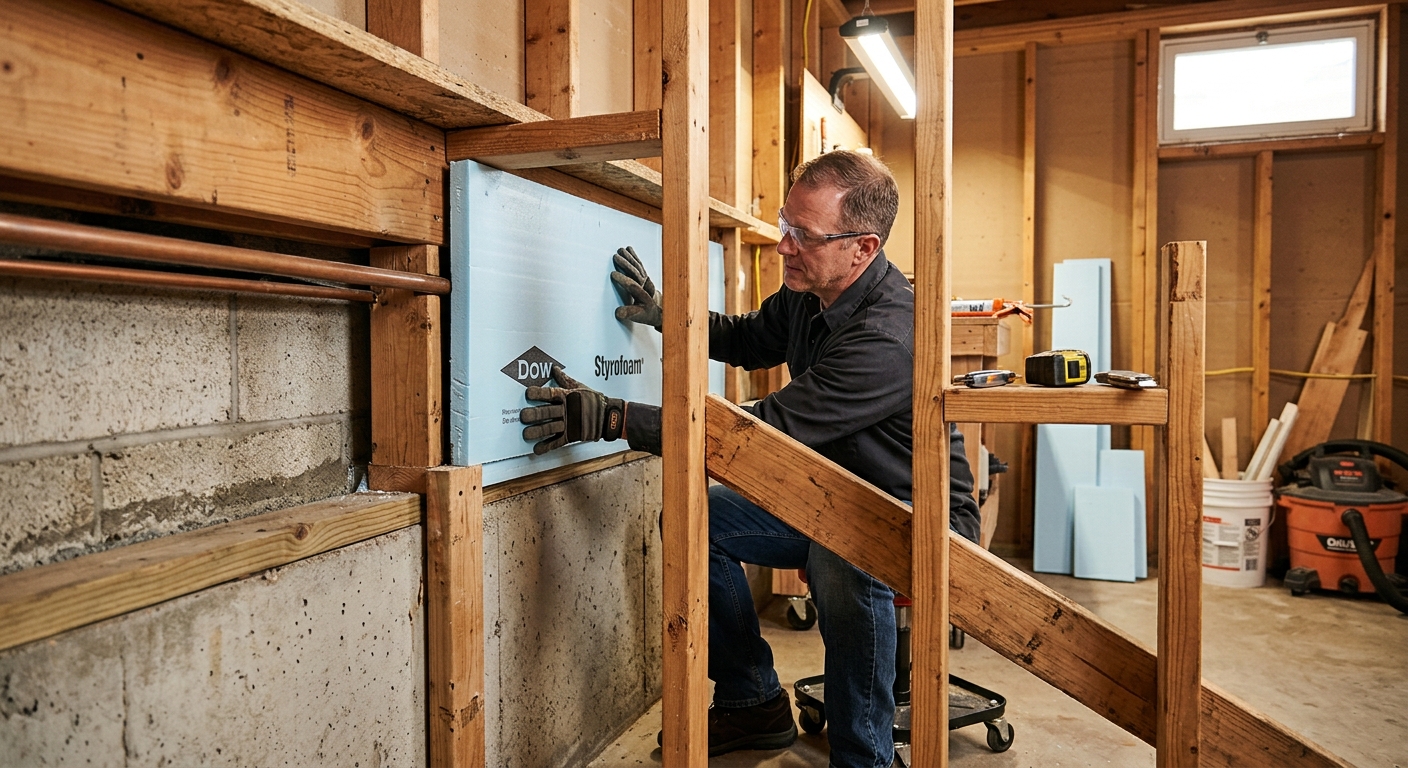
- Access your basement or crawlspace and locate the rim joist, which is the horizontal framing member sitting on top of your foundation wall around the entire perimeter. Cut 2-inch rigid foam boards to fit each bay between floor joists, press them firmly against the rim joist, and seal all four edges with spray foam. The rim joist is typically the single largest air leakage site in homes with basements and is responsible for 15 to 20% of total air infiltration.
- In the attic, use a flashlight to identify all penetrations from the floors below: plumbing vents, electrical wires, HVAC ducts, and the tops of interior walls. Seal gaps around each penetration with fire-rated caulk for small gaps (under 1/4 inch) and fire-rated spray foam or metal flashing plus fire-rated caulk for larger gaps. These attic bypasses allow stack-effect air movement to pull warm air directly from living spaces into the unconditioned attic.
- Check the knee walls in any finished attic or bonus room. The wall cavities behind knee walls open directly into unconditioned attic space unless they are blocked. Install rigid foam baffles at the top and bottom of each knee wall cavity and seal with spray foam to cut off the convective loop that drains heat from these rooms.
- Inspect the ductwork in your basement or attic for gaps at joints and connections. Use mastic sealant (not standard duct tape, which fails within a few years) to seal any visible gaps. Leaky ducts lose 20 to 30% of heated air before it reaches living spaces, which directly loads the heat escape problem you are solving elsewhere.
- After completing all sealing work, do a final check by holding a lit incense stick near every sealed location on a windy day. Moving smoke reveals any remaining air movement. Mark and re-seal any spots where smoke drifts, then schedule a professional blower door test if you want a verified before-and-after infiltration measurement.
- Contact your utility company or a certified BPI (Building Performance Institute) contractor to schedule a blower door test. This pressurizes your home to 50 Pascals and uses calibrated airflow measurement to give you an exact ACH number and a thermal camera scan showing every leak location.
- Review the audit report with your contractor and prioritize the top three to five findings by heat loss impact. A good auditor will give you a prioritized list with estimated savings per measure so you can decide which work to authorize.
- Authorize professional air sealing for attic bypasses, rim joists, and any crawlspace areas the auditor identifies. Professional crews use two-part spray polyurethane foam and commercial-grade mastic that is more durable and reaches locations that are difficult for DIY access.
- If the audit reveals duct leakage above 15%, ask for a duct blaster test and quote for professional duct sealing with Aeroseal or mastic. Aeroseal is an injected polymer that seals leaks from the inside of the duct system and can reduce duct leakage by up to 90%.
- Request a post-work blower door test to confirm the improvement and document the new ACH number. This verification is required for most utility rebate programs and confirms you received the performance you paid for.
Why It Works: The Benefits
Sealing the eight common heat escape routes identified here can reduce annual heating costs by 15 to 30%, which translates to $150 to $450 per year for a home with a $1,500 annual heating bill. The DOE consistently ranks air sealing and insulation as the highest-ROI home energy improvements available.
Cold drafts and uneven room temperatures are almost always caused by localized air leakage rather than furnace output. Sealing the specific gaps described here eliminates cold spots and drafts, making rooms feel 2 to 4 degrees warmer at the same thermostat setting.
When your home holds heat better, your furnace runs fewer cycles per day to maintain the setpoint. Shorter and less frequent run cycles reduce mechanical wear, extend equipment life, and reduce the chance of a mid-winter breakdown.
Uncontrolled air leakage brings in unconditioned outdoor air loaded with allergens, humidity, and pollutants through gaps near soil, crawlspaces, and attics. Sealing these pathways reduces particulate infiltration and gives you better control over where fresh air actually enters the house.
Many of the same gaps that leak heat also let in moisture, insects, and rodents. Sealing rim joists, pipe penetrations, and foundation cracks with foam and caulk provides a secondary barrier against both energy loss and physical intrusion.
💰 Savings Impact by Action
Foam-sealing the rim joist eliminates what is typically the single largest air leakage site in a basement home, responsible for 15 to 20% of total infiltration losses.
Sealing attic bypasses and the attic hatch before insulating can reduce heating energy use by up to 20% by stopping warm air from bypassing the insulation layer entirely.
Installing foam gaskets behind exterior wall outlets and switches eliminates a source of infiltration that accounts for up to 2% of total home air leakage at near-zero cost.
Replacing failed weatherstripping and caulking window frames reduces infiltration through the building envelope perimeter by 8 to 12% in homes with original door and window seals.
Sealing leaky ducts with mastic recovers 20 to 30% of heated air that currently escapes into unconditioned attic or basement space before reaching living areas.
🏠 Key Concepts Explained
The Science Behind It
Heat moves in three ways: conduction through solid materials, convection through moving air and fluids, and radiation through electromagnetic waves. In a home, all three mechanisms are actively working against you in winter, and the eight escape routes in this post exploit at least one of them. The stack effect is the master driver behind most air leakage loss. As warm air rises inside your home, it creates positive pressure at ceiling level and negative pressure at floor level. This pressure differential forces warm air out through every gap at the top of the thermal envelope while simultaneously pulling cold outdoor air in through every gap at the bottom. The taller the home and the greater the indoor-outdoor temperature difference, the stronger this stack effect becomes.
The concept of the thermal envelope is central to understanding where to focus your effort. Your thermal envelope is the continuous boundary of insulation and air barrier that separates conditioned from unconditioned space. Every gap, bypass, or thin spot in that boundary is a place where the three heat transfer mechanisms can operate unchecked. Rim joists fail because they combine conductive loss through wood framing with air leakage through the many small gaps in that framing assembly. Attic bypasses fail because they allow warm air to bypass the insulation layer entirely through convective flow, making even well-insulated attics underperform if the ceiling below is not air sealed first.
This is why the DOE and ENERGY STAR both recommend air sealing before adding insulation. Insulation slows conductive heat transfer but does almost nothing to stop airflow. A batt of fiberglass insulation laid loosely over a gap between wall plates does not stop air from flowing around and through it. The correct sequence is always seal first, then insulate. When you address both mechanisms together, the combined performance improvement is multiplicative, not just additive, which explains why comprehensive air sealing projects consistently deliver savings at the high end of the 15 to 30% range.
Frequently Asked Questions
▼ I sealed a bunch of gaps but my house still feels cold and drafty. What am I missing?
The most commonly missed locations are attic bypasses (the gaps at the tops of interior walls where they meet the attic floor), the rim joist in the basement, and recessed light fixtures that penetrate into the attic. These three locations together account for the majority of air leakage in most homes but are invisible from the living space. If you have addressed the obvious spots and still feel drafts, a blower door test by a BPI-certified auditor will pinpoint the remaining locations using pressurization and a thermal camera.
▼ Can renters do any of this without landlord permission?
Renters can safely do outlet gaskets, door sweep replacement, adhesive weatherstripping on doors, and interior window caulking, all of which are removable or cosmetically invisible and typically do not require landlord approval. For anything involving structural access (attic, basement, rim joist), get written permission first. Many landlords will agree to air sealing work if you present it as benefiting the property, and some will cover material costs since it improves the asset.
▼ How long before I see the savings show up on my energy bill?
You should see a measurable reduction within the first full billing cycle after completing the work, especially if you tackle the attic hatch and rim joist in the same project. For the full savings picture, compare the same calendar month year-over-year adjusted for heating degree days rather than comparing consecutive months, since temperature variations between months can mask real improvements. Most homeowners see a clear 15 to 20% drop in heating energy consumption by the end of the first winter.
▼ My house was built in the 1960s. Is it worth doing this, or do I need a full renovation?
Pre-1970 homes almost always have the highest air leakage rates (often 1.0 ACH or higher) and benefit the most from air sealing in absolute dollar terms precisely because the baseline is so leaky. You do not need a renovation. Start with the rim joist, attic hatch, and attic bypasses, and you can realistically cut infiltration by 30 to 40% with a weekend of DIY work. A professional energy audit is particularly cost-effective for older homes because the auditor will identify the highest-impact locations quickly, saving you time versus a trial-and-error approach.
▼ Is there a risk of making my house too tight by sealing all these gaps?
For most existing homes, aggressive DIY air sealing will not reach the threshold where mechanical ventilation becomes mandatory. Homes built before 2000 typically start so leaky that even comprehensive DIY air sealing leaves the house well above the 0.35 ACH minimum natural ventilation rate. However, if you are completing a major professional air sealing project in a smaller home and plan to also add significant insulation, ask your contractor to measure ACH after the work and discuss whether an HRV or ERV is warranted before the project is finished.
Quick Tips
- Do your leak hunting on a cold, windy day. Hold a stick of incense or a thin piece of tissue near suspected gaps and watch for movement. Wind pressure on the exterior amplifies infiltration and makes leaks much easier to detect without any instruments.
- Seal the attic floor before adding attic insulation. Every dollar spent on attic insulation over an unsealed ceiling is a dollar that underperforms. Air sealing first and insulating second is the sequence that building science consistently validates.
- Focus on the top and bottom of your thermal envelope first. The greatest pressure differentials from the stack effect occur at the attic floor level and at the basement ceiling level (rim joist), so fixes at these two locations deliver the highest impact per hour of work.
- Use foam backer rod in gaps wider than 1/2 inch before caulking. Caulk is not designed to bridge large gaps and will crack and fail within one to two seasons if applied across a span wider than about 3/8 inch. Backer rod fills the gap so caulk can form a proper thin-film seal.
Variations for Your Situation
- Apartment or Rental: Renters cannot access rim joists or attic hatches, but can still address the three most impactful renter-safe fixes. Install foam outlet gaskets on every exterior wall outlet (a 12-pack costs about $5), apply rope caulk (a removable, peel-off product) along drafty window sills and frames, and place an under-door draft stopper at exterior doors. These three steps can reduce your personal heating energy use by 5 to 10% with zero permanent modifications and a total investment under $25.
- Tight Budget (under $50): Focus exclusively on zero-cost and low-cost actions in this order: outlet gaskets ($5 to $8), adhesive foam weatherstripping for failed door seals ($8 to $12), rope caulk for window gaps ($4 to $6), and a homemade attic hatch cover built from scrap rigid foam if you have attic access. Skip the rim joist and duct sealing for now and add them next season. Even this minimal list addresses four of the eight escape routes and can deliver 10 to 15% savings.
- Older Home (pre-1980): Homes from this era typically have minimal or no insulation in rim joists, original single-pane windows, knob-and-tube or early aluminum wiring (which affects what sealants are safe to use near outlets), and no housewrap or continuous air barrier in the wall assembly. Prioritize the rim joist and attic bypasses first since these deliver the most improvement fastest. Avoid spray foam directly on knob-and-tube wiring. Consider scheduling a professional energy audit before doing extensive attic work, as some older insulation materials (vermiculite, early fiberglass) may require special handling.