You added attic insulation. You sealed the windows. You upgraded to a smart thermostat. So why does your energy bill still feel like it belongs to a house with none of those upgrades? The answer is almost certainly hiding above your ceiling in places you have never thought to look. Attic bypasses are gaps, holes, and cracks where your home’s interior connects directly to the unconditioned attic space, and they silently drain conditioned air 24 hours a day, every single day of the year.
These bypasses exist in nearly every home built before the mid-2000s, and even many newer homes have them. They form around recessed light cans, plumbing and electrical penetrations, top plates of interior walls, attic hatches, and chimney chases. A fluffy blanket of fiberglass insulation sitting on top of these openings does almost nothing to stop airflow. Insulation resists heat transfer by conduction, but it is not an air barrier. Warm indoor air in winter, or hot attic air in summer, moves freely through these gaps and directly undermines every dollar you have spent on insulation.
This guide walks you through exactly what attic bypasses are, where to find them, and how to seal them yourself or with a professional. We will cover the building science behind why this matters, realistic savings numbers from DOE research, and step-by-step approaches for every skill level. If you do one home efficiency project this year, this is the one that delivers the best return.
What You’ll Need
Click on an item below to shop for the recommended items for this recipe on Amazon.
As an Amazon Associate, we earn from qualifying purchases.
How to Do It
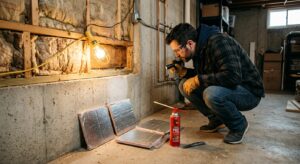
- Start with your attic hatch or pull-down stair. Cut rigid foam board insulation (R-10 minimum) to fit the hatch opening and glue weatherstripping around the perimeter of the frame. This single fix often reduces bypass losses by 5 to 10% on its own.
- From inside the attic, locate the top of any dropped ceilings, soffits above kitchen cabinets, or built-in shelving. These cavities are open to the attic and are major bypass pathways. Temporarily push back any loose insulation to expose the gaps.
- Use canned spray foam (for gaps under 3 inches) to seal around any visible pipe, wire, or duct penetrations you can reach from the attic hatch without walking deeper into the attic.
- Check around the perimeter of the attic hatch frame on the attic side. Apply a bead of paintable latex caulk where the frame meets the drywall to close any gaps you can see.
- Replace the insulation you moved, then close the hatch. Use a stick of incense near the closed hatch on a cold or hot day to check for remaining airflow. A wavering flame confirms you have reduced the bypass significantly.
- Before entering the attic, create a simple map of your floor plan below. Mark the location of every interior wall, recessed light, bathroom exhaust fan, plumbing stack, and chase. These translate directly to bypass locations once you are in the attic.
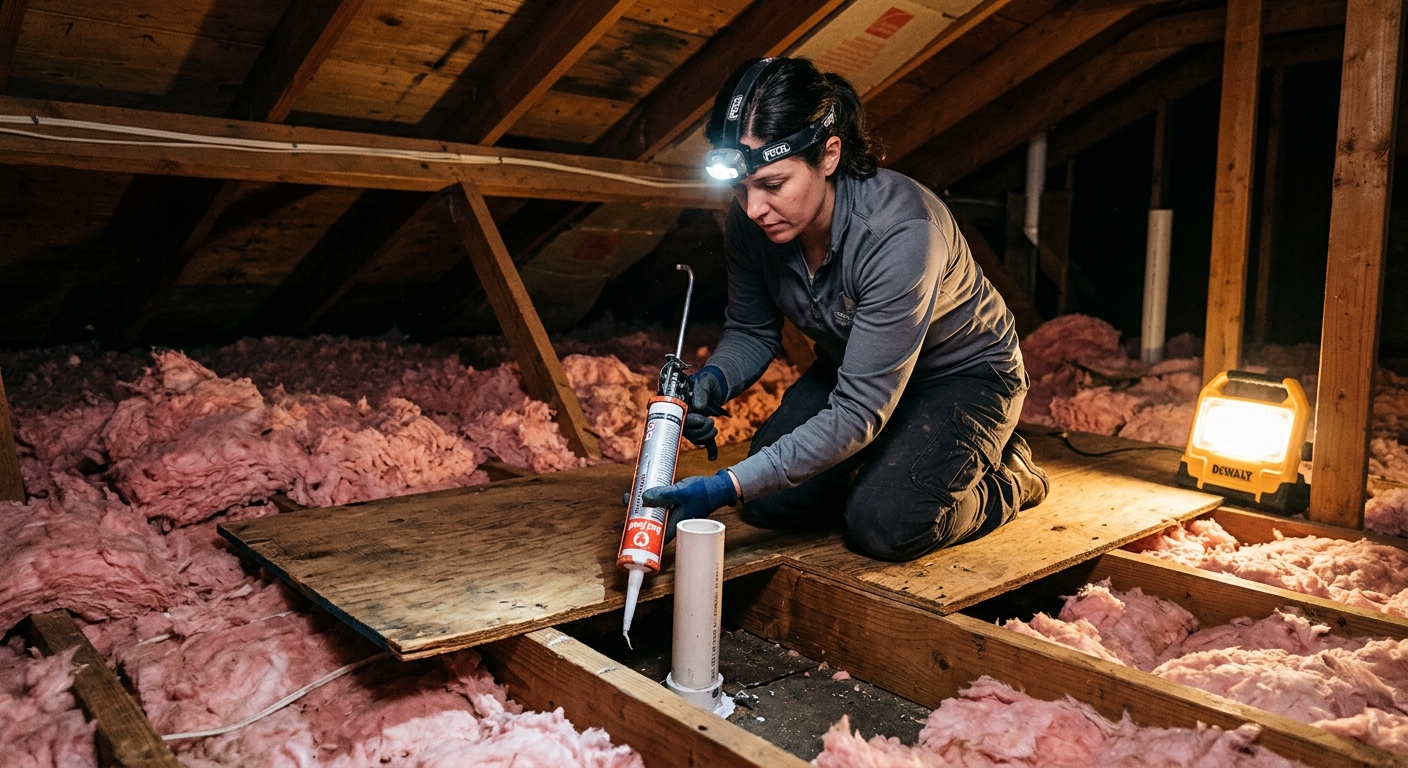
- Gear up properly before entering. Wear a properly rated N95 or P100 respirator, safety glasses, knee pads, gloves, and a long-sleeved shirt. Bring a bright work light and step only on ceiling joists or a piece of plywood laid across them, never on the drywall.
- Systematically move insulation batts aside to expose the top plates of all interior walls. Use fire-rated expanding foam or fire-rated caulk to seal the gap between the drywall and the top plate framing along every interior wall you can access. This is often the largest single source of bypass air loss in a home.
- Seal all plumbing, electrical, and HVAC penetrations through the ceiling with fire-rated caulk for gaps under half an inch, or fire-rated foam for larger gaps. Seal around the base of any bathroom exhaust fan housings as well.
- Address recessed light cans. For older non-IC-rated cans, build a sealed box from rigid mineral wool or rigid foam with taped seams and caulk the box to the drywall surface around the can. For IC-rated cans, simply caulk around the perimeter where the can meets the drywall from the attic side.
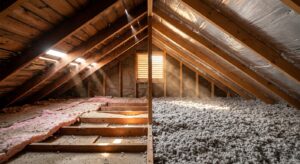
- Seal any gaps around the chimney chase using high-temperature silicone caulk and sheet metal flashing attached with metal screws, as foam and standard caulk are not rated for the heat near a chimney. After sealing all bypasses, replace all insulation to its original depth and add additional blown insulation if needed to reach at least R-38 (R-49 in colder climates).
- Hire a BPI-certified building analyst or a contractor who uses a blower door test as part of their process. The blower door depressurizes your home and measures total air leakage in ACH50 (air changes per hour at 50 pascals), giving you a baseline and a confirmed result after work is completed.
- Request that the contractor perform a thermal imaging scan with an infrared camera during the blower door test. This reveals exactly where bypasses are occurring, including ones hidden behind insulation that a visual inspection would miss entirely.
- The contractor will use a combination of two-part spray foam, rigid foam boards, fire-rated caulk, and metal flashing to seal all identified bypasses systematically from the attic. Professionals can also seal bypasses inside wall cavities that are inaccessible to DIYers.
- After sealing, request a second blower door test to confirm improvement. A well-executed professional job should reduce your ACH50 number by 25 to 40% and bring most homes to below 5 ACH50, the threshold recommended by ENERGY STAR.
- Review the completed job report and ask for photos of sealed areas. A reputable contractor will provide before and after blower door test results in writing so you can verify the work delivered measurable improvement.
Why It Works: The Benefits
The DOE estimates that air sealing attic bypasses combined with adequate insulation reduces annual energy costs by 15 to 30%. On a $2,400 annual energy bill, that is $360 to $720 back in your pocket every year.
Sealing bypasses reduces cold drafts in winter and muggy, hot upstairs rooms in summer. Homeowners consistently report that rooms that were always too cold or too hot become much more livable after bypass sealing.
Stopping warm moist air from entering the attic eliminates the primary cause of condensation-related rot and mold on roof sheathing, which can cost $5,000 to $20,000 to remediate if left unchecked for years.
Sealing the attic floor stops insulation fibers, dust, and potential mold spores from being drawn into your living space through the same pressure dynamics that drive air loss.
Adding insulation on top of unsealed bypasses can waste up to 50% of the insulation’s potential benefit. Sealing first means every dollar you have already spent on insulation starts working as intended.
💰 Savings Impact by Action
Sealing attic bypasses reduces whole-home air leakage by 25 to 40%, translating to 15 to 20% savings on annual heating and cooling costs according to DOE research.
Adding an insulated, weatherstripped cover to an uninsulated attic hatch alone reduces attic-related air loss by up to 8% for minimal cost.
Sealing and covering unprotected recessed can lights eliminates one of the most common bypass pathways and can reduce ceiling air leakage by up to 10%.
Sealing the gap between drywall and the top framing plate along all interior walls addresses up to 15% of total bypass leakage in a typical two-story home.
Sealing all bypasses and then upgrading attic insulation to R-49 delivers a combined reduction in heating and cooling energy use of up to 30% per ENERGY STAR estimates.
🏠 Key Concepts Explained
The Science Behind It
Attic bypasses matter so much because of the fundamental difference between conductive heat transfer and convective heat transfer. Insulation like fiberglass batts and blown cellulose works by trapping still air in tiny pockets, slowing the conduction of heat through the material. But when air itself is moving through a gap, it carries heat energy with it directly, a process called convection. No amount of fluffy insulation stops convective airflow. A gap as small as one square inch in a ceiling can allow 25 to 50 cubic feet of conditioned air per hour to escape depending on pressure conditions, and that air is carrying the heat your furnace or air conditioner just spent money to create.
The stack effect amplifies this problem dramatically. In winter, the warm air inside your home is less dense than the cold air outside, so it rises toward the top of the structure. Any opening near the top of the conditioned space, which in most homes means the ceiling-attic boundary, acts as an exhaust vent for your expensive conditioned air. Physics demands that an equal volume of cold outside air enter somewhere lower in the house to replace it. The result is a continuous loop where your HVAC system is essentially heating or cooling the outdoors. Research from Lawrence Berkeley National Laboratory has found that air infiltration accounts for 25 to 40% of the energy used for heating and cooling in a typical American home.
Moisture damage is the other half of the bypass story that homeowners often do not consider until it is too late. Indoor air in winter carries significant moisture vapor from cooking, breathing, bathing, and houseplants. When this warm, humid air enters the cold attic through bypasses, it encounters surfaces well below its dew point and deposits that moisture as condensation or frost. Over months and years, this repeated wetting and drying cycle degrades roof sheathing, promotes mold growth on framing, and can cause structural rot. Building scientists call this interstitial condensation, and it is almost entirely preventable by stopping the air movement at its source rather than trying to manage the moisture after it has already entered the attic.
Frequently Asked Questions
▼ I sealed my attic bypasses but my energy bills barely changed. What went wrong?
Bypass sealing delivers its full benefit only when the home also has adequate insulation depth on top of the sealed areas. If your attic floor has less than R-30 of insulation after sealing, heat is still conducting through even though airflow has been reduced. Check your insulation depth with a ruler and add blown insulation to reach at least R-38. Also confirm that your attic bypasses were fully sealed by doing an incense stick test near recessed lights and the attic hatch with the HVAC running.
▼ Can I do this project if my attic has blown-in insulation instead of batts?
Yes, but it requires more effort. You will need to temporarily rake the blown insulation away from the areas you are sealing, which is messy and can disturb the existing insulation depth. Work in small sections, seal, let the foam or caulk cure, and then rake the insulation back before moving to the next section. Consider renting a small handheld leaf blower to reposition loose insulation more easily. If your blown insulation is very deep, hiring a professional who can use thermal imaging to locate bypasses without removing all the insulation may be more cost-effective.
▼ How do I know if I have attic bypasses without going up there?
The clearest sign is rooms that are always too cold in winter or too hot in summer despite running the HVAC system. Other signs include recessed lights that feel cold or drafty when you hold your hand near them in winter, frost or moisture stains visible on the attic side of the hatch, and unusually high heating or cooling bills relative to your home’s square footage. A BPI-certified energy auditor can confirm bypass locations precisely using a blower door test and infrared camera for around $300 to $500.
▼ What if my home was built after 2000? Do I still have attic bypasses?
Newer homes are built to tighter standards but most still have meaningful bypass leakage. Energy codes improved significantly after 2004 and again after 2012, but code compliance does not guarantee air tightness in every detail. Recessed lights, plumbing chases, and interior wall top plates are still common bypass locations in homes built as recently as 2015. If your home was built after 2012 and you want to confirm, a blower door test is the only way to know for certain how tight your building envelope actually is.
Quick Tips
- Do your bypass sealing project in spring or fall when attic temperatures are tolerable. Summer attic temperatures routinely exceed 130 degrees Fahrenheit, which creates a serious risk of heat stroke even during short exposures.
- Canned spray foam expands as it cures. Apply it at about 50% of the gap volume and let it expand to fill the rest rather than overfilling and creating a bulging mess that is difficult to seal properly.
- Lay a piece of plywood across the ceiling joists as a work platform before you start. Moving across an attic on just the joists while carrying tools and materials is exhausting and increases the risk of accidentally stepping through the drywall.
- After sealing, check your work on a cold night with the heat running by holding your hand near the ceiling around recessed lights and the attic hatch. You should feel significantly less cold air movement than before. An infrared thermometer pointed at these areas will show surface temperatures closer to room temperature if the sealing was successful.
Variations for Your Situation
- Apartment/Rental: Renters in multi-unit buildings still benefit from addressing bypasses at the unit level. Focus on sealing gaps around recessed lights from below using paintable acoustical sealant applied from inside the room, and ask your landlord to install an insulated attic hatch cover if the unit has attic access. Both fixes are typically reversible and cost under $40. Horizontal unit separations in condos have similar bypasses between floors that affect noise and energy equally.
- Tight Budget (under $50): Start with the two highest-impact items: an insulated attic hatch cover (around $30 at home improvement stores) and a $10 can of fire-rated foam for the most visible pipe and wire penetrations you can reach from the hatch opening without walking across the attic. These two steps alone typically address 20 to 40% of total bypass leakage for a fraction of the full project cost. Save up for the comprehensive sealing later.
- Older Home (pre-1980): Homes built before 1980 typically have 3 to 5 times more air leakage than modern homes and often have more complex bypass pathways including large open chimney chases and balloon framing that connects wall cavities continuously from basement to attic. For these homes, a professional blower door test and air sealing is almost always the better starting point, as the number and complexity of bypasses makes DIY sealing significantly less likely to achieve meaningful results without a systematic approach guided by diagnostic testing.