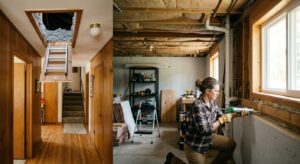
Your home could be leaking heat through a dozen hidden gaps right now and you would never see them. Insulation gaps, thermal bridges, and air leaks inside walls and ceilings are completely invisible without the right tool. The result is higher energy bills, cold spots on winter mornings, and an HVAC system that runs longer than it should. Most homeowners assume their insulation is fine because they had it installed years ago. The reality is that insulation can settle, shift, get wet, or simply was never installed correctly in the first place.
Thermal imaging, also called infrared thermography, solves this problem by converting tiny temperature differences on your walls, ceilings, and floors into a color-coded picture you can actually act on. A handheld infrared camera or a professional energy audit with a blower door test will show you exactly where your building envelope is failing. You stop guessing and start fixing the right spots, which means every dollar you spend on insulation or air sealing goes to work immediately.
This post walks you through what thermal imaging actually reveals, how to use it yourself with an affordable consumer camera, when to bring in a certified energy auditor for a professional scan, and how to prioritize the repairs you find. Whether you are dealing with a drafty bedroom, mysteriously high utility bills, or just want to know your home is performing the way you expect, thermal imaging gives you real answers.
What You’ll Need
Click on an item below to shop for the recommended items for this recipe on Amazon.
As an Amazon Associate, we earn from qualifying purchases.
How to Do It
- Choose the right conditions: scan on a day when the outdoor temperature is at least 15 to 20 degrees Fahrenheit different from your interior. Winter evenings after the sun has set work best because solar loading on walls has cleared.
- Walk your home slowly with the camera set to a mid-range sensitivity palette (rainbow or ironbow colorization makes temperature differences easiest to read). Start at the ceiling level of each room and work downward.
- Flag any blue or purple patches in winter (cool areas indicating heat loss) on exterior walls, around window frames, at the top and bottom plates of walls, and around electrical outlets on exterior walls.
- Pay special attention to rim joists in the basement or crawlspace, attic hatch frames, and the area where the ceiling meets exterior walls. These are the most common failure zones in most homes.
- Photograph every anomaly with both the thermal image and the standard camera image overlaid. Most consumer apps do this automatically. Label each photo with the room and location so you can create a repair priority list.
- Cross-check suspicious areas by holding your hand near the surface. If you feel a draft or noticeably cooler air, the thermal image is confirming a real air leak, not just a cool surface from thermal mass differences.
- Call your utility company or visit their website to ask about Home Energy Audit programs. Many utilities in the US offer audits for $50 to $150 or fully subsidized. Ask specifically if the audit includes a blower door test and infrared scan.
- Before the auditor arrives, make a list of every comfort complaint you have noticed: drafty rooms, rooms that heat or cool unevenly, condensation on windows, unusually high bills in specific months. This guides the auditor toward your actual problem areas.
- During the audit, the technician installs a calibrated fan in an exterior doorway (the blower door) that depressurizes the home to a standard 50 Pascals of pressure. This amplifies every air leak so the infrared camera reads them clearly.
- Walk the house with the auditor while the blower door runs. Ask them to explain each anomaly on the camera screen in real time. Note whether each finding is an air leak, missing insulation, or moisture, as the repair approach differs for each.
- Request the written audit report, which should include an estimated ACH50 (air changes per hour at 50 Pascals) for your home, a prioritized list of recommended upgrades, estimated costs, projected savings in dollars per year, and available rebate programs.
- Use the report to get 2 to 3 contractor bids for the recommended air sealing and insulation work. Show contractors the thermal images so they understand exactly what needs to be addressed and can bid on the same scope.
- Address attic air sealing first. Use canned spray foam to seal around all top plates where interior walls meet the attic floor, around recessed light cans (use a fire-rated foam collar first), and around any plumbing or wiring penetrations. This single step saves 10 to 20% on heating bills in many homes.
- Seal rim joists in the basement or crawlspace with cut-and-cobble rigid foam (2-inch polyisocyanurate, R-13 per inch) cut to fit each joist bay, followed by a bead of spray foam around all four edges to prevent air bypass. This is one of the highest-return repairs in most homes.
- At exterior outlets and switch plates on exterior walls, install foam gaskets behind the cover plate. These cost about $0.50 each and take two minutes per outlet. They stop a surprising amount of cold air infiltration revealed on most thermal scans.
- For wall cavities with missing insulation identified by the scan, the least invasive fix is blown-in insulation through small holes drilled from the exterior or interior, then patched. Contractors use dense-pack cellulose or fiberglass for this application.
- Re-scan problem areas with your thermal camera after repairs to confirm they are resolved. A before-and-after comparison showing uniform wall temperatures is proof the fix worked and is satisfying documentation of your investment.
Why It Works: The Benefits
Without thermal imaging, most homeowners add insulation uniformly or nowhere at all. A scan shows you the exact wall cavities, attic bays, or rim joists that are failing, so you spend money only where it counts and avoid wasting money on areas that are already performing well.
Homes that address the specific leaks and insulation gaps identified by a thermal scan typically see 15 to 30% reductions in heating and cooling costs. A home spending $200 per month on heating could save $30 to $60 every month after targeted air sealing and insulation repairs.
Cold walls and floors radiate discomfort even when the air temperature is technically correct. Fixing the gaps revealed by a scan raises mean radiant temperature in living spaces, which makes a 68 degree room feel as comfortable as a 72 degree room, letting you lower your thermostat setpoint without sacrificing comfort.
Thermal cameras regularly reveal roof leaks, plumbing sweating, and ice dam damage before visible water stains appear. Catching a roof leak or wet insulation batt early can save thousands in mold remediation and structural repair, turning a $300 audit into a very high-return investment.
Many utility rebate programs and state weatherization programs require proof of pre- and post-retrofit conditions. Thermal images serve as that documentation, and they also help you hold contractors accountable by showing exactly what was wrong before the work began.
💰 Savings Impact by Action
Sealing top plate gaps, recessed lights, and attic bypasses identified by a thermal scan reduces heating energy use by 10 to 20% in most homes.
Insulating and air sealing rim joists with rigid foam and spray foam eliminates one of the largest single sources of heat loss in homes with basements, saving up to 15% on heating bills.
Dense-pack blown-in insulation targeting cavities identified as empty by thermal scan reduces wall conduction losses by 10 to 15%.
Addressing air leaks around window frames and exterior doors found by thermal scanning reduces infiltration losses by 5 to 10% with low-cost weatherstripping and caulk.
Homeowners who address all major thermal imaging findings across air sealing and insulation typically achieve 20 to 30% total reduction in annual heating and cooling costs.
🏠 Key Concepts Explained
The Science Behind It
Everything above absolute zero emits infrared radiation, and the intensity of that emission is directly related to surface temperature. An infrared camera detects this radiation wavelength by wavelength using a focal plane array sensor and converts it into a temperature map displayed as a false-color image. The colors you see on screen represent surface temperatures, not heat flow directly. What you are really looking at is the result of heat conduction and convection through your building materials reaching the interior surface and changing its temperature relative to surrounding areas.
The building science reason thermal imaging is so powerful is that heat loss obeys the laws of thermodynamics consistently. Heat always flows from warm to cold, and it will find the path of least resistance through your building envelope. A missing batt of R-19 insulation in a wall cavity increases heat conduction through that stud bay by 5 to 8 times compared to an insulated bay. That dramatic difference in heat flow cools the interior surface of the drywall by 3 to 6 degrees Fahrenheit on a cold night, which is more than enough for an infrared camera to display clearly. Air leaks are even more dramatic because convective heat transfer moves heat 10 times faster than conduction through a solid, so even a small gap at a top plate produces a vivid cold streak on the image.
Moisture complicates the picture in a useful way. Water has an extremely high specific heat capacity, meaning it stores and releases heat slowly compared to dry building materials. A wet area of insulation or framing appears as a distinct cool zone in winter because it is releasing stored heat more slowly than the surrounding dry material. This thermal lag is detectable for hours after the moisture source has stopped, which is why infrared cameras are used by water damage restoration professionals and insurance adjusters to document hidden moisture intrusion that cannot yet be seen or smelled.
Frequently Asked Questions
▼ My thermal camera just shows a uniform color everywhere. Is my insulation perfect?
Not necessarily. The most common reason for a flat, uniform image is insufficient delta-T between indoors and outdoors. You need at least 15 degrees Fahrenheit of difference for meaningful results. If it is 55 degrees outside and 68 degrees inside, that is only 13 degrees and most consumer cameras will not reveal subtle defects. Wait for a colder night or a hotter afternoon in summer before concluding your insulation is fine.
▼ I found a cold spot on my wall. How do I know if it is missing insulation or just an air leak?
Shape and edges tell you a lot. Missing insulation creates a broad, soft-edged cool patch that corresponds roughly to a wall cavity width (14 to 24 inches). An air leak creates a wispy, irregular streak often radiating from a specific penetration point like an outlet, top plate, or window corner. Hold your hand near the surface: if you feel moving air, it is a leak. If the surface simply feels cold but still, it is likely missing or settled insulation.
▼ Can I use thermal imaging in summer instead of winter?
Yes, summer scanning works well if you reverse your interpretation. Run the AC to cool the interior and scan on a hot afternoon when outdoor temps are well above indoor. Heat intrusion from outside shows as warm patches on interior surfaces rather than cold ones. The same failure zones show up: poorly insulated walls, attic bypasses, and air leaks. Just make sure the delta-T is at least 15 degrees, so a 90 degree day with 72 degrees indoors gives you an 18 degree difference that most cameras handle well.
▼ A contractor told me I need to replace all my insulation. Does the thermal scan actually prove that?
A thermal scan by itself does not prove insulation needs full replacement. It shows temperature anomalies that suggest insulation deficiencies, but the definitive test for existing insulation is a physical inspection or a core sample to check R-value, moisture content, and compression. If a contractor recommends total replacement based only on a visual thermal image without accessing the cavity, get a second opinion. Targeted air sealing and spot insulation repairs often deliver 80% of the benefit at 20% of the cost of a full replacement.
▼ My utility company offers a free energy audit. Is it as good as hiring an independent auditor?
Utility-sponsored audits vary widely. Some are full blower door and infrared tests performed by certified BPI auditors that are genuinely excellent. Others are walk-through checklists that are less comprehensive. Ask specifically before scheduling: does the audit include a blower door depressurization test and a live infrared camera scan? If the answer to both is yes, it is worth doing regardless of cost. If it is only a visual walkthrough with an energy checklist, consider budgeting for an independent BPI-certified auditor who will give you more actionable data.
Quick Tips
- Scan at night in winter for the clearest results. After sunset, walls equilibrate to their true insulation performance without solar heat loading skewing the surface temperatures.
- Keep a room at normal thermostat temperature for at least 4 hours before scanning. Walls need time to reach steady-state heat flow for the camera to read accurately.
- Take notes on your phone as you scan. It is easy to forget which room or wall a photo belongs to when you review 60 images later.
- Check your utility company before buying or renting a thermal camera. Many utilities and public libraries now loan FLIR cameras for free to customers as part of efficiency programs.
- A thermal image of a perfectly performing wall should be uniform in color with slightly warmer stripes where studs are (thermal bridges) but no cold patches between them. Use this as your baseline for comparison.
- In summer, you can flip the diagnostic: run your AC and scan on a hot afternoon. Heat intrusion from outside appears as warm patches instead of cold ones, revealing the same insulation and air sealing problems.
Variations for Your Situation
- Apartment or Rental: Renters cannot modify walls or attic insulation, but thermal scanning is still valuable for identifying drafty areas you can address with landlord-safe solutions. A smartphone thermal camera (FLIR ONE, around $200) lets you document cold spots around windows, sliding doors, and exterior outlets for your landlord with compelling visual proof. Use removable window insulation film ($20 to $40 per window), draft snakes at doors, and outlet gaskets (no tools, no damage, under $10) to address what you can independently.
- Tight Budget (under $50): Skip buying a camera and instead rent one from your public library or local tool library, which many cities now offer for free. Alternatively, your hand is a surprisingly effective air leak detector: on a cold windy day, slowly move your palm 2 inches from exterior walls, outlet covers, window frames, and baseboards. Mark every spot where you feel cool air with a sticky note. Then address those leaks with a $6 can of spray foam and a $5 pack of outlet gaskets, targeting the biggest drafts first for the fastest payback.
- Older Home (pre-1980): Homes built before 1980 have much higher baseline air leakage (often 15 to 20 ACH50 versus a modern target of 3 or below) and may have no wall cavity insulation at all. A thermal scan in these homes is extremely revealing but also more complex to interpret because there are so many failure points. Prioritize a professional blower door audit first since the ACH50 number tells you how much improvement is physically possible. Also confirm there is no knob-and-tube wiring in the walls before adding any blown-in insulation, as covering active knob-and-tube creates a fire hazard that requires rewiring before the insulation work can proceed.