Imagine paying for a full tank of gas and then watching a third of it pour onto the ground before you even leave the driveway. That is essentially what happens when your home’s ductwork is riddled with leaks. According to the U.S. Department of Energy, the typical home loses 20 to 30% of conditioned air through leaky ducts, and in older homes that number can climb even higher. That lost air is not just uncomfortable, it is money you are paying your utility company every single month for heat or cool air that never reaches your living spaces.
Duct systems run through some of the most thermally hostile parts of your home: unconditioned attics that can hit 150 degrees Fahrenheit in summer, crawlspaces hovering near outdoor temperatures, and wall cavities open to the outside. When conditioned air escapes into these spaces, your HVAC system has to work harder and longer to compensate, accelerating wear, increasing repair costs, and shortening the system’s lifespan. Meanwhile, rooms far from the air handler feel stuffy or drafty regardless of where you set the thermostat.
This post walks you through exactly what duct leakage is, how to find it yourself, and three approaches to fixing it ranging from a free diagnostic you can do in 15 minutes to a professional duct-sealing service that can pay for itself in under three years. Whether you are a hands-on DIYer or prefer to call a pro, there is a practical path here for your situation and your budget.
What You’ll Need
Click on an item below to shop for the recommended items for this recipe on Amazon.
As an Amazon Associate, we earn from qualifying purchases.
How to Do It
- Turn your HVAC system to fan-only mode at the thermostat so air is moving through the ducts without heating or cooling. This makes leaks easier to feel.
- Hold a stick of lit incense or a thin piece of toilet paper near every duct joint, connection point, and register you can access in the attic, basement, or crawlspace. Watch for the smoke or paper to flutter, which indicates escaping air.
- Mark any leaking joints with masking tape so you can find them easily when you start sealing.
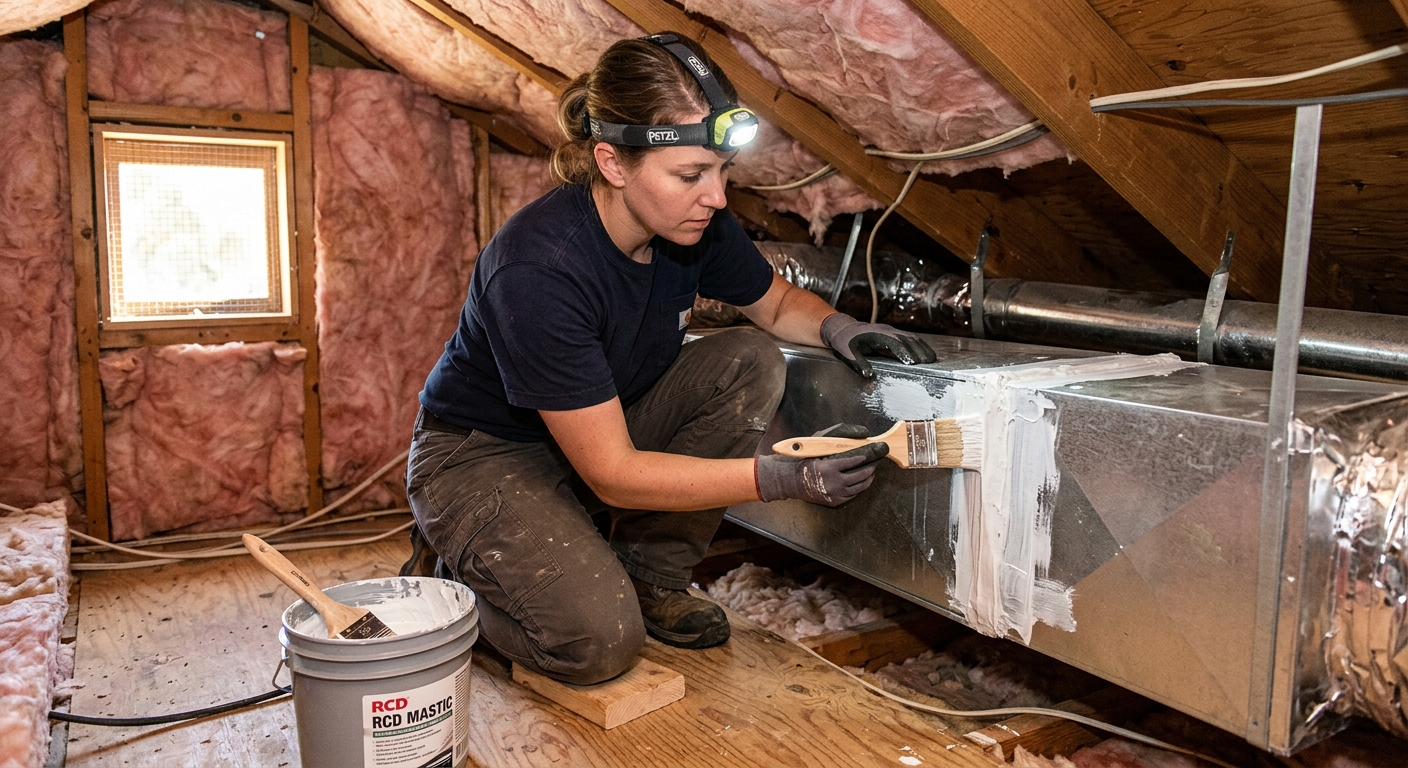
- Apply water-based mastic duct sealant to all flagged joints using a paintbrush or gloved hand. Mastic is far more durable than standard duct tape, which fails within a few years due to heat cycling.
- For gaps wider than about a quarter inch, press fiberglass mesh tape into wet mastic first, let it dry, then apply a second coat of mastic over the top for a reinforced seal.
- After sealing, turn the system back to normal operation. Check the sealed joints for any remaining flutter or air movement after 24 hours once the mastic has fully cured.
- Create a simple duct map of your home by tracing the main supply trunk and branch runs from the air handler. Note every accessible joint, elbow, take-off collar, and return connection on your map.
- Turn the system to fan-only mode and perform a whole-system leak survey using incense sticks at every accessible point on your duct map, including inside the air handler cabinet around the blower.
- Start at the air handler and work outward. Seal the air handler cabinet seams with foil-backed tape rated for HVAC use, then move to the main trunk line, then branch runs, then register boots where ducts meet the floor or ceiling.
- Apply mastic to all metal-to-metal joints. For flexible duct connections, use foil tape rated UL 181B-FX to secure the inner liner, then mastic over the connection for durability.
- Check and reseal any existing duct tape you find. Original gray cloth duct tape degrades within 5 to 10 years and is likely the source of many active leaks in older homes.
- Once sealing is complete, check that all supply and return registers are delivering noticeably stronger airflow than before. If certain rooms still receive weak airflow, there may be leaks inside wall cavities that require professional aeroseal treatment.
- Request quotes from two to three certified Aeroseal contractors in your area. Ask each for a pre-test showing your current duct leakage rate expressed as CFM25 (cubic feet per minute at 25 Pascals of pressure).
- On service day, the contractor pressurizes your duct system and introduces a non-toxic aerosolized polymer. Airborne sealant particles collect and bond at every leak point from the inside, including gaps in wall cavities you could never reach manually.
- The process typically takes three to five hours. You receive a printed report showing pre-sealing and post-sealing leakage rates, which documents exactly how much improvement was achieved.
- Review the report and ask the contractor to explain any remaining leakage. Some leaks in inaccessible locations may require supplemental manual sealing at visible access points.
- After sealing, have your HVAC technician verify that system static pressure and airflow are within design specifications, since a tighter duct system can sometimes require minor adjustments to balancing dampers.
Why It Works: The Benefits
Sealing ducts reduces heating and cooling energy use by 20 to 30% in a typical home, which translates to $200 to $600 per year in savings depending on climate zone, home size, and current utility rates.
Rooms that were previously too hot in summer or too cold in winter often reach comfortable setpoints once conditioned air stops leaking before reaching the far ends of the duct system.
Leaky return ducts can pull in attic insulation fibers, pest debris, mold spores, and outdoor pollutants. Sealing those leaks reduces contaminant infiltration and can meaningfully improve the air your family breathes indoors.
Reducing system runtime by 20 to 30% directly cuts wear on the compressor, blower motor, and heat exchanger, potentially adding several years to the life of equipment that costs $5,000 to $12,000 to replace.
A home that wastes 25% of its conditioned air is emitting 25% more carbon than necessary for the same level of comfort. Sealing ducts is one of the highest-impact single actions a homeowner can take to reduce residential emissions.
💰 Savings Impact by Action
Sealing supply and return duct leaks recovers 20 to 30% of conditioned air that would otherwise escape into unconditioned attic or crawlspace.
Sealing cabinet seams and filter slot gaps at the air handler alone can recover 10 to 15% of total system leakage at virtually no cost.
Professional Aeroseal sealing reaches inaccessible in-wall duct leaks, reducing total duct leakage by an average of 60 to 90% of the pre-treatment rate.
Adding or restoring insulation around sealed ducts in attics reduces heat gain into supply air, saving an additional 8 to 12% on cooling costs in hot climates.
🏠 Key Concepts Explained
The Science Behind It
Your duct system operates under pressure. Supply ducts push conditioned air out at positive pressure, while return ducts pull room air back in at negative pressure. When a supply duct has a gap or crack, high-pressure conditioned air escapes into whatever unconditioned space surrounds it, driven by the pressure differential created by the blower. That escaped air is not recoverable; it heats or cools the attic or crawlspace instead of your living room, and the energy that produced it is simply gone.
The thermodynamic penalty is amplified by location. The rate of heat transfer between the escaped air and its new surroundings depends on the temperature difference between them, a principle described by Newton’s Law of Cooling. A supply duct leaking 68-degree air into a 140-degree attic in July experiences an extreme temperature gradient, meaning the escaped air rapidly absorbs heat and the surrounding attic surface temperature drops slightly, making the whole attic slightly more comfortable while your living spaces remain warm. The reverse happens in winter, when leaked warm air simply evaporates into cold attic air with no benefit to anyone except the utility company.
Duct leakage also creates whole-house pressure imbalances that drive infiltration. When supply ducts lose air to the attic, your home’s interior goes slightly negative relative to outdoor pressure. That pressure difference then pulls outdoor air in through every gap in the building shell, essentially negating some of the benefit of any air sealing work you have done elsewhere. This is why duct sealing and building envelope sealing work synergistically: fixing one without the other leaves significant energy savings on the table.
Frequently Asked Questions
▼ How do I know if my ducts are actually leaking if I cannot get into the attic?
Check your utility bills against neighbors with similar sized homes in your climate. If your heating and cooling costs are significantly higher, duct leakage is a likely culprit. You can also feel around every supply and return register with your hand while the system runs; a register blowing noticeably less air than others on the same system often signals a nearby duct leak. A professional duct leakage test using a blower door gives you exact numbers without needing attic access.
▼ I sealed my ducts but my energy bills barely changed. What went wrong?
If visible sealing did not move the needle, most of your leakage is likely in inaccessible duct runs inside wall cavities or enclosed floor systems. These hidden leaks require Aeroseal or similar pressurized interior sealing, which is the only method that can reach them. Also verify that your air handler cabinet itself is sealed, since cabinet leakage is frequently missed and can account for a disproportionate share of total system loss.
▼ Can I use regular duct tape from the hardware store to seal my ducts?
No. Standard gray cloth duct tape has a rubber-based adhesive that dries out and fails within a few years under the heat cycling of an HVAC system, and it is not code-approved for ductwork. Use water-based mastic sealant for metal-to-metal joints and UL 181B-rated foil tape for flexible duct connections. These materials cost only slightly more and last the life of the duct system.
▼ My home is newer. Do I still have duct leakage issues?
Newer homes can still have significant duct leakage because most duct systems are installed by hand with imperfect connections, and building codes in many states still allow leakage rates that cost homeowners meaningful money. Homes built before 2015 are especially likely to have substandard duct sealing by today’s standards. A duct leakage test is the only way to know your actual rate regardless of home age.
▼ Will sealing my ducts cause any problems with my HVAC system?
In most cases, sealing ducts improves system performance by allowing the blower to maintain proper pressure and airflow. In rare situations, a very tight duct system can slightly increase static pressure if the system was originally sized for a leaky duct system, which your HVAC technician can evaluate and correct by adjusting the blower speed or balancing dampers. This is not a reason to avoid sealing, just a reason to have the system checked afterward if airflow seems significantly different.
Quick Tips
- Focus your sealing effort on ducts in unconditioned spaces first. A duct leak in a conditioned basement costs far less than the same leak in an attic running at 140 degrees Fahrenheit.
- After sealing, check your energy bills for two to three months and compare them to the same period from the prior year, adjusted for degree days, to measure actual savings.
- If any room was noticeably harder to heat or cool before sealing, rebalance your system after sealing by partially closing dampers on registers closer to the air handler so more airflow reaches distant rooms.
- Consider scheduling a professional blower door test combined with a duct leakage test. Many utility companies offer this service subsidized or free, and it gives you precise data rather than estimates.
Variations for Your Situation
- Apartment/Rental: Renters in apartments with individual HVAC units should focus on accessible areas like the air handler cabinet inside a closet and the register boots where vents meet walls or floors. Seal cabinet gaps with removable foil tape and ask the landlord to schedule a professional duct test, noting that lower energy bills benefit both parties. In apartments with central building HVAC, duct sealing is the building owner’s responsibility; redirect your energy toward thermostat scheduling and window sealing instead.
- Tight Budget (under $50): A $15 can of mastic and a $10 brush can seal every accessible joint in a typical home’s attic and crawlspace. Start with the air handler cabinet using foil tape, then hit every visible duct connection you can reach. Even partial sealing of the worst leaks can recover 10 to 15% of conditioned air loss, which in many homes translates to $100 to $200 per year in savings from a $25 investment.
- Older Home (pre-1980): Homes of this age frequently have original ductwork with every joint held together by deteriorated gray cloth tape that has completely failed. Plan on a thorough reseal of the entire accessible duct system, not just spot repairs. Also check for disconnected ducts entirely, which are surprisingly common in older homes after decades of pest activity, insulation contractors, or amateur repairs. Budget $150 to $300 for a comprehensive DIY overhaul of an older system, or consider professional Aeroseal if the duct runs are extensively enclosed in original plaster walls.