You crank up the heat, the rest of the house feels fine, but that one room stays stubbornly cold. Maybe it’s the bedroom at the end of the hall, the converted garage, or the home office addition. Whatever the room, the instinct is to blame the furnace or the thermostat. In most cases, the furnace is working exactly as intended. The problem is in how conditioned air travels through your home and how well that specific room holds onto it.
Cold rooms are almost always caused by one of a handful of diagnosable issues: undersized or blocked supply ducts, too little insulation in exterior walls or the ceiling, significant air leaks around windows and exterior penetrations, or poor return air pathways that strangle airflow before it ever reaches the room. Identifying which problem you have takes about 20 minutes and a few simple checks, and many fixes cost under $50.
This post walks you through exactly how to diagnose your cold room, explains the building science behind why it stays cold, and gives you three levels of solutions ranging from a free 15-minute adjustment to a professional duct rebalancing. Whether the room is just uncomfortable or genuinely unusable in winter, there is a practical fix available to you.
What You’ll Need
Click on an item below to shop for the recommended items for this recipe on Amazon.
As an Amazon Associate, we earn from qualifying purchases.
How to Do It
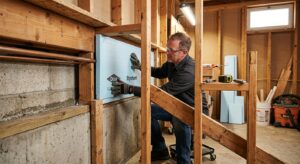
- Check all supply registers in the cold room and make sure none are blocked by furniture, curtains, or rugs. A couch sitting 2 inches in front of a floor register can cut effective airflow by 60%.
- Confirm the register damper is fully open. Most registers have a small lever or rotating slat mechanism. Slide or rotate it until you can feel strong airflow with your hand held above the vent.
- Check registers in other rooms. If some are partially closed, open them all. Closing off registers in other rooms does not increase pressure to the cold room and actually stresses the blower.
- Undercut the cold room door by at least 3/4 inch from the finished floor if the door fits tightly. This creates a return air pathway so supply air is not fighting back pressure. You can test the current gap by sliding a piece of paper under the door.
- Feel around the window frames and exterior wall outlets in the cold room with a damp hand on a windy day. If you feel air movement, note those spots for sealing in your next step.
- Seal all air leaks in the cold room. Apply rope caulk or silicone caulk around window frames, use foam backer rod in large gaps around electrical outlets on exterior walls, and seal the gap where the baseboard meets the floor with paintable latex caulk. Focus on the exterior walls first.
- Add outlet and switch plate gaskets to every electrical box on exterior walls in the cold room. These foam gaskets cost about $5 for a pack of 10 and take 60 seconds each to install after removing the cover plate.
- Install a through-the-wall or in-duct booster fan if the room is at the end of a long duct run. Duct booster fans plug into a standard outlet and fit inside the existing duct or register and cost $30 to $80. They increase airflow to the room by 20 to 40% without any duct work.
- Add a door sweep or replace worn weather stripping on any exterior door in or adjacent to the cold room. A worn door sweep can allow as much cold air infiltration as leaving a window cracked 1/4 inch.
- If the cold room is above a garage or over a crawl space, add rigid foam insulation panels to the floor cavity from below. Two inches of polyisocyanurate rigid foam (R-13) can cut heat loss through that floor by 70% and is a DIY job with a utility knife and spray foam for sealing edges.
- After completing the sealing, run the system and measure the temperature differential again after 24 hours. If the room is now within 3 to 4 degrees of adjacent spaces, the fix is working. If the gap remains more than 5 degrees, proceed toward professional duct assessment.
- Hire an HVAC contractor or building performance contractor to perform a duct leakage test (Duct Blaster test). This identifies where your duct system is losing conditioned air before it ever reaches the room. Industry average duct leakage is 25 to 30% in existing homes.
- Ask for a room-by-room airflow measurement using a flow hood. This tool measures exactly how many cubic feet per minute each register delivers versus what the room requires based on its square footage and load. You will get hard data on which rooms are starved.
- Have the contractor seal identified duct leaks with mastic sealant, not duct tape. Mastic is the correct material and lasts the life of the duct system. This alone can improve system efficiency by 20% and recover airflow to undersupplied rooms.
- If airflow is confirmed inadequate for the room size, have the contractor add a dedicated branch duct from a trunk closer to the air handler, resize the existing branch to the room, or install a duct booster with a pressure-differential controller for automatic operation.
- For room additions or converted spaces with no existing ductwork, explore a ductless mini-split heat pump as a standalone solution. A single-zone mini-split typically costs $1,500 to $3,500 installed and delivers precise temperature control with very high efficiency, independent of the main system.
Why It Works: The Benefits
Fixing airflow balance and sealing leaks in the cold room typically brings its temperature within 2 to 3 degrees of the rest of the house, eliminating the need to overheat common areas to compensate.
When you compensate for one cold room by turning up the thermostat, every degree above the set point adds roughly 3% to your heating bill. Fixing the root cause instead of the symptom can save 10 to 25% per heating season.
Cold rooms frequently develop condensation on walls and windows because warm moist air contacts cold surfaces. Correcting the temperature reduces this condensation risk, protecting against mold and wood rot over time.
An unbalanced duct system forces the air handler to work harder and longer to satisfy the thermostat. Rebalancing airflow can reduce system runtime by 10 to 15%, extending equipment life and reducing wear.
Cold rooms with poor airflow also tend to have stagnant air with higher dust and allergen concentrations. Improved circulation flushes the room with filtered air from the system, improving indoor air quality measurably.
💰 Savings Impact by Action
Sealing infiltration leaks in the cold room reduces heat loss through the envelope by up to 20%, directly lowering the heating load for that space.
Professionally sealing leaky ducts with mastic recovers up to 20% of conditioned air that was previously escaping into unconditioned spaces like attics and crawl spaces.
Adding R-13 rigid foam under a room above a garage or crawl space reduces heat loss through that floor assembly by 60 to 70%, translating to roughly 15% lower heating demand for the room.
Eliminating the habit of raising the whole-house thermostat to compensate for one cold room saves approximately 3% per degree avoided, or about 10% on a typical overcompensation of 3 to 4 degrees.
Correcting duct imbalance through rebalancing or a booster fan reduces total system runtime by 10 to 15% by allowing the thermostat to satisfy at the correct set point without prolonged cycling.
🏠 Key Concepts Explained
The Science Behind It
Your heating system is designed around a simple principle: push a calculated volume of warm air into each room based on that room’s heat loss rate, which is determined by its size, insulation levels, window area, and how many exterior walls it has. When that designed airflow is actually delivered, the room stays comfortable. When something disrupts it, the room falls behind. The furnace does not know one room is cold because the thermostat is almost always in a different, warmer room. It shuts off when the hallway reaches 70 degrees while your bedroom is still at 62.
Duct systems operate on pressure difference. Warm air leaves the air handler under pressure and flows toward registers, but it will always take the path of least resistance. If one branch duct is long, undersized, or has several sharp bends, it loses pressure through friction. Meanwhile a shorter, straighter duct to a closer room delivers air easily. This is why far rooms are almost always the cold ones. Closing registers in closer rooms sounds like it should help, but duct systems are not like garden hoses. Closing registers raises static pressure across the entire system, which actually reduces total system airflow and can push more air out through duct leaks rather than into the cold room.
Insulation and air sealing matter because heat moves in three ways: conduction through materials, convection through moving air, and radiation between surfaces. A poorly insulated wall or ceiling loses heat through all three simultaneously. Air sealing stops the convective losses (the biggest and fastest), insulation slows conduction, and a warmer interior wall surface reduces radiant losses that make occupants feel cold even in a nominally heated room. Addressing all three together is why a combined air sealing and insulation approach typically outperforms either fix done alone by a significant margin.
Frequently Asked Questions
▼ Why is one room always cold even though the vent is blowing warm air?
Warm air coming out of the vent is not the same as adequate airflow volume. Hold your hand about 6 inches above the register and feel the pressure of the airflow, not just the temperature. If the flow feels weak compared to other rooms, the duct delivering air to that register is undersized, too long, or partially blocked. A duct booster fan or professional rebalancing is your next step.
▼ My cold room is above the garage. Is that fixable without major renovation?
Yes, and this is one of the most solvable versions of the problem. The floor cavity between the living space and the garage is almost always under-insulated or completely empty. Adding rigid foam insulation boards to the garage ceiling below the room is a DIY-friendly project that typically costs $150 to $400 in materials and can raise the floor surface temperature by 8 to 12 degrees. Pair this with air sealing around any penetrations through that floor and the improvement is dramatic.
▼ Can a smart thermostat fix a cold room problem?
A standard smart thermostat will not fix the underlying airflow or insulation issue, and may actually make it worse by satisfying the thermostat in warm areas faster and shutting off the system before the cold room catches up. Some multi-zone smart systems like Ecobee with remote sensors can help by averaging temperatures across rooms, but they are compensating for the problem rather than solving it. Fix the root cause first, then add smart controls.
▼ What if my cold room is a newer addition to the house?
Additions are the most common source of stubborn cold rooms because they are often connected to an existing duct system that was never designed to serve additional square footage. The existing system is simply undersized for the expanded home. The best solutions are either a dedicated new duct branch sized correctly for the addition’s heat load or a ductless mini-split that operates independently. A qualified HVAC contractor can do a Manual J load calculation to determine the right sizing.
▼ How do I know if the problem is airflow or insulation?
Feel the exterior walls and ceiling of the cold room on a cold day with the heat running. If the walls feel noticeably cold to the touch compared to interior walls, insulation is a significant factor. If the walls feel reasonably warm but the room still cannot keep up, airflow is the primary issue. In many cases it is both, and the fastest path to comfort is air sealing first, then insulation, then airflow correction in that order.
Quick Tips
- Run your system’s fan in continuous mode (not just auto) during cold snaps to keep air circulating and temperatures more even throughout the house.
- Add a heavy thermal curtain on north-facing windows in the cold room. Closed at night, a good thermal curtain can reduce window heat loss by 25 to 35%.
- If the cold room is rarely used, a small programmable electric space heater set to 60 degrees as a backup costs roughly $15 to $25 per month to run and prevents pipe freeze risk in very cold climates.
- Check that your attic insulation is not compressed or missing above the cold room. Compressed fiberglass insulation loses up to 40% of its R-value and is a common problem in older homes.
Variations for Your Situation
- Apartment or Rental: Renters cannot modify ductwork or add insulation to walls, but can make meaningful improvements without landlord permission. Add heavy thermal curtains ($30 to $80) to cold exterior-facing windows, use draft stoppers at the base of doors, and place a plug-in oil-filled radiator on a programmable timer as a supplemental heat source for under $60. If the vent flow is weak, notify your landlord in writing since duct maintenance is typically the landlord’s responsibility.
- Tight Budget Under $50: Focus on the three highest-impact free or near-free actions. First, unblock and fully open all supply registers in the room. Second, add foam outlet gaskets to all exterior wall outlets and switches (under $10 for a pack). Third, use rope caulk on window frames for the winter season since it is removable and costs about $5 per window. These three steps together can reduce cold air infiltration by 15 to 20% at minimal cost.
- Older Home Pre-1980: Homes built before 1980 often have little to no wall insulation, single-pane windows, and duct systems with significant leakage since they predate modern energy codes. In these homes, air sealing is the single highest-return investment since leakage rates are often 3 to 5 times higher than a modern home. Start with a professional energy audit, which costs $150 to $400 but often identifies $800 to $2,000 in actionable improvements, and check whether your utility offers a free audit as many do.