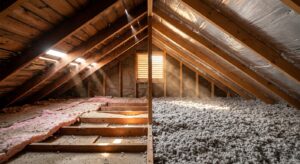
Most homeowners think about insulation in terms of walls and attics, but your front and back entry doors are often the biggest overlooked weak points in the building envelope. An older solid wood or hollow-core door can have an effective R-value as low as R-2, and even a modern insulated steel door rarely exceeds R-5 to R-6. When your wall insulation is already underperforming, that door becomes a significant source of heat loss in winter and heat gain in summer.
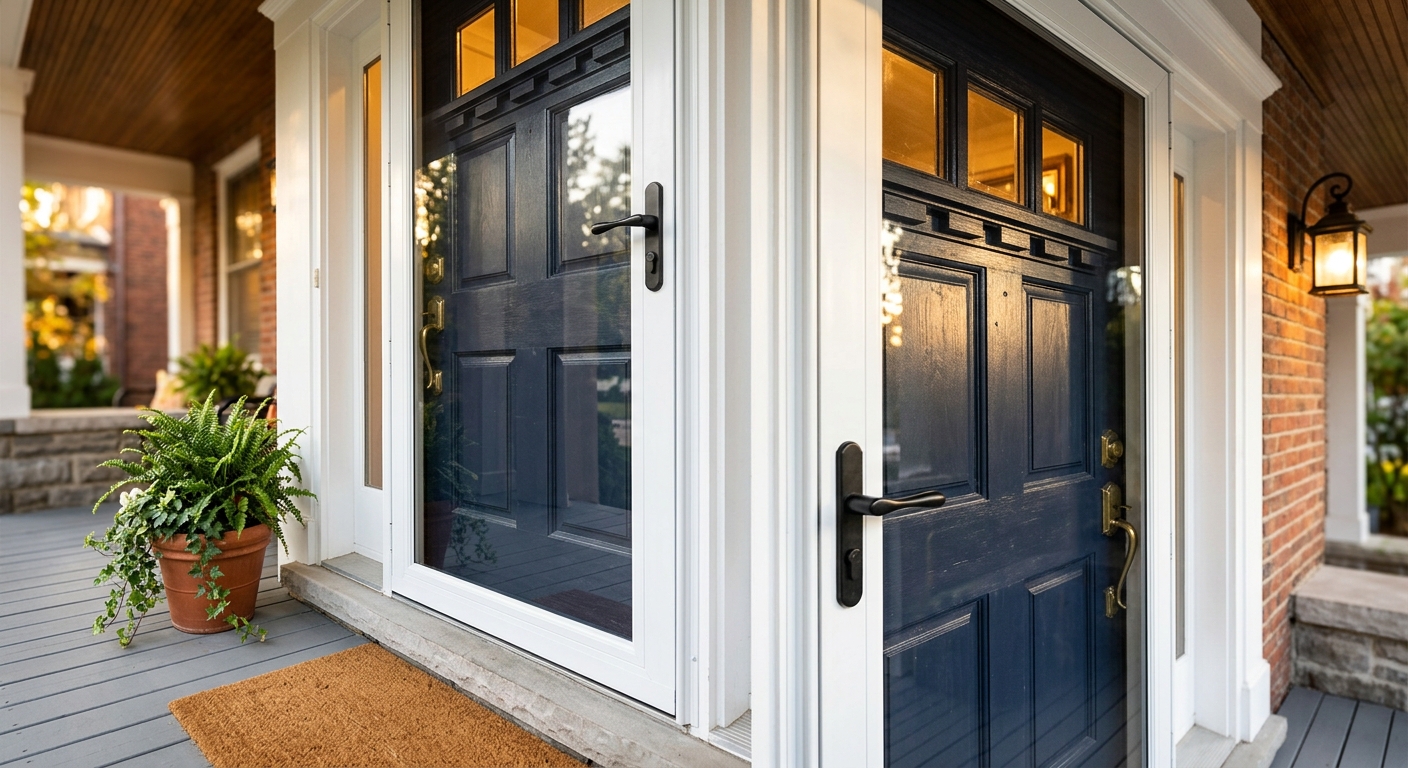
A storm door addresses this problem by creating a sealed air buffer between your primary door and the outside world. That small pocket of trapped air acts as insulation, and the added layer of weather stripping around the storm door frame cuts drafts that bypass your primary door entirely. In homes with weak or aging insulation, this effect is amplified because the storm door compensates for what the rest of the envelope is failing to do.
This post explains the building science behind why storm doors punch above their weight in poorly insulated homes, walks you through two practical approaches to adding one, and gives you real numbers so you can decide whether this upgrade makes sense for your situation.
What You’ll Need
Click on an item below to shop for the recommended items for this recipe on Amazon.
As an Amazon Associate, we earn from qualifying purchases.
How to Do It
- Run your hand around the interior perimeter of the closed door on a cold or windy day and feel for drafts. Mark any locations where you feel air movement with masking tape.
- Inspect the existing door sweep at the bottom of the door. If it is cracked, compressed flat, or missing entirely, replace it with a new vinyl or rubber door sweep, which costs $8 to $15 at any hardware store.
- Check the compression weather stripping around the door jamb on all three sides. Press it with your finger. If it does not spring back or has visible gaps, peel it off and replace it with new foam or EPDM compression strip.
- Apply a thin bead of paintable acrylic caulk to any visible gaps between the door frame and the surrounding wall on the interior side. This seals infiltration that bypasses the door entirely.
- Close the door and check the threshold seal. If daylight is visible or drafts persist at the bottom, adjust the threshold height using the screws on its top surface to create a tighter contact with the door sweep.
- Measure your door opening width and height precisely. Standard storm doors fit 80-inch height openings. Note which side the hinges are on so you order a left- or right-hand door correctly.
- Choose a storm door rated for your climate. Look for a model with a multi-point compression seal, a heavy-duty closer, and low-e glass if the door faces south or west. Brands like Larson, Andersen, and Pella offer solid mid-range options in the $180 to $350 range.
- Remove the existing door trim cap if present. Most storm door kits include a new aluminum or vinyl frame that screws directly into the existing door casing, no major carpentry required.
- Install the hinge side of the frame first using the provided screws, checking for plumb with a level before tightening fully. Then install the latch side, ensuring even spacing around the primary door when it is closed.
- Hang the storm door on the hinges and adjust the door closer tension so the door closes firmly and latches without slamming. Set the hold-open feature if included so the door stays open when needed.
- Test the seal by closing both doors and checking for light gaps around the storm door perimeter. Compress the seal by adjusting the latch-side strike plate if needed. A tight seal is critical to getting the full insulating benefit.
- Get at least two quotes from door installers or general contractors. Ask specifically for an insulated fiberglass or steel entry door with a minimum R-5 rating paired with a low-e storm door.
- Ask your contractor to check the rough opening for rot, water damage, or out-of-square framing before the new door goes in. Addressing this now prevents seal failures later.
- Confirm that the installer will use spray foam or backer rod plus caulk to seal the gap between the new door frame and the rough opening on all four sides, not just interior trim.
- Look into the federal Energy Efficient Home Improvement Credit (25C), which allows a 30% tax credit up to $250 per exterior door ($500 total) for qualifying ENERGY STAR certified doors. Ask your contractor for the product certification documentation.
- After installation, request that the installer adjust both door closers and verify the storm door sweep makes full contact with the threshold before they leave.
Why It Works: The Benefits
A storm door can reduce heat loss through an entry door assembly by 10 to 20%, according to the U.S. Department of Energy. In a poorly insulated home, where baseline losses are already high, that reduction translates to more noticeable comfort and lower bills.
Homes in colder climates with older entry doors and weak insulation can see annual energy savings of $25 to $75 per door depending on door orientation, local energy costs, and how leaky the existing door is. That adds up to real payback within a few years.
Double-sealing the entry eliminates the cold draft zone that often extends 4 to 6 feet into a foyer in winter, making the area near the front door genuinely comfortable rather than something you rush through.
By shielding the primary door from direct rain, UV exposure, and temperature swings, a storm door can significantly slow weathering of wood doors and reduce warping that causes seal failures over time.
Full-view and ventilating storm doors allow you to open the primary door and use natural airflow during mild weather, reducing AC runtime during shoulder seasons when the storm door screen replaces mechanical cooling.
💰 Savings Impact by Action
Adding a second door seal at the entry reduces air infiltration at that opening by up to 15%, directly cutting the volume of unconditioned air entering the home.
The DOE estimates storm doors reduce heat transfer through the entry door assembly by 10 to 20%, with higher values in homes where the primary door is older or poorly sealed.
Low-e storm door glass blocks up to 30% of solar heat gain on sun-facing entries, reducing summer cooling load at that specific opening.
Replacing worn door and window weather stripping throughout a home can reduce annual energy use by up to 10%, with entry doors contributing the largest share per opening.
🏠 Key Concepts Explained
The Science Behind It
The reason storm doors work so well in poorly insulated homes comes down to a concept called the thermal envelope. Your home’s envelope is the collection of surfaces that separate conditioned interior air from unconditioned outside air: walls, roof, foundation, windows, and doors. Every point in that envelope has a resistance to heat flow measured as an R-value. When one component significantly underperforms the others, heat loss concentrates there because heat always moves toward equilibrium through the path of least resistance.
A standard hollow-core interior door used as an entry door has an R-value around R-2. A solid wood door is approximately R-3 to R-5. A modern insulated fiberglass or steel door reaches R-5 to R-8. A storm door on its own adds roughly R-1 to R-2 in effective insulation from the dead air space it creates. But the bigger gain is not conduction at all, it is convection and infiltration control. The DOE estimates that air infiltration accounts for 25 to 40% of heating and cooling energy loss in an average home. Entry doors are disproportionate contributors because they are opened repeatedly and their seals wear quickly. Adding a second sealed door cuts the available path for that infiltration significantly.
In a poorly insulated home, the building envelope as a whole is already losing substantial energy. The storm door’s contribution is amplified in this context because the pressure difference between inside and outside is more pronounced when insulation is thin and interior temperatures swing more readily. By stabilizing the temperature in the small vestibule between the two doors, the storm door also reduces the frequency of condensation on the primary door, which is a source of long-term frame damage and seal deterioration. It is a simple addition that addresses several failure modes at once.
Frequently Asked Questions
▼ My storm door is installed but I still feel cold air near the entry. What is wrong?
The most common cause is a worn or improperly adjusted door sweep on either the storm door or the primary door, not both. Check that both sweeps make firm contact with the threshold when the door is fully closed. Also inspect the compression seal on the latch side of the storm door frame, which often gaps slightly if the strike plate is not adjusted correctly. Tighten the latch-side frame screws and adjust the strike plate inward until the seal compresses evenly.
▼ Will a storm door warp or damage my existing wood front door?
It can, if the primary door receives intense direct sun and the storm door does not have a low-e glass coating. The trapped air space between the two doors can reach temperatures above 140 degrees Fahrenheit on a sunny summer day, which is enough to warp thin wood panels, peel paint, or damage weatherstripping. Choose a storm door with a low-e glass insert for any south- or west-facing entry, and this risk is largely eliminated.
▼ How long does it take to see savings on my energy bill after installing a storm door?
You should see a measurable difference within the first full heating or cooling season, typically 3 to 6 months after installation. The savings are most visible in winter bills in cold climates and summer bills in hot climates where the door is south- or west-facing. Tracking your bill month-over-month against the same period the prior year gives you the clearest picture, since weather variation can mask short-term changes.
▼ Can I install a storm door on a door that has a sidelite panel next to it?
Standard storm doors are designed to cover only the door opening and hinge to the door casing, not to span a sidelite. If your entry has a sidelite that is also leaky, it needs to be addressed separately with caulking, weather stripping, or a window film. Do not attempt to modify a storm door frame to span beyond the primary door casing, as this creates attachment and sealing problems.
▼ My home is a rental. Can I install a storm door without major modifications?
Storm door installation requires screwing into the door casing, so it is a modification that most landlords need to approve in advance. However, the upgrade adds value to the property and many landlords will agree if you present the energy savings case. As an alternative, focus on the air sealing quick fix approach using adhesive-backed foam weather stripping and a door sweep, both of which are removable and do not require landlord permission in most cases.
Quick Tips
- Orient your storm door choice by the compass direction the door faces. South and west facing doors benefit most from low-e glass to reject solar heat gain in summer.
- Clean and lubricate the storm door closer at the start of each heating season. A slow-closing or misaligned closer leaves the door slightly ajar and eliminates most of the air sealing benefit.
- If your home has a storm door that is already installed but old, check whether the glass or screen panel still seals correctly in its track. Worn track seals are a common source of cold air entry in older storm doors.
- In very cold climates, consider a storm door with a solid core lower panel rather than full glass. This reduces radiant heat loss at foot level where the temperature differential is greatest in winter.
Variations for Your Situation
- Apartment or Rental: Renters cannot install a storm door without landlord approval, but they can dramatically reduce door infiltration using peel-and-stick EPDM compression weather stripping ($8 to $12 per door), a slip-on door sweep ($10 to $15), and a door draft stopper at the threshold. These three items address the same infiltration pathways a storm door targets and are fully removable. Present the storm door idea to your landlord as a property improvement that reduces their heating costs.
- Tight Budget Under $50: Skip the storm door and focus entirely on the primary door seals. Replace the door sweep ($10 to $15), apply adhesive foam weather stripping to all three sides of the jamb ($6 to $10), and caulk the interior gap between the door casing and the wall ($5 for a tube). Together these three steps can recover 60 to 70% of the air sealing benefit of a storm door for under $35 in materials and an hour of work.
- Older Home Pre-1980: Homes built before 1980 often have out-of-square door frames, non-standard opening sizes, and original wood thresholds that have settled unevenly. Measure your door opening in three places vertically and three horizontally before ordering any storm door, since a difference of more than half an inch between measurements means the frame needs shimming or adjustment before a pre-hung storm door will seal correctly. In these homes, professional installation is often worth the cost to avoid a poorly fitted door that performs worse than no storm door at all.