Every winter, millions of homeowners crank up the thermostat and wonder why their house never quite feels warm. The furnace runs constantly, the bills climb higher, and certain rooms stay stubbornly cold no matter what you do. The culprit is often hiding in plain sight: your walls are quietly bleeding heat to the outside, 24 hours a day.
Wall heat loss is one of the most underdiagnosed problems in residential energy efficiency. While attic insulation gets most of the attention, the U.S. Department of Energy estimates that walls account for roughly 35% of a home’s total heat loss in poorly insulated houses. That means a significant chunk of your heating dollar is literally passing through the drywall and into the cold air outside. The good news is that wall heat loss leaves behind clear, detectable signs — and many fixes are well within a motivated homeowner’s reach.
This post walks you through five concrete signs that your walls are losing heat right now, explains the building science behind each one, and gives you two proven approaches to stop the losses and reclaim your comfort and your money.
What You’ll Need
Click on an item below to shop for the recommended items for this recipe on Amazon.
As an Amazon Associate, we earn from qualifying purchases.
How to Do It
- On a cold windy day, walk slowly along every exterior wall holding a stick of incense or a lit candle near the baseboard, electrical outlets, switch plates, and window and door trim. Watch for smoke or flame disturbance that reveals air leaks.
- Remove outlet and switch plate covers on exterior walls. Use a foam outlet gasket (available in packs of 10 for about $4) to seal the gap between the electrical box and the drywall. Replace the cover and repeat for every exterior outlet and switch.
- Apply a bead of paintable latex caulk along the joint where the baseboard trim meets the floor on exterior walls. This seals a common infiltration path where cold air enters from the wall cavity below.
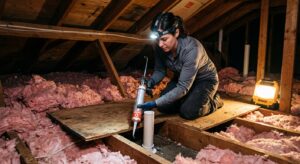
- Seal any visible gaps around pipes, wires, or cables that penetrate exterior walls using fire-rated acoustic sealant or expanding spray foam rated for gaps under 1 inch.
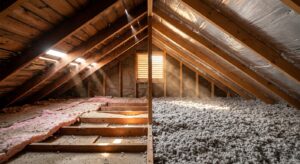
- Check the attic floor above exterior walls for gaps in the top plate. Use a can of low-expanding spray foam to seal around any top-plate penetrations you can access from the attic. This single step often yields the largest reduction in stack-effect air flow.
- After sealing, repeat the incense test to confirm the leaks are closed. Document your work with photos for future reference and any rebate applications.
- Hire an insulation contractor to perform a blower door test first. This measures your home’s current air leakage rate in ACH50 and gives you a baseline to verify improvement after the work is done.
- Request dense-pack cellulose as the default material. It achieves R-3.5 per inch, resists convective looping, and has a lower environmental footprint than fiberglass. For a 2×4 wall cavity this yields approximately R-13.
- The contractor will drill 2-inch holes in either the interior drywall or exterior siding between each stud bay, inject the material under pressure until the cavity is fully packed, then patch and paint the holes. Most crews complete a whole house in one day.
- Ask for a post-installation blower door test to confirm the air leakage has improved and that no cavities were missed. A reputable contractor will provide this as standard practice.
- Check for available rebates before paying. Many utility companies and state energy offices offer $0.10 to $0.30 per square foot of insulated wall, and the federal 25C tax credit covers 30% of the installed cost up to $1,200 per year as of 2024.
- After the work is complete, monitor your heating bills for two full billing cycles and compare to the same period the prior year, adjusting for any significant temperature differences using heating degree day data available free from NOAA.
Why It Works: The Benefits
Properly insulating previously uninsulated or under-insulated walls can reduce heating energy use by 15 to 40%, translating to $200 to $600 per year in savings for a typical 1,500 to 2,500 square foot home in a cold climate.
Insulated walls maintain a more stable surface temperature, eliminating the radiant chill that makes rooms feel cold even when the air temperature reads 70 degrees F. Rooms that previously ran 5 to 8 degrees colder than the thermostat setting often stabilize within 1 to 2 degrees.
When the building envelope holds heat longer, your furnace or heat pump cycles less frequently. Shorter run times extend equipment life and reduce wear on components that typically cost $3,000 to $8,000 to replace.
Insulating walls raises the interior wall surface temperature, keeping it above the dew point and preventing condensation inside the wall cavity, which protects framing, drywall, and air quality.
Insulated walls reduce sound transmission from outside by 3 to 5 decibels on average, a noticeable improvement in homes near busy streets or neighbors, at no additional cost beyond the insulation itself.
💰 Savings Impact by Action
Sealing wall penetrations and outlet gaps can reduce infiltration-driven heat loss by up to 20%, with payback typically under 12 months.
Adding dense-pack insulation to previously empty wall cavities reduces whole-wall heat loss by 30 to 40% in cold climates.
Adding a continuous layer of rigid foam to the exterior over studs reduces thermal bridging losses by up to 10% of total wall heat transfer.
Air sealing plus full wall insulation together reduce total heating energy use by 15 to 40% depending on the home’s starting conditions and climate zone.
🏠 Key Concepts Explained
The Science Behind It
Heat always moves from warm to cold through three mechanisms: conduction, convection, and radiation. In your walls, all three are happening simultaneously. Conduction moves heat directly through solid materials like drywall, studs, and sheathing. The rate is governed by thermal conductivity, and wood studs conduct heat roughly 400 times faster than still air, which is why they act as thermal bridges even when the cavities are well insulated. A nominally R-13 insulated wall with 2×4 studs at 16 inches on center has a whole-wall effective R-value closer to R-9 to R-10 once thermal bridging is accounted for.
Convection matters inside the wall cavity when insulation is absent, thin, or has settled and left gaps. Air near the warm interior drywall heats up, rises, and migrates toward the cold exterior sheathing, where it cools, drops, and cycles back. This convective loop runs continuously and can transfer as much heat as a small space heater running all day. Dense-pack insulation eliminates convective looping by physically preventing air movement within the cavity, which is why it consistently outperforms loose or improperly installed batts despite having a similar nominal R-value.
Radiation is the mechanism most homeowners feel but rarely identify correctly. Every surface emits infrared radiation proportional to its temperature. A cold exterior wall radiates very little heat back toward you, but your body is continuously radiating heat toward it. This radiant exchange makes you feel cold even when the air temperature reads 70 degrees F, because mean radiant temperature, the average of all surface temperatures around you, is significantly below your skin temperature. Insulating the wall raises its interior surface temperature from perhaps 55 degrees F on a cold day to closer to 67 degrees F, dramatically changing the radiant balance in the room and making it feel genuinely warmer without changing the air temperature at all.
Frequently Asked Questions
▼ My walls feel cold to the touch even though I just had insulation added. Did it work?
Touch alone is not a reliable test because your skin is sensitive to thermal conductivity, not just temperature. Drywall feels colder than wood at the same temperature because it conducts heat away from your hand faster. Use an infrared thermometer to get the actual surface temperature. If the wall is reading below 60 degrees F on a very cold day, ask your contractor for a post-installation blower door test and confirm that every stud bay was actually filled, as missed cavities are a common installation error.
▼ One room is always colder than the rest of the house. Why would that be if the walls are insulated?
A single cold room usually points to a localized problem rather than a whole-house insulation failure. Check for a missing or blocked supply register, a duct leak in the wall or ceiling cavity serving that room, a window with a failed gas seal, or a wall section where insulation was never installed, such as above a garage or over a crawl space. Use an infrared thermometer to scan all four walls and the ceiling to isolate which surface is coldest, then focus your investigation there.
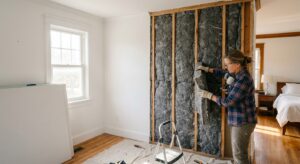
▼ Can I add insulation to my walls without removing the drywall?
Yes. Blown-in insulation, either dense-pack cellulose or blown-in fiberglass, is specifically designed for retrofit applications where drywall removal is not practical. A contractor drills small access holes between each stud bay from either the interior or exterior, fills the cavity under pressure, and patches the holes. The finished result is nearly invisible after painting. This approach costs significantly less than a gut renovation and achieves comparable thermal performance.
▼ How do I know if my walls have any insulation at all without opening them up?
Remove an outlet cover on an exterior wall and shine a flashlight into the gap around the electrical box. If you see pink, yellow, or gray material, there is some insulation present, though it may be settled or incomplete. If you see bare wood studs and black or dark wall sheathing, the cavity is empty. You can also carefully drill a small exploratory hole in an inconspicuous location, such as inside a closet on an exterior wall, and use a wire or thin rod to probe the cavity depth. An energy auditor with an infrared camera can give you a full picture of insulation gaps in under an hour.
▼ Are there rebates available to help offset the cost of wall insulation?
Yes, and they are worth checking before you pay. The federal 25C Energy Efficient Home Improvement Credit covers 30% of insulation material and installation costs up to $1,200 per year through 2032. Many state programs and utility companies layer on top of this with rebates of $0.10 to $0.50 per square foot. Visit the DSIRE database at dsireusa.org and your utility company’s website to find programs in your zip code. Ask your insulation contractor if they are familiar with the local programs, as experienced contractors often handle the rebate paperwork on your behalf.
Quick Tips
- Check the walls in your oldest or coldest room first. In homes built before 1980, wall insulation is frequently absent entirely, not just thin, and those rooms will show the biggest improvement per dollar spent.
- Seal air leaks before adding insulation if you are doing both. Air sealing first maximizes the performance of any insulation you add afterward, and some insulation contractors will reduce their quote if the air sealing is already done.
- Pay attention to the corner where the ceiling meets exterior walls. This junction is one of the most common locations for both missing insulation and air infiltration, and it is often accessible from the attic without touching the walls at all.
- If your energy bills have increased more than 10 to 15% year over year without a rate increase, treat it as a strong signal that insulation has settled or moisture has degraded it. Insulation performance can drop by 50% when wet.
- When comparing insulation quotes, ask contractors to specify the installed density in pounds per cubic foot for blown-in materials. Dense-pack cellulose should be installed at 3.5 lb per cubic foot or higher. Lower densities allow settling and convective looping over time.
Variations for Your Situation
- Apartment/Rental: Renters cannot modify wall insulation, but can still address drafts and radiant chill. Hang heavy thermal curtains rated R-2 or higher on any wall that faces the exterior, not just windows. Place draft stoppers at door bases and apply removable rope caulk, which peels off cleanly, around drafty window frames. A rug or thick curtain on a cold exterior wall can raise the perceived room temperature by 2 to 4 degrees F through reduced radiant heat loss. Total cost is typically $30 to $120 and requires no landlord permission.
- Tight Budget (Under $50): Focus entirely on air sealing, which delivers the fastest payback of any energy improvement. A $4 pack of outlet gaskets, a $6 tube of latex caulk, and a $12 can of minimal-expanding spray foam cover most of the highest-impact sealing points in a typical home. Prioritize exterior outlets and switches, the baseboard-to-floor joint on exterior walls, and any pipe or wire penetrations you can reach. These three items combined can reduce infiltration-driven heat loss by 10 to 20% at a total cost under $25.
- Older Home (Pre-1980): Homes built before 1980 are far more likely to have zero wall insulation, single-pane windows, and balloon-frame construction where wall cavities run continuously from basement to attic, creating direct chimneys for stack-effect air loss. Start with a professional energy audit, which costs $200 to $500 and is often subsidized by utilities, to map the full scope of losses before spending on any single fix. Dense-pack cellulose is particularly well suited to older balloon-frame homes because it fills continuous cavities and dramatically slows stack-effect air movement. Budget $3,000 to $6,000 for a full wall insulation retrofit and expect 25 to 40% heating bill reductions in climates with 5,000 or more heating degree days.