
The moment the temperature drops, most of us reach for the thermostat without a second thought. But your furnace has been sitting idle for six or more months, and firing it up cold, without any preparation, is one of the most common and costly mistakes homeowners make every fall. Dust-clogged filters, cracked door seals, and a thermostat stuck in summer mode can turn an efficient heating system into an expensive one almost overnight.
Here is the good news: the four fixes that make the biggest difference are almost entirely DIY-friendly, cost very little, and take less than an afternoon to complete. Together, they address the real culprits behind high heating bills, uneven temperatures, and mid-winter furnace failures. We are talking about air filtration, duct leakage, thermostat programming, and envelope sealing, four systems that work together to determine how hard your furnace has to run and how much you pay for the privilege.
This guide walks you through each fix in plain language, with real numbers on what you can save, how long each task takes, and when it makes sense to call a pro instead. Whether your home is 10 years old or 50, these steps will help you start the heating season smarter and warmer.
What You’ll Need
Click on an item below to shop for the recommended items for this recipe on Amazon.
As an Amazon Associate, we earn from qualifying purchases.
How to Do It
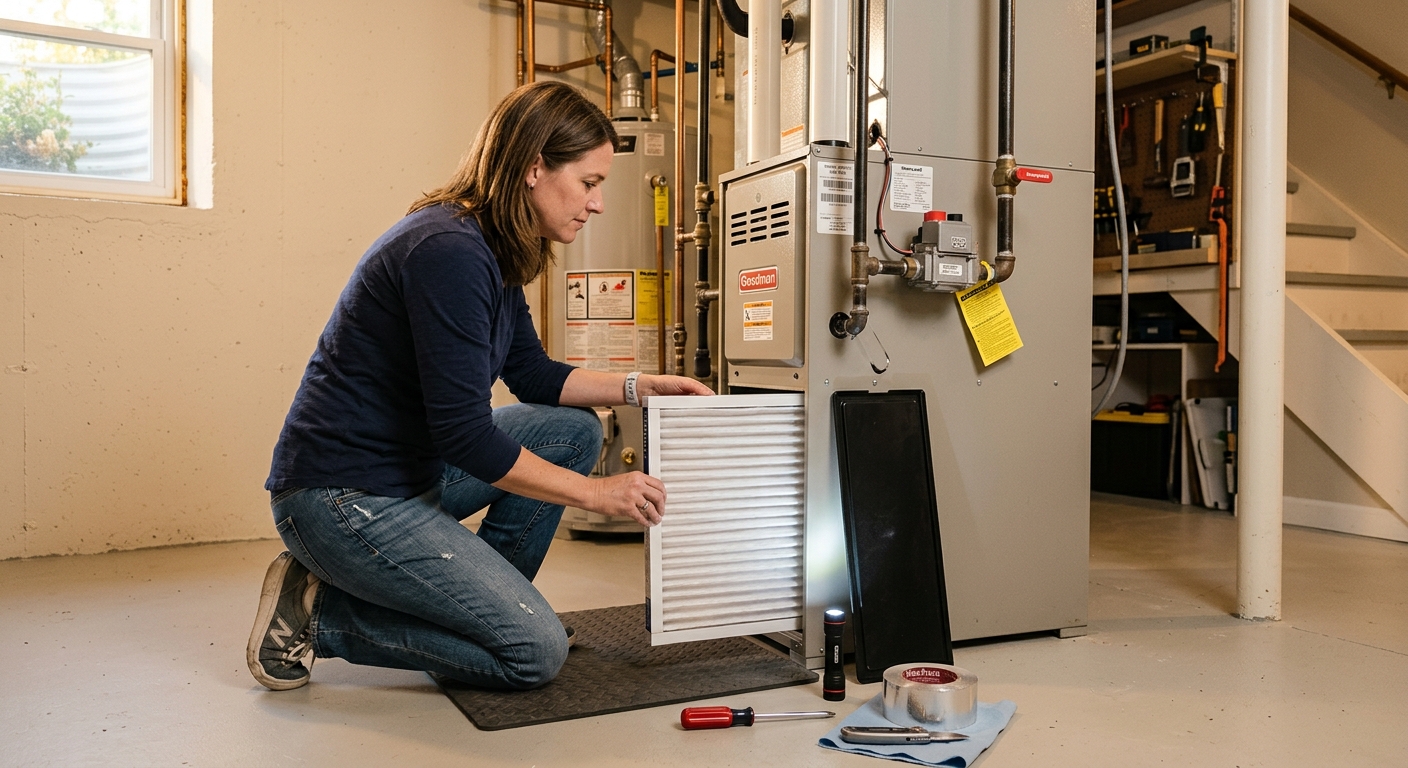
- Replace the furnace air filter with a fresh MERV 8 to 11 rated filter. Check the slot for the correct size (printed on the old filter’s cardboard frame), slide the new one in with the airflow arrow pointing toward the furnace, and dispose of the old filter in a sealed bag.
- Set your thermostat to a fall heating schedule: 68 to 70 degrees Fahrenheit when home and awake, 62 to 65 degrees when sleeping, and 60 to 62 degrees when everyone is away for more than 2 hours. If you have a programmable or smart thermostat, create the schedule in the device settings now before the cold arrives.
- Walk your home’s perimeter and press your hand or a lit incense stick near the bottom of all exterior doors. Feel or watch for drafts and note any doors where you can see daylight around the frame. Replace worn door sweeps and press adhesive foam weatherstripping into the frame gaps as a temporary fix until you can do a full weatherstrip replacement.
- Test your carbon monoxide detectors by pressing the test button. Replace the batteries if they chirp or fail to respond. If the unit is more than 7 years old, replace the entire detector, the sensors degrade over time regardless of battery condition.
- Switch your ceiling fans to their winter (clockwise) rotation setting using the small switch on the motor housing. Running fans at low speed clockwise pushes the warm air that collects near the ceiling back down to floor level, reducing how hard the furnace works.
- Replace the furnace filter (MERV 8 to 11) and, while the filter panel is open, use a flashlight to visually inspect the blower compartment for dust buildup on the blower wheel and motor. If the wheel has thick dust caked between the fins, use a soft brush or compressed air to clean it before closing, since a dirty blower wheel reduces airflow by 15 to 25%.
- Program a full 7-day heating schedule into your thermostat with at minimum three setpoints: wake, sleep, and away. If your thermostat is more than 10 years old or is a simple single-temperature dial, replace it with a programmable model ($25 to $50) or a smart thermostat ($120 to $250). This single upgrade pays back in 6 to 12 months through consistent setback savings.
- Inspect accessible ductwork in the basement, attic, or crawl space for disconnected joints, crushed flex duct, or gaps at supply and return connections. Seal any gaps you find with UL-181 rated metal foil tape (not standard duct tape, which fails quickly). Focus especially on joints at the air handler, trunk lines, and the first 5 feet of each branch run where leakage is highest.
- Do a complete weatherstripping audit on all exterior doors. Remove old compressed or cracked weatherstripping from the door frame stops and replace with V-strip (tension seal) weatherstripping on the sides and top, and a door sweep on the bottom. A properly sealed exterior door should require light resistance to close and show no light gaps around the frame.
- Seal air infiltration points throughout the home using a $5 to $8 tube of paintable latex caulk. Priority locations: window frame-to-wall joints on the interior, gaps where plumbing or electrical enters from outside or the crawl space, the attic hatch perimeter, and around recessed light fixtures visible from the attic. Each sealed gap is a point where the stack effect was actively exchanging your heated air for cold outside air.
- Turn the furnace to heating mode for its first test run. Stand near the supply vents closest to the furnace and the farthest supply vents from the air handler. If the farthest rooms are getting noticeably less airflow, note it as a potential duct balancing or leakage issue to investigate further. Let the furnace run through one full cycle and check that the burner flame, if visible through the sight glass, is steady and blue, not orange or flickering.
- Schedule a furnace tune-up with a licensed HVAC technician in September or early October, before the seasonal rush drives up wait times and prices. Ask specifically for a combustion analysis, heat exchanger inspection, and flue draft test, not just a filter swap and thermostat check.
- Request a blower door test or duct leakage test (called a duct blaster test) if you suspect significant energy loss. These diagnostic tools quantify exactly how leaky your envelope and duct system are, giving you a baseline to measure improvements against and prioritize your DIY repairs.
- Have the technician check static pressure in the duct system. High static pressure (above 0.5 inches of water column) indicates restriction from a dirty filter, undersized ducts, or blocked returns, and is the leading cause of blower motor failure and heat exchanger stress.
- Ask for a written report of any findings including efficiency ratings, carbon monoxide readings at the flue, and any components showing wear. This documents the furnace’s condition and gives you a prioritized repair list with estimated costs so you can plan for the season.
Why It Works: The Benefits
Completing all four fixes together typically reduces heating costs by 20 to 35% per season, which translates to $200 to $600 in savings for a home spending $1,500 to $2,000 annually on heat.
The most common mid-winter furnace failures, including overheating shutdowns and blower motor failures, are directly linked to restricted airflow from dirty filters. Replacing the filter before the season starts dramatically reduces breakdown risk during peak demand.
Sealing duct leaks and air infiltration points eliminates the cold spots and drafty corners that make some rooms feel 5 to 10 degrees cooler than others, improving comfort without raising the thermostat.
A fresh MERV 8 to 11 filter captures dust, pet dander, and mold spores that accumulate over summer. Combined with a sealed envelope, this reduces the unfiltered outdoor air and attic air pulled into your living space all winter.
Inspecting or having a professional check the heat exchanger and flue before first use catches cracks that could allow combustion gases into the home. This check costs nothing to do yourself visually and could be life-saving.
💰 Savings Impact by Action
A clean MERV 8 to 11 filter restores full airflow, reducing blower energy use and preventing overheating shutdowns that waste 10 to 15% of furnace runtime.
Programming consistent setbacks of 7 to 10 degrees for 8 hours daily saves approximately 10 to 15% on annual heating costs according to DOE data.
Sealing duct leaks in an average home reduces heated air lost to unconditioned spaces by up to 20%, directly cutting the runtime needed to reach setpoint.
Sealing envelope gaps at doors, windows, and penetrations can reduce infiltration-related heat loss by 15 to 25% in a typical leaky home.
🏠 Key Concepts Explained
The Science Behind It
Your furnace does not just heat air, it moves air. The blower pulls air from your living space through return ducts, passes it across a heat exchanger where combustion gases (safely on the other side of a steel barrier) transfer their heat to the airstream, and then pushes that warm air back out through supply ducts. Every step in that chain depends on unrestricted airflow. When a filter gets clogged, the blower has to work against higher resistance, which reduces airflow, raises the temperature inside the heat exchanger, and triggers high-limit safety shutoffs. Over time, the repeated stress of thermal cycling on an overheated heat exchanger leads to the cracks that create carbon monoxide risk.
The thermal envelope of your home works like a pressure boundary. In winter, the stack effect creates a natural pressure differential: warm air is buoyant and wants to escape through any gap at the top of the structure, while the resulting negative pressure at the bottom draws cold outside air in to replace it. This is not a small effect. In a leaky home, this passive air exchange can replace the entire air volume of the house two to three times per hour, requiring the furnace to reheat that incoming cold air continuously. Sealing the top and bottom of the envelope together, attic bypasses and lower-level penetrations alike, breaks this loop and dramatically reduces the furnace runtime needed to maintain temperature.
Duct leakage compounds both problems. When supply ducts leak conditioned air into unconditioned spaces, the furnace runs longer to compensate. When return ducts leak, they pull in unfiltered air from attics or crawl spaces, bypassing the filter entirely and distributing that air throughout the house. The ENERGY STAR program considers a home with duct leakage above 15% of airflow to have a significantly inefficient system. Most homes without any duct sealing measures test at 25 to 35% leakage, meaning one dollar in four spent on heating is going directly into the attic.
Frequently Asked Questions
▼ My furnace kicks on but the house still feels cold. What is wrong?
Check two things first: whether the supply vents are open and unblocked by furniture or rugs, and whether the return air vents are clear. A blocked return starves the system of air to heat. If airflow feels weak at the vents, replace the filter immediately even if it looks acceptable, a partially clogged filter causes exactly this symptom. If airflow is strong but rooms still do not warm up, you likely have significant duct leakage or an undersized furnace for your current load.
▼ I notice a burning smell when I first turn the furnace on. Is that dangerous?
A brief dusty or musty smell during the first few cycles of the season is normal. Dust and debris that settled on the heat exchanger over summer burns off quickly and the smell should disappear within an hour. If the smell is persistent, chemical or plastic in nature, or smells like burning rubber or singed wire, shut the furnace off and call an HVAC technician. Those smells indicate a wiring issue, a failing blower motor capacitor, or a foreign object in the system.
▼ How long before I see these fixes show up on my energy bill?
Thermostat scheduling shows up immediately on the next billing cycle since it reduces runtime every single day. Filter replacement and duct sealing improve efficiency but may take one to two billing cycles to appear clearly in the numbers, partly because early-fall bills are lower than peak-winter bills and weather variation can mask the savings. For the clearest comparison, compare this January’s bill to last January’s, adjusted for degree days if your utility provides that data.
▼ My home is a rental. Can I do any of these fixes?
Absolutely. Replacing the air filter, programming the thermostat, adding door sweeps, and applying weatherstripping are all renter-safe improvements that do not require landlord approval in most cases and leave no permanent marks. If the thermostat is locked or a basic non-programmable dial, ask your landlord in writing to replace it with a programmable model, framing it as a maintenance request. Duct sealing with foil tape is also non-destructive and reversible, making it acceptable in most rental situations.
▼ My furnace is over 20 years old. Is it worth doing all these fixes or should I just replace it?
Do the low-cost fixes regardless because they improve efficiency and safety even on an aging system. However, if your furnace is rated below 80% AFUE (the rating should be on the yellow EnergyGuide label or accessible online by model number), replacing it with a modern 96% AFUE condensing furnace can cut fuel consumption by 15 to 20% on its own. Get a professional inspection first to determine the heat exchanger condition. A cracked heat exchanger on a 20-plus-year-old furnace is a strong signal that replacement is the right financial and safety call.
Quick Tips
- Buy filters in a 3-pack or 4-pack at the start of the season so you always have a replacement on hand. Set a recurring phone reminder for every 60 to 90 days to check and swap the filter.
- Point a bright flashlight at the gap under exterior doors at night with the interior lights off. Any visible light means you have a gap large enough to feel as a draft during cold weather.
- Seal the attic access hatch with weatherstripping around its perimeter and glue rigid foam insulation to the top surface of the hatch panel. Attic hatches are one of the largest single air leakage points in most homes and are routinely overlooked.
- If your programmable thermostat is not actually being programmed (most are not), consider a smart thermostat with a learning algorithm. Studies from Nest and Ecobee both show average savings of 10 to 15% annually compared to a constant-setpoint manual thermostat, largely because the schedule actually gets followed.
Variations for Your Situation
- Apartment or Condo: Renters can still capture 40 to 50% of the available savings through filter replacement (ask your building manager for the correct size if not labeled), thermostat scheduling, and sealing gaps around window frames and under exterior doors with removable rope caulk or foam tape. Both products leave no residue and cost under $15. Ceiling fan reversal and CO detector testing are also fully renter-safe. Skip duct sealing in centrally managed buildings since you typically do not have access to the duct system.
- Tight Budget (under $30): Prioritize in this order: replace the air filter ($10 to $15, highest impact per dollar), add foam outlet gaskets to exterior-wall electrical outlets ($5 for a pack of 10), apply adhesive door sweep to the primary exterior door ($8 to $12), and set a heating schedule on whatever thermostat you have (free). These four steps alone can deliver 15 to 20% savings with minimal upfront cost.
- Older Home (pre-1980): Homes built before 1980 typically have single-pane windows, minimal wall insulation, and no vapor barrier, meaning air leakage and heat loss are significantly higher than in newer construction. Prioritize the stack effect fixes first: seal the attic hatch, caulk all ceiling penetrations visible from the attic, and add weatherstripping to every exterior door before touching anything else. These homes often have uninsulated or poorly insulated duct runs in the attic or crawl space, and a professional duct sealing job using Aeroseal ($1,000 to $2,000) can deliver 25 to 30% heating cost reductions that DIY tape alone cannot fully achieve.