Your garage door covers anywhere from 80 to 200 square feet of wall space, and if it has no insulation, it might as well be a giant radiator in summer and a refrigerator panel in winter. Most standard steel garage doors have an R-value of less than 2, which means heat moves through them almost freely. For comparison, a typical insulated exterior wall sits at R-13 to R-21. That gap is costing you money every single month.
If your garage shares a wall with your living room, master bedroom, or kitchen, that temperature transfer is directly affecting your home’s comfort and your HVAC workload. Attached garages can account for 10 to 20% of a home’s total heat loss in cold climates, and in hot climates an uninsulated garage can reach 130 to 140 degrees Fahrenheit in summer, turning your car into an oven and your shared wall into a heating element. The good news is this is one of the most rewarding DIY projects you can tackle in a single afternoon.
This guide covers three approaches: a budget-friendly quick fix using foam board panels, a proper DIY kit installation, and a professional door replacement for those ready for a long-term upgrade. Each option includes real costs, payback timelines, and step-by-step instructions so you can pick the right path for your situation.
What You’ll Need
Click on an item below to shop for the recommended items for this recipe on Amazon.
As an Amazon Associate, we earn from qualifying purchases.
How to Do It
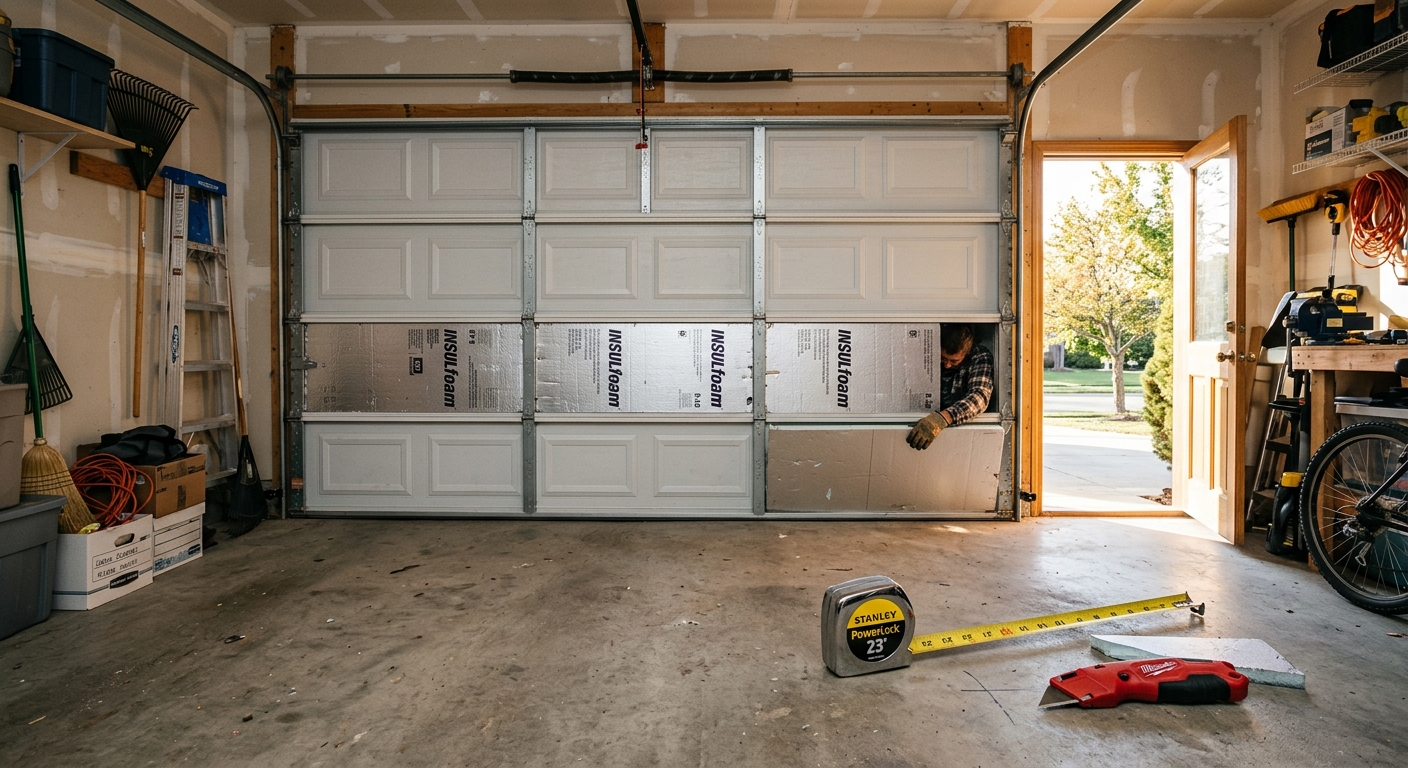
- Measure each panel section of your garage door from the inside, recording height and width for every individual panel bay between the horizontal rails.
- Purchase 1.5-inch or 2-inch thick rigid polyisocyanurate (polyiso) foam board from a home center. Polyiso offers R-6 to R-13 per inch, the highest R-value per dollar of any rigid foam.
- Score and snap the foam board to fit each panel bay using a utility knife and straightedge, cutting pieces about 0.25 inch smaller on each side so they fit snugly without bowing.
- Press each foam panel firmly into the recessed bay. For a more permanent hold, apply three to four dabs of construction adhesive rated for foam (such as Loctite PL 300) to the back of each piece before pressing it in.
- Check that all panels seat flush and do not interfere with the door’s horizontal rails, hinges, or rollers. Trim any edges that catch on hardware.
- Test the door by manually lifting it and cycling it with the opener twice to confirm smooth operation and that no panels have shifted.
- Purchase a garage door insulation kit sized for your door (single 9×7 ft or double 16×7 ft). Confirm it lists your door’s panel style (raised, flat, or recessed) on the packaging.
- Clean the inside surface of each panel bay with a damp cloth and allow it to dry completely. Adhesion and retainer clips grip far better on a clean surface.
- Install the plastic retainer clips by pressing or screwing them into the center of each panel bay according to the kit instructions, typically two clips per panel bay.
- Cut the foam batt or foam board panels to length using a utility knife. Most kits include pre-scored material that snaps cleanly with minimal cutting.
- Snap each foam panel onto the retainer clips, pressing firmly until you hear or feel the clip engage. The foam should sit flat and tight within the panel frame.
- Replace the garage door bottom weather seal if it is cracked, compressed flat, or more than 5 years old. A new vinyl bulb seal costs $15 to $30 and prevents cold or hot air from entering under the door, complementing the insulation upgrade significantly.
- Balance-test the door by disconnecting the opener and lifting the door manually to waist height. If it drifts up or drops down, the springs need adjustment by a professional before regular use.
- Request quotes from at least two local garage door companies. Ask specifically for doors with a factory R-value of 12 or higher, polyurethane foam core (not polystyrene), and a 20-gauge or heavier steel skin.
- Choose a door with thermal breaks in the steel frame to reduce thermal bridging at the edges, a feature most budget doors skip but that significantly improves real-world performance.
- Confirm the installer will also replace the bottom seal, side seals, and top weather seal as part of the job. These are often worn on older doors and negate much of the new door’s insulation value if left in place.
- Ask the installer to verify that the existing torsion springs and opener are rated for the new door’s weight. A heavier insulated door may require spring replacement or a higher-torque opener.
- After installation, test the auto-reverse safety feature on the opener and confirm the door seals evenly across the bottom on all surface types present in your garage floor.
- Register the manufacturer warranty and schedule a spring tension check at 12 months, as new springs settle slightly during the first year of use.
Why It Works: The Benefits
Properly insulating an attached garage door can reduce heating and cooling costs by 10 to 20% for the adjacent living spaces, saving $75 to $200 per year in moderate climates depending on home size and energy rates.
An insulated door can reduce peak garage temperature swings by 20 to 30 degrees Fahrenheit, making the space comfortable enough to use as a workshop, gym, or hobby space year-round.
Extreme temperature swings damage paint cans, batteries, power tools, and vehicles. Stabilizing garage temperatures above freezing in winter and below 90 degrees in summer extends the life of everything you store there.
When a garage shared wall is no longer conducting extreme temperatures, the HVAC system serving adjacent rooms runs fewer cycles. Homeowners in hot climates often report their AC running noticeably less within the first week after installation.
Foam and fiberglass insulation also reduce sound transmission through the door, dampening street noise, wind, and rain by 20 to 40%, which is a noticeable improvement for garages adjacent to bedrooms.
💰 Savings Impact by Action
Insulating an attached garage door reduces heat transfer through the door by up to 70%, contributing a 10 to 20% reduction in heating and cooling costs for adjacent living spaces.
Replacing a worn garage door bottom seal stops cold or hot air infiltration at the floor gap, reducing total garage air leakage by up to 8% on its own.
Caulking and sealing the gap between the door frame and rough opening eliminates a primary infiltration pathway, cutting perimeter air leakage by up to 10%.
Adding R-13 insulation to an uninsulated garage-to-living-space wall reduces heat transfer through that surface by up to 85%, delivering up to 20% savings on adjacent room conditioning costs.
🏠 Key Concepts Explained
The Science Behind It
Heat always moves from warmer to cooler areas, and it does so through three mechanisms: conduction, convection, and radiation. An uninsulated metal garage door participates in all three simultaneously. The steel skin conducts heat directly from the hot exterior surface through to the interior, the air inside heats up and circulates by convection, and the hot door surface radiates infrared energy across the garage. Adding a foam core interrupts the conductive pathway, which is the dominant mechanism in a solid metal door.
Rigid polyisocyanurate foam works by trapping millions of tiny gas-filled cells within a closed-cell structure. Gas is a poor conductor of heat, so the foam forces heat to take a much longer, more tortuous path from one side to the other. A 2-inch polyiso panel with an R-value of roughly 13 conducts heat about six times more slowly than bare steel, which is why even a modest foam layer produces a dramatic drop in garage peak temperatures.
The payback math is straightforward. If your garage hits 130 degrees Fahrenheit in summer and the shared wall with your living space is 120 square feet, that wall is absorbing and re-radiating enormous amounts of heat into your air-conditioned space. Dropping the garage peak temperature to 95 to 100 degrees through door insulation and air sealing reduces that wall’s heat flux by 50 to 60%, directly lowering the BTU load your air conditioner must remove. For every 1 degree Fahrenheit you reduce your AC setpoint load, you save approximately 3% on cooling energy, so a 20-degree garage temperature reduction translates to meaningful compressor runtime savings within the first billing cycle.
Frequently Asked Questions
▼ My garage door is still really hot after I added insulation. What did I miss?
Check the perimeter seals first. Gaps around the door frame and under the bottom seal let hot outside air flow directly into the garage regardless of how well the door panels are insulated. Also confirm that your garage has at least one vent or that the door into the house is not creating a pressure imbalance that draws in hot attic air. Finally, check whether the garage ceiling is insulated, as heat from an uninsulated attic above an attached garage is a major source of heat gain that the door alone cannot fix.
▼ Will adding foam board insulation to my garage door break the opener or springs?
It can if your springs are already at their limit. A standard single-car door foam kit adds roughly 8 to 12 pounds, and most modern torsion spring systems handle this without issue. To check, disconnect the opener and manually lift the door to waist height. If it stays in place, the springs are balanced adequately. If it drops, have a garage door technician adjust the spring tension before using the opener with the added weight.
▼ Can I insulate a garage door that has windows in the top panel?
Yes. Simply cut around the window openings in your foam panels, leaving the glass exposed. The insulated panels below and to the sides of the windows still provide significant improvement. If the windows are single-pane, consider applying a window insulating film kit to the glass for an additional R-value boost at low cost.
▼ How long until I see savings on my utility bill after insulating?
Most homeowners notice a difference within the first month’s billing cycle, especially in summer or winter when temperature differentials are largest. The savings are most visible on bills for the month immediately following a hot or cold stretch. If your garage is detached and not adjacent to living space, the savings will be modest and mainly relate to protecting stored items rather than reducing HVAC load.
▼ I rent and my landlord owns the garage. Can I still do this?
Yes, the foam board quick-fix approach using construction adhesive is reversible and leaves no permanent damage to the door. However, it is still courteous to notify your landlord, since the modification affects a mechanical component they own. Some landlords will actually purchase the materials themselves once they understand it protects the door and reduces energy costs. Avoid screw-mounted retainer clip kits if you need a completely non-damaging installation.
Quick Tips
- Insulate the shared wall between your garage and living space with R-13 batt insulation if it is currently uninsulated. This is often a bigger heat pathway than the door itself.
- Paint your garage door a light or reflective color if you live in a hot climate. A white or light gray door can be 20 to 30 degrees cooler on its surface than a dark brown or black door in direct sun.
- Add a door sweep or brush seal to the pedestrian door leading from the garage into the house. This single $15 fix stops a surprising amount of conditioned air from escaping.
- Use a wireless thermometer with an outdoor and indoor probe to measure your garage temperature before and after insulating. Seeing a 25-degree improvement on a hot day is extremely motivating and helps you calculate your actual savings.
Variations for Your Situation
- Apartment or Rental with Shared Garage: If you share a garage structure and cannot modify the main door, focus on insulating the interior wall between your parking space and any heated areas using rigid foam panels cut to fit and held with removable construction adhesive. Add a door sweep to the entry door from the garage into your unit for immediate comfort improvement at under $15.
- Tight Budget Under $50: Buy a single 4×8 sheet of 1-inch rigid polystyrene foam board for $12 to $18 and cut it to fit your door panels using a utility knife. Friction-fit the pieces without adhesive for a fully reversible zero-fastener installation. Combined with replacing the bottom door seal ($15 to $25), this approach delivers 60 to 70% of the benefit of a full kit at a fraction of the cost.
- Older Home Pre-1980 with a Wood Garage Door: Wood doors have a natural R-value of about 3 to 5, higher than bare steel, but older wood doors often have gaps, warped panels, and deteriorated seals that negate this advantage. Before adding insulation, inspect all panel edges and corners for daylight gaps and seal them with paintable latex caulk. Then apply 1-inch polyiso foam to the recessed bays using foam-safe adhesive. Avoid heavy foam on older wood doors with worn hinges, as added weight can cause sagging.