If you have a room that always feels cold no matter how high you set the thermostat, chances are the floor above an unheated space is the culprit. Crawl spaces, unheated garages, and unconditioned basements pull heat directly out of your living space through the floor assembly, making rooms uncomfortable and forcing your heating system to work overtime. The U.S. Department of Energy estimates that floors over unconditioned spaces account for a significant share of a home’s total heat loss, particularly in older construction.
Unlike attic insulation, floor insulation is a project many homeowners overlook simply because it is out of sight. But insulating underneath a floor over an unheated space is one of the highest-return insulation upgrades available, especially in colder climates where the temperature differential between your living area and the space below can exceed 40 degrees Fahrenheit in winter. Done correctly, it delivers noticeable comfort improvements within the first heating season.
This guide walks you through everything you need to know, from understanding why floors lose heat to choosing the right insulation type, installing it yourself, or deciding when to call a professional. Whether you are dealing with a crawl space, an unheated attached garage, or a basement that stays cold all winter, you will find a practical, actionable approach that fits your situation and budget.
What You’ll Need
Click on an item below to shop for the recommended items for this recipe on Amazon.
As an Amazon Associate, we earn from qualifying purchases.
How to Do It
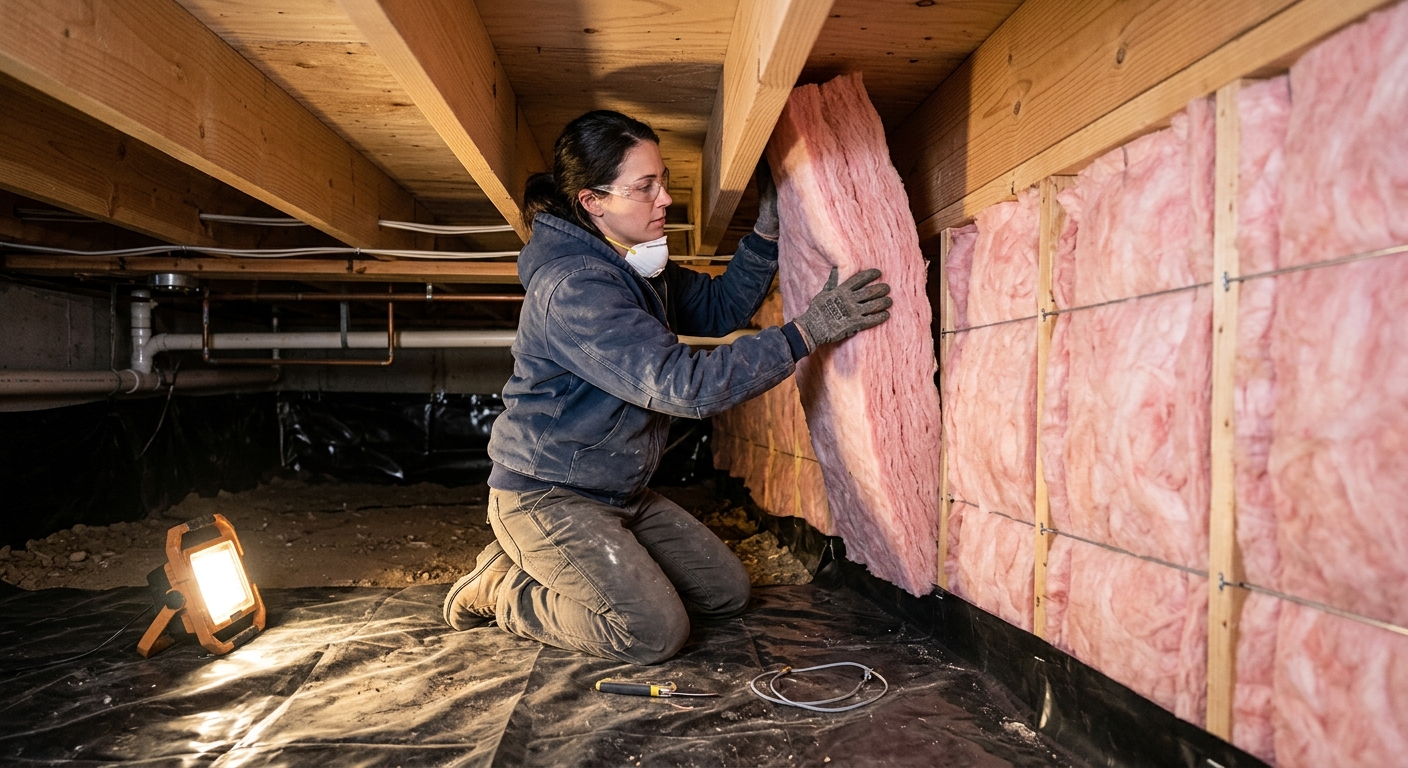
- Put on a respirator, safety glasses, and gloves before entering the crawl space or working under the floor. Lay a vapor barrier sheet on the ground if working in a crawl space to keep you clean and dry.
- Inspect the joist bays from below. Look for open gaps around pipes, wires, and HVAC ducts penetrating the subfloor. Use a can of low-expanding spray foam to seal every gap and penetration you find before adding any insulation.
- Cut pre-cut R-19 or R-21 unfaced fiberglass batt insulation to fit snugly between joists, sized about 1 inch wider than the joist bay so it friction-fits without falling. The paper or kraft face should face up toward the warm subfloor if using faced batts.
- Secure each batt using insulation support rods (also called tiger claws or wire stays) placed every 18 to 24 inches to prevent sagging. Do not compress the batts, as compression reduces R-value.
- Check every batt after installation to confirm there are no gaps at the ends or sides. Gaps as small as 1 inch can reduce the effective R-value of a section by 50% due to convective air movement.
- If the crawl space floor is bare dirt, lay a 6-mil polyethylene vapor barrier over the entire ground surface and tape the seams to reduce ground moisture evaporating into the space.
- Measure the total square footage of floor area above the unheated space and calculate the number of joist bays. Note joist depth (typically 2×10 or 2×12 in older homes) to choose the right insulation thickness.
- Seal all air bypasses first using canned spray foam for gaps under 1 inch and two-component spray foam or rigid foam scraps plus caulk for larger openings around pipes, wires, and beam pockets.
- Cut 1-inch thick rigid foam board (polyisocyanurate or XPS) to fit tightly against the subfloor in each joist bay, creating an air barrier above the insulation layer. Seal the perimeter of each piece with acoustical sealant or canned foam.
- Fill the remaining depth of each joist bay below the rigid foam with unfaced fiberglass batts cut to fit snugly. This layered approach achieves R-25 to R-30 in a standard 2×10 joist bay without exceeding the cavity depth.
- Install insulation support rods every 16 to 18 inches across all bays to hold everything in place against gravity. Double-check that no batts are compressed or have air gaps at their edges.
- For floors over an unheated garage, staple a layer of foil-faced insulation board or house wrap to the bottom of the joists as a final air barrier and radiant barrier. This step also protects the insulation from vehicle exhaust and minor physical damage.
- If accessible, insulate the rim joists at the perimeter of the floor using cut-and-cobble rigid foam pieces at least 2 inches thick, glued and sealed with spray foam. Rim joists are one of the biggest sources of heat loss in the entire floor assembly.
- Get at least three quotes from insulation contractors who specialize in crawl spaces. Ask specifically for closed-cell spray polyurethane foam, which provides R-6 to R-7 per inch and acts as both an air and vapor barrier.
- Before the crew arrives, clear out any stored items from the crawl space or basement and repair any active moisture issues such as standing water, leaking pipes, or damaged vapor barriers.
- A professional crew will seal air bypasses, spray 2 to 3 inches of closed-cell foam (R-13 to R-21) directly against the subfloor, filling the joist bays from the top down. The foam adheres mechanically, eliminating sagging entirely.
- For code compliance in most jurisdictions, spray foam applied to the underside of a floor must be protected by a thermal barrier such as drywall or an intumescent coating. Confirm with your contractor that the final installation meets local fire code.
- After installation, request a certificate of R-value and product data sheets for your records, which are useful for home resale and may be required for rebate applications.
- Check with your utility company before scheduling work. Many utilities offer rebates of $0.10 to $0.25 per square foot for floor insulation upgrades, which can reduce net project cost by $200 to $500.
Why It Works: The Benefits
Properly insulating a floor over an unheated space can reduce heating energy use by 10 to 20% annually, translating to $150 to $400 per year in savings for a typical home depending on climate and fuel type.
Floor surface temperatures can increase by 8 to 15 degrees Fahrenheit after insulation is added, eliminating the cold-floor sensation that makes rooms feel uncomfortable even when the air temperature is adequate.
With less heat escaping through the floor, your furnace or heat pump cycles less frequently, reducing wear on the system and potentially extending equipment life by several years.
A properly detailed floor insulation system that includes air sealing reduces the flow of humid crawl space air into the floor assembly, lowering the risk of subfloor moisture damage, rot, and mold growth.
Insulating the floor cavity helps keep pipes in the floor assembly above freezing during cold snaps, reducing the risk of burst pipes without the need for pipe heat tape in many cases.
💰 Savings Impact by Action
Adding R-25 insulation under a previously uninsulated floor over an unheated space reduces floor heat loss by up to 15% of total annual heating energy.
Sealing and insulating rim joists at the perimeter of the floor assembly reduces air infiltration and conductive loss by up to 10% of heating energy in a typical older home.
Foam-sealing pipe and wire penetrations through the floor reduces conditioned air loss by up to 8%, with the highest impact in homes built before 1990.
Insulating uninsulated HVAC ducts running through a crawl space or unheated basement can recover 20 to 30% of heating and cooling output that would otherwise be lost before reaching living areas.
Installing a ground vapor barrier in a dirt crawl space reduces moisture-driven heat loss and protects insulation performance, contributing up to 5% in effective energy savings by keeping insulation dry.
🏠 Key Concepts Explained
The Science Behind It
Heat flows from warm to cold through three mechanisms: conduction, convection, and radiation. In an uninsulated floor over a crawl space or unheated basement, all three are working against you. Conduction moves heat through the wood subfloor and joists directly into the cold air below. Convection carries heat away as cold air moves through gaps and around uninsulated surfaces. And radiation from the warm floor surface emits infrared energy downward into the colder space below, even without any physical contact.
Fiberglass batt insulation works primarily by trapping millions of tiny air pockets that slow conductive and convective heat transfer. But air must be still for this to work. When batts sag away from the subfloor, even a half-inch gap allows convective air loops to form between the warm subfloor and the cold insulation surface, short-circuiting much of the R-value. This is why fit and retention are critical for floor insulation in a way they are not for attic insulation, where gravity holds batts flat against the ceiling. Rigid foam boards work differently because they are a solid material that blocks air movement entirely and delivers R-value through closed cells that cannot convect.
The moisture dynamics are equally important. Cold surfaces in a floor assembly can fall below the dew point of moist air rising from the crawl space, causing condensation inside the floor cavity. Over time, this leads to elevated wood moisture content, rot, and mold. Proper vapor management, placing a vapor retarder on the warm-in-winter side of the assembly and controlling moisture sources in the crawl space itself, prevents this cycle. In most of North America, this means keeping vapor-retarding layers close to the living space side of the floor assembly rather than the crawl space side.
Frequently Asked Questions
▼ My floor is still cold after I insulated the crawl space. What went wrong?
The most likely causes are sagging batts that have pulled away from the subfloor, uninsulated rim joists at the perimeter, or air gaps around pipes and wires that were not sealed. Go back under with a flashlight and press each batt firmly upward. If it has any give or movement, it is not in full contact with the subfloor and needs support rods added or replacement. Also check that all rim joist sections are insulated, as these are frequently skipped.
▼ Can I just insulate the crawl space walls instead of the floor?
Yes, and in some cases it is actually the better approach. Insulating the crawl space walls and treating the crawl space as a semi-conditioned space (called an encapsulated crawl space) eliminates the floor cold problem entirely and also protects pipes and ducts in the space. However, it requires air sealing the vents, installing a heavy-duty vapor barrier on the ground, and potentially adding a dehumidifier. This approach typically costs $3,000 to $8,000 professionally installed but delivers excellent results in humid climates.
▼ How do I know if my existing crawl space insulation is still doing its job?
Pull down one section and inspect it. If the batts are compressed, water-stained, falling out, or have black or green discoloration (mold), they have likely lost significant R-value and may be creating moisture problems. Old fiberglass batts that are simply dusty but still fluffy and in contact with the subfloor may still be performing acceptably, but check their thickness against the rated R-value since settling reduces effectiveness over time.
▼ Do I need a permit to insulate my own crawl space floor?
In most jurisdictions, adding insulation to an existing home does not require a permit if you are not changing the structure or the mechanical systems. However, if you are doing spray foam work or making changes to the vapor barrier in a newer home subject to energy codes, check with your local building department. Encapsulating an entire crawl space often does trigger permit requirements in many municipalities.
▼ Will insulating the floor under my bonus room above the garage cause moisture problems in the garage ceiling?
It can if done incorrectly. In a cold climate, the vapor retarder must face upward toward the living space, not downward toward the garage. Use unfaced batts or faced batts installed with the kraft paper up, and consider adding a rigid foam layer against the subfloor to create a continuous air barrier. Avoid trapping moisture by ensuring the assembly dries toward the garage side.
Quick Tips
- Work in cold weather if possible. You will immediately feel where the cold air is entering, making it easier to identify and seal bypasses before insulating.
- Use a pre-cut batt product sized for your joist spacing (16-inch or 24-inch on center) to save significant cutting time and reduce waste.
- Photograph every phase of the installation before it is covered up. This documentation is valuable for rebate applications and future contractors.
- Do not forget HVAC ducts running through the unheated space. Uninsulated supply and return ducts in a crawl space can waste 20 to 30% of your HVAC output before it even reaches the living area.
Variations for Your Situation
- Apartment/Rental: If you live above an unheated space in a rental, focus on rugs and area carpets with thick pads, which can reduce perceived floor coldness significantly and are completely reversible. A 1/2-inch thick rug pad under a dense area rug adds the equivalent of R-1 to R-2 at floor level. For drafts coming through the floor, removable rope caulk pressed into visible gaps requires no tools and leaves no damage. Contact your landlord about the heating bill savings from proper insulation, as it is in their financial interest to act.
- Tight Budget (under $50): Focus your entire budget on rim joist sealing, the highest-return task per dollar. A can of spray foam ($8 to $12) and a roll of 2-inch rigid foam scraps or a small sheet of foam board ($20 to $30) can seal the rim joist perimeter of a small crawl space. Pair this with repositioning any existing batts that have fallen or sagged using wire stays ($10 to $15 per bundle of 50) to maximize the R-value already in the floor before spending money on new insulation.
- Older Home (pre-1980): Homes built before 1980 often have no insulation at all under floors and significant air leakage through the floor assembly, sometimes accounting for 20 to 30% of total home air infiltration. Prioritize air sealing as a first step because it costs little and delivers immediate savings. Check for knob-and-tube wiring in the crawl space before insulating, as insulation cannot legally cover active knob-and-tube circuits in most jurisdictions without an electrical inspection. Budget for removing old, deteriorated insulation if present, which typically costs $1 to $2 per square foot before new insulation goes in.