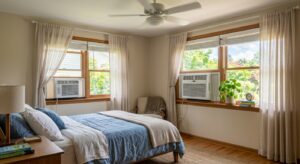
A sunroom sounds like a dream: natural light, outdoor views, a comfortable indoor space. But come July, that wall of glass turns into a solar oven. Sunrooms can reach 120°F or more on a hot afternoon, and if they connect to your main living area, that heat bleeds directly into your home, forcing your central AC to compensate. Many homeowners report their cooling bills jumping 15 to 25% after adding or activating a sunroom in summer.
The problem is physics. Glass has almost no insulating value compared to a standard wall, and single-pane glass lets in roughly 85% of solar radiation as heat. Even double-pane low-E glass, while much better, still transmits significant solar gain on south- and west-facing exposures. Without intervention, your sunroom becomes a heat engine that works against every other energy improvement you have made.
The good news is that you do not need to seal the room off or install a second HVAC system to make it livable. This guide covers practical, layered strategies from no-cost airflow tricks to targeted mini-split installations, with real numbers on cost, savings, and payback so you can choose the approach that fits your budget and comfort goals.
What You’ll Need
Click on an item below to shop for the recommended items for this recipe on Amazon.
As an Amazon Associate, we earn from qualifying purchases.
How to Do It
- Close all sunroom doors to the main house between 10 a.m. and 6 p.m. to break the convective loop. This single habit change prevents the hottest air from migrating into your conditioned space and is the highest-impact zero-cost action available.
- Install a door snake or roll a towel against the bottom gap of any door between the sunroom and main house. Gaps under interior doors can leak 20 to 30 cubic feet of air per minute; blocking them costs nothing.
- Apply white or reflective window film to the sunroom’s south- and west-facing glazing. Film kits cost $20 to $40 and can reject 70 to 80% of solar heat, dropping interior glass surface temperature by 25 to 30°F within days of installation.
- Add a box fan or window fan to create cross-ventilation in the early morning (before 8 a.m.) when outdoor air is coolest. Run it to pull outdoor air in through low openings and exhaust through a high window or operable skylight to pre-cool the thermal mass in the floor and walls.
- Place a light-colored cotton or linen rug over any dark tile or concrete floor in the sunroom. Dark flooring in direct sun can reach 140°F, radiating heat onto occupants. A light covering reduces surface temperature by 20 to 40°F and dramatically lowers perceived heat.
- Install exterior solar shades or shade sails on the south- and west-facing sides of the sunroom. Exterior shading is 3 to 5 times more effective than interior shading because it stops solar energy before it passes through the glass. A 10-by-12 foot shade sail costs $60 to $120 and can be hung with basic hardware in 2 to 3 hours.
- Seal the perimeter of any door or pass-through between the sunroom and main house using self-adhesive weatherstripping foam tape. Focus on the top and side jambs first, then the door sweep at the bottom. A complete weatherstrip kit runs $12 to $20 and reduces air infiltration by up to 40%.
- Caulk around any electrical outlets, light fixtures, or plumbing penetrations in the shared wall between the sunroom and main living area. Use a paintable silicone caulk rated for indoor use. This step takes 30 to 45 minutes and closes hidden air pathways that are often worse than the door gaps.
- Add thermal cellular shades (also called honeycomb shades) to interior windows. These trap air in hexagonal cells, raising the effective insulation of a single-pane window from about R-1 to R-3 to R-5. They cost $40 to $100 per window and can be cut to fit with scissors and mounted without drilling using tension mounts.
- If the sunroom has a glass or polycarbonate roof panel, apply a reflective foil bubble wrap insulation sheet to the interior surface using removable adhesive clips. This creates a radiant barrier that reflects heat back up before it warms the room, reducing roof-transmitted heat gain by up to 50%.
- Verify your work by measuring sunroom temperature at 3 p.m. on a sunny day before and after your improvements. A reduction of 15 to 25°F is realistic. If you still exceed 85°F at 3 p.m., move to the targeted cooling approach below.
- Calculate your sunroom’s cooling load before purchasing equipment. A rough rule of thumb is 20 BTU per square foot for a well-shaded sunroom or 30 to 40 BTU per square foot for a mostly glass room with poor shading. A 200 square foot sunroom typically needs a 6,000 to 9,000 BTU unit.
- Choose a single-zone ductless mini-split with a SEER rating of at least 18. Models from Mitsubishi, Daikin, and LG are widely available and reliable. The higher the SEER, the lower your operating cost: a SEER 20 unit costs roughly 30% less to run than a SEER 13 unit.
- Hire a licensed HVAC contractor to install the mini-split. Installation requires refrigerant handling certification and typically costs $500 to $1,200 in labor. The contractor will mount the indoor air handler, run the refrigerant line set through a small wall penetration, and connect the outdoor condenser.
- Ensure the outdoor condenser unit is placed on the north or shaded side of the home if possible. A condenser in direct sun operates at lower efficiency and can add 10 to 15% to operating costs compared to a shaded installation.
- Program the mini-split with a schedule: set it to pre-cool the sunroom to 75°F starting at 6 a.m., maintain 78°F during peak hours, and turn off automatically at 9 p.m. Using scheduling instead of continuous operation typically saves 25 to 35% on the unit’s electricity consumption.
- Check for available rebates before finalizing your purchase. ENERGY STAR certified mini-splits qualify for federal tax credits of up to 30% of installed cost under the Inflation Reduction Act (25C credit), and many utilities offer additional rebates of $100 to $500.
Why It Works: The Benefits
Blocking solar gain and isolating the sunroom from your HVAC zone can reduce whole-home cooling energy use by 15 to 30%, translating to $80 to $200 in savings over a summer depending on your climate and home size.
A well-managed sunroom stays within 5 to 10°F of your indoor setpoint, making it usable during morning and evening hours even on 95°F days rather than being a room you avoid from May through September.
When a sunroom stops dumping heat into your main living area, your central system runs fewer cycles per day. Reducing runtime by 15% extends compressor life and can delay a costly HVAC replacement by 2 to 4 years.
Sealing the leaky junction between a sunroom and the main house prevents dust, pollen, and humidity from being drawn into your living space whenever the temperature gradient creates a pressure difference.
A sunroom that is actually usable in summer adds functional living square footage. Real estate surveys show usable sunrooms add 5 to 7% to perceived home value compared to rooms treated as seasonal or off-limits.
💰 Savings Impact by Action
Exterior shade sails or solar film block 50 to 80% of solar heat gain through glass, reducing whole-room cooling load by up to 30%.
Sealing the door and wall junction between the sunroom and main house cuts infiltration-driven cooling loss by up to 15% on your whole-home bill.
Scheduling a mini-split to pre-cool and set back temperatures rather than running continuously saves 25 to 35% of the unit’s operating electricity.
A foil radiant barrier applied to the interior of a glass or polycarbonate roof panel reduces roof-transmitted heat gain by 40 to 50%, cutting total room load by up to 20%.
Cross-ventilating with a high-low vent pairing during morning hours lowers peak afternoon temperature by 10 to 15°F, reducing mechanical cooling runtime by roughly 10%.
🏠 Key Concepts Explained
The Science Behind It
Glass is a remarkably poor insulator. A single pane of glass has an R-value of roughly 0.9, compared to R-13 for a standard insulated wall. But the bigger problem is not conduction through the glass, it is solar radiation passing directly through it. Visible light and near-infrared radiation from the sun travel through glass almost unimpeded and are absorbed by floors, furniture, and walls inside the sunroom. These surfaces then re-emit that energy as long-wave infrared radiation, which cannot pass back through glass. This is the greenhouse effect in miniature, and it is why a sunroom can be 40 to 60°F hotter than the outdoor air temperature on a sunny afternoon.
Exterior shading works better than interior shading because it intercepts solar energy before it crosses the glass boundary. Once sunlight passes through the glass and becomes heat inside the room, no interior blind or curtain can undo that energy conversion. It is already trapped. An exterior shade or reflective film applied to the outer surface reduces solar heat gain by 50 to 80% compared to 20 to 40% for an interior curtain at the same window. This is why building scientists call exterior shading one of the highest return-on-investment interventions in hot climates.
Ventilation strategy matters because of how air density changes with temperature. Hot air is less dense and rises, creating the stack effect. A sunroom vented only at the bottom or only at the top cannot take advantage of this natural airflow. Pairing a low inlet (a cracked door or low window) with a high outlet (an operable skylight or high vent) allows the hottest air to escape continuously. In a well-designed naturally ventilated sunroom, temperature can be held within 10°F of outdoor air temperature without any powered cooling, which is far cheaper than running even the most efficient mini-split.
Frequently Asked Questions
▼ I put up interior blinds but my sunroom is still unbearably hot. What am I missing?
Interior blinds only block 20 to 40% of solar heat because the energy has already passed through the glass and converted to heat before the blind intercepts it. Switch to exterior shading: a shade sail, exterior roller shade, or solar window film applied to the outer glass surface. This stops the heat before it enters and can reduce solar gain by 50 to 80%.
▼ Can I just extend my home’s central AC ductwork into the sunroom?
This is almost always a bad idea without a professional load calculation first. Sunrooms have 3 to 5 times the cooling load per square foot of insulated living space, and extending a duct run into them typically results in inadequate cooling, poor humidity control, and increased wear on your existing system. A dedicated mini-split is almost always the better technical and financial solution for sunroom cooling.
▼ My sunroom has polycarbonate roof panels, not glass. Does that change anything?
Polycarbonate transmits solar heat similarly to glass and in some cases worse, since older twin-wall polycarbonate yellows over time and loses any UV blocking. The same exterior shading and radiant barrier strategies apply. Applying a reflective foil insulation to the interior of polycarbonate roof panels is especially effective and can cut roof heat gain by 40 to 60%.
▼ How do I know what size mini-split to buy for my sunroom?
Use a rough rule of 25 to 35 BTU per square foot for a mostly glass sunroom with some exterior shading in place. A 150 square foot sunroom typically needs a 6,000 BTU unit, and a 250 square foot sunroom needs a 9,000 BTU unit. Avoid oversizing: a unit that is too large will short-cycle, fail to dehumidify properly, and wear out faster. When in doubt, get a quote from an HVAC contractor who will do a Manual J load calculation.
▼ Will these improvements work in a three-season or uninsulated sunroom?
Solar shading and ventilation strategies work well regardless of insulation level. However, if the walls and roof have no insulation at all, conductive heat gain will also be significant and exterior shading alone may only get you part of the way. Adding even 1 inch of rigid foam insulation to opaque wall sections can make a noticeable difference in peak temperature. A dedicated mini-split is generally more cost-effective than trying to insulate a three-season room to full building code standards.
Quick Tips
- Use a $20 infrared thermometer to measure glass surface temperatures at 2 p.m. before making any changes. A surface reading above 110°F tells you solar gain is your dominant problem and shading should be your first investment.
- Keep sunroom plants well-watered in summer. Transpiration from a dozen potted plants can lower local humidity and temperature by 2 to 5°F through evaporative cooling, with zero energy cost.
- If you have operable skylights, open them at night even in hot climates. Night sky radiant cooling lets the sunroom shed heat into the cold night sky, dropping the room 10 to 20°F before morning so it starts cooler and takes longer to overheat.
- Light-colored or white exterior paint on any solid walls of the sunroom reflects 70 to 80% of solar radiation compared to 5 to 20% for dark colors. If your sunroom has a painted knee wall or solid base, repainting it light gray or white is a free improvement if you already have leftover paint.
Variations for Your Situation
- Apartment or Condo with a Sunroom: Renters typically cannot modify windows or install permanent shading hardware. Focus on interior cellular shades with tension-mount brackets (no drilling required, $40 to $100 per window), a high-quality portable evaporative cooler for dry climates or a portable air conditioner for humid climates ($300 to $500), and door draft stoppers to prevent hot air from bleeding into the main unit. Get written permission from your landlord before applying any window film, as some leases prohibit window modifications.
- Tight Budget Under $75: Start with the three highest-impact free and low-cost actions: close the sunroom door from 10 a.m. to 6 p.m. (free), apply a $25 solar window film kit to the largest south- or west-facing pane, and add a $15 door sweep to the bottom of the connecting door. Together these three steps can reduce sunroom peak temperature by 15 to 20°F at a total cost under $40. Save the larger investments until you have measured the improvement.
- Older Home Pre-1980 with Original Single-Pane Glass: Original single-pane glass has an SHGC of 0.86 and R-0.9, making solar gain extreme. Prioritize exterior shading and interior secondary glazing film (a stretched plastic film applied to the window frame interior, $15 to $30 per window) before any cooling equipment. The secondary film effectively creates a DIY double-pane unit, raising the R-value to approximately 2.0 and reducing conductive heat loss by 50%. In older construction, also check the sill plate and knee wall junction for large air gaps that may need spray foam or caulk before any other improvement will be effective.