If your pipes sound like someone is swinging a wrench inside your walls every time the dishwasher finishes or you close a faucet quickly, you are dealing with water hammer. It is not just annoying. That shockwave traveling through your pipes at up to 4,000 feet per second puts real mechanical stress on joints, valves, and appliance connections. Over time, repeated water hammer can loosen fittings, crack solder joints, and even burst supply lines at the washing machine.
The good news is that water hammer is one of the most fixable plumbing problems a homeowner can tackle. In most cases, the culprit is either water pressure that is too high (above 80 psi) or a missing or waterlogged air chamber that used to cushion the pressure spike. Both problems have straightforward solutions ranging from a free pressure regulator adjustment to a $10 water hammer arrestor you can install in under 30 minutes.
This post covers exactly what causes that banging noise, how to check your home’s water pressure in five minutes with a cheap gauge, and three approaches to fix it for good, from a zero-cost tweak to a professional pipe-securing upgrade for severe cases.
What You’ll Need
Click on an item below to shop for the recommended items for this recipe on Amazon.
As an Amazon Associate, we earn from qualifying purchases.
How to Do It
- Buy a water pressure test gauge at any hardware store for $10 to $15. It has a standard hose bib fitting.
- Attach the gauge to an outdoor hose bib or the cold water line at your washing machine. Turn the valve on fully and read the static pressure. Normal range is 50 to 70 psi. Above 80 psi is the danger zone.
- Find your pressure reducing valve (PRV). It is a bell-shaped brass fitting on the main water supply line, usually near where the line enters the house or near the water meter.
- Loosen the lock nut on top of the PRV with an adjustable wrench. Turn the adjustment screw clockwise to increase pressure or counter-clockwise to decrease it. Turn in small quarter-turn increments.
- After each adjustment, recheck your gauge at the hose bib. Target a reading between 55 and 65 psi for most homes.
- Retighten the lock nut once you hit your target pressure, then run the washing machine or trigger whatever normally causes the hammer to confirm the noise has reduced or stopped.
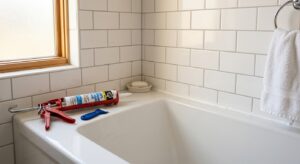
- Purchase water hammer arrestors sized for your application. Washing machine arrestors use a 3/4-inch female hose thread connection. Dishwasher or icemaker arrestors typically use a 3/8-inch compression fitting. Look for models rated to ASSE 1010 standard.
- Shut off water to the affected fixture or close the main shutoff if working on multiple locations. Open the faucet nearest the work area to bleed pressure from the line.
- For a washing machine: unscrew the hot and cold supply hoses from the back of the machine. Thread the arrestors directly onto the hot and cold inlet valves on the wall, then reattach the supply hoses to the arrestor outlets. Hand tighten plus one quarter turn with pliers. Do not overtighten.
- For a dishwasher: shut off the supply valve under the sink. Disconnect the supply line at the valve, install a tee fitting, then thread the arrestor into the tee branch. An arrestor with a 3/8-inch compression fitting typically installs without soldering.
- Turn water back on slowly and check all connections for drips. Tighten any fittings that seep water.
- Run the appliance through a cycle and listen for any remaining banging. If hammer persists at other locations, repeat the process at those supply points.
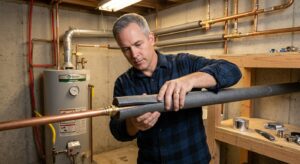
- Have a plumber test both static and dynamic pressure (pressure while water is flowing). Dynamic pressure drops below 40 psi can indicate a failing PRV or undersized supply lines that compound hammer.
- Replace the PRV if it is older than 10 years or not holding a steady set point. PRV replacement typically costs $200 to $400 in parts and labor and comes with a pressure gauge port for easy future monitoring.
- Ask the plumber to inspect accessible supply lines in the basement, crawlspace, or utility area for pipes that are unsecured or rubbing against framing. Every 4 to 6 feet of pipe run should have a strap or clamp anchoring it to the structure.
- Add foam pipe insulation sleeves at any contact points where pipes touch wood framing. This costs under $10 in materials and stops the physical banging sound even if some residual pressure wave remains.
- Consider a whole-house expansion tank if your home has a closed plumbing system (common with backflow preventers or check valves on the main line). Thermal expansion in a closed system mimics water hammer and requires a bladder-style expansion tank to resolve.
Why It Works: The Benefits
Repeated hydraulic shock loosens threaded connections and can crack solder joints. Eliminating water hammer prevents the cumulative damage that leads to $200 to $2,000 repair bills for burst supply lines or failed joint repairs inside walls.
Washing machines and dishwashers with solenoid valves are particularly vulnerable. Chronic water hammer can shorten valve lifespan by 30 to 50%, leading to premature appliance service calls averaging $150 to $300 per visit.
Properly installed water hammer arrestors or a corrected pressure setting typically silence the banging the same day. There is no waiting period. The fix either works or it points you toward the next step.
Dropping over-pressurized water from 100 psi down to 65 psi reduces flow rates at every fixture, which can trim water consumption by 6 to 11% according to EPA WaterSense data, especially at showers and older faucets without flow restrictors.
A banging pipe is easy to ignore until a supply hose bursts and floods a laundry room. Fixing water hammer removes a known failure risk from your home and can lower the chance of a homeowner’s insurance water damage claim, which average $11,000 per incident.
💰 Savings Impact by Action
Lowering supply pressure from 100 psi to 60 psi reduces household water consumption by 6 to 11% by cutting flow rates at every fixture simultaneously.
Eliminating chronic hammer stress can extend solenoid valve lifespan in washers and dishwashers by up to 40%, reducing service call frequency.
Proper pressure regulation and arrestor installation eliminates the pressure spikes responsible for the vast majority of hammer-related joint failures and supply hose bursts.
EPA WaterSense data shows an average 8% reduction in water use when homes are brought from over-pressurized levels down to the 55 to 65 psi target range.
🏠 Key Concepts Explained
The Science Behind It
Water hammer is a textbook example of momentum transfer in a closed system. Water flowing through a 3/4-inch pipe at a normal 8 feet per second has real mass and velocity. When a solenoid valve snaps shut in milliseconds, that column of water must decelerate instantly. The resulting pressure spike follows the Joukowsky equation: the faster the closure and the higher the flow velocity, the greater the peak pressure. In a home running at 100 psi with fast-closing valves, that spike can momentarily hit 400 to 600 psi at the valve seat, which is why fittings crack and supply hoses fail at the connection point rather than in the middle of the hose.
Air chambers and water hammer arrestors work on the same principle but in different ways. A traditional air chamber is simply a capped vertical pipe stub where a pocket of air sits above the waterline. Compressible air absorbs the shockwave the way a shock absorber cushions a bump in the road. The problem is that air gradually dissolves into water under pressure, typically within one to two years, leaving a water-filled chamber that provides zero cushioning. A modern ASSE 1010-rated arrestor replaces that air with a sealed piston backed by an internal air charge. Because the piston physically separates the air from the water, the air charge never gets absorbed and the device works indefinitely without maintenance.
Pressure reduction works by lowering the baseline energy in the system before the shockwave even starts. Because the peak hammer pressure is a multiple of the flowing pressure, dropping your supply from 100 psi to 60 psi does not just reduce the hammer by 40 psi, it can cut the pressure spike by 60% or more because you are also slowing the flow velocity at every fixture. This is why a PRV adjustment is always the right first step. It costs nothing extra if you already have a PRV, and it has system-wide benefits beyond just stopping the banging.
Frequently Asked Questions
▼ I adjusted the pressure regulator but the banging is still happening. What am I missing?
If pressure is now in the 55 to 65 psi range and hammer persists, the problem is likely loose pipes or a waterlogged air chamber rather than pressure. Check the pipes closest to the banging location for unsecured runs and install a mechanical arrestor at the triggering valve. The pressure fix and the arrestor together solve the vast majority of cases.
▼ My home is older and I cannot find a pressure reducing valve anywhere. What do I do?
Homes built before the 1980s often lack a PRV entirely, especially in lower-pressure municipal zones where one was not required at time of construction. First measure your actual pressure. If it is above 80 psi, budget $250 to $450 to have a licensed plumber install a PRV on your main line. In the meantime, install ASSE 1010 arrestors at each hammering appliance as an immediate stopgap.
▼ Can water hammer actually break a pipe or is it just noise?
Yes, it can cause real damage over time, though catastrophic instant failure is rare. The more common scenario is that repeated shockwaves gradually fatigue solder joints, loosen threaded fittings, and crack the rubber internals of solenoid valves. Washing machine supply hose failures, which cause an average of $11,000 in water damage per incident, are frequently linked to chronic water hammer stress at the connection point.
▼ The banging only happens on the hot water side. Does that change the fix?
Hot-side-only hammer almost always traces to the water heater supply connection or thermal expansion in a closed system. If your home has a backflow preventer on the main line, hot water expanding in the tank has nowhere to go and creates pressure spikes that mimic hammer. The fix in that case is a thermal expansion tank installed on the cold inlet to the water heater, which a plumber can add in under an hour for $100 to $200 in parts and labor.
▼ Can I fix water hammer in an apartment or rental?
You can install ASSE 1010 arrestors on your washing machine supply lines without any landlord involvement since they are appliance accessories, not permanent modifications. For whole-building pressure issues, report the banging to your property manager in writing and reference the risk of pipe damage. They are responsible for PRV maintenance and structural plumbing under most lease agreements.
Quick Tips
- Check water pressure at different times of day. Municipal pressure is often highest early in the morning and lowest in the evening. If your PRV is marginal, morning pressure spikes can trigger hammer even when afternoon readings look fine.
- Washing machine supply hoses are the single most common source of water hammer in homes. If you can only afford one arrestor, put it on the washing machine hot supply line first.
- If you drained the system to fix an air chamber and the banging came back within six months, you have a waterlogged chamber. Stop refilling it and install a mechanical arrestor instead.
- Flexible braided stainless supply hoses absorb more vibration than rigid copper stubs. Replacing rigid washing machine connections with 4-foot braided hoses can reduce transmitted noise even before installing an arrestor.
Variations for Your Situation
- Apartment/Rental: Tenants can buy washing machine water hammer arrestors for $15 to $25 total and install them without tools in about 10 minutes by threading them between the wall valves and supply hoses. For dishwasher or icemaker hammer, ask your building manager to adjust the PRV or have a plumber install an arrestor, documenting the request in writing to establish the maintenance responsibility.
- Tight Budget (under $50): Start with the free step: locate your PRV and adjust it to 60 psi using a $12 gauge. If pressure was already high, that fix alone costs almost nothing and may solve the problem entirely. If hammer persists, buy a single washing machine arrestor kit for $15 to $20 and address only the loudest trigger point first.
- Older Home (pre-1980): Homes of this era were built with air chambers instead of mechanical arrestors. Those chambers are almost certainly waterlogged by now. Drain the entire system by shutting the main valve and opening the lowest faucet, which recharges the air chambers temporarily, but plan to replace them with ASSE 1010 arrestors within the year since the recharge fix lasts only a few months. Also prioritize a pressure check since many older homes have never had a PRV installed.