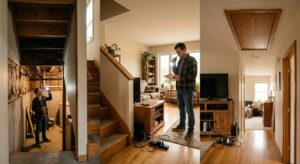
Imagine being able to see cold air sneaking in under your front door, a dark blue void above your garage ceiling where insulation was never installed, or a bright orange streak along your ductwork where conditioned air is leaking into the attic. That is exactly what a thermal camera shows you, and it is one of the most powerful diagnostic tools available to a homeowner. Instead of hiring an auditor and hoping they find the worst offenders, you can walk your own home and see the problems yourself.
Heating and cooling accounts for roughly 43% of the average American utility bill, according to the U.S. Energy Information Administration. A significant share of that cost is wasted on air and heat that escapes through poorly sealed or insulated areas. The frustrating part is that most of these losses are completely invisible to the naked eye. Your home might feel drafty without your ever being able to pinpoint the source, or your heating system may run constantly in January while certain rooms stay stubbornly cold.
This guide explains exactly how thermal cameras work, what conditions produce the most accurate readings, and how to walk your home systematically to build an actionable repair list. Whether you rent a camera for an afternoon, buy an affordable smartphone attachment, or hire a certified energy auditor, you will come away with a clear picture of where your money is going and what fixes will deliver the biggest return.
What You’ll Need
Click on an item below to shop for the recommended items for this recipe on Amazon.
As an Amazon Associate, we earn from qualifying purchases.
How to Do It
- Choose the right conditions: scan on a day when the outdoor temperature is at least 15 to 20 degrees Fahrenheit colder than indoors. Early morning in winter, before sunrise, is ideal because the building envelope has had hours to equilibrate and there is no solar heating distorting surface temperatures.
- Turn off your HVAC fan 30 to 60 minutes before scanning interior walls so air movement does not mask conductive heat loss patterns with convective cooling effects.
- Start at the attic hatch or pull-down stair. This is almost always the single biggest heat loss point and will immediately demonstrate what a problem looks like on your specific camera. A poorly insulated hatch shows up as a bright warm patch on a cold ceiling surface.
- Move systematically through each room scanning all four walls, the ceiling, electrical outlets on exterior walls, window frames, and door frames. Hold the camera 18 to 36 inches from the surface and move slowly. Mark problem spots with blue painter’s tape so you can return for repairs.
- Scan your basement rim joists (the framing where the floor meets the foundation wall) from the interior. These are among the leakiest areas in pre-1980 homes and show up as dramatically cold bands. Also scan any ductwork running through unconditioned spaces.
- Review your images and sort problem areas into three categories: air sealing (sharp, localized cold spots near penetrations), insulation gaps (broad cool areas mid-wall or ceiling), and moisture (unexpectedly cool patches that do not align with framing). Prioritize air sealing first as it typically delivers the fastest payback.
- Contact your electric or gas utility and ask specifically about a Home Energy Assessment or Weatherization Audit program. Many reimburse $150 to $600 of audit costs and provide contractor referral lists for follow-up work.
- Book a BPI-certified or RESNET-certified energy auditor. Certification ensures the auditor follows a standardized protocol and uses calibrated equipment. Ask specifically whether a blower door test and thermal imaging are both included.
- Prepare your home the day before: close all windows and exterior doors, make sure all fireplace dampers are closed, and note any rooms that feel consistently cold or drafty so you can direct the auditor’s attention.
- During the audit, follow the auditor through the home and ask them to explain each finding in real time. Take photos of their thermal images with your phone so you have a reference when making repairs later.
- Request a written report with prioritized recommendations and estimated payback periods for each improvement. A good auditor will rank items by cost per unit of energy saved, not just total savings.
- Use the report to apply for rebates and incentives. The federal Weatherization Assistance Program and the 25C energy efficiency tax credit (up to $1,200 per year for insulation and air sealing under the Inflation Reduction Act) can offset a substantial portion of repair costs identified in the audit.
- Complete the smartphone thermal scan as described in the first approach, photographing and blue-tape-marking every problem area you find.
- Purchase materials before you start repairs: a can of low-expansion spray foam for gaps larger than 1/4 inch, a tube of paintable latex caulk for gaps smaller than 1/4 inch, pre-cut rigid foam board for the attic hatch, and foam gaskets for electrical outlets on exterior walls.
- Begin with the attic. Seal all top plate penetrations (wire and pipe holes punched through the ceiling framing) with spray foam, then cut rigid foam board to fit over the attic hatch and secure it with weatherstripping tape on the perimeter. This one step alone can reduce attic heat loss by 25 to 35%.
- Move to rim joists in the basement or crawlspace. Cut 2-inch rigid foam (R-10) to fit snugly between each joist bay and seal the perimeter of each piece with spray foam or acoustical sealant. This is consistently one of the highest-return improvements in older homes.
- Seal all electrical outlets and switch plates on exterior walls with foam gaskets available in packs of 10 at any hardware store. These install in under 30 seconds each and eliminate one of the most overlooked infiltration paths.
- Re-scan every repaired area with the thermal camera to confirm improvement. Areas that showed as cold blue should now appear much closer to the ambient wall temperature. Document the before-and-after images to track your progress and validate the repairs.
Why It Works: The Benefits
A thermal scan produces a prioritized repair list based on actual heat loss, so you spend money sealing and insulating the spots that matter most rather than applying caulk randomly. Homeowners who fix the top three to five problem areas identified in a scan commonly reduce their heating bill by 15 to 25%.
You can re-scan any area immediately after adding weatherstripping or caulk to confirm the fix worked. This before-and-after confirmation is something no blower door test or utility bill comparison can give you in real time.
Wet insulation loses up to 40% of its R-value and shows up as a distinctly cooler patch on a thermal image. Catching moisture intrusion early prevents mold growth and rot that can cost thousands of dollars to remediate.
The DOE estimates that sealing air leaks alone can save 10 to 20% on annual heating and cooling costs. When combined with targeted insulation improvements identified through thermal imaging, total savings of 20 to 30% are realistic for a home built before 2000.
Cold walls and drafty corners are a direct result of heat loss at specific locations. Fixing the leaks a thermal scan identifies raises the mean radiant temperature of your rooms, making 68 degrees Fahrenheit feel as comfortable as 72 degrees felt before the repairs.
💰 Savings Impact by Action
Sealing top plate penetrations and the attic hatch reduces heat loss through the ceiling by up to 20%, the single highest-return location in most homes.
Insulating and air sealing basement rim joists with rigid foam and spray foam can cut infiltration-related heat loss by 10 to 15% in pre-1980 homes.
Foam gaskets behind exterior wall outlet and switch plates eliminate a commonly overlooked infiltration path, contributing up to 5% in total air leakage reduction.
Adding insulation to voids identified by thermal imaging, especially in attics and crawlspaces, reduces conductive heat loss by 15 to 25% in those areas.
Sealing leaky ductwork in unconditioned spaces identified via thermal imaging can recover 20% of heating energy that would otherwise be lost before reaching living areas.
🏠 Key Concepts Explained
The Science Behind It
Thermal cameras do not measure air temperature. They measure the surface temperature of whatever object they are pointed at by detecting the infrared radiation that every object above absolute zero emits. The Stefan-Boltzmann law tells us that radiated energy increases with the fourth power of absolute temperature, which means even modest surface temperature differences produce measurable differences in emitted radiation. A wall section losing heat through a gap in insulation will have a surface temperature 3 to 8 degrees Fahrenheit cooler than the surrounding wall on a cold day, and modern thermal cameras can detect differences of less than 0.5 degrees.
The reason scans must be done under adequate delta-T conditions is simple heat transfer physics. Heat flows by conduction through a material at a rate proportional to the temperature difference across it. If it is 20 degrees outside and 70 degrees inside, there is a 50-degree driving force pushing heat through every part of your envelope. Areas with poor insulation or air leaks will equilibrate toward the outside temperature faster than well-insulated areas, producing the surface temperature contrasts the camera detects. On a mild day when indoor and outdoor temperatures are close together, the heat flow rate slows and the contrasts become too small to see reliably.
Air leaks and conduction losses appear differently on camera because they have different physics. A conduction loss through thin insulation shows up as a broad, gradual temperature gradient across the wall surface because heat is flowing relatively uniformly through the material. An air leak, by contrast, shows up as a sharp, localized cold spot right at the point of entry because 0-degree outdoor air is infiltrating directly and cooling a tight spot on the surface. This distinction is useful because the repair strategies differ: conduction losses require added insulation, while air leaks require sealing first. Most building scientists recommend prioritizing air sealing because moving air carries far more heat per unit of area than conduction through even poorly insulated walls.
Frequently Asked Questions
▼ My thermal images all look the same color with no obvious hot or cold spots. What am I doing wrong?
The most common cause is insufficient temperature differential between inside and outside. You need at least 15 degrees Fahrenheit difference for reliable results, and 25 degrees or more for clear images with a basic smartphone attachment. Try scanning again on a colder night or earlier in the morning before the sun heats exterior surfaces. Also check that your camera’s temperature range is set appropriately for the conditions rather than left on an auto scale that compresses subtle differences.
▼ I found a large cold area on my living room wall but there is no window or door there. What could it be?
A large, diffuse cold area mid-wall almost always indicates missing or settled insulation in that wall cavity. In older homes it is common for blown-in insulation to settle and leave voids, or for batt insulation to have been installed with gaps. The repair is to add insulation, either by drilling small holes and blowing in dense-pack cellulose (a job typically done by a contractor for $1 to $3 per square foot) or by opening the wall. Get a second look from a certified auditor before committing to wall work, since costs can be significant.
▼ Can I use a thermal camera to check if my windows need replacing?
Yes, but interpret the results carefully. All windows lose more heat than insulated walls, so they will always appear cooler in a thermal image. What you are looking for is a dramatic temperature difference between the center of the glass and the frame, or cold air infiltration visible as a streaking cold pattern at the corners and edges. A modern double-pane window in good condition will show a relatively uniform cool surface. If the frame is far colder than the glass center, or if you see condensation-zone patterns indicating a failed seal, the window is worth evaluating for replacement or resealing.
▼ I found what looks like a moisture problem in my ceiling. How urgent is it?
Act within a few weeks, not months. Wet insulation loses R-value rapidly and creates ideal conditions for mold growth within 24 to 48 hours of saturation. Use a non-contact moisture meter to confirm elevated moisture levels in the area the thermal camera flagged. Then trace the source, which is most often a roof leak, plumbing leak, or condensation from an improperly vented bathroom fan. Fix the moisture source before repairing or replacing the insulation, or the problem will recur.
▼ My energy auditor found lots of problems but the quotes for repairs are very expensive. Where should I start?
Start with air sealing because it delivers the best cost-per-dollar-saved ratio and is largely DIY-friendly. Attic hatch insulation, rim joist sealing, and outlet gaskets together often cost under $200 in materials and can reduce heating bills by 10 to 15% on their own. Save the larger investments like insulation retrofits and window replacements for after you have claimed any available utility rebates and the federal 25C tax credit, which covers 30% of qualifying insulation and air sealing costs up to $1,200 per year.
Quick Tips
- Scan on the coldest night of the week to maximize contrast. A 30-degree night gives you twice the delta-T of a 50-degree night, making subtle problems much easier to see.
- Take every thermal image paired with a regular photo of the same spot. The visual photo helps you identify exactly what building component you are looking at, which is easy to lose track of when reviewing images later.
- Check your dryer vent, range hood duct, and bathroom exhaust fan terminations with the thermal camera. Flapper backdraft dampers that stick open are a major source of heat loss that homeowners almost never think to check.
- Thermal imaging works for finding cooling losses in summer too. Run the scan on a hot afternoon when outdoor temperatures are at least 15 degrees warmer than your air-conditioned interior and look for warm intrusion points rather than cold ones.
Variations for Your Situation
- Apartment/Rental: Renters cannot open walls or add insulation, but a thermal scan is still valuable for identifying drafty spots you can address with landlord-approved fixes. Use a smartphone thermal attachment to find cold air infiltration at window frames and under doors, then install adhesive-backed foam weatherstripping (under $15) and door draft stoppers without modifying the unit. Document all findings with thermal images and present them to your landlord as evidence for requesting repairs. Many landlords will act when presented with a visual case rather than a verbal complaint.
- Tight Budget (under $50): Skip buying or renting a thermal camera and use indirect diagnostic methods instead. On a cold windy day, hold a lit incense stick or a thin piece of toilet paper near window frames, electrical outlets, baseboards, and door frames. Movement in the smoke or paper reveals air infiltration. A non-contact infrared thermometer (under $20 at any hardware store) lets you measure surface temperatures of walls, outlets, and ducts to identify the coldest spots. This method misses insulation voids but catches most air leaks effectively.
- Older Home (pre-1980): Homes built before 1980 were constructed with minimal insulation standards and almost no attention to air sealing, so expect to find significant problems everywhere. Prioritize rim joists, attic bypasses, and knob-and-tube wiring areas (which must be kept free of insulation until rewired). In these homes a professional audit with a blower door test is especially worthwhile because the leakage is often too pervasive to address efficiently without a ranked priority list. Check whether your state or local utility offers the Weatherization Assistance Program, which provides free audits and air sealing to qualifying lower-income homeowners.