You have probably felt it: a cold spot near the window, a mysterious chill along the baseboard, or a furnace that never seems to stop running. According to the U.S. Department of Energy, air leaks are one of the biggest sources of wasted energy in the average home, and they are rarely where people expect. Cracks around outlets, gaps behind trim, and leaky attic hatches quietly bleed conditioned air day and night.
The good news is that finding these leaks does not require a $400 thermal camera or a professional blower door test. A basic candle flame is sensitive enough to reveal airflow too gentle for your skin to notice. When a flame flickers, leans, or gutters, you have found a leak. The technique is old, cheap, and surprisingly effective.
This post walks you through exactly when to test, how to move the flame safely, where the usual culprits hide, and how to seal what you find. Most homeowners can complete the entire process in one evening, and common fixes like caulk and weatherstripping cost $20 to $100 while often paying for themselves within a single heating season.
What You’ll Need
Click on an item below to shop for the recommended items for this recipe on Amazon.
As an Amazon Associate, we earn from qualifying purchases.
How to Do It
- Pick a cold, windy evening when the outdoor temperature is at least 20 degrees colder than indoors. Turn off your furnace or AC and close all windows and doors. Turn off bathroom and kitchen exhaust fans so the air in the house is as still as possible.
- Light a taper candle or a stick of incense and hold it about 1 inch from the surface you are testing. Use a candle with a sheltered flame, such as one in a glass jar with the lid removed, or keep your free hand cupped near the flame to block your own breath.
- Move the flame slowly, about 1 inch per second, around window frames, door edges, baseboards, electrical outlets, light switches, and the spot where walls meet ceilings. Watch for flickering, bending, or a smoke trail that gets pulled sideways or sucked toward the gap.
- Mark each leak with a small piece of painter’s tape so you can find it again in daylight. Note which ones are strongest.
- Apply a quick temporary fix: press rope caulk into window gaps, add door sweeps to the bottom of exterior doors, and stick foam gaskets behind outlet and switch cover plates on exterior walls.
- Repeat the candle test across the whole house, including the places people skip: the attic hatch, recessed lights, plumbing and wiring penetrations, fireplace damper, dryer vent, and the rim joist area in the basement. Check upper floors on a windy night, since pressure differences are strongest there.
- Seal small gaps up to 1/4 inch with paintable acrylic latex caulk, or silicone caulk for wet areas. Clean off old caulk first and apply a continuous bead along window and door trim and baseboards that leak.
- Seal gaps between 1/4 inch and 3 inches around pipes, wires, and vents with low-expansion spray foam. Use fire-rated caulk or foam around flues and chimneys, and keep combustible materials away from heat sources.
- Replace worn weatherstripping on doors and the movable parts of windows with adhesive-backed V-strip or foam tape, and install a door sweep on any exterior door where you can see daylight at the bottom.
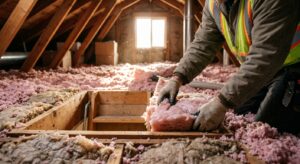
- Insulate and gasket the attic hatch with rigid foam and adhesive weatherstripping so it closes tightly like a refrigerator door.
- Run the candle test again on the sealed areas to confirm the flame stays steady. Revisit any spot that still flickers.
- Search for a certified energy auditor through your utility, the Building Performance Institute (BPI), or RESNET. Many utilities offer free or heavily discounted audits.
- The auditor mounts a calibrated fan in an exterior doorway to depressurize the house, then uses smoke pencils or infrared cameras to pinpoint leaks you cannot reach or see.
- Receive a written report with your home’s air leakage rate (measured in CFM50 or ACH50) and a prioritized list of fixes ranked by savings per dollar spent.
- Hire an insulation or air sealing contractor to handle the hard-to-reach areas like attic floors, wall cavities, and rim joists, and ask for a post-work blower door test to verify the improvement.
Why It Works: The Benefits
The EPA estimates that air sealing plus insulation upgrades can save an average of 15% on heating and cooling costs, or about 11% on total energy costs.
Sealing leaks stops the cold air streams that make rooms feel 5 to 8 degrees colder than the thermostat reading, so you can often lower your setpoint by a degree or two and stay comfortable.
Every leak that lets air in also lets in dust, allergens, and street noise. Sealing gaps noticeably reduces all three, especially around windows and doors.
When your furnace or AC does not have to fight constant leakage, it cycles less often. That can extend equipment life and reduce repair calls.
Leaky walls and attics can carry humid air into cold cavities where it condenses, leading to mold and rot. Air sealing helps keep that moisture out.
💰 Savings Impact by Action
The EPA estimates sealing leaks and adding insulation saves an average of 15% on heating and cooling costs.
Weatherstripping and insulating the attic hatch stops one of the biggest stack effect escape routes in the house.
A gap under an exterior door equals a hole the size of a brick or more, and sweeps close it for under $15.
Foam gaskets on exterior wall outlets and switches cut small but constant leaks for pennies per outlet.
Sealing trim gaps around window frames reduces infiltration and cold drafts on windy nights.
🏠 Key Concepts Explained
The Science Behind It
Air leaks are driven by three forces: wind pressure, the stack effect, and mechanical pressure from fans and ductwork. On a cold night, the warm air inside your home is lighter than the cold air outside, so it rises and escapes through gaps in the upper parts of the house. To replace it, cold air is drawn in through gaps near the bottom. The taller the house and the larger the temperature difference, the stronger this effect becomes.
A candle flame is a surprisingly good sensor because it responds to very low air velocities, often below 1 mile per hour, which is too gentle for human skin to feel reliably. Smoke from an extinguished candle or incense stick is even better, because the visible plume lets you see which direction air is moving and whether it is flowing into or out of the house.
Why does this matter for your bills? The DOE notes that infiltration can account for 5 to 30% of a home’s annual heating and cooling energy use. Because heating a leaky house means constantly warming new cold air from outside, reducing air changes per hour directly cuts the load on your furnace. Sealing leaks is typically the most cost-effective efficiency upgrade, often outperforming adding insulation on a dollar-per-dollar basis.
Frequently Asked Questions
▼ Why is my candle flickering everywhere in the house?
If the flame wobbles near every window and door, your own movement or a running fan may be causing it. Turn off all fans and HVAC, stand still for a few seconds, and retest. If it still flickers broadly, your home may be very leaky overall, and a professional blower door test is worth the $200 to $600.
▼ Is it safe to use a candle near windows and curtains?
Keep the flame at least 6 inches from any fabric and never leave it unattended. Pull curtains aside or use an incense stick or a battery-powered smoke pen, which costs about $10 to $20 and eliminates the fire risk entirely.
▼ I sealed the leaks but my house still feels cold. What now?
Drafts are only part of the picture. Check attic insulation depth (aim for R-38 to R-60 depending on your climate zone) and consider whether your windows are single-pane. Radiant cold from poorly insulated walls and windows can make a room feel chilly even without air movement.
▼ How long before I notice savings on my bill?
You will usually feel the comfort improvement immediately, but bill savings show up over a full heating or cooling cycle. Compare your usage in kWh or therms against the same month last year, adjusting for weather. Most homeowners see 5 to 15% reductions and recoup material costs within 3 to 12 months.
▼ Can I do this in a rental without upsetting my landlord?
Yes. Removable rope caulk, foam outlet gaskets, adhesive door sweeps, and window insulation film are all renter-friendly and leave no damage. Take photos of any leaks you find, and ask your landlord to handle larger issues like failed window seals or missing insulation.
Quick Tips
- Test at night or in the early morning when the indoor-outdoor temperature difference is greatest, ideally 20 degrees or more.
- Hold the flame about 1 inch away from the surface and move slowly. Fast movement creates its own air currents and gives false readings.
- Check high and low: attic hatches, top-floor ceiling fixtures, and basement rim joists are the biggest leakers in most homes.
- Feel with a wet hand or a strip of tissue paper as a backup. A damp hand feels even slight drafts as cooling on the wet side.
- Re-test after sealing and again next winter. Caulk and weatherstripping degrade over 5 to 10 years.
Variations for Your Situation
- Apartment/Rental: Focus on non-permanent fixes you can remove at move-out. Use rope caulk ($5 to $8) on window gaps, foam outlet gaskets ($6 for a pack of 24), adhesive door sweeps ($10 to $15), and clear window insulation film kits ($15 to $25 per few windows). Report major leaks around windows, baseboards, and exterior doors to your landlord in writing.
- Tight Budget (under $50): Do the candle test for free, then prioritize the cheapest high-impact fixes. A tube of acrylic caulk ($5 to $8), a roll of foam weatherstripping ($6 to $10), a pack of outlet gaskets ($6), and a door sweep ($10) can handle most of the worst leaks. Start with exterior-wall outlets, the attic hatch, and the gap under your front door.
- Older Home (pre-1980): Expect more leaks and bigger gaps, especially around old double-hung windows, chimney chases, balloon-framed wall cavities, and unsealed rim joists. Prioritize the attic floor and basement rim joist first, since those spots typically deliver the largest savings. Be cautious about disturbing old materials, since homes built before 1978 may contain lead paint and older insulation may contain asbestos. Test before sanding or scraping.