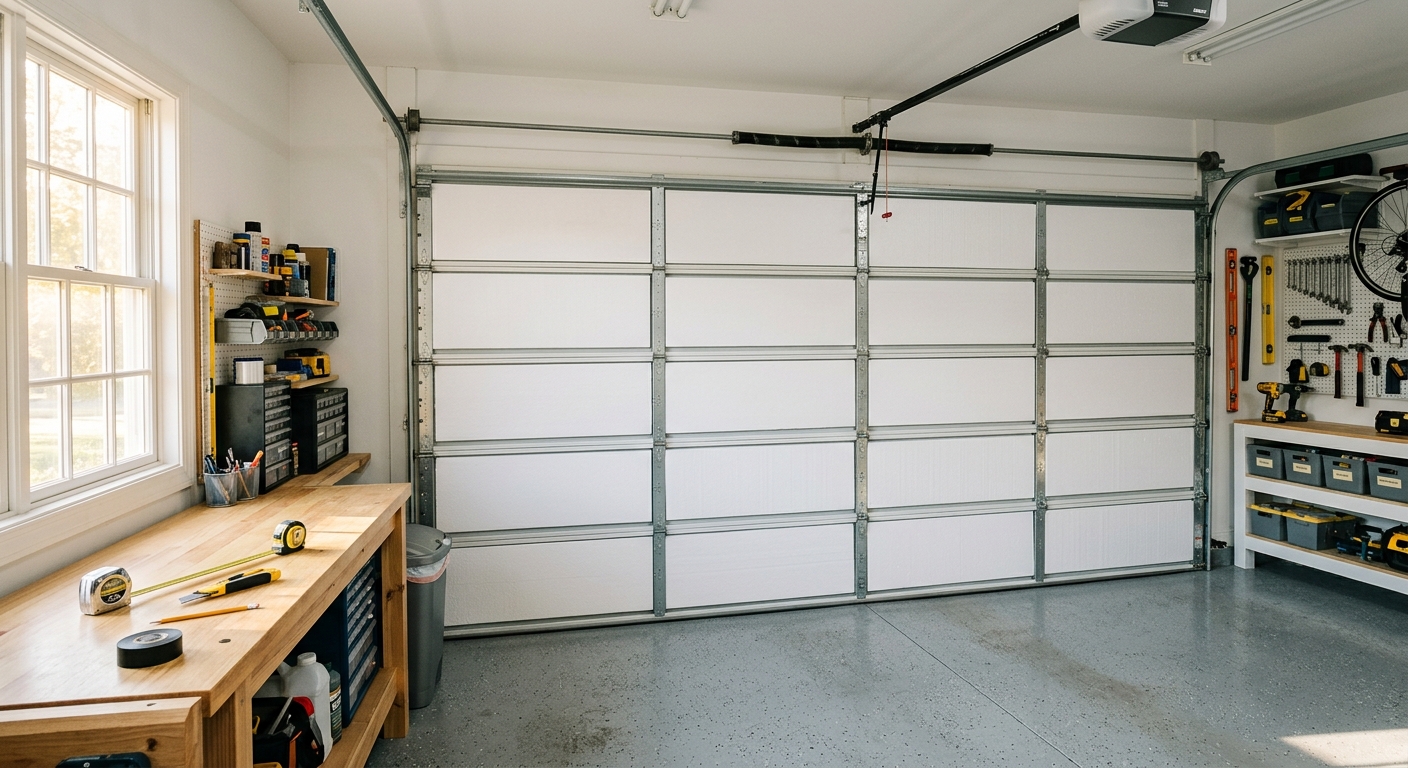
If your home has an attached garage, that garage door is one of the largest uninsulated surfaces on your entire house. A standard two-car garage door covers around 128 square feet of surface area, and without insulation, it acts like a giant radiator in summer and a heat sink in winter. The adjacent rooms, whether that is a bedroom above the garage or a living room sharing a wall, pay the price in comfort and on your utility bill.
Most homeowners never think about the garage door when they are air-sealing and insulating their home, yet it is often the lowest-hanging fruit available. A foam board or reflective insulation kit costs between $30 and $60, installs without special tools, and can bring garage temperatures 10 to 20 degrees closer to the interior of your home. For a heated or cooled garage, that translates directly into lower energy bills every single month.
This guide walks you through two practical approaches: a beginner-friendly reflective foil kit you can finish in an afternoon, and a more effective rigid foam board upgrade you can complete over a full weekend. Both stay well under $50 in materials, and neither requires any special skills or power tools.
What You’ll Need
Click on an item below to shop for the recommended items for this recipe on Amazon.
As an Amazon Associate, we earn from qualifying purchases.
How to Do It
- Measure each door panel’s width and height. Most two-car doors have 4 horizontal panels, each roughly 32 inches tall. Write down each dimension before buying materials.
- Purchase a precut garage door insulation kit with reflective foil bubble wrap, such as the NASA Tech or Reach Barrier kits available at home improvement stores for $25 to $40 for a two-car door.
- Clean the interior face of each door panel with a dry rag to remove dust and oil so the included retainer clips or double-sided tape adhere properly.
- Install the plastic retainer clips by pressing them through the foil at the corners and along the edges of each panel, then snapping them onto the door panel frame rail as directed by the kit instructions.
- Trim excess foil with scissors for a clean fit. The foil should lie flat against the panel with a small air gap if using a two-layer bubble version, since that air gap is what provides the R-value.
- Check that all panels move freely when you open and close the door. The foil should not catch on any part of the door track or hardware.
- Measure each door panel individually. Panels on the same door are often slightly different widths, so measure each one. Also note the panel recess depth, since you need foam that fits within the recessed frame without sticking out past it.
- Purchase 1-inch or 1.5-inch thick extruded polystyrene (XPS) foam board in 4×8 sheets from a home improvement store. One sheet costs about $12 to $16 and covers roughly 30 to 32 square feet. A two-car door needs 2 to 3 sheets.
- Mark and score each foam panel to size using a straight edge and a utility knife. Score firmly on one side and snap the panel cleanly, then score the other side to finish the cut. No saw needed.
- Cut the panels about 1/4 inch smaller than the measured recess on each side so they fit snugly without bowing the door skin outward.
- Press each foam panel into the door panel recess. A properly cut panel will friction-fit without adhesive on many steel doors. For doors with smooth panel faces, apply two small dabs of panel adhesive or foam-safe construction adhesive to hold the panel in place. Avoid adhesives containing solvents that dissolve foam.
- Open and close the door fully to verify smooth operation. Check that foam panels do not contact the door tracks, springs, or cables at any point. If any panel is too thick for the recess depth and causes binding, trim it or switch to thinner foam.
- Inspect and replace the bottom door seal if it is cracked, compressed flat, or missing. A replacement rubber bottom seal costs $10 to $20 and installs by sliding into the existing retainer channel, sealing the biggest remaining air gap.
Why It Works: The Benefits
Insulating an attached garage door can reduce heating and cooling loads for adjacent rooms by 10 to 20%, with homeowners in extreme climates reporting monthly savings of $15 to $40 during peak seasons.
Rooms above or beside an uninsulated garage can swing 10 to 25 degrees from the rest of the house. Insulating the door brings those spaces closer to the rest of the home’s temperature, reducing the need to crank up the thermostat.
A garage that stays within 10 to 15 degrees of outdoor temperatures in summer and holds heat better in winter is far more comfortable as a workshop, gym, or hobby space, which most homeowners use their garages for.
When the garage acts as a buffer zone with a more stable temperature, the HVAC system handling adjacent rooms runs less frequently. Fewer run cycles extends equipment life and reduces maintenance costs over time.
Foam insulation panels add a modest but noticeable amount of sound dampening, reducing street noise and the sound of rain on the metal door by roughly 30 to 40% depending on panel thickness.
💰 Savings Impact by Action
Insulating an uninsulated garage door reduces heat transfer through the door surface by up to 15% of total garage thermal load, lowering peak summer temperatures by 5 to 10 degrees.
Replacing a worn garage door bottom seal reduces cold air infiltration under the door by up to 8%, directly lowering heating demand in adjacent spaces.
A reflective foil layer on the garage door interior reduces radiant heat gain from the sun-heated door surface by up to 12% of total summer cooling load for attached-garage homes.
Combining door insulation, bottom seal replacement, and ceiling insulation above the garage can reduce total heating and cooling costs for adjacent rooms by up to 20% annually.
🏠 Key Concepts Explained
The Science Behind It
Heat moves through a garage door via three mechanisms simultaneously: conduction, convection, and radiation. Bare steel is an excellent conductor, meaning heat flows rapidly through the metal skin from the hot side to the cool side. Adding a foam board panel with an R-value of 4 to 6 slows that conduction dramatically by forcing heat to move through a material that is a poor conductor instead of a good one.
Radiant heat is the dominant factor in summer climates. When direct sunlight hits a dark metal door, the surface temperature can exceed 130 degrees Fahrenheit. That surface then radiates infrared energy into the garage air and into everything nearby. A reflective foil layer on the interior door face works by reflecting that infrared radiation back outward before it can enter the garage as heat. This is the same principle used in radiant barriers in attics and in emergency foil blankets, and it can reduce radiant heat gain through the door by 50 to 97% depending on the emissivity rating of the foil surface.
The combination of foam plus foil, which is how the best DIY kits are built, addresses both pathways at once. The foam stops conducted heat and also creates a still-air cavity, since still air itself is a reasonable insulator at about R-1 per inch. The foil reflects radiant heat before it even reaches the foam. This is why a 1-inch foam-and-foil panel can outperform a 2-inch plain foam panel in high-sun climates, even though it has a lower nominal R-value on paper.
Frequently Asked Questions
▼ My garage door is making grinding or straining noises after I added foam panels. What do I do?
This is a sign the opener motor is working harder than its rated load because the door is now heavier. Stop using the opener immediately and call a garage door technician to adjust the spring tension and reprogram the opener’s force limits. Rigid foam panels typically add 8 to 15 pounds to a two-car door, which is within range for most modern openers but can exceed the capacity of older or lower-horsepower units.
▼ The foam panels keep falling out of the door panel recesses. How do I keep them in place?
Score the back face of the foam panel lightly with a utility knife in a cross-hatch pattern, then apply two or three dabs of foam-compatible construction adhesive such as Loctite PL 300 or 3M 78 spray adhesive. Let each panel cure for 30 minutes before testing. Avoid expanding spray foam or solvent-based adhesives, since they can warp the foam or damage the door paint.
▼ I insulated the door but the garage still gets really hot in summer. Did it not work?
The door is only one part of the thermal envelope. Check whether the garage ceiling has any insulation between it and a conditioned space above, since heat also enters through an uninsulated ceiling and through gaps around the door perimeter seal. Also inspect the side walls for insulation. Addressing all three together can reduce garage peak temperatures by 15 to 25 degrees rather than the 5 to 10 degrees the door alone provides.
▼ Can I use regular pink fiberglass batt insulation instead of foam boards?
Technically yes, but it is not recommended for garage door panels. Fiberglass batts are bulky, difficult to cut cleanly to panel size, and absorb moisture over time in the humidity swings typical of a garage. They also have no structural rigidity, so they tend to sag out of the panel recess within a year. Rigid foam boards or precut foil kits are better suited to this specific application.
▼ Will insulating my garage door void the warranty on the door or opener?
Most garage door and opener warranties do not explicitly cover DIY insulation additions, but using a manufacturer-supplied insulation kit for your door brand, such as the Clopay or Wayne Dalton branded kits, typically preserves warranty coverage. If you use a third-party kit, document the added weight and confirm it stays within the opener manufacturer’s rated door weight capacity, which is usually printed on a sticker on the opener motor housing.
Quick Tips
- Do the door balance test before and after installation: disconnect the opener and lift the door manually to waist height. If it stays put, the springs are balanced. If it falls or shoots up, call a technician before using the opener.
- Use foil tape to seal the edges between foam panels and the door panel frame. Even a small gap allows convective air movement that bypasses the insulation and reduces effective R-value.
- Paint foam board panels with latex paint if you want a cleaner finished look. Do not use oil-based paint or spray paint directly on foam, since solvents dissolve XPS and EPS foam instantly.
- Pair your door insulation project with a $10 to $15 door perimeter weatherstrip replacement. The side and top seals on a garage door degrade every 5 to 10 years, and new seals eliminate cold drafts that would otherwise make the foam improvement feel underwhelming.
Variations for Your Situation
- Apartment or Rental with a Shared Garage: If you rent a unit with access to a shared or single-car garage, focus on portable solutions. A freestanding radiant barrier curtain hung inside the garage near the door costs $30 to $60 and requires no modification to the door itself. You can also place a thermal door cover over the interior face of the door using magnetic strips for a fully removable solution that leaves no marks.
- Tight Budget Under $20: Skip the kit and buy a single 4×8 sheet of 1-inch XPS foam board for about $12 to $14. A standard single-car door typically needs just one sheet. Cut panels to fit the recessed sections with a utility knife, friction-fit them in place without adhesive, and spend the remaining few dollars on a replacement bottom door seal. This bare-bones approach still delivers R-4 per panel and meaningful temperature reduction for almost no money.
- Older Detached Garage or Unheated Workshop: For a detached garage you use as a workshop or hobby space, prioritize the bottom seal and perimeter weatherstrip before spending anything on panel insulation. Air infiltration is usually far worse in older detached structures than conduction through the door. Seal all gaps first, then add rigid foam panels. Also consider a small electric infrared heater for spot heating rather than trying to condition the entire space in winter, since an infrared heater warms people and surfaces directly without needing to heat the air volume of the whole garage.