Most homes are cooled with a single-zone central AC system that blasts the same temperature into every room simultaneously. The problem is that you’re not in every room simultaneously. You’re paying to cool the guest bedroom at 2 PM, the living room at midnight, and the garage-adjacent hallway all day long, whether anyone is there or not. According to the U.S. Department of Energy, heating and cooling account for nearly half of a typical home’s energy bill, and a large portion of that is wasted on unoccupied spaces.
True zoned HVAC systems with dampered ductwork and multiple thermostats can cost $2,000 to $5,000 installed. But you don’t need that level of investment to get meaningful results. By combining smart thermostat scheduling, strategic vent management, portable cooling units, and a few airflow tricks, most homeowners can achieve 15 to 30% savings on their cooling bills without touching their existing system.
This guide walks you through practical, layered approaches to zoned cooling, from no-cost adjustments you can make in the next 15 minutes to targeted DIY upgrades under $300 that deliver real, measurable comfort improvements. You’ll also learn the building science behind why these strategies work, so you can troubleshoot your own home and make smarter decisions going forward.
What You’ll Need
Click on an item below to shop for the recommended items for this recipe on Amazon.
As an Amazon Associate, we earn from qualifying purchases.
How to Do It
- Walk through your home and identify which rooms are unoccupied for most of the day. Common candidates include formal dining rooms, guest bedrooms, and storage-adjacent spaces.
- Partially close (not fully shut) the supply vents in unoccupied rooms, reducing airflow by about half. Turn the vent louvers to roughly 50% open rather than slamming them shut to avoid duct pressure problems.
- Make sure all return air vents throughout the home remain fully open. Blocking returns causes far more pressure and efficiency problems than adjusting supply vents.
- Set your thermostat 4 to 6 degrees warmer than your current setpoint during peak afternoon hours (2 PM to 6 PM) and program a 30-minute pre-cool cycle before you typically return to or use the main living areas.
- Place box fans in doorways between your cooled living zone and adjacent warm areas with the fan blowing warm air toward the return vent side of the house, improving circulation without extra equipment.
- Check supply vent placement in your primary occupied rooms and make sure no furniture is blocking them. A couch sitting over a floor vent can reduce that room’s airflow by 50% or more.
- Install a smart thermostat (Ecobee, Google Nest, or Honeywell T6 Pro) with room sensor capability. Ecobee’s SmartSensor system actively reads temperature in multiple rooms and averages them, so the system responds to where people actually are rather than just where the thermostat is mounted.
- Place a remote room sensor in your most-used space, typically the living room or bedroom you spend the most time in. The thermostat will prioritize comfort in that room during the hours you schedule.
- Create a daily schedule on your smart thermostat: set the temperature 4 to 6 degrees warmer during unoccupied hours (9 AM to 5 PM for a typical working household), pre-cool 30 minutes before occupancy, and allow a setback again overnight if you sleep in a room that stays naturally cooler.
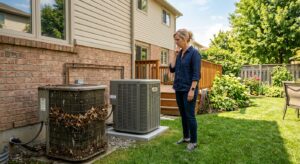
- Identify the single hottest room in your home during peak afternoon hours. Measure the temperature differential with a simple digital thermometer. If it runs 6 or more degrees warmer than the thermostat setpoint, that room is a candidate for a supplemental unit.
- Install a window AC unit (5,000 to 8,000 BTU for rooms up to 350 square feet) or set up a portable AC unit with a dual-hose design in that problem room. Run it only during the hours the room is occupied, rather than all day. A single 6,000 BTU window unit running 6 hours per day costs roughly $20 to $35 per month in electricity.
- Raise your central thermostat setpoint by 3 to 5 degrees above its previous setting during the hours the supplemental unit is running. This reduces central AC runtime, which more than offsets the cost of running the smaller unit and delivers net savings of 15 to 25% in most homes.
- Choose a DIY-friendly mini-split kit rated for your problem room’s square footage. A 9,000 BTU unit handles up to 400 square feet; a 12,000 BTU unit covers up to 550 square feet. Look for units with at least 20 SEER efficiency rating.
- Select the installation wall on an exterior-facing surface to minimize the refrigerant line run length. The shorter the line set, the simpler the installation and the better the efficiency.
- Mount the indoor air handler unit high on the wall (6 to 7 feet from the floor) according to the manufacturer template, ensuring it is level and the condensate drain has a downhill path to exit the building.
- Drill a 3-inch hole through the exterior wall for the line set, electrical, and drain line. Use a hole saw and sleeve kit for a clean, weather-sealed pass-through.
- Run the line set, communication wire, and condensate drain through the wall to the outdoor condenser location. Mount the outdoor unit on a level pad or wall bracket at least 12 inches off the ground with 18 inches of clearance on all sides for airflow.
- Connect all wiring per the wiring diagram, then call a licensed HVAC technician to make the refrigerant connections and perform a system startup check if using a traditional line-set kit. For pre-charged DIY kits, follow the manufacturer’s quick-connect procedure and test operation before sealing the wall penetration.
Why It Works: The Benefits
Cooling only occupied zones and raising the central thermostat setpoint by 4 degrees can reduce cooling energy use by 15 to 20% per the DOE’s 7 to 10% per degree rule of thumb. Combined with smart scheduling, total savings of 25 to 30% are realistic.
Targeted supplemental cooling in hot spots like upstairs bedrooms or home offices lets you maintain 72 to 74 degrees where you actually need it without freezing the rest of the house or running the central system at full blast all day.
When the central system cycles less often because supplemental cooling is handling peak loads in key rooms, compressor runtime drops. Less runtime means fewer mechanical failures and a longer equipment lifespan, potentially adding 3 to 5 years to your existing system.
A strategic combination of a smart thermostat ($130 to $250) and one portable or window AC unit ($150 to $400) can deliver similar comfort to a $3,000 zoned HVAC retrofit, with a payback period of 6 to 18 months versus 5 to 8 years.
Unlike duct modifications or HVAC upgrades that require contractors and permits, most pseudo-zoning strategies take effect the same day. You can feel the comfort difference within hours of setting up a portable unit or adjusting your thermostat schedule.
💰 Savings Impact by Action
Raising the setpoint 4 to 6 degrees during unoccupied hours and using pre-cool cycles saves 10 to 15% on cooling energy annually per DOE estimates.
Adding a targeted window or portable AC to a hot room and raising the central thermostat reduces central system runtime by 15 to 25% during peak afternoon hours.
Partially redirecting supply airflow away from unoccupied rooms improves delivery efficiency in occupied zones by 5 to 10% without any equipment cost.
Blocking direct sun on west and south-facing windows with curtains or exterior shades reduces room heat gain by up to 77%, cutting cooling load by 10 to 15% in sun-exposed homes.
Replacing central AC runtime in a high-load room with a 20 to 25 SEER mini-split reduces energy consumption for that zone by 25 to 35% compared to a typical 14 SEER central system.
🏠 Key Concepts Explained
The Science Behind It
Your central AC system was designed to deliver a fixed volume of conditioned air across a set of ducts with specific resistance characteristics. When you start redirecting or restricting that airflow, you’re working with two competing physics problems: thermal load distribution and duct system hydraulics. The good news is that pseudo-zoning works because cooling loads are genuinely unequal across rooms. A room with no occupants, no electronics, and a north-facing window may generate only 200 to 400 BTUs of heat gain per hour, while a home office with a desktop computer, two people, and afternoon sun on a west window can generate 2,000 to 4,000 BTUs per hour. Matching your cooling effort to those real numbers instead of treating every room identically is where the efficiency gains come from.
The stack effect adds another layer of complexity in two-story homes. Warm air rises naturally, which means upper floors accumulate heat faster than lower floors regardless of where your thermostat is located. If your thermostat is on the first floor and reads 72 degrees, the second floor may be 80 degrees or warmer. This is why smart thermostats with remote sensors in upstairs rooms outperform single-point thermostats by an average of 10 to 15% in two-story homes, according to Ecobee’s published field data. The sensor tells the system what temperature people are actually experiencing, not what the air happens to be at a five-foot height near the staircase.
Supplemental cooling works because of the efficiency math involved. Your central AC system runs at its rated SEER efficiency only under ideal conditions. At peak afternoon loads when outdoor temperatures hit 95 degrees or more, system efficiency drops and runtime increases sharply. A 6,000 BTU window unit running in a single room at 12 SEER costs about $0.06 to $0.10 per hour to operate. If it allows you to raise the central thermostat by 4 degrees and eliminate one or two compressor cycles per hour, the central system saves 15 to 20 cents per hour in operating cost. The net result is that you spend 10 cents to save 15 to 20 cents, which is a straightforward energy arbitrage that works in nearly every home.
Frequently Asked Questions
▼ Why is my upstairs still hot even with the AC running constantly?
This is almost always a combination of thermal stratification and inadequate supply airflow to the upper floor. Check that your upstairs supply vents are fully open and unobstructed, then measure the actual airflow by holding a tissue at each vent. Weak airflow usually points to a duct leak in the attic or an undersized return on the upper floor. A duct blaster test from an HVAC technician can locate leaks quickly, and sealing them with mastic can improve upstairs cooling by 20 to 30%. Short term, add a window or portable AC to the hottest upstairs room and raise the central thermostat.
▼ Can I just close all the vents in rooms I don’t use?
No, and this is the most common zoning mistake homeowners make. Closing more than 20 to 25% of your supply vents raises static pressure in your duct system, which reduces airflow, strains the blower motor, and can cause the evaporator coil to freeze over. Instead, partially restrict vents to about 50% in unoccupied rooms, and never touch the return vents. If you want true room isolation, install adjustable dampers inside the ductwork rather than relying on the vent louvers.
▼ Will a portable AC unit work as well as a window unit?
A single-hose portable AC is noticeably less efficient than a window unit because it exhausts indoor air out through the hose, creating negative pressure that pulls warm unconditioned air in from outside through cracks and gaps. A dual-hose portable AC performs much closer to a window unit by using one hose for intake and one for exhaust. If window installation is impossible due to your window type or building rules, choose a dual-hose portable unit and expect it to cost 15 to 25% more to operate per BTU than an equivalent window model.
▼ My energy bill went up after I installed a window AC. What went wrong?
The most likely cause is that you added the window unit but did not raise your central thermostat setpoint. If the central system is still running to its original setpoint and the window unit is running on top of that, you’ve added cooling load rather than shifted it. Raise the central thermostat 3 to 5 degrees during the hours the supplemental unit runs. Also confirm you sealed the gaps around the window AC installation, since a poor seal can let in enough warm outdoor air to negate the unit’s cooling output.
▼ How do I know if my home is a good candidate for a mini-split upgrade?
A mini-split makes strong financial sense when you have one or two chronic problem rooms that run 8 or more degrees warmer than the rest of the house, when your central system is already sized correctly for the main living areas, or when you have an addition or converted garage that has no existing ductwork. Run the numbers using your local electricity rate and the number of months per year you cool. A 12,000 BTU mini-split at 20 SEER typically costs $40 to $70 per month to run at 8 hours daily, and it qualifies for a 30% federal tax credit under the Inflation Reduction Act through 2032.
Quick Tips
- Run ceiling fans counterclockwise in summer to push air straight down and create a wind-chill effect. This lets you raise the thermostat 4 degrees without noticing a comfort difference, saving up to 10% on cooling costs.
- Block afternoon sun with exterior shading or blackout curtains in west and south-facing rooms before noon. Shading a single large window can reduce that room’s cooling load by 500 to 1,000 BTUs per hour.
- Use a $15 digital thermometer to map every room in your home at 3 PM on a hot day. The temperature map will immediately show you which rooms need supplemental cooling and which are being overcooled.
- Set your portable or window AC unit’s thermostat to 76 to 78 degrees rather than maximum cold. Running it on the medium fan setting at a moderate temperature is 20 to 30% more efficient than blasting it at maximum and cycling it on and off.
Variations for Your Situation
- Apartment or Rental: Renters cannot modify ductwork or install through-wall units, but window AC units are permitted in most leases with landlord approval. Focus on a dual-hose portable AC unit ($200 to $350) for the bedroom or home office, a smart plug-in thermostat for window units, blackout curtains on west-facing windows, and ceiling or box fans to maximize air movement. These changes alone can reduce your personal cooling costs by 15 to 25% compared to relying solely on a central system you cannot control.
- Tight Budget (under $50): Start with the zero-cost vent optimization steps and thermostat scheduling if you have a programmable thermostat already. Add blackout curtains for west and south windows ($20 to $40 for a basic panel) and two box fans ($15 to $25 each) to create a cross-ventilation path through your most-used rooms during evening hours. Using fans to exhaust hot air out one window while drawing cooler evening air in from a shaded side of the house can drop room temperature by 5 to 8 degrees without running the AC at all during mild evenings.
- Older Home (pre-1980): Homes built before 1980 typically have single-pane windows, minimal wall insulation, and leaky ductwork that loses 20 to 30% of conditioned air before it reaches the living space. In these homes, address the duct leakage first since it undermines every other zoning strategy. Have a technician perform a duct leakage test and seal accessible joints with mastic paste or metal foil tape, which can cut cooling costs 15 to 20% on its own. Then layer in smart thermostat scheduling and supplemental cooling for the highest-impact rooms. Avoid spending heavily on mini-splits until the building envelope and duct system losses are under control.