Here is a home improvement so simple and inexpensive that most homeowners walk right past it every time they do laundry. Your hot water pipes, especially the first 6 to 10 feet leaving the water heater, lose heat continuously through their bare metal or copper walls. That means your water heater fires up more often to maintain temperature, and you stand at the faucet waiting longer for warm water to arrive. The Department of Energy estimates that pipe insulation alone can reduce standby heat loss significantly and raise delivered water temperature by 2 to 4 degrees Fahrenheit.
The fix costs between $10 and $20 at any hardware store and requires no special skills. Pre-slit foam pipe insulation sleeves slip over your pipes in minutes, and even a partial job on the most exposed runs near your water heater delivers real, measurable savings. This is one of the few home upgrades with a payback period measured in weeks, not years.
In this post, we cover how pipe insulation works, which pipes matter most, how to choose the right foam size, and two approaches ranging from a 20-minute quick fix to a thorough DIY project covering your full accessible hot water system. We also include troubleshooting answers, savings numbers, and tips for apartments and older homes.
What You’ll Need
Click on an item below to shop for the recommended items for this recipe on Amazon.
As an Amazon Associate, we earn from qualifying purchases.
How to Do It
- Turn off the water heater or set it to vacation mode before starting so you are not working near a hot burner or heating element. The pipes themselves may be warm but safe to touch.
- Measure the diameter of your hot water pipes. Most residential pipes are 1/2 inch or 3/4 inch. Bring a photo to the hardware store or measure the outer diameter with a tape measure to buy correctly sized foam pipe insulation sleeves.
- Purchase pre-slit polyethylene foam pipe insulation sleeves in the matching diameter. One 6-foot sleeve costs roughly $1.50 to $2.50. Buy enough to cover 10 feet on the hot water outlet side and 3 feet on the cold water inlet side.
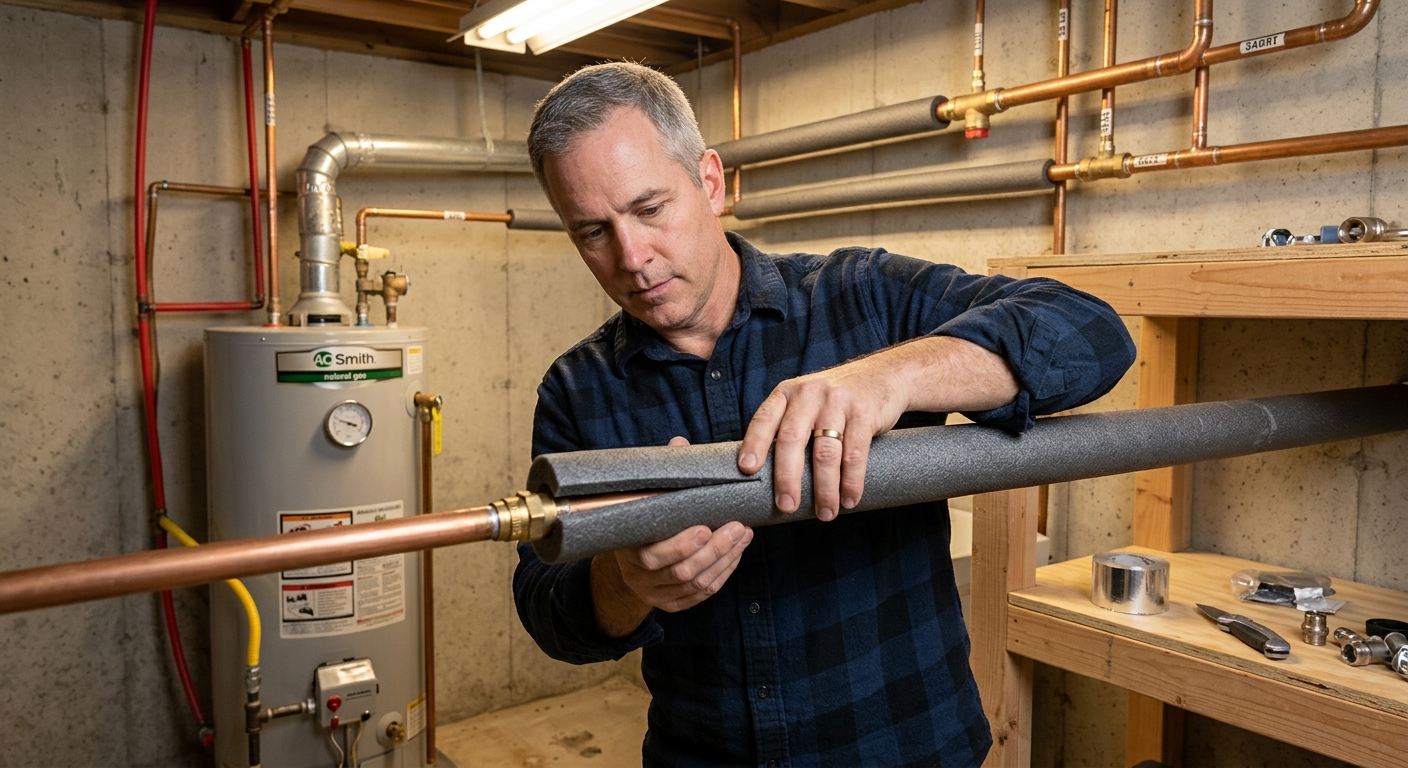
- Starting at the water heater outlet, snap each pre-slit sleeve open, position it over the pipe, and press the slit closed. The foam self-adheres on most products, or you can use a strip of duct tape every 12 inches to keep seams closed.
- Butt each sleeve end tightly against the next piece with no gaps. At elbows, cut 45-degree mitered angles on both pieces so they meet cleanly without leaving bare pipe exposed.
- Restore the water heater to its normal setting. Inspect the insulation after 24 hours to confirm no sections have sprung open at the seams.
- Sketch a rough map of your hot water pipe runs through the basement or crawlspace. Note total linear footage, pipe diameters, and any elbows, tees, or valves. This lets you buy the right quantity of materials in one trip.
- Purchase pre-slit foam pipe insulation sleeves plus a roll of foil HVAC tape or foam-compatible pipe insulation tape. For pipes near the water heater that exceed 140 degrees F, choose insulation rated for high-temperature exposure rather than standard polyethylene foam.
- Start at the water heater and work outward, pressing sleeves onto the hot water supply line. Tape every seam closed with foil tape rather than relying on the self-sealing slit alone. Taped seams resist moisture, last longer, and prevent gaps from forming over time.
- At each elbow or tee fitting, cut pieces at a 45-degree angle so they meet at the joint with minimal bare metal exposed. For complex fittings like gate valves or union connections, use self-sealing pipe wrap tape to cover any irregular surfaces the pre-slit sleeve cannot conform to.
- Insulate the cold water inlet pipe for the first 3 feet entering the water heater. This section can collect condensation in humid basements and contributes to standby loss.
- Check any pipes running through unheated spaces like garages or crawlspaces and insulate those full runs, not just the sections near the heater. These remote runs lose heat faster due to colder ambient temperatures and represent the largest opportunity beyond the heater itself.
- Label any insulated shutoff valves with a marker on the foam so you can locate them quickly in an emergency without tearing off insulation.
Why It Works: The Benefits
The DOE estimates pipe insulation can reduce water heating energy consumption by 4 to 10% annually. For a household spending $500 per year on water heating, that translates to $20 to $50 in savings every year.
Insulated pipes retain heat between uses, so the water sitting in the line stays warmer longer. Many homeowners report cutting their wait time for hot water by 30 to 60 seconds on frequently used fixtures.
Shorter wait times mean fewer gallons of cold water purged down the drain before hot water arrives. A household that runs the shower for 60 fewer seconds per day can save 700 to 1,000 gallons of water per year.
In crawlspaces and garages, pipe insulation adds a buffer against freezing temperatures. While it is not a substitute for heat tape in extreme climates, it meaningfully slows heat loss during cold snaps and can prevent burst pipes during brief temperature dips.
Insulated pipes deliver water 2 to 4 degrees Fahrenheit warmer at the faucet, which means you can lower your water heater setpoint by a few degrees and still get the same comfort, compounding your energy savings.
💰 Savings Impact by Action
Insulating hot water pipes reduces standby heat loss and can cut water heating energy use by 4 to 10% according to the Department of Energy.
Lowering water heater temperature from 140 to 120 degrees F after insulating pipes saves an additional 3 to 5% on water heating costs.
Faster hot water delivery from insulated pipes reduces the volume of cold water purged per use, cutting household water consumption by 5 to 8% for water heating-related draws.
Foam insulation on crawlspace pipes slows temperature drop during cold snaps, reducing freeze risk and potential repair costs that can reach $500 to $2,000 for a burst pipe.
🏠 Key Concepts Explained
The Science Behind It
Heat always flows from hot to cold, and it does so faster when the temperature difference is larger and the barrier between them is thinner. A bare copper pipe carrying 120-degree water through a 55-degree basement has a 65-degree differential driving continuous heat loss into the surrounding air. The pipe’s copper walls, with extremely low thermal resistance, offer almost no barrier to that flow. The result is measurable cooling of the water sitting in the line between uses, and a higher frequency of water heater cycling to compensate.
Polyethylene foam insulation changes the equation by adding thermal resistance, measured as R-value. A standard 1/2-inch foam sleeve achieves roughly R-3, meaning it resists heat flow about three times more effectively than bare pipe. The foam works by trapping tiny pockets of still air within its cellular structure. Still air is a poor conductor of heat, so those trapped bubbles act as a thermal buffer between the hot pipe and the cooler ambient air. The result is a much slower rate of temperature decay in the water between uses and a significantly smaller heat load on the water heater.
The physics also explain why the first 10 feet of pipe matter most. Water leaves the heater at its hottest point, so the temperature differential between pipe and air is greatest right at the heater outlet. Heat loss per foot of pipe is highest there and decreases as the water travels further and cools. This is why even a partial job covering just the heater exits and the most exposed runs in unconditioned spaces captures the majority of available savings, often 70 to 80% of the total benefit you would get from insulating the entire system.
Frequently Asked Questions
▼ My foam insulation keeps popping open at the seams. How do I keep it closed?
Pre-slit foam relies on weak self-adhesive strips that often fail in humid or warm environments. Apply foil HVAC tape over every seam at 12-inch intervals to hold the insulation firmly closed. For pipes that run near the water heater where temperatures may exceed 120 degrees F, consider switching to fiberglass pipe wrap, which handles higher temperatures and does not degrade the way foam can near heat sources.
▼ Will this actually make hot water arrive at my shower faster?
It depends on how long your pipe run is between the water heater and the shower. Pipe insulation slows heat loss between uses, so if you showered an hour ago the water in the line will still be warmer, reducing wait time. However, if the water has been sitting in a long pipe run for 8 hours, insulation alone may not fully eliminate the wait. For showers far from the heater, a hot water recirculation pump is a more targeted solution and pairs well with insulated pipes.
▼ Can I insulate pipes that are inside finished walls or ceilings?
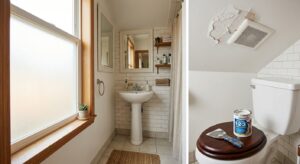
No, this project only applies to accessible, exposed pipes in basements, crawlspaces, utility rooms, and garages. You should not open finished walls to insulate pipes unless you are doing a larger renovation. Focus your effort on the exposed runs in unconditioned spaces, which is where the majority of heat loss occurs anyway.
▼ I found gray chalky insulation already on my pipes in my older home. Can I just leave it or add foam over it?
Do not disturb or add new material over old gray or white pipe insulation in homes built before 1980, as it may contain asbestos. Leave it intact and contact a licensed asbestos abatement contractor for testing before doing any work near it. Asbestos is only dangerous when disturbed and airborne, so undamaged original insulation that is not friable can often be left in place safely with professional guidance.
▼ Does insulating cold water pipes matter too?
Insulating cold water pipes does not save energy the way hot pipe insulation does, but it has two real benefits: it prevents condensation on cold pipes in humid basements, which can drip and cause moisture damage, and it helps protect pipes in unheated spaces from freezing. Insulate cold pipes in crawlspaces, garages, and exterior walls if you live in a climate that sees freezing temperatures.
Quick Tips
- Buy pipe insulation in 6-foot sections rather than shorter pieces to minimize seams, since every uncovered seam is a point of heat loss.
- Use foil tape instead of standard duct tape on seams. Foil tape resists moisture in crawlspaces and basements and lasts far longer than cloth-backed duct tape near warm pipes.
- If your pipes are in a damp crawlspace, choose closed-cell foam insulation rather than open-cell, since closed-cell resists moisture absorption and will not grow mold.
- After completing the project, run a hot water tap for 30 seconds, then wait 2 hours and run it again. Compare how quickly hot water arrives on the second run. Most homeowners notice a measurable improvement within days of insulating.
Variations for Your Situation
- Apartment/Rental: Renters typically cannot access water heater pipes, but if your unit has an exposed hot water line in a utility closet or under the sink, you can add pre-slit foam insulation without modifying any building systems. Most landlords have no objection since it causes no damage. If your landlord handles the utility bill, present the savings data and ask them to insulate the main runs as a building improvement. Foam sleeves cost under $20 and require no tools beyond a utility knife.
- Tight Budget (under $10): Buy foam insulation only for the 3 to 6 feet immediately exiting the water heater. This single section delivers the majority of standby heat loss savings because the water is hottest there. One or two 6-foot sleeves costing $3 to $5 each cover this priority zone entirely. Skip the foil tape and use strips of regular duct tape for now. This captures roughly 60 to 70% of the benefit of a full insulation job at one-third the cost.
- Older Home (pre-1980): Older homes often have longer pipe runs, more uninsulated basement footage, and possibly iron or galvanized steel pipes rather than copper. Steel pipes are slightly less conductive than copper but still benefit significantly from insulation. Check carefully for any existing asbestos pipe insulation before starting. If pipes show signs of corrosion or pinhole leaks, get them inspected by a plumber before wrapping them in foam. Prioritize runs through unheated basements or crawlspaces first, as these homes often lack any floor insulation above those spaces, making ambient temperatures extremely cold in winter and heat loss from pipes correspondingly high.