You know the sound. The furnace or AC kicks on, and suddenly one vent in the hallway starts buzzing like a trapped insect. Most people tolerate it for months, or even years, because it seems like a minor irritation that is not worth a service call. The good news is that you do not need a technician, and you do not need to spend more than a few dollars.
A rattling vent cover is usually caused by one of three things: loose mounting screws, a warped or undersized damper, or a gap between the boot (the metal box behind the register) and the drywall or floor. That third cause matters for your energy bill. Gaps around register boots can leak a surprising amount of air into wall cavities, floors, and attics instead of into the room, and the DOE estimates that typical duct systems lose 20 to 30 percent of airflow through leaks and poor connections.
This post walks through two fixes: a true five-minute quick fix that uses almost nothing, and a more thorough DIY upgrade that silences the noise for good while sealing the leaks behind it. Either one can be done on a weekday evening without special skills.
What You’ll Need
Click on an item below to shop for the recommended items for this recipe on Amazon.
As an Amazon Associate, we earn from qualifying purchases.
How to Do It
- Turn the HVAC system on so you can hear the rattle, then place your hand lightly on the cover to confirm that it is the source of the noise.
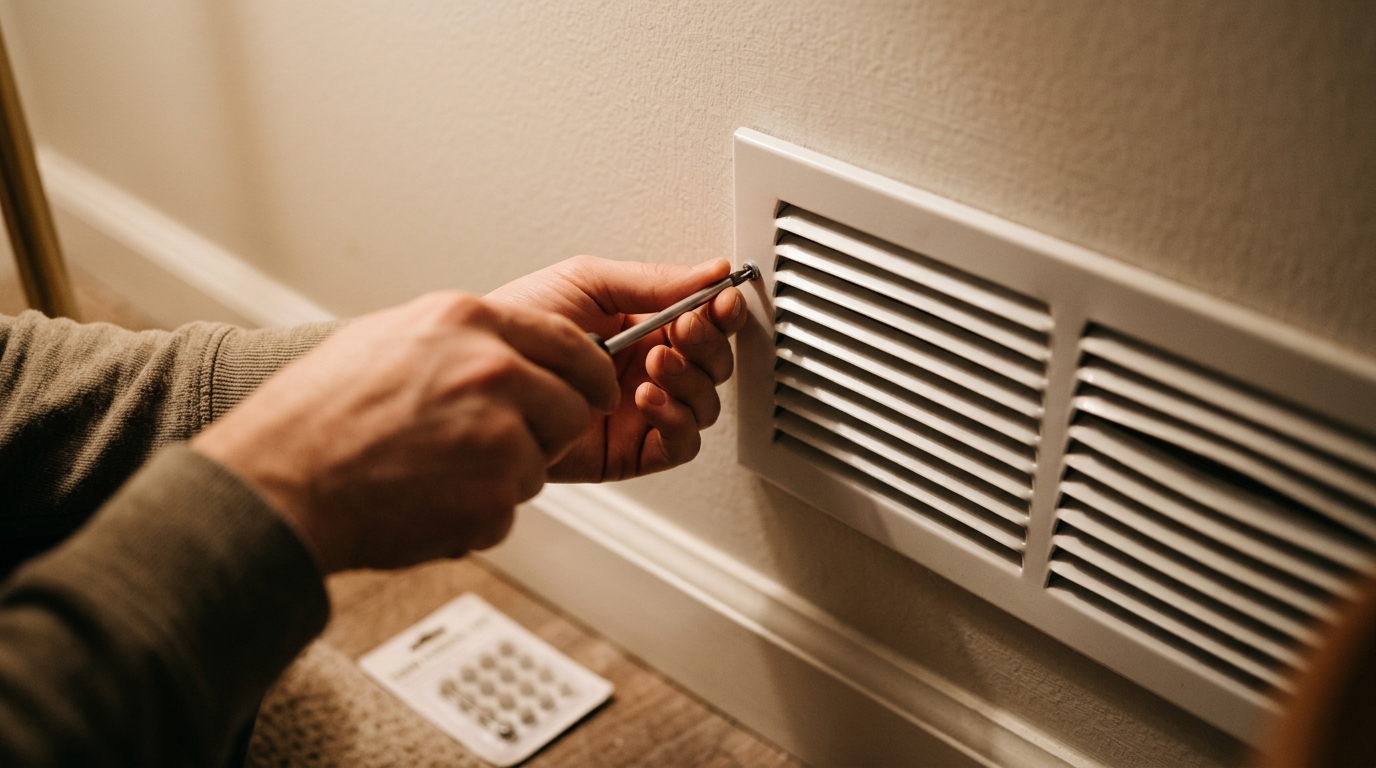
- Check the screws. Use a screwdriver to snug any that are loose, stopping as soon as they are firm so you do not strip the hole or crack the cover.
- If a screw spins freely without tightening, remove it, push a wooden toothpick or two dipped in wood glue into the hole, snap it off flush, and drive the screw back in.
- Remove the cover and press a strip of self-adhesive foam weatherstripping around the underside of the flange so the cover sits on a soft gasket instead of bare metal or drywall.
- Reinstall the cover, run the system, and listen. If the damper still chatters, gently bend the blade back to a flat position with your fingers or move the lever to a different setting.
- Turn off the HVAC system, remove the screws, and lift off the register cover. Vacuum out any dust and debris from the boot opening.
- Inspect the boot where it meets the floor, wall, or ceiling. Look for gaps wider than 1/8 inch, daylight, or loose, shifting metal.
- Seal larger gaps with a bead of duct mastic or high-quality water-based sealant applied with a putty knife or brush. Avoid standard cloth duct tape, which dries out and fails within a few years.
- If the boot itself is loose in its opening, secure it to the framing with a couple of short screws through the boot flange, then re-seal around the edge.
- Apply a continuous strip of closed-cell foam gasket tape to the back of the register flange to cushion it and block small air leaks.
- Reinstall the cover, tighten the screws until snug, turn the system on, and confirm the rattle is gone and no air is escaping around the edges.
Why It Works: The Benefits
Eliminating a buzzing register can cut perceived noise in a bedroom or office noticeably, and it is one of the easiest comfort upgrades you can make for almost no cost.
Sealing the gap around a register boot can recover a portion of the 20 to 30 percent of airflow that typical duct systems lose, so more conditioned air reaches the room.
When air goes where it is supposed to, rooms that were always slightly too warm or too cool often come closer to the thermostat setting without any other changes.
A sealed boot keeps dust, insulation fibers, and attic or crawlspace air from being pulled into the duct system through gaps on the return side.
The quick fix can cost nothing, and a full seal using foam gasket tape and mastic runs about $5 to $15 for enough material to handle several registers.
💰 Savings Impact by Action
Sealing the gap around a leaky register boot recovers lost airflow and can trim roughly 1 to 3 percent from heating and cooling costs per affected register.
Typical duct systems lose 20 to 30 percent of airflow to leaks, so targeting accessible points like register boots is a low-cost first step toward recovering it.
Directing more air into the room instead of wall cavities helps close the gap between the thermostat reading and how the room actually feels.
Damping a loose cover with a foam gasket and snug screws typically eliminates most or all of the buzzing in a single pass.
🏠 Key Concepts Explained
The Science Behind It
A vent cover rattles for the same reason a guitar string or a loose window pane does: a thin, lightly supported object is exposed to a moving force at a frequency it is easy to excite. Air leaving a register creates turbulence along the louvers and flange, and that turbulence pushes on the cover in tiny, rapid pulses. If the cover is not held firmly, those pulses make it vibrate against the boot or the wall, and the result is the buzz you hear.
Adding a compressible gasket or tightening the fasteners works because it changes two things at once. First, it removes the free movement, so the cover can no longer slap against the surface. Second, it adds damping, which dissipates vibration energy as tiny amounts of heat in the foam instead of letting it build into audible resonance.
The energy side of the story comes from air leakage. Supply ducts run at a higher pressure than the surrounding space, so any gap pushes conditioned air out into wall cavities, floors, or attics. According to ENERGY STAR and the DOE, typical homes lose roughly 20 to 30 percent of the air moving through the duct system to leaks and poor connections. Sealing the boot at the register is one of the simplest points of attack, because it is accessible without cutting into walls or crawling into the attic.
Frequently Asked Questions
▼ I tightened the screws and the vent still rattles. What now?
Remove the cover and look at the damper blade and the boot. A bent blade can usually be flattened by hand, and a loose boot needs to be screwed to the framing and sealed with mastic. If the rattle persists after both steps, replace the register with a heavier-gauge steel model.
▼ Why does my vent whistle instead of rattle?
A whistle usually means air is being forced through a very narrow opening, often because the damper is mostly closed or the louvers are partially blocked. Open the damper fully, clear any furniture or rugs covering the register, and check that your filter is clean, since restricted airflow elsewhere can push more air through the remaining paths.
▼ Can renters do this without landlord permission?
Yes. Tightening screws, adding foam weatherstripping, and replacing a cover with an identical model are all reversible and non-structural. Skip the duct mastic and any work inside the boot or ductwork, and simply let your landlord know if you find a large gap or damaged boot.
▼ How long before I notice savings on my energy bill?
A single sealed register will produce a small effect, likely in the range of 1 to 3 percent, and you will not see it as a clear line item. The savings add up if you seal several leaky registers, and the noise reduction is immediate, so most people judge the fix by the quiet rather than the dollars.
▼ What if my home is older than 30 years?
Older homes often have loose, rusted, or poorly sealed boots, and the original ducts may have more leakage overall. The same steps apply, but plan on using mastic more generously and consider an HVAC pro to pressure-test the system if comfort problems are widespread.
Quick Tips
- Check all of your registers in one pass, since a loose screw on one often means the others are due for a tightening too.
- Replace a warped or bent cover with a new stamped-steel register, which usually costs $5 to $15 and fits snugly with less vibration than thin plastic models.
- Seal first, then caulk or gasket: mastic handles the hidden gap behind the boot, while foam tape handles the visible seam under the cover.
- Vacuum inside the boot once a year when you change your filter, because debris buildup can contribute to whistling and buzzing.
Variations for Your Situation
- Apartment/Rental: Stick to reversible fixes. Tighten the existing screws, add self-adhesive foam gasket tape ($3 to $6 per roll) under the cover, and replace the cover with a matching stamped-steel register if it is warped. Skip mastic and boot repairs, and report large gaps or damaged ductwork to your landlord in writing.
- Tight Budget (under $50): The toothpick-and-glue trick costs essentially nothing and fixes most stripped screw holes. Add a $4 roll of foam weatherstripping for the cover and a small tube of water-based duct sealant for a few dollars more, and you can handle every register in a typical house for under $20.
- Older Home (pre-1980): Expect loose boots, older ductwork, and larger gaps where boots meet floors or walls. Use mastic and metal-backed foil tape on any exposed seams you can reach, secure each boot to the framing, and consider a professional duct leakage test if several rooms are consistently uncomfortable.