You wake up at 2 AM and the room feels colder than it should. The thermostat says 68 degrees, but your feet are freezing and there is a faint breeze you cannot quite locate. Before you blame the windows, go look at your basement or crawl space ceiling edge. The rim joist, also called the band joist or sill box, is one of the leakiest parts of a typical home, and it is almost always uninsulated or poorly insulated.
The rim joist is the perimeter framing that rests on top of your foundation wall and supports your first floor. It is full of gaps: where wood meets concrete, where boards meet each other, and where wires, pipes, and vents pass through. The Department of Energy lists the rim joist area among the top places for air leakage in a house, and in many homes it accounts for a surprisingly large share of total heat loss for its small size.
In this post, we will explain why this spot leaks so badly, show you a quick fix you can finish in an afternoon, walk through a more thorough DIY upgrade with rigid foam and sealant, and explain when it makes sense to call a pro. We will also cover the cautions, since insulating the wrong way can trap moisture and cause bigger problems.
What You’ll Need
Click on an item below to shop for the recommended items for this recipe on Amazon.
As an Amazon Associate, we earn from qualifying purchases.
How to Do It
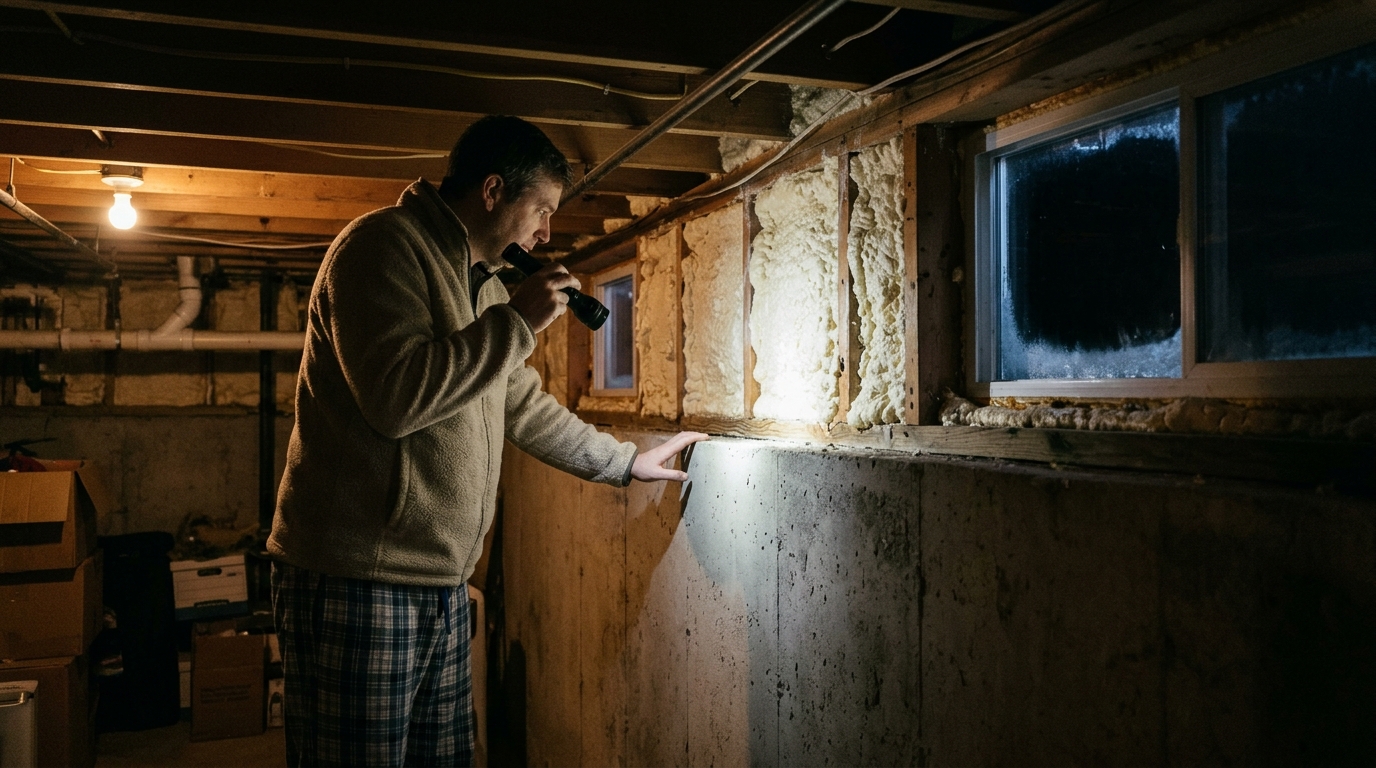
- Put on safety glasses, gloves, and a dust mask, then walk the perimeter of your basement or crawl space with a flashlight to locate gaps where wood meets concrete and where wires or pipes pass through.
- Clean dust and cobwebs off the surfaces so sealant will stick.
- Fill gaps smaller than 1/4 inch with a paintable acrylic latex or polyurethane caulk, working along the sill plate seam and every board joint.
- Spray low-expansion foam sealant into larger gaps and around penetrations such as wires, pipes, and dryer vents, keeping foam away from heat sources like flues.
- Walk the rim again with your hand held near the seams on a windy day to feel for any remaining air movement and touch up as needed.
- Complete the air sealing steps from the quick fix first, since foam board works best on a sealed surface.
- Measure each rim joist bay, which is the space between floor joists, and cut pieces of 1.5 to 2 inch rigid foam board (XPS or polyiso) about 1/4 inch smaller than the opening.
- Apply a bead of spray foam or caulk around the cut edge of each piece, then press it snugly into the bay so it fills the cavity.
- Seal every edge of the foam board with canned spray foam to create a continuous air barrier, paying close attention to the top and bottom edges.
- Add a second layer or a stacked layer of foam if you want to reach R-10 to R-13 total, and cover exposed foam with a code-approved thermal barrier where your local code requires it.
- Seal around any wires, pipes, or ducts that pass through the foam using fire-rated sealant where required.
- Get at least three quotes from licensed insulation contractors and ask for closed-cell spray foam at a minimum 2 inch thickness, which delivers around R-13 and acts as an air barrier.
- Clear stored items away from the perimeter walls so the crew has access, and make sure the space is dry.
- Have the contractor inspect for moisture, rot, or pest damage before foam is applied, because foam will hide problems once installed.
- After installation, ask for a manufacturer data sheet and confirm the foam is covered by a thermal barrier if required by local code.
Why It Works: The Benefits
Air sealing and insulating basement rim joists commonly reduces whole-house heating costs by 10 to 20%, depending on how leaky the home was to begin with.
First-floor surface temperatures can rise 3 to 6 degrees F near exterior walls once the cold air source is sealed.
Sealing gaps closes entry routes for mice, insects, and basement dust that would otherwise be pulled into living space.
Stopping humid air from reaching cold wood surfaces lowers the chance of condensation, mold growth, and wood rot over time.
Eliminating the drafts and cold spots near exterior walls makes thermostat settings feel more accurate, so many homeowners can lower their setpoint by 1 to 2 degrees without noticing.
💰 Savings Impact by Action
Closing gaps in the rim joist can reduce whole-house air leakage and cut heating costs by roughly 10 to 15%.
Adding R-10 to R-13 foam over a sealed rim joist further reduces heat loss through the framing by around 10%.
Warmer floor surfaces let many homeowners lower the thermostat 1 to 2 degrees, saving about 1 to 3% per degree.
Sealing and insulating the rim reduces condensation on cold wood surfaces, lowering mold and rot risk substantially.
🏠 Key Concepts Explained
The Science Behind It
Air moves because of pressure differences, and in winter your house acts like a chimney. Warm air rises and leaks out through the attic and upper walls, which creates slightly lower pressure at the bottom of the house. That low pressure pulls cold outdoor air in through the easiest paths available, and the rim joist, with its many seams and penetrations, is one of the easiest. This is the stack effect, and it gets stronger as the temperature gap between inside and outside increases.
Insulation resists conductive heat flow, but it does not stop air. A fiberglass batt stuffed into a rim joist bay will slow heat conduction slightly, yet moving air can pass through it and carry heat along with it. Rigid foam and spray foam work better because they are both insulators and air barriers. When you seal the edges, the foam stops air movement and raises the surface temperature of the wood, which also reduces condensation risk.
The comfort payoff comes from how cold air behaves once it enters. It is denser than warm air, so it sinks and spreads across the floor, creating the draft you feel on your ankles at 2 AM. Cutting off the supply at the rim joist stops the cold air from forming, which is why many homeowners notice warmer floors and steadier temperatures almost immediately after the work is done.
Frequently Asked Questions
▼ Why is my floor still cold after sealing the rim joist?
The rim joist is only one source of cold air, so check for other leaks such as unsealed basement windows, uninsulated floors over a garage or crawl space, and gaps around ductwork. Try the smoke test again on a windy day to find remaining drafts, and consider a professional blower door test if the cold persists.
▼ Can I just use fiberglass batts in the rim joist?
It is not recommended, because fiberglass does not block air and can hold moisture against cold wood. If you already have batts in place, remove them, air seal the cavity, and replace with rigid foam or closed-cell spray foam.
▼ How long before I notice savings on my bill?
You will likely feel the comfort improvement the same night, and savings show up on your next heating bill. Most homeowners see a 10 to 20% drop in heating costs over a full winter, though results depend on how leaky the house was beforehand.
▼ Is this safe if I have a gas furnace or water heater nearby?
Yes, as long as you keep sealants and foam away from flues and vents, and do not block combustion air openings. Use fire-rated materials near any heat source, and have a licensed technician verify your combustion air supply if you are unsure.
Quick Tips
- Seal first, insulate second: air sealing delivers most of the benefit and makes any insulation you add perform better.
- Use rigid foam or closed-cell spray foam rather than fiberglass in basement rim joists to avoid moisture problems.
- Check the dryer vent, cable entries, and plumbing penetrations, because these are common leak points that are easy to miss.
- Look for a utility rebate before you start, since many local utilities and some federal tax credits help offset the cost of air sealing and insulation.
Variations for Your Situation
- Apartment/Rental: Most renters do not have access to the rim joist, but if you rent a ground-floor unit or a house, ask your landlord about sealing it and share the potential savings. In the meantime, use removable draft stoppers and rugs near exterior walls, which cost $10 to $40.
- Tight Budget (under $50): Skip the foam board for now and focus on air sealing only. A couple of tubes of acrylic caulk and two cans of low-expansion foam, about $25 to $45 total, can stop most of the draft and cut heating costs by a noticeable margin.
- Older Home (pre-1980): Older homes often have uneven or rough-cut framing, gaps wider than modern construction, and sometimes no sill sealer at all. Plan on using more spray foam and expect to spend an extra hour or two on sealing, and check for asbestos or lead paint before disturbing old materials.