If you live in a hot climate and your AC never seems to catch up on a summer afternoon, your attic may be the culprit. On a 95°F day, an unprotected attic can reach 150 to 160°F. That superheated air radiates through your ceiling insulation and into your living space, adding a relentless heat load that your cooling system has to fight all day long. Traditional fluffy insulation slows this process, but it does not stop radiant heat transfer the same way a reflective barrier can.
Radiant barriers work on a simple principle: reflective foil reflects radiant heat rather than absorbing it. Installed correctly in your attic, they can reduce attic temperatures by 20 to 30°F and cut the radiant heat flowing into your home by up to 40%. The Department of Energy estimates cooling savings of 5 to 15% in hot, sunny climates like the South, Southwest, and parts of the Pacific Coast. For a home spending $200 per month on summer cooling, that translates to $120 to $360 per year back in your pocket.
This post covers exactly how radiant barriers work, which installation method makes sense for your home and budget, what realistic savings look like, and how to avoid the common mistakes that reduce performance. Whether you are a confident DIYer or prefer to hire out, you will leave with a clear action plan.
What You’ll Need
Click on an item below to shop for the recommended items for this recipe on Amazon.
As an Amazon Associate, we earn from qualifying purchases.
How to Do It
- Measure your attic square footage by multiplying length by width from inside the attic. Add 10% for overlap and waste. A 1,500 sq ft footprint needs about 1,650 sq ft of material.
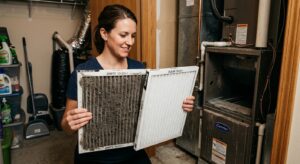
- Purchase perforated radiant barrier foil from a home improvement store or online supplier. Perforated versions allow moisture to pass through, preventing condensation buildup, and are strongly recommended over solid foil for most climates.
- On a cool morning, put on long sleeves, gloves, eye protection, and an N95 respirator before entering the attic. Heat and fiberglass particles are serious hazards.
- Staple the radiant barrier to the underside of the roof rafters, shiny side facing down toward the attic floor. Maintain a 1-inch minimum air gap between the foil and the roof deck above. This air gap is essential for performance.
- Overlap seams by 2 to 3 inches and staple every 12 inches along the length. Work from the peak down toward the eaves, stopping about 18 inches from the soffit vents to preserve airflow into the attic.
- After installation, check that all soffit vents remain unobstructed and that ridge vents are clear. Blocking attic ventilation will reduce the barrier’s effectiveness and can create moisture problems.
- Get at least three quotes from insulation contractors or radiant barrier specialists. Ask specifically whether they use perforated foil and whether the installation preserves soffit-to-ridge airflow.
- Confirm the contractor will install the barrier on the underside of rafters with a proper air gap rather than directly on top of your attic floor insulation, which is significantly less effective.
- Ask whether they will also assess and seal attic bypasses (plumbing chases, recessed light gaps, top plates) while they are in the attic. Combining air sealing with radiant barrier installation maximizes total savings.
- After installation, request a walkthrough to visually confirm soffit vents are unobstructed and seams are lapped and stapled correctly. A good installer will welcome this.
- Check for available utility rebates before paying. Many utilities in Texas, Florida, and Arizona offer $100 to $300 rebates for radiant barrier installation, which meaningfully shortens payback.
Why It Works: The Benefits
DOE data shows radiant barriers cut cooling energy use by 5 to 15% in hot climates. On a $2,400 annual cooling spend, that is $120 to $360 saved each year, compounding over the 10 to 25-year lifespan of the barrier.
Properly installed radiant barriers can drop attic air temperature by 20 to 30°F on peak summer days, which directly reduces heat migration through your ceiling and takes stress off HVAC equipment and any ductwork running through the attic.
When your AC runs fewer hours per day because the thermal load is lower, the compressor and blower motor accumulate less wear. Reducing run time by even 10% can meaningfully extend the operating life of a system that costs $5,000 to $12,000 to replace.
In two-story homes, the second floor is often 5 to 8°F warmer than the main level on hot afternoons. Cutting radiant heat gain from the attic reduces this imbalance and makes upper bedrooms genuinely livable without cranking the thermostat down.
A radiant barrier complements your current insulation rather than replacing it. You get additional thermal protection without tearing out or adding bulk insulation, which makes it a cost-effective upgrade for attics that already meet minimum insulation requirements.
💰 Savings Impact by Action
Reflecting up to 97% of roof radiant heat reduces cooling energy use by 5 to 15% in hot, high-sun climates per DOE research.
Proper soffit-to-ridge airflow flushes convective heat and compounds radiant barrier savings by keeping attic air temperatures 10 to 15°F lower.
Sealing attic bypasses around plumbing, electrical, and framing gaps can cut conditioned air loss by up to 20% and is most cost-effective when done during attic work.
Leaky attic ductwork wastes 20 to 30% of conditioned air before it reaches living spaces, and sealing duct joints while in the attic costs little extra labor.
Bringing attic insulation to R-38 or R-49 reduces conductive heat gain through the ceiling by 15 to 25% and makes the radiant barrier significantly more effective.
🏠 Key Concepts Explained
The Science Behind It
Heat moves in three ways: conduction, convection, and radiation. Traditional insulation like fiberglass batts and blown cellulose is excellent at resisting conductive and convective heat flow, but radiant heat is a different beast. It travels as infrared electromagnetic waves and passes straight through air without warming it until it strikes a solid surface. Your dark roof shingles absorb solar energy all day and re-emit it as infrared radiation downward into the attic. From there it strikes the top of your insulation, gets absorbed, and slowly conducts its way into your ceiling and living space below.
A radiant barrier interrupts this process at the source. Polished aluminum foil has an emissivity of 0.03 to 0.05, which means it reflects 95 to 97% of the radiant energy striking it rather than absorbing and re-radiating it. When installed on the underside of roof rafters with an air gap below, the shiny surface faces the incoming radiation from the roof deck and bounces it back up. The air gap is critical because if the foil touches another surface on its reflective side, heat conducts directly through and the reflective benefit disappears entirely.
Attic ventilation plays a supporting role that compounds the radiant barrier’s effect. Ridge and soffit vents allow outside air to flush through the attic continuously, carrying away convective heat that builds up in the attic air mass. Radiant barriers reduce how much radiant energy enters the attic in the first place, and ventilation removes the convective heat that remains. Together, these two systems can keep attic temperatures 30 to 40°F cooler than an unprotected, poorly ventilated attic, which dramatically reduces the heat load migrating into your conditioned living space during peak afternoon hours.
Frequently Asked Questions
▼ How much will a radiant barrier actually save me on my electric bill?
In hot climates with long cooling seasons like Texas, Florida, and Arizona, expect 5 to 15% reduction in cooling energy use. If cooling accounts for half your summer electric bill, that translates to roughly $10 to $30 per month in savings during peak months. Savings are lower in mild climates or homes with significant shade trees, so set realistic expectations based on your location and how hard your AC currently works.
▼ My attic already has R-38 insulation. Will a radiant barrier still help?
Yes, because radiant barriers and bulk insulation address different heat transfer mechanisms. Your R-38 slows conductive heat flow, but radiant heat from the roof deck still loads the top of that insulation all day. A radiant barrier reduces how much radiant energy reaches your insulation in the first place, making the insulation more effective. The DOE has documented savings in well-insulated homes in hot climates.
▼ Can I just lay the radiant barrier on top of my attic floor insulation instead of stapling it to the rafters?
You can, but it is significantly less effective and comes with a real drawback. Laying foil on the attic floor means dust accumulates on the reflective surface quickly, dropping reflectivity from 97% to as low as 50% within a few years. It also creates a slightly different thermal benefit pathway. Stapling to the underside of rafters keeps the surface clean and provides a consistent air gap, which is the correct installation for maximum long-term performance.
▼ Will a radiant barrier help in winter too?
The effect is minimal and slightly negative in winter. The same reflective surface that blocks summer heat gain also reflects some radiant heat back into the attic in winter rather than allowing it to radiate down toward your living space. In practice, this effect is very small and is far outweighed by summer cooling savings in any climate with a significant cooling season. Homes in predominantly cold climates with minimal air conditioning use should prioritize adding bulk insulation instead.
▼ My second floor is still hot after installing a radiant barrier. What else should I check?
First confirm the installation left a proper air gap on the reflective side and that soffit vents are unobstructed. If the installation is correct, check whether your attic ductwork is leaking conditioned air or lacks adequate insulation, since leaky ducts in a hot attic can account for 20 to 30% of cooling loss on their own. Also check whether your second-floor ceiling has any uninsulated areas around recessed lights, attic hatches, or plumbing chases that are bypassing the insulation entirely.
Quick Tips
- Install in spring before summer heat peaks so you capture savings through the entire cooling season rather than just part of it.
- Combine radiant barrier installation with air sealing of attic bypasses (around plumbing pipes, recessed lights, and top plates) for compounded savings that often exceed 20% together.
- If your attic insulation is below R-30, add insulation first. Radiant barriers are most effective when paired with adequate bulk insulation, not as a substitute for it.
- In mixed climates with real winters, note that radiant barriers may slightly reduce passive solar heat gain in winter since the reflective surface works year-round. The cooling savings in hot summers almost always outweigh this minor winter effect.
Variations for Your Situation
- Apartment/Rental: Tenants in apartments rarely have attic access, but those in top-floor units under a flat or low-slope roof can request that their landlord or HOA evaluate radiant barrier installation, framing it as a way to reduce HVAC costs and extend equipment life. Renters can also apply reflective window film to south and west-facing windows for $30 to $80 and achieve meaningful solar heat gain reduction without any structural modification.
- Tight Budget (under $50): If full radiant barrier installation is not yet affordable, focus on reflective attic hatch covers. An uninsulated attic access hatch is a direct radiant heat bypass into your living space. A pre-made reflective attic stair cover costs $30 to $50 and takes under an hour to install, delivering a noticeable reduction in heat entering the home through that single gap with immediate results.
- Older Home (pre-1980): Older homes often have insufficient attic insulation, knob-and-tube or aluminum wiring, and minimal soffit ventilation. Before installing a radiant barrier, have an electrician assess any wiring concerns and ensure you have at least R-19 insulation already in place. Many older homes will see a larger benefit from adding bulk insulation first, then layering in a radiant barrier as a second upgrade once the foundation is solid. Budget $1,500 to $3,000 total for both improvements in a typical older home.