Hold your hand near a wall outlet on a cold, windy day and you may feel a thin stream of chilly air. It is not your imagination. Electrical boxes are cut into exterior walls, and the gap around the box, the holes where wiring enters, and the openings in the outlet itself all create tiny but real pathways for outside air to get into your living space.
One outlet will not wreck your energy bill, but your home has dozens of them. The Department of Energy estimates that air leakage can account for 25 to 40 percent of the energy used for heating and cooling in a typical home. Outlets and switches on exterior walls are some of the easiest leaks to fix, and they are often overlooked because they hide in plain sight.
In this post, you will learn why outlets leak, how to find the worst offenders in about ten minutes, and two proven ways to fix them. One takes about five minutes per outlet and costs almost nothing. The other is a slightly more thorough upgrade that seals the leak at its source. Either way, you will walk away with a warmer, quieter, more comfortable home.
What You’ll Need
Click on an item below to shop for the recommended items for this recipe on Amazon.
As an Amazon Associate, we earn from qualifying purchases.
How to Do It
- Turn off power to the outlet at the breaker panel, then confirm it is dead with a non-contact voltage tester before touching anything.
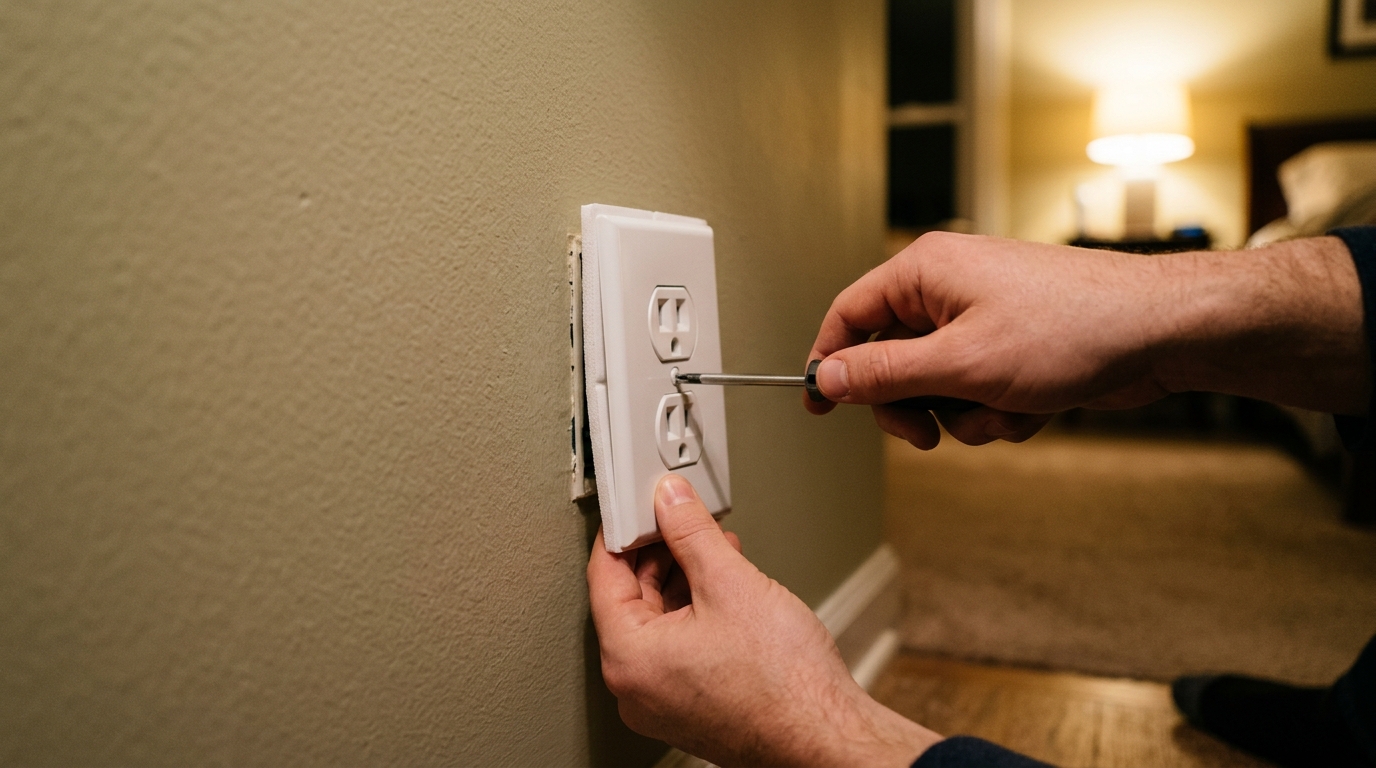
- Unscrew the cover plate and set the screw aside so it does not get lost.
- Press a foam gasket over the outlet or switch so it sits flat against the wall, with the openings lined up to the receptacle.
- Reinstall the cover plate over the gasket and tighten the screw until snug. Do not overtighten, since cracking the plate defeats the seal.
- Turn the breaker back on and test the outlet with a lamp or phone charger.
- For unused outlets, add child-safety plug covers to block air flow through the receptacle openings too.
- Shut off the breaker, verify with a non-contact voltage tester, and remove the cover plate.
- Unscrew the outlet from the box and gently pull it out, leaving the wires attached. Take a photo of the wiring first for reference.
- Use a flashlight to inspect the box and the wall around it. Look for gaps between the box and drywall and any open holes where cable enters the box.
- Apply a thin bead of paintable acrylic latex caulk around the outside edge of the box where it meets the drywall. For cable entry holes, use fire-rated caulk or foam sealant rated for electrical boxes and keep it away from wire terminals.
- For larger gaps between the box and the wall, use a small amount of low-expansion spray foam, applying lightly because it expands.
- Let the sealant cure according to the package, then push the outlet back into the box, screw it in, and add a foam gasket behind the cover plate.
- Reattach the cover plate, restore power, and test. If you have a smoke pencil or stick of incense, hold it near the outlet on a windy day to confirm no air movement remains.
Why It Works: The Benefits
Sealing all exterior wall outlets and switches typically trims 1 to 3 percent off annual energy bills. For a home spending $2,000 a year on heating and cooling, that is $20 to $60 saved for a materials cost of about $10 to $20.
Eliminating cold air streams at floor level makes seating areas, bedrooms, and home offices noticeably more comfortable, especially during winter wind events.
Air gaps carry sound, so sealing outlets on walls facing streets or neighbors can dampen traffic and conversation noise slightly.
The same pathways that let in cold air also let in dust, allergens, and occasionally pests like ants and spiders. Sealing them keeps your indoor air cleaner.
Foam gaskets cost under $0.50 each when bought in a multipack, and they can be removed in seconds if you ever need to replace the outlet.
💰 Savings Impact by Action
Sealing all exterior wall outlets and switches typically trims about 1 to 3 percent from annual heating and cooling costs.
Eliminating floor-level drafts can let you lower the winter thermostat by 1 to 2 degrees without feeling colder, worth roughly 5 to 15 percent in perceived comfort.
Combining outlet sealing with weatherstripping, attic penetrations, and caulking can reduce total heating and cooling costs by 10 to 20 percent.
At roughly $15 in materials and a few dollars saved each month, most homeowners recover their cost in well under a year.
🏠 Key Concepts Explained
The Science Behind It
Air moves from areas of high pressure to areas of low pressure, and your home is constantly experiencing pressure differences. In winter, warm indoor air rises and escapes near the ceiling, creating slightly lower pressure near the floor that pulls cold outdoor air inward. Wind adds to the effect on exposed walls. Any hole in the building envelope, even a small gap around an electrical box, becomes a path for this air to travel.
An electrical box is essentially a plastic or metal cup set into a wall cavity. If the cavity is not fully air-sealed, outside air can move through insulation, along the studs, and into the back of the box. From there it passes through the gaps in the outlet face, the screw holes, and the edges of the cover plate. Foam gaskets work by creating a compressible seal between the wall and the plate that blocks this final exit path, while caulk and sealant close the leaks at the source.
The energy impact adds up because heating and cooling air is expensive. Every cubic foot of air that leaks in has to be heated or cooled to room temperature, and the HVAC system does that work continuously. Studies by the Department of Energy and Lawrence Berkeley National Laboratory show that sealing typical air leaks in the envelope can reduce heating and cooling costs by 10 to 20 percent. Outlets are only one part of that picture, but they are among the cheapest, fastest leaks to stop.
Frequently Asked Questions
▼ Why can I still feel a draft after installing foam gaskets?
The leak is probably coming from behind the box rather than through the outlet face. Remove the outlet again and check for gaps where the box meets the drywall or where cables enter the box, then seal those with caulk or fire-rated sealant. Also confirm the cover plate is sitting flat and not bowed.
▼ Can renters do this without landlord permission?
Yes, foam gaskets are completely reversible and do not change the wiring. Just avoid caulk or spray foam, since those are harder to undo. Most leases allow swapping a cover plate, but if you are unsure, a quick text to your landlord is worth it.
▼ How long before I actually notice savings on my bill?
You will feel the draft difference immediately. On your bill, expect a small but real drop, typically 1 to 3 percent, which shows up over the next one to two billing cycles during the heating or cooling season. The project pays for itself in months.
▼ What if my home is older than 30 years?
Older homes usually have leakier boxes and less insulation in the walls, so you will likely see more benefit. Be extra careful with brittle wiring or old cloth-insulated cables, and call an electrician if you see cracked insulation, two-prong outlets without grounding, or aluminum wiring.
▼ Is it safe to put foam or caulk near electrical wires?
Foam gaskets behind the cover plate are safe and designed for this exact use. For sealing the box, use only products labeled for electrical boxes or fire-rated, and keep sealant off wire terminals. Never use standard expanding foam inside the box.
Quick Tips
- Test for leaks on a cold, windy day by holding a lit incense stick or smoke pencil near each outlet. If the smoke wavers or gets pulled in, you have a leak.
- Prioritize outlets on north-facing and windward exterior walls, plus any outlets in the attic, basement, or garage-adjacent walls.
- Buy gaskets in a multipack that includes both outlet and switch sizes so you can finish the whole house in one trip.
- Replace cracked or warped cover plates when you add gaskets. A plate that does not sit flat will leave a gap that defeats the seal.
- Seal the cable entry points in the back of boxes when you have an outlet pulled out, since that is where much of the air actually enters.
- Take before and after photos with a thermal camera or an inexpensive infrared thermometer to confirm the difference.
Variations for Your Situation
- Apartment/Rental: Stick to foam gaskets and plug covers, which cost $5 to $15 total and can be removed without a trace. Test outlets on exterior walls first, and skip any outlet on a shared interior wall since it will not benefit.
- Tight Budget (under $50): Buy a 40-pack of foam gaskets for about $10 and a tube of acrylic caulk for $5. Focus on exterior wall outlets and switches in the rooms you use most, and you will cover most of the benefit for under $20.
- Older Home (pre-1980): Expect larger gaps around boxes and possibly no insulation in the wall behind them. Use a combination of gaskets and caulk, and consider having an electrician inspect any outlet that feels warm, looks discolored, or lacks a ground.