
Your air conditioner stops cooling on a 95-degree afternoon, or your furnace refuses to kick on during the first cold snap of winter. The instinct is immediate: call an HVAC technician. But before you dial, consider this: industry data suggests that a significant portion of no-heat and no-cool service calls, sometimes estimated at 25 to 40%, are resolved by technicians fixing something the homeowner could have handled for free. A clogged filter, a tripped breaker, or a thermostat set to the wrong mode can cost you a $100 to $200 diagnostic fee plus a wait of one to three days.
The good news is that HVAC systems are designed with built-in safeguards, and those safeguards often trigger shutdowns before real damage occurs. Understanding what those safeguards are and how to reset them puts you in control. This post walks you through the three most common, easiest-to-check culprits behind HVAC problems, with specific steps for both a quick check and a more thorough DIY inspection.
Even if your system does turn out to need a technician, doing these checks first means you can describe the problem accurately, rule out simple causes, and avoid paying for a service call that amounts to a technician flipping a switch. That said, there are clear situations where you should call a pro immediately, and we cover those too.
What You’ll Need
Click on an item below to shop for the recommended items for this recipe on Amazon.
As an Amazon Associate, we earn from qualifying purchases.
How to Do It
- Check your thermostat: Confirm it is set to the correct mode (Heat or Cool, not Fan or Off), the set temperature is at least 3 to 5 degrees above or below the current room temperature, and the batteries are not dead. Replace batteries if the display is dim or blank.
- Check your main electrical panel: Locate the breaker labeled for your HVAC, AC, furnace, or air handler. If it is tripped (sitting between On and Off), switch it fully Off and then back On. Also check for a secondary disconnect box mounted on the wall near the outdoor unit.
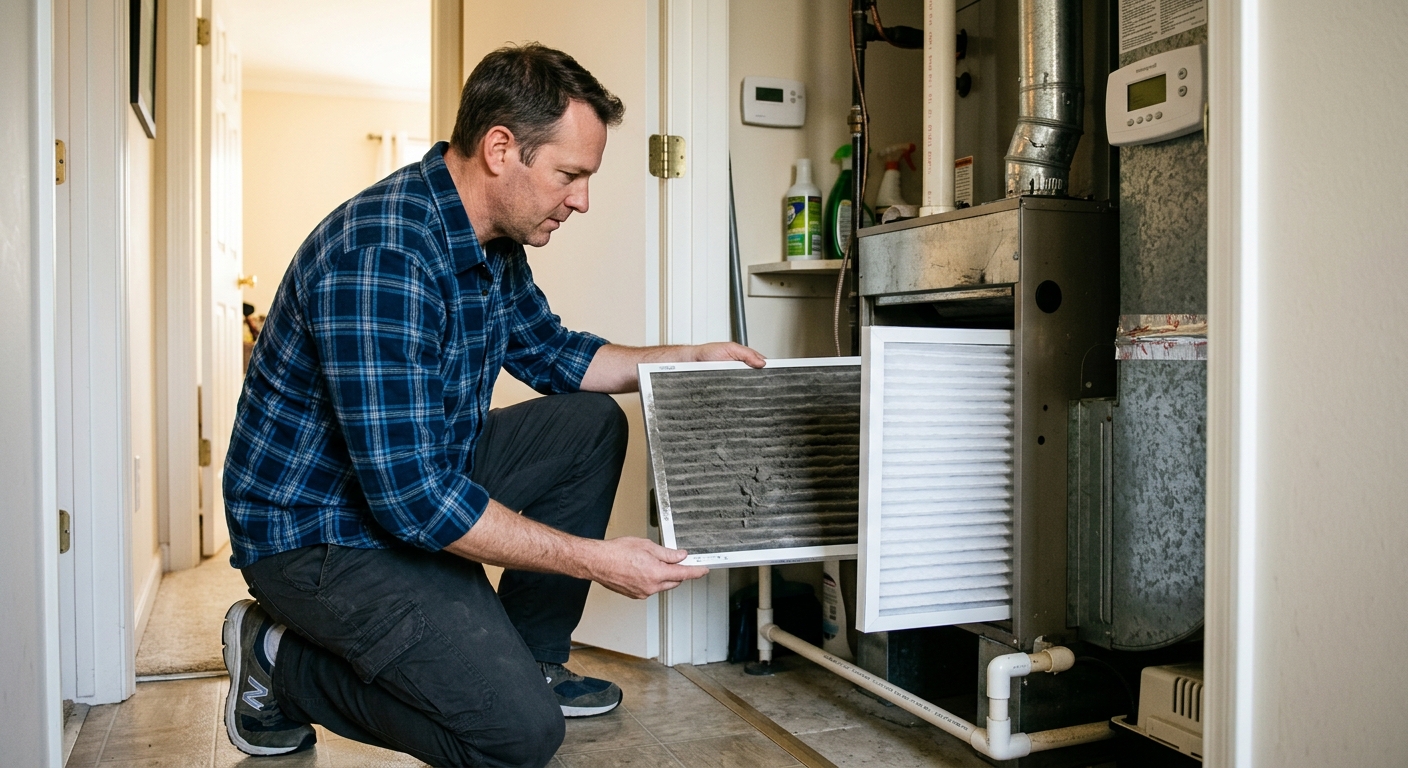
- Check your air filter: Pull the filter from the return air vent or air handler cabinet. If it is visibly gray, clogged, or has not been replaced in more than 60 to 90 days, replace it with a new filter of the same size. A severely clogged filter can cause both furnace overheating shutdowns and AC coil freeze.
- Look at the outdoor unit: Confirm the fan on top of the condenser is spinning when the system is running. Check that no debris, leaves, or landscaping is blocking airflow within 2 feet of the unit.
- Listen for error codes: Many modern thermostats and furnaces display error codes or flash LED indicators. Check your thermostat display and the furnace or air handler door for any blinking light sequences, then look up the code in your owner’s manual or search it online.
- Replace the air filter with a new MERV 8 to 11 rated filter sized to match your existing filter dimensions. After replacing, run the fan on ‘Fan On’ mode for 30 to 60 minutes to thaw any ice on a frozen evaporator coil before switching back to Cool mode.
- Inspect and clear the condensate drain line: Locate the white PVC drain pipe exiting the air handler, usually near the indoor unit. Pour a cup of distilled white vinegar down the access port (a capped T-fitting on the drain line) to clear algae buildup. If there is standing water in the drain pan, the float switch may have tripped. Clear the pan with a wet-dry vacuum.
- Reset the system: Turn the thermostat to Off, then go to your breaker panel and flip the HVAC breaker Off for 30 seconds before turning it back On. Return to the thermostat and wait 5 minutes before switching to your desired mode. Many systems have a built-in 5-minute delay to protect the compressor.
- Check all supply and return vents: Walk through the home and confirm all supply vents are open and unobstructed by furniture, rugs, or curtains. Closed vents increase static pressure and can cause the same problems as a clogged filter.
- Inspect the outdoor condenser unit: With the system powered off at the disconnect, use a garden hose to gently rinse the condenser fins from the inside out (spray through the top grill downward if accessible) to remove dirt and debris reducing airflow. Restore power and wait 10 minutes before testing.
- If the system still does not operate correctly after these steps, document what you observed, any error codes, and what you tried, then call a licensed HVAC technician. You now have enough information to describe the problem accurately and evaluate whether the diagnosis you receive makes sense.
Why It Works: The Benefits
Diagnostic fees for HVAC technicians typically range from $75 to $200 depending on your region and the time of year. Resolving a tripped breaker, clogged filter, or thermostat setting issue takes under 30 minutes and costs nothing.
During peak season, HVAC technicians are often booked one to three days out. Identifying and fixing a simple issue yourself restores comfort immediately rather than waiting through the hottest or coldest days of the year.
Replacing a dirty filter, the most common HVAC problem, extends equipment life and can improve system efficiency by 5 to 15%, reducing wear on the blower motor and compressor over time.
Even if the system does need a professional, completing these checks helps you describe the problem precisely, which reduces diagnostic time and helps you recognize if a technician is upselling an unnecessary repair.
A clogged filter not only reduces efficiency but also allows dust, allergens, and particulates to circulate through your home. Regular checking keeps indoor air quality at healthy levels year-round.
💰 Savings Impact by Action
Resolving a filter, thermostat, or breaker issue yourself eliminates a $100 to $200 diagnostic fee entirely.
Replacing a severely clogged filter can restore system airflow and efficiency by 5 to 15%, directly reducing runtime and energy cost.
A monthly vinegar flush costing under $1 prevents drain clogs that can trigger a full system shutdown and a $75 to $150 service call.
Catching a repeated breaker trip or short cycling early prevents compressor damage that can cost 30 to 50% of the system’s replacement value to repair.
🏠 Key Concepts Explained
The Science Behind It
HVAC systems are built around a continuous airflow loop. The blower pulls warm indoor air across the evaporator coil (in cooling mode) or heat exchanger (in heating mode), transfers energy, and pushes conditioned air back into the living space. Every component in that loop depends on adequate airflow. When airflow drops below the system’s design specification, typically because of a clogged filter or blocked vent, several things happen in sequence: static pressure rises, the blower motor draws more current, and the temperature difference across the coil or heat exchanger increases beyond safe limits.
In a furnace, excessive heat exchanger temperature triggers the high-limit switch, which shuts off the burner to prevent cracking. In an air conditioner, a starved evaporator coil drops below the freezing point of water (32 degrees Fahrenheit) and ice begins to form. Ice acts as additional insulation on the coil, further reducing heat transfer and eventually blocking all airflow through the unit. Both scenarios produce the same symptom from a homeowner’s perspective: the system runs but doesn’t condition the air, or shuts off entirely. Simply replacing the filter and allowing the coil to thaw resolves the situation without any mechanical repair.
The electrical side follows similar logic. HVAC compressors draw very high startup current, sometimes 50 to 80 amps briefly. A weakened capacitor, a slightly undersized breaker, or a partial fault in the compressor winding can cause the breaker to trip under that startup load. Resetting the breaker once is reasonable. If it trips again, the system is drawing abnormal current and continuing to reset the breaker risks damaging the compressor, the wiring, or both. That is the clear line between a homeowner check and a situation that requires a licensed professional with diagnostic instruments.
Frequently Asked Questions
▼ My AC is running but not cooling the house. What should I check first?
Start with the air filter and the evaporator coil. A visibly clogged filter or a coil covered in ice are the two most common causes of an AC that runs but does not cool. Replace the filter, switch the system to Fan Only for 30 to 60 minutes to thaw any ice, then switch back to Cool mode. If the system still underperforms after the coil has fully thawed, low refrigerant is the likely cause and requires a licensed technician to diagnose and recharge.
▼ My furnace turns on for a minute and then shuts off repeatedly. Is that normal?
No, that behavior is called short cycling and usually means the furnace is overheating and the high-limit switch is cutting off the burner as a safety measure. The most common cause is a clogged air filter restricting airflow across the heat exchanger. Replace the filter, wait 10 minutes, and try again. If the problem continues with a fresh filter, you may have a failing inducer motor, a cracked heat exchanger, or a faulty limit switch, all of which require a professional.
▼ I reset the breaker but it tripped again within an hour. Now what?
Stop resetting it. A breaker that trips repeatedly is detecting a real overcurrent condition, which means something in the circuit is drawing more power than it should. This is most often a failing compressor, a shorted capacitor, or a wiring fault. Continuing to reset the breaker can damage the compressor beyond repair (a $1,500 to $3,000 repair) or create a fire hazard. Call a licensed HVAC technician and tell them the breaker tripped more than once within a short window.
▼ How do I know if my condensate line is actually clogged?
Check the drain pan directly beneath your indoor air handler. If there is standing water in the pan, the condensate line is draining slowly or not at all. You may also see the system shut off entirely if a float switch is installed, which is a safety feature that cuts power when the pan fills. Use a wet-dry vacuum to suction out the standing water through the access port on the drain line, then flush with vinegar. If the pan refills quickly after clearing, the clog may be further down the line and a technician with a drain cleaning attachment may be needed.
▼ Can I do these checks if I have a heat pump instead of a traditional furnace and AC?
Yes, the same checks apply: filter, thermostat settings, breaker, and condensate drain. Heat pumps have one additional behavior to be aware of: they run a normal defrost cycle in winter where the outdoor unit may appear to be steaming or have ice on it briefly. That is normal. However, if the outdoor unit is completely encased in ice and the system is not heating, the defrost cycle may have failed, which requires a technician. Also confirm your thermostat is set to Heat and not Emergency Heat unless you have lost heating entirely.
Quick Tips
- Set a recurring phone reminder every 60 days to check and replace your air filter. Most filters are rated for 90 days under ideal conditions, but homes with pets or high dust levels need changes every 30 to 60 days.
- Pour a quarter cup of distilled white vinegar down your condensate drain access port once a month during cooling season to prevent algae buildup before it causes a clog and triggers the float switch shutoff.
- Know where your outdoor disconnect box is before you need it. It is the gray or black box mounted on the wall within a few feet of the outdoor condenser unit and lets you cut power to just the AC without going to your main panel.
- Write the date you replaced your filter with a marker directly on the filter frame so you always know at a glance how old it is when you open the cabinet.
Variations for Your Situation
- Apartment or Rental: Renters can safely check the thermostat settings and batteries, locate and inspect the return air filter (many apartments have accessible filters in a ceiling or wall return vent), and look at the circuit breaker panel if accessible. Do not attempt to access the air handler cabinet or outdoor unit. Document the issue with photos and notify your landlord or property manager in writing with your observations, including the filter condition, so they cannot charge you for a service call caused by a filter they were responsible for replacing.
- Tight Budget (Under $20): Skip the condenser rinse and focus on the free checks: thermostat settings, breaker reset, and a visual filter inspection. If the filter is clearly clogged, a basic fiberglass filter costs $2 to $5 and can restore system operation immediately. The vinegar flush for the condensate line costs under $2 if you have vinegar at home. These steps alone resolve the majority of common no-cool and no-heat complaints without spending more than a few dollars.
- Older Home (Pre-1985): Older systems may not have the same safety lockout features as modern equipment, which means they can run in a degraded state without shutting down protectively. Filters may be in non-standard locations or sizes, and the condensate system may drain to a floor drain rather than having a float switch. Check the filter location in the owner’s manual or look at both the return air vent and the air handler cabinet. Be especially cautious about resetting a breaker repeatedly in older wiring, and have a technician inspect the system annually given that components like capacitors, contactors, and heat exchangers degrade significantly after 15 to 20 years.