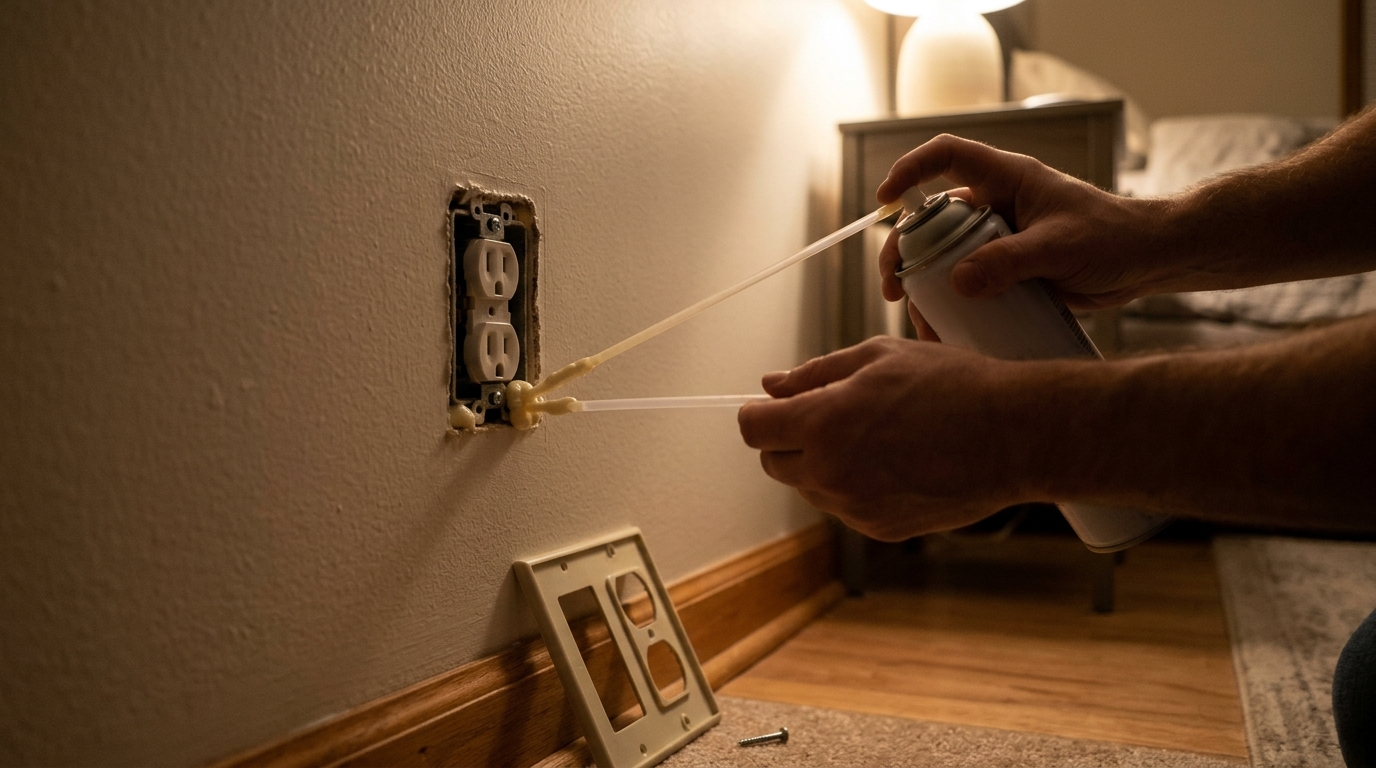
Hold your hand near an outlet on an exterior wall on a windy winter night and you will probably feel a faint, steady breeze. That cold air is coming from inside the wall cavity, where outdoor air moves freely through gaps around wiring, behind drywall, and through the hole cut for the electrical box. Once it reaches the outlet, it slips right through the cover plate and into your living room.
The Department of Energy estimates that air leakage accounts for roughly 25 to 40 percent of the energy used to heat and cool a typical home. Outlets and switches are only one piece of that puzzle, but they are one of the easiest and cheapest pieces to fix. A typical house has 30 to 60 outlets and switches, and the ones on exterior walls act like tiny chimneys, especially overnight when the temperature difference between inside and outside is greatest.
This post covers two ways to stop that leakage: a quick, no-fuss foam gasket fix that takes about 20 minutes, and a more thorough sealant method that seals the box itself. You will also learn where the real savings come from, what to avoid for safety, and how to adapt the approach for renters, tight budgets, and older homes.
What You’ll Need
Click on an item below to shop for the recommended items for this recipe on Amazon.
As an Amazon Associate, we earn from qualifying purchases.
How to Do It
- Go to the breaker panel and switch off power to the circuit you are working on, then confirm the outlet is dead with a non-contact voltage tester.
- Unscrew the cover plate and set the screws aside so they do not get lost.
- Press a pre-cut foam gasket over the outlet or switch so the openings line up with the receptacle, ensuring the gasket sits flat against the wall.
- Reinstall the cover plate and tighten the screws snugly but do not overtighten, which can crack the plate and compress the foam too much.
- Repeat on every exterior-wall outlet and switch, then restore power and test each outlet with a lamp or tester.
- Turn off the breaker, confirm the outlet is dead with a voltage tester, then remove the cover plate and unscrew the outlet from the box and gently pull it forward.
- Inspect the gap between the drywall and the outside of the electrical box, plus any holes where wires enter the box.
- Apply a thin bead of fire-rated acrylic caulk or low-expansion fire-block foam around the outside edge of the box where it meets the drywall, and around cable entry points from the outside only.
- Keep sealant away from the screw terminals, the back of the receptacle, and any exposed wiring. Wipe any excess with a damp rag before it cures.
- For stubborn drafts, install a flexible electrical box sealing pad or an airtight box behind the drywall on new work, then re-secure the outlet and cover plate with a foam gasket.
- Restore power, test the outlet, and check for lingering airflow with a stick of incense or a smoke pencil on a windy day.
- Book a home energy audit that includes a blower door test to measure air leakage and pinpoint the leakiest areas.
- Have the technician use an infrared camera while the house is depressurized to find drafts around outlets, windows, and wall penetrations.
- Ask the contractor to seal the top plates, attic penetrations, and wall-to-floor junctions that feed air into the wall cavities behind your outlets.
- Request a post-sealing blower door test to verify the improvement, and ask for the before and after numbers in writing.
Why It Works: The Benefits
Sealing common air leaks, including outlets, can reduce heating and cooling costs by up to 10 to 20 percent when combined with other gaps. Outlets alone typically contribute 1 to 3 percent.
Closing outlet leaks eliminates the thin streams of cold air that make a room feel colder than the thermostat says, so you can often lower the setpoint by 1 to 2 degrees without noticing.
Leaky wall cavities pull in attic dust, insulation fibers, and outdoor allergens. Sealing the openings cuts down on the particles that settle around outlets and on nearby surfaces.
Air gaps carry sound as easily as air. Sealing around outlet boxes on shared or street-facing walls modestly cuts noise transmission.
Foam gaskets cost about 20 to 30 cents each, and a can of fire-rated sealant is around $8 to $12. Most homeowners recoup the cost in a single season.
💰 Savings Impact by Action
Gaskets and box sealing on exterior walls typically trim 1 to 3 percent from heating and cooling costs.
Combining outlets with windows, doors, attic, and rim joist sealing can cut total energy use by about 15 percent according to ENERGY STAR.
Properly sealed outlets can cut the airflow felt at the wall by roughly 60 percent or more, improving comfort even if bill savings are modest.
With fewer drafts, many households can lower the winter setpoint 1 to 2 degrees, saving roughly 5 percent annually.
🏠 Key Concepts Explained
The Science Behind It
Air moves because of pressure differences, and a house is full of them. When it is cold outside, warm indoor air rises and escapes through the upper portion of the building, creating slightly lower pressure at the bottom. That pulls cold air in through every available opening at low levels, including outlets, baseboards, and rim joists. Wind adds to the effect by pressurizing the windward side of the house and depressurizing the leeward side.
The key problem with outlets is the wall cavity behind them. Even a well-insulated wall has gaps at the top and bottom plates, around plumbing and wiring, and where the siding or sheathing is imperfect. Outdoor air can enter those gaps and travel inside the cavity until it finds the hole cut for the electrical box. Fiberglass insulation does not stop moving air, so the air passes through it and bypasses much of its R-value.
Foam gaskets and sealant work by restoring air barrier continuity. They do not add meaningful R-value on their own, but they stop the convective flow that carries heat away. Because moving air transfers heat far more efficiently than still air, even a small reduction in leakage can have an outsized effect on comfort. That is why sealing a handful of outlets can make a noticeable difference even though the savings on your bill are modest.
Frequently Asked Questions
▼ Why do I still feel a draft at the outlet after adding a foam gasket?
The gasket only seals the cover plate, not the box or the wall cavity behind it. If air is still moving, remove the plate and caulk the gap between the box and drywall with fire-rated sealant, then check for unsealed wire entry holes. If the draft is strong, the underlying cause may be an attic or rim joist leak that needs professional air sealing.
▼ Can renters do this without landlord permission?
Yes for foam gaskets, since they install behind the existing cover plate and can be removed when you move out. Skip sealing the box itself, since that involves removing the outlet and applying sealant, which a landlord may not want you to do. Keep the original plates and gaskets in a bag so everything can be restored.
▼ How long before I actually notice savings on my bill?
You will likely feel less draft the same day, but the bill impact is small and gradual, typically 1 to 3 percent. Compare your usage in kilowatt-hours or therms to the same month last year, adjusting for weather, over one full season to see a meaningful difference.
▼ What if my home is older than 30 years?
Older homes often have more gaps, less insulation, and sometimes outdated wiring, so the leakage is usually worse and the benefits larger. If you see cloth-covered wiring, ungrounded two-prong outlets, or brittle insulation, have an electrician inspect the circuit before you start sealing around it.
▼ Is it safe to use spray foam around an outlet?
Only products labeled as fire-rated or low-expansion and safe for electrical applications should be used, and only on the outside of the box where it meets the drywall. Standard expanding foam can expand with surprising force, trap heat, and damage the box or wiring, so keep it away from the inside of the box and any live parts.
Quick Tips
- Start with outlets and switches on exterior walls, especially on the north and windward sides of the house, since interior wall outlets leak far less.
- Buy gaskets in bulk packs, which usually cost 20 to 30 cents each and cover standard outlets, switches, and often GFCI plates.
- Combine outlet sealing with caulking around window trim and baseboards for a bigger effect, since drafts often come from several nearby sources at once.
- Use child-safe outlet caps in unused outlets for a little extra blocking, though they do not replace gaskets for stopping air movement.
Variations for Your Situation
- Apartment/Rental: Stick with foam gaskets, which cost about $6 to $12 for a pack of 20 to 40 and remove cleanly. Seal only exterior-wall outlets and switches, and keep the original cover plates for move-out.
- Tight Budget (under $50): Buy one pack of gaskets for under $10 and a tube of fire-rated caulk for around $8. Prioritize outlets on exterior walls, then add weatherstripping to the leakiest door for another few dollars of savings.
- Older Home (pre-1980): Expect more gaps around boxes, plaster or lath walls, and possibly old wiring. Have an electrician check the circuit before sealing, and consider pairing outlet work with attic air sealing, which typically delivers 5 to 10 times the savings.