If your home was built in the 1970s, it was almost certainly constructed before the U.S. adopted its first residential energy codes in the late 1970s and early 1980s. That means your walls likely hold R-11 or less, your attic may have only 3 to 4 inches of insulation, and air leaks around every outlet, window frame, and plumbing penetration are silently inflating your utility bills month after month. The average 1970s home uses 30 to 50% more energy than a comparable new build, according to Department of Energy data.
The good news is that retrofitting an older home is one of the best investments a homeowner can make. Unlike cosmetic renovations, energy upgrades pay you back every single month through lower bills, and many qualify for federal tax credits of up to 30% under the Inflation Reduction Act. A properly sequenced retrofit can cut your total energy use by 40 to 60%, bringing your home’s performance close to, or in some cases matching, current ENERGY STAR new construction standards.
This guide walks you through the most impactful upgrades in the order building scientists recommend: seal air leaks first, then add insulation, then address mechanical systems. Whether you have a weekend and $200 or a budget for a full professional retrofit, there is a clear starting point here that will deliver real, measurable results.
What You’ll Need
Click on an item below to shop for the recommended items for this recipe on Amazon.
As an Amazon Associate, we earn from qualifying purchases.
How to Do It
- Walk your attic on a cold or windy day and look for daylight, feel for drafts, or use a stick of incense to find air movement around top plates, plumbing stacks, electrical boxes, and recessed light housings. Mark each leak with painter’s tape.
- Apply fire-rated caulk or acoustical sealant around all electrical and plumbing penetrations through the top plate. Use a bead of caulk to seal the gap between drywall and the top plate along every interior wall-ceiling junction you can reach.
- Seal recessed light cans from above in the attic using an IC-rated foam box or a purpose-made recessed light cover sealed with acoustical sealant around the perimeter. This single step can close some of the largest air bypasses in a 1970s home.
- Use expanding spray foam to seal any gap wider than about a quarter inch, including around pipes, wires, and duct penetrations. Use caulk for gaps smaller than a quarter inch.
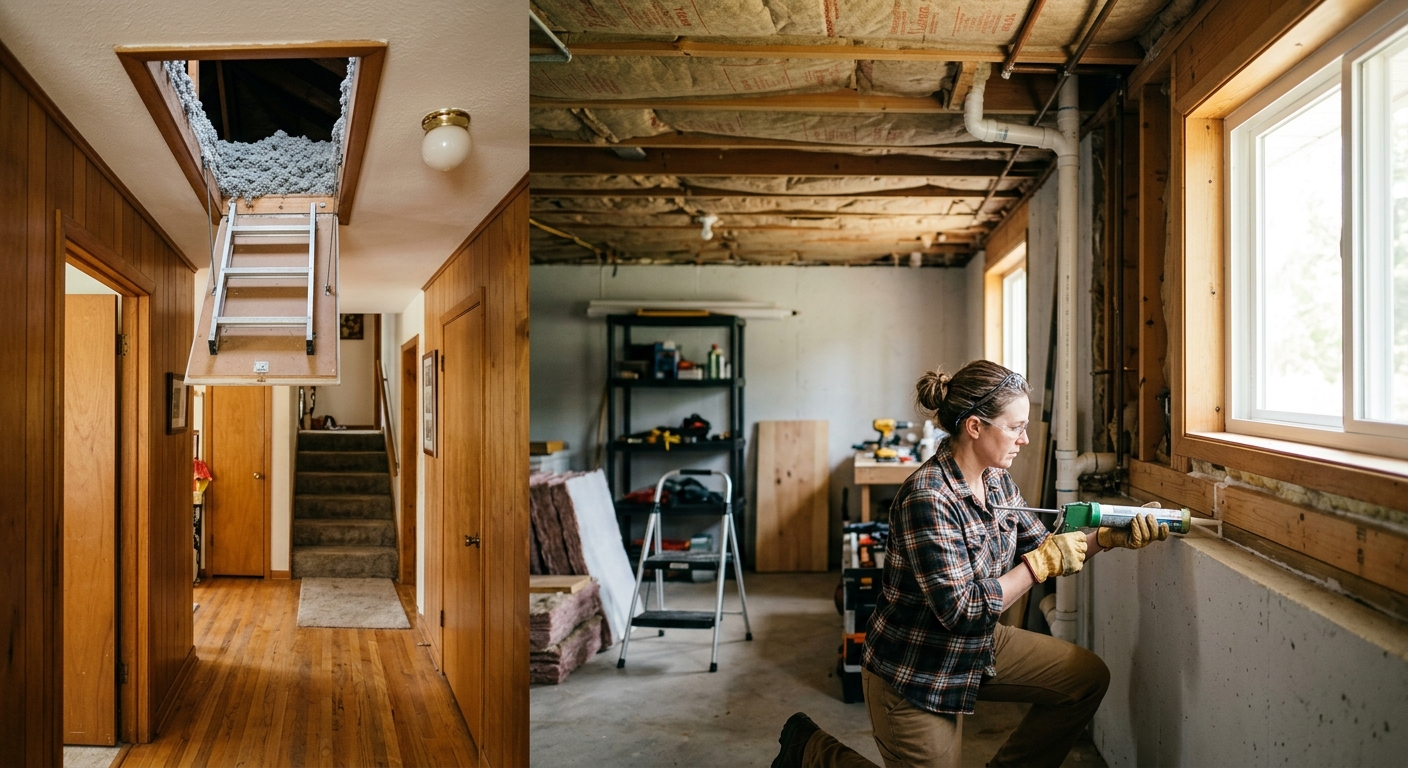
- In the basement or crawl space, caulk the rim joist where the framing sits on the foundation wall. This is often the single leakiest location in a two-story 1970s home and takes less than an hour to address.
- Replace weatherstripping on all exterior doors and apply door sweeps to the bottom of each door. A door with a visible gap at the base loses as much air as a 2-inch hole in the wall.
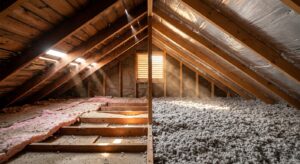
- Measure your current attic insulation depth. In a 1970s home, you are likely to find 3 to 6 inches of fiberglass batts or blown insulation, roughly R-10 to R-19. The current DOE recommendation for most U.S. climates is R-38 to R-60 in the attic.
- Install cardboard or foam baffles (rafter vents) at each eave between rafters before adding insulation. These maintain a 1-inch airway from the soffit vent to the ridge vent and prevent insulation from blocking airflow, which can cause ice dams and moisture problems.
- Rent a blowing machine from a home improvement store (typically free with purchase of 10 or more bags of blown insulation) and load the attic with blown fiberglass or cellulose to reach your target R-value. For R-49 total, you need roughly 14 to 15 inches of blown cellulose over existing insulation.
- Cut and fit rigid foam board insulation (minimum 2 inches of polyisocyanurate, R-13) to cover the attic hatch or pull-down stair box, sealing the edges with foam tape. The attic hatch is often completely uninsulated in older homes and acts as a direct thermal hole.
- After blowing insulation, install a ruler marker (a simple painted paint stick) in the attic so future inspectors can verify insulation depth without disturbing it.
- Check your attic ventilation ratio: you need at least 1 square foot of net free vent area per 150 square feet of attic floor. Blocked soffit vents are common in 1970s homes and must be cleared before sealing the attic floor to prevent moisture buildup.
- Hire a BPI-certified or RESNET-certified energy auditor to perform a blower door test and infrared thermal imaging scan. The blower door test measures your home’s air changes per hour (ACH) and will likely show a 1970s home at 8 to 15 ACH50, compared to a new build target of 3 ACH50 or less.
- Have a weatherization contractor seal all major air bypasses identified by the auditor using a combination of spray foam, rigid foam, and sheet metal for large openings like dropped ceilings and fireplace chases. Professional air sealing can reach areas inaccessible to DIYers.
- Have dense-pack blown insulation installed in all exterior wall cavities by drilling small holes and injecting cellulose under pressure. This is the highest-impact wall upgrade for a 1970s home and brings walls from roughly R-4 to R-13 to R-15, with payback typically in 5 to 8 years.
- Commission duct sealing and testing using Aeroseal or manual mastic sealant to reduce duct leakage from a typical 25 to 30% loss down to 5% or less. In homes with ducts in unconditioned attics, consider insulating duct runs to at least R-8.
- Replace the primary heating and cooling system with a cold-climate heat pump rated at a minimum HSPF2 of 8.5 if your climate supports it, or a 96% AFUE gas furnace with a 20 SEER air conditioner if you are in a heating-dominated climate. New HVAC in a now-tighter house is sized correctly for the reduced load, avoiding the oversizing common in older installations.
- Replace original single-pane windows with double-pane low-e units rated U-0.27 or better, prioritizing north and west-facing windows in cold climates where the cost-benefit is strongest. Budget $400 to $900 per window installed.
Why It Works: The Benefits
A comprehensive retrofit of a 1970s home including air sealing, insulation, and HVAC upgrades can reduce annual energy costs by 40 to 60%, translating to $800 to $2,000 per year in savings for an average 2,000 square foot home depending on climate and fuel type.
Sealing air leaks and adding insulation eliminates the drafts, cold floors, and hot-or-cold rooms that plague older homes. Wall surface temperatures rise closer to room air temperature, eliminating the radiant chill effect that makes 65°F feel cold in a drafty 1970s house.
Under the Inflation Reduction Act, qualifying insulation, air sealing, and HVAC upgrades are eligible for a 30% federal tax credit capped at $1,200 per year for insulation and envelope improvements, plus additional credits for heat pumps and other equipment, substantially reducing out-of-pocket costs.
Controlled air sealing reduces unfiltered air infiltration through wall cavities and crawl spaces, lowering the entry of outdoor allergens, radon, and moisture-laden air. When paired with proper mechanical ventilation, this creates a healthier indoor environment than either a leaky old home or a sealed home without ventilation.
DOE research and appraisal studies consistently show that energy-efficient homes sell for 3 to 5% more than comparable inefficient homes. For a $350,000 home, that represents $10,500 to $17,500 in added market value, often exceeding the total cost of a comprehensive retrofit.
💰 Savings Impact by Action
Sealing attic bypasses, rim joists, and penetrations reduces heating and cooling energy use by 15 to 25% in a typical 1970s home.
Upgrading attic insulation from R-11 to R-49 reduces ceiling heat loss by up to 15% of total heating and cooling load.
Reducing duct leakage from 25 to 30% down to 5% effectively delivers 20 to 25% more conditioned air to living spaces without increasing HVAC runtime.
Replacing a 1970s era 60% AFUE furnace or inefficient central AC with a modern heat pump or 96% AFUE system reduces mechanical energy use by 25 to 40%.
Dense-pack cellulose in empty 1970s wall cavities increases effective wall R-value from roughly R-4 to R-15, reducing wall heat loss by up to 10% of total load.
🏠 Key Concepts Explained
The Science Behind It
Heat moves in three ways: conduction through solid materials, convection through moving air, and radiation through space. A 1970s home is deficient in all three modes of resistance. Thin insulation allows conductive heat flow through walls and ceilings. Unsealed gaps allow convective heat loss through bulk air movement, which is far faster than conductive loss through solid materials. Single-pane windows allow direct radiant heat transfer to cold glass surfaces and sky. Modern building science addresses all three simultaneously, which is why a comprehensive retrofit outperforms any single upgrade.
The most important principle in building science sequencing is to seal first, then insulate. Adding insulation over a leaky building envelope is ineffective because moving air bypasses insulation entirely. A 1% gap in an insulated assembly can account for 30 to 40% of total heat loss through that assembly, because air moves heat much faster than the insulation resists conduction. This is why 1970s attics with 6 inches of fiberglass over unsealed top plates perform far worse than the R-value rating suggests.
Modern new builds achieve their efficiency through a combination of continuous air barriers, thermal breaks, and high-performance windows rather than simply more insulation. When you retrofit a 1970s home, you are essentially adding these systems retroactively. Dense-pack cellulose in wall cavities adds both insulation and air resistance. Spray foam at rim joists adds insulation, air sealing, and a vapor retarder in one step. The goal is not to add R-value in isolation but to create a continuous thermal boundary, and when that boundary exists in a 1970s home, its performance can genuinely rival new construction.
Frequently Asked Questions
▼ I added insulation but my energy bills barely changed. What went wrong?
In most cases, significant air leaks were not addressed before the insulation was added, allowing moving air to bypass the insulation entirely. Have a blower door test performed to identify remaining bypasses, particularly around the attic top plate, recessed lights, and the rim joist. Sealing those bypasses after the fact will deliver the savings you expected from insulation alone.
▼ My 1970s home has gas heat. Can I still make it airtight?
Yes, but you need to address combustion safety at the same time. Older atmospherically vented furnaces and water heaters rely on natural air infiltration for combustion and safe venting. When you tighten the house, upgrade those appliances to sealed-combustion or direct-vent units that draw combustion air directly from outside. A BPI-certified contractor will check combustion safety as part of any professional retrofit.
▼ How do I know if my 1970s home has asbestos insulation I should not disturb?
Asbestos was commonly used in pipe and duct insulation, vermiculite attic insulation, and some loose-fill products through the 1970s. If your attic insulation is gray, granular, and pebble-like, do not disturb it and have a certified asbestos inspector test a sample before any work. Fibrous white or yellow batting is almost certainly fiberglass and is safe to handle with standard PPE. When in doubt, test before touching.
▼ Will tightening my home cause moisture or mold problems?
Not if the work is done correctly. The key is pairing air sealing with adequate controlled ventilation, typically an energy recovery ventilator (ERV) or at minimum bathroom exhaust fans meeting ASHRAE 62.2 standards. Problems arise when homes are sealed without providing fresh air replacement. A properly retrofitted 1970s home actually has better moisture control than a leaky one because you control where air enters rather than allowing it to move through wall cavities.
▼ How much will a full professional retrofit actually save me per year?
For a typical 2,000 square foot 1970s home in a mixed climate spending $2,500 to $3,000 per year on energy, a comprehensive retrofit including air sealing, full insulation, duct sealing, and HVAC replacement can realistically save $1,000 to $1,800 per year. At a total project cost of $15,000 to $20,000 before tax credits, and after applying 30% federal credits reducing the net cost to $10,500 to $14,000, payback typically falls in the 7 to 10 year range with ongoing savings for decades afterward.
Quick Tips
- Prioritize upgrades in this order for best return: air sealing first, attic insulation second, duct sealing third, mechanical systems fourth, and windows last. Windows have the longest payback period of any upgrade.
- Check whether your utility offers free or discounted energy audits before paying full price. Many utilities offer blower door tests and thermographic scans for $50 or even free to residential customers.
- Federal tax credits under the Inflation Reduction Act reset each calendar year, meaning you can claim up to $1,200 for insulation and air sealing in one year and another $1,200 the following year, allowing you to phase upgrades while maximizing credits.
- Cellulose blown insulation is made from recycled paper treated with borate and is both more air-resistant and more moisture-tolerant than fiberglass. In 1970s homes with existing irregular insulation, cellulose is generally the better choice for topping off attics.
Variations for Your Situation
- Tight Budget (under $500): Focus exclusively on air sealing, which delivers the highest return per dollar of any upgrade. Spend $50 to $100 on caulk, spray foam, acoustical sealant, and weatherstripping and address the top four leak locations: attic top plates, rim joists, recessed lights, and exterior door weatherstripping. This scope alone can reduce heating and cooling bills by 15 to 20% at near-zero cost.
- Rental Property Owner: You cannot always justify the full upgrade cost on a rental, but air sealing and attic insulation have the fastest payback and improve tenant comfort and retention. Focus on the attic (fully tax deductible as a rental expense) and duct sealing in unconditioned spaces. Avoid window replacement unless windows are failing structurally, as payback on rentals rarely justifies the cost.
- Historic or Architecturally Significant Home: If your 1970s home has original materials you want to preserve, interior rigid foam retrofits and blown-in insulation through small drilled holes (dense-pack) allow major performance improvements without altering exterior appearance. Work with a weatherization contractor experienced in historic preservation, and check whether your local historic district restricts window replacement, as interior window inserts are often a compliant and cost-effective alternative to full replacement.